
This Star Trek: Elite Force II walkthrough is divided into 12 total pages.
You can jump to nearby pages of the game using the links above.
End Game
After disabling the force field, take the lift down then follow Chell's advise and use your tricorder on this shield control node to proceed through the doorway.
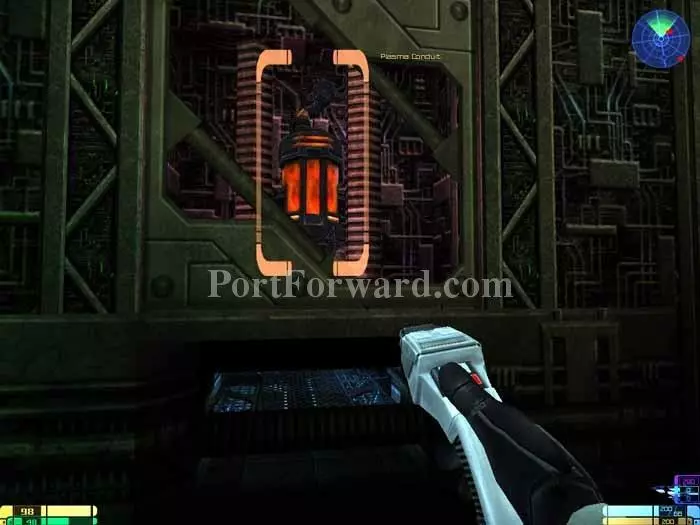
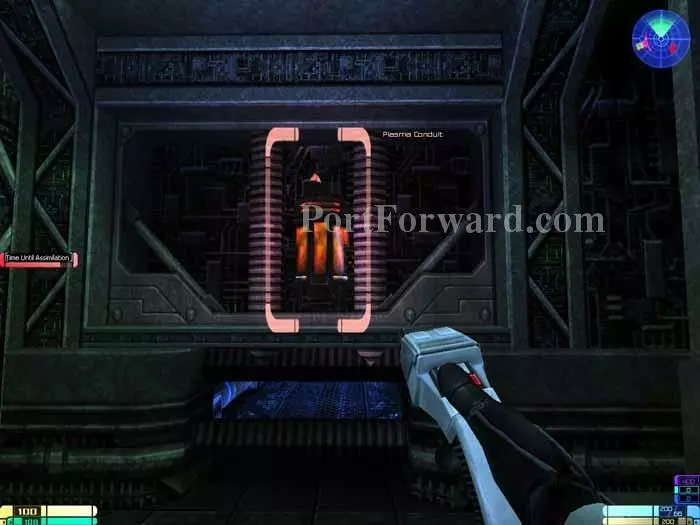
Destroying this plasma conduit will allow access to the crawlspace beneath.
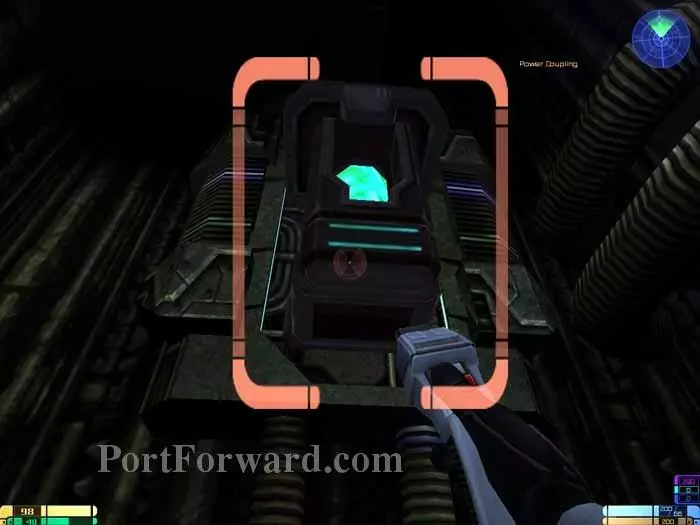
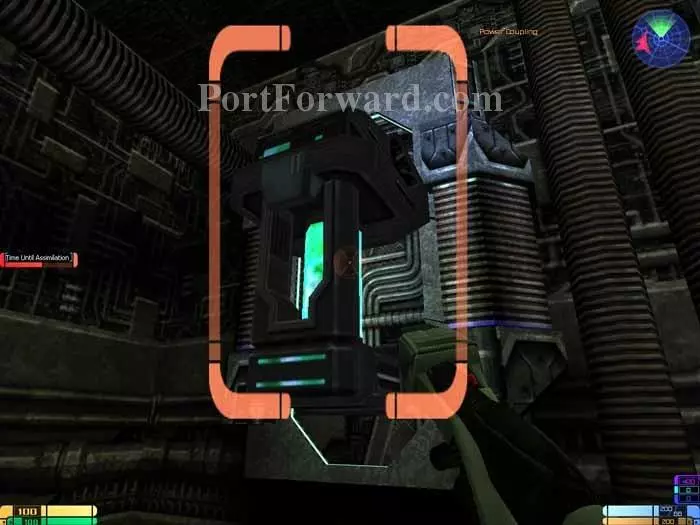
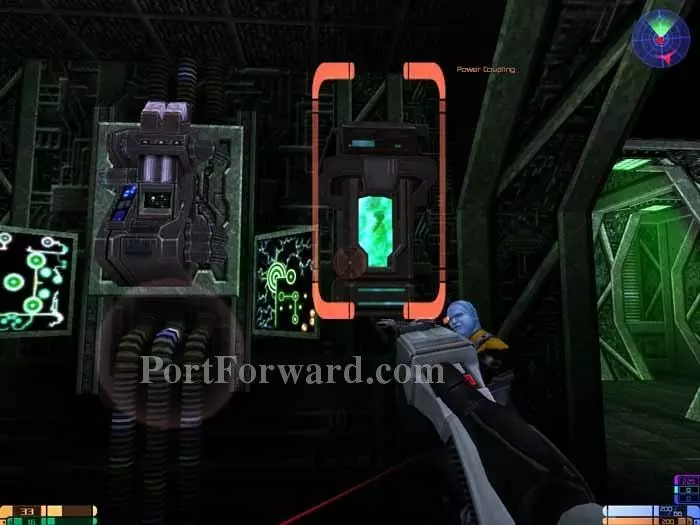
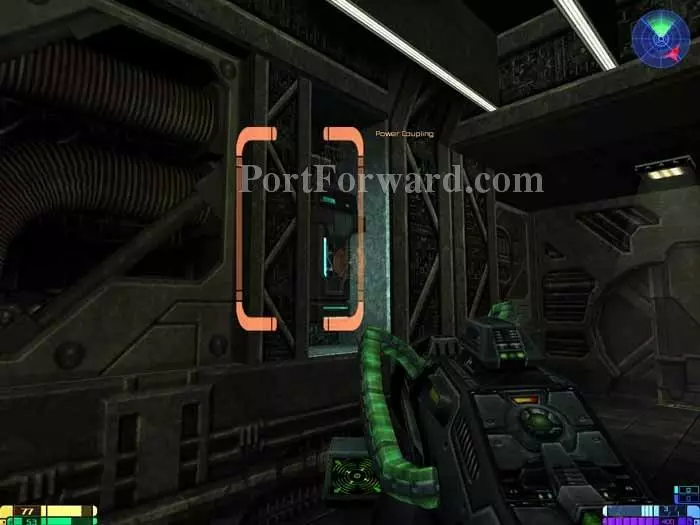
Destroy this power coupling and Chell will inform you that, "The green force field just went down. Excellent work!"
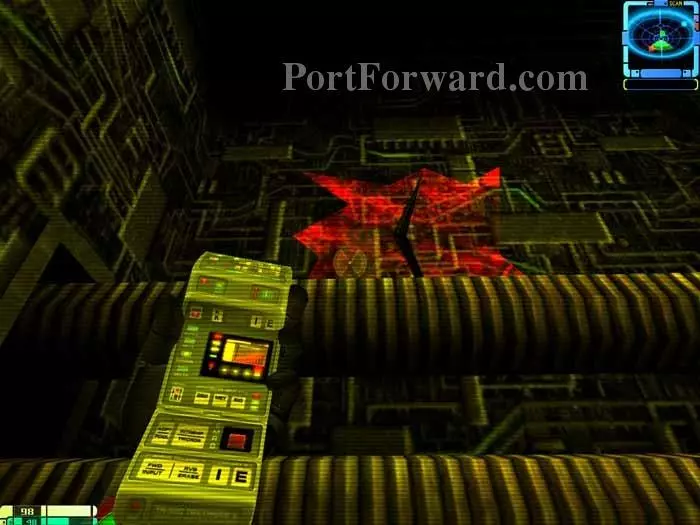
Activate your tricorder's Structural Integrity View Mode and spot this crack on the wall.
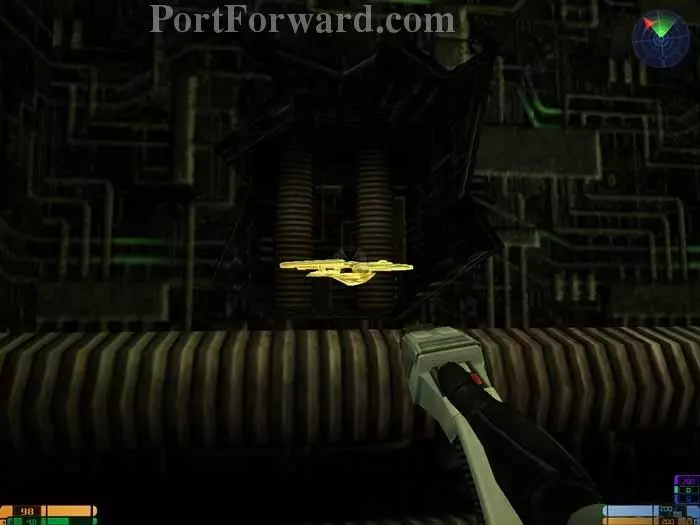
Blast the area to reveal the second Golden Starship.
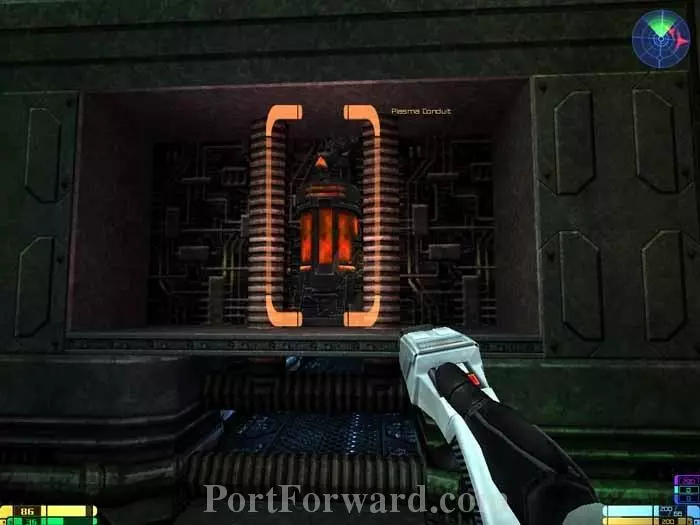
Destroying this plasma conduit will allow access to the crawlspace beneath.
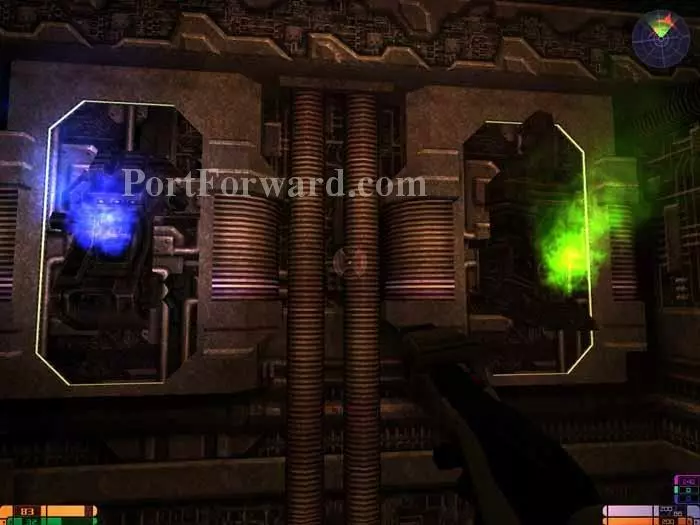
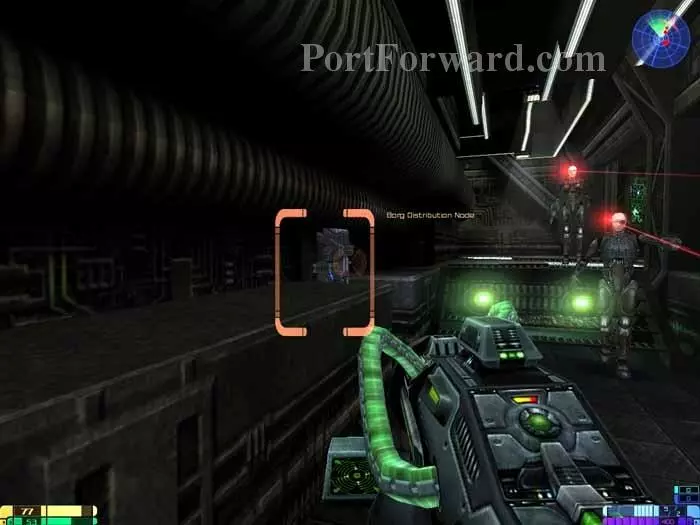
Destroy this distribution node and power coupling.

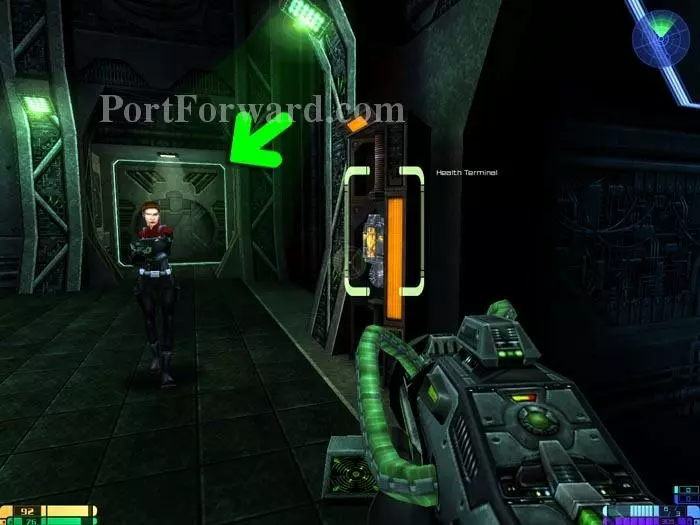
Use the energy and health terminals at the end of the next corridor.
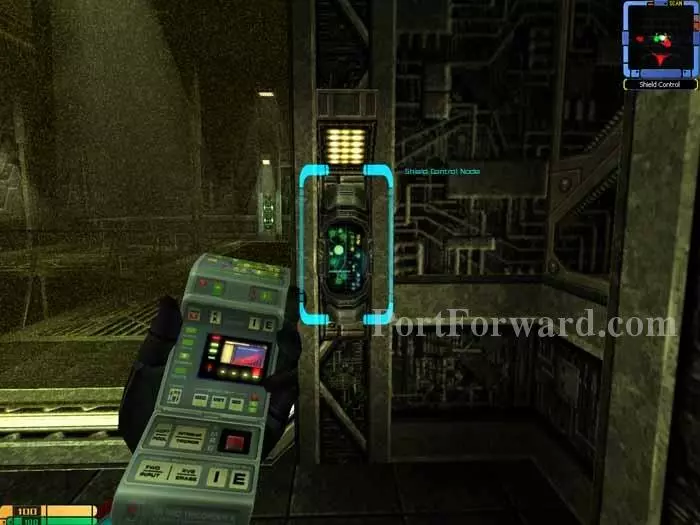
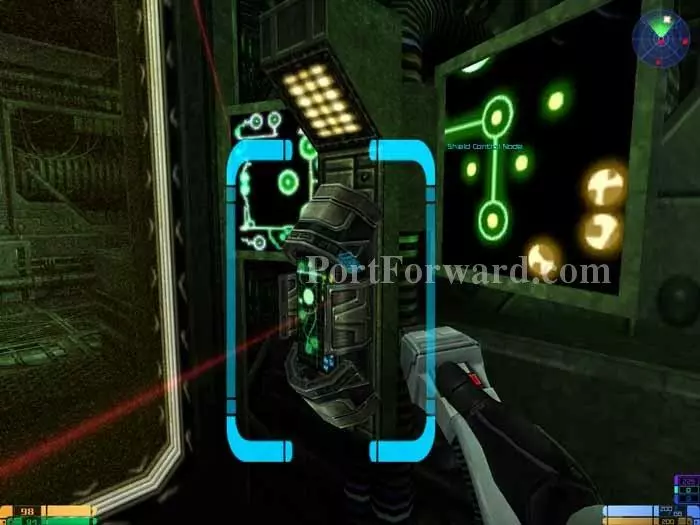
Use your tricorder on this shield control node to lower the force field and pass through the doorway.
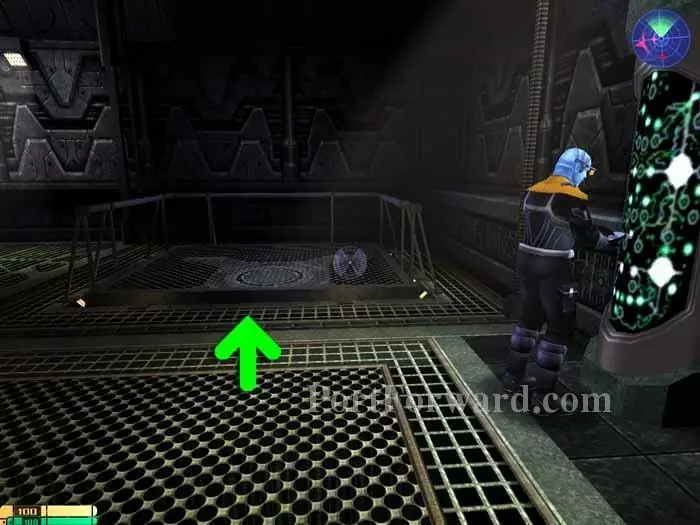
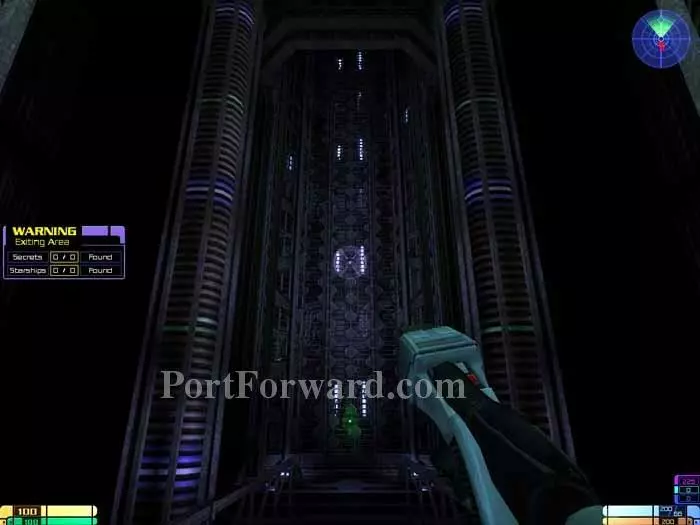
Stand on this lift as Chell operates the controls.
Chang is about to be assimilated and time is running out. Fortunately there's another plasma conduit with a handy crawlspace beneath. Blast and enter.
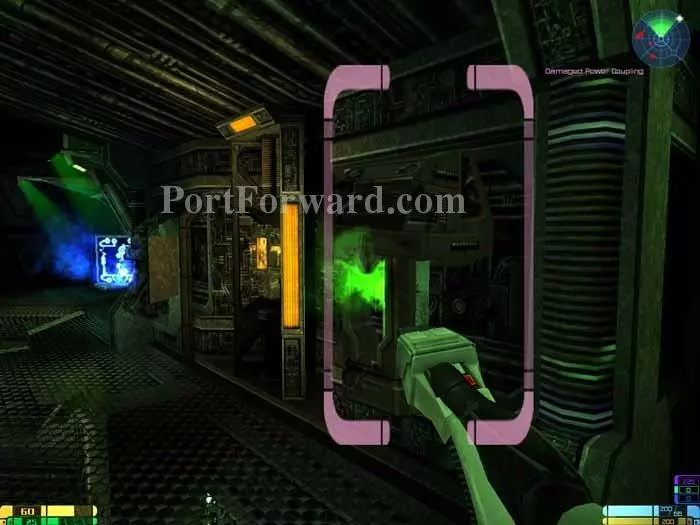
Destroying this power coupling will lower the force field blocking Chang.
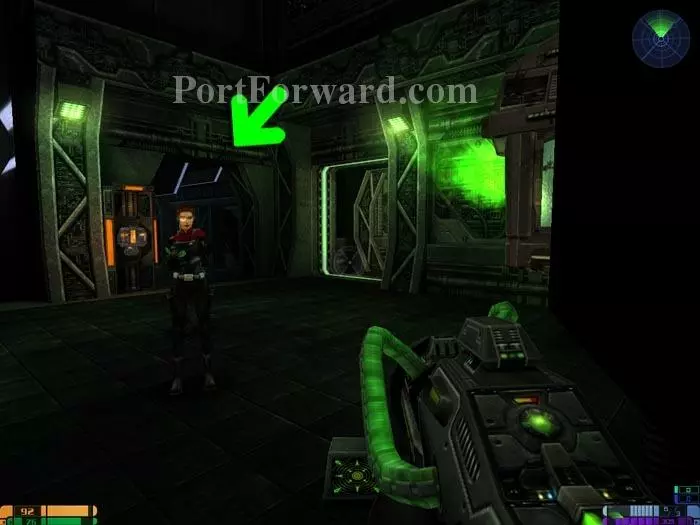
Approach Chang and Munro contacts Voyager for immediate beam-out.

Turn around and activate your tricorder's Structural Integrity View Mode. Spot the vulnerable wall and blast it away.
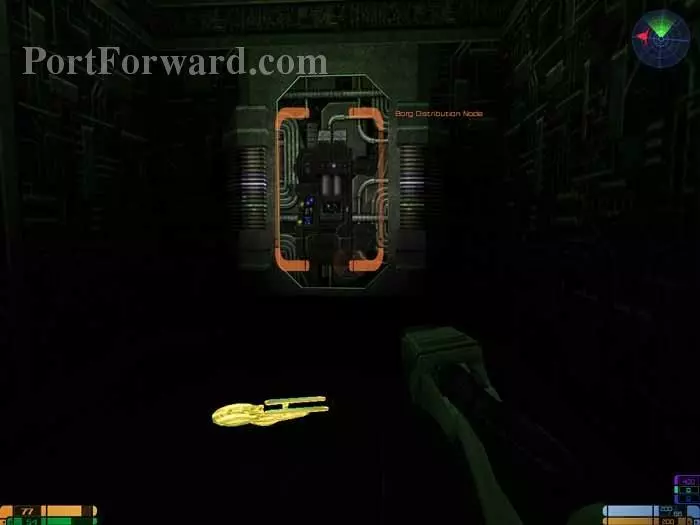
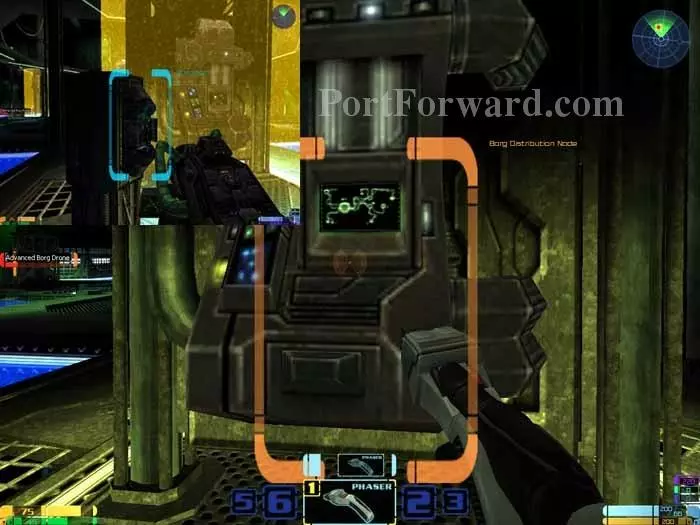
Inside you'll find the third Golden Starship, and a Borg distribution node. Shoot the node to deactivate any Borg in the area.
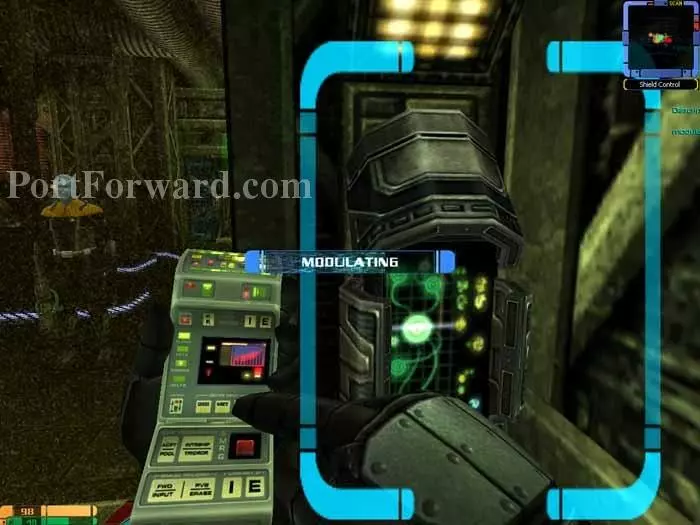
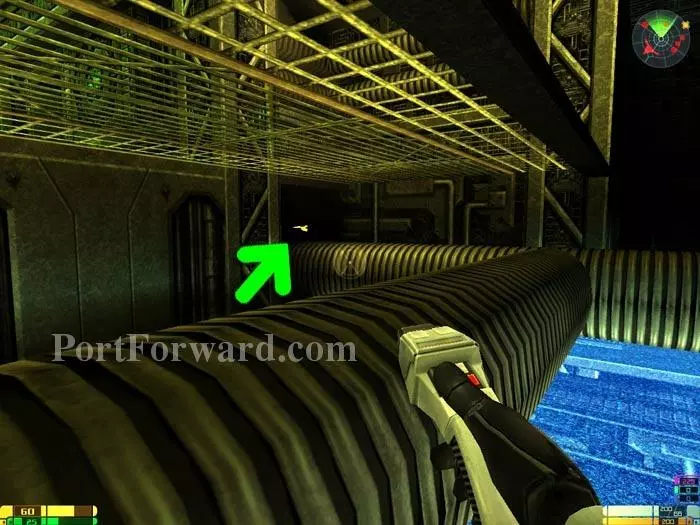
Jump along the pipes and use your tricorder to modulate the shield control node. Destroy the power coupling inside. Chell will tell you, "That knocked out the force field up here."
The fourth Golden Starship is hidden under the grating in this area. Be careful not to fall into the blue force field.
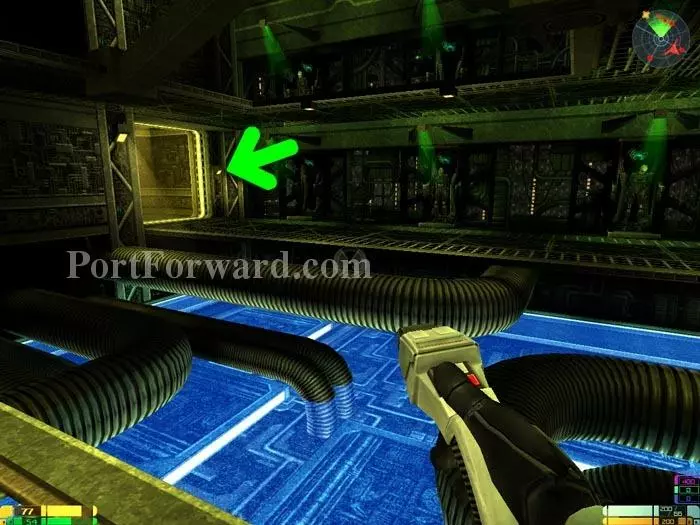
Return to Chell via the same lift you used before then exit through the now-accessible green doorway.
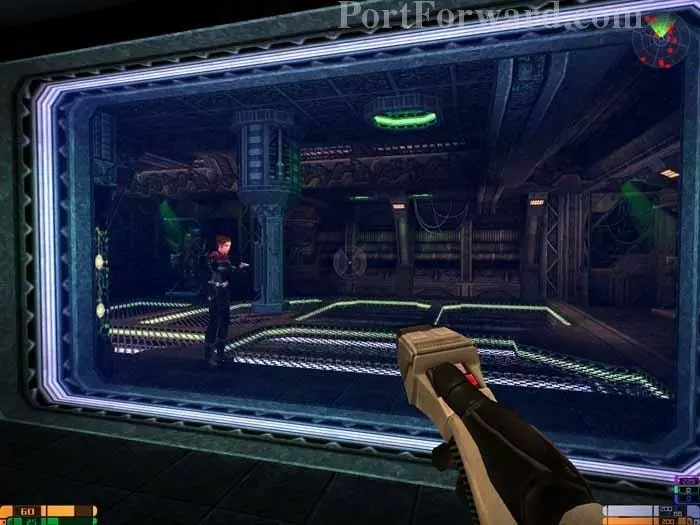
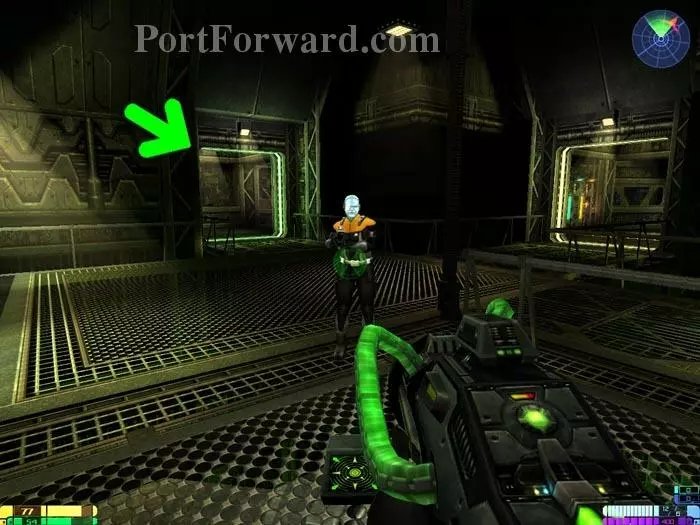
Take the lift down then follow the corridor to find Telsia trapped behind a force field.
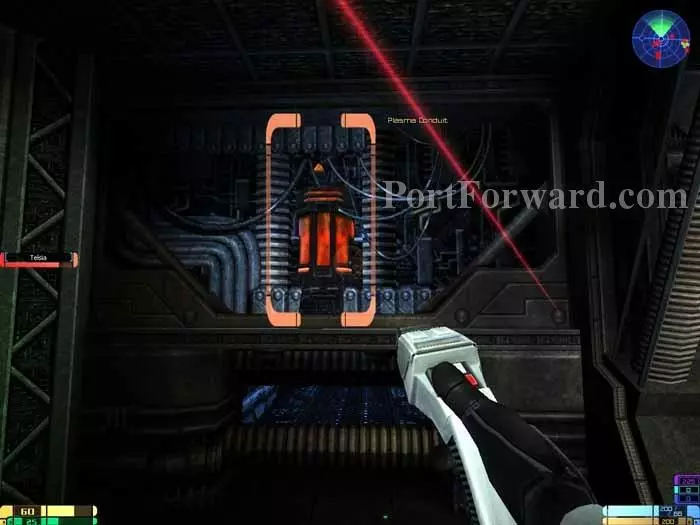
Once again, destroy the plasma conduit to allow access to the crawlspace beneath.
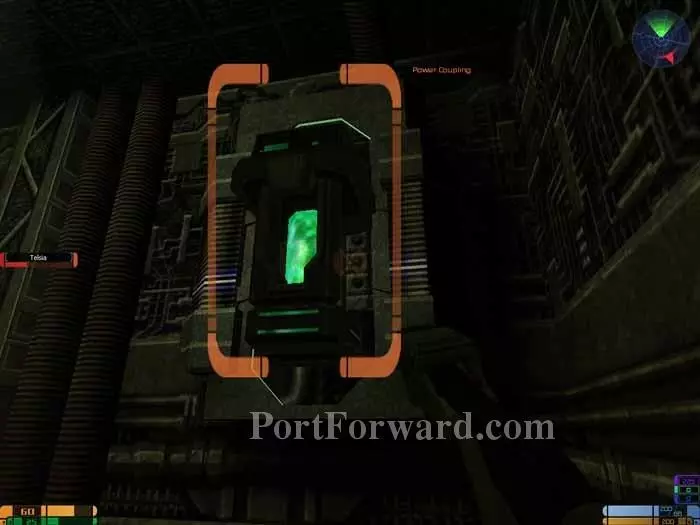
Destroy the power coupling to drop the force field and free Telsia. Exit the crawlspace to view a cutscene.
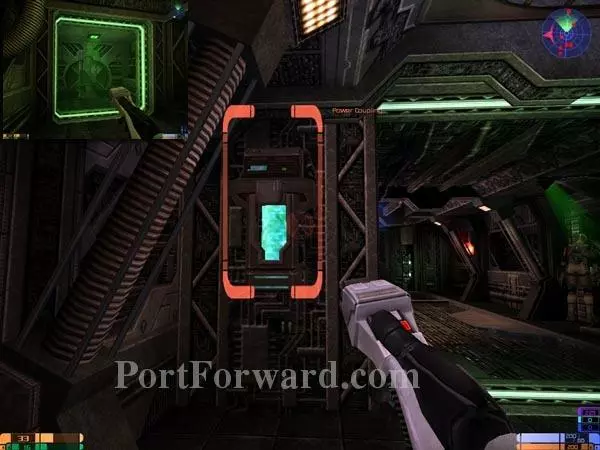
Destroying this power coupling will drop the force field blocking the doorway down the corridor and to the right. Pass through it and proceed to the lift.
Race down the corridor and destroy the power coupling and Borg distribution node to the right.
Proceed through a door then keep to the right to find another power coupling, Borg distribution node and a health terminal. Destroying the power coupling will also knock out the nearby distribution node, disabling any Borg in the area.
Exit through the back then continue down the corridor to the main lift and a cutscene.
Use your tricorder to modulate the shield control node at the back of the room. Pass through the doorway and use the energy terminal to the left.

To the right is the node disabling the IMODs. Destroy it to complete your first objective. Exit this room and keep right to pass through a door and then to a health terminal.

Continue through yet another door and destroy this plasma conduit, then proceed to the lift visible at the back of the room.
Take the lift down, proceed down the corridor and destroy this distribution node to disable the Borg in the area.
Backtrack to the door area and destroy this power coupling to drop the force field blocking the first power generator.
The generator room lies ahead and to the right. Assist Chell by setting your tricorder to the proper settings. The settings are random.
Exit the area then destroy the power coupling on the left, exposing the second power generator. Continue past a second health terminal to the generator room and assist Chell once again.
Backtrack and exit through the now-accessible doorway indicated above. To the left is an energy terminal, and to the right is the power coupling enabling access to the third generator.

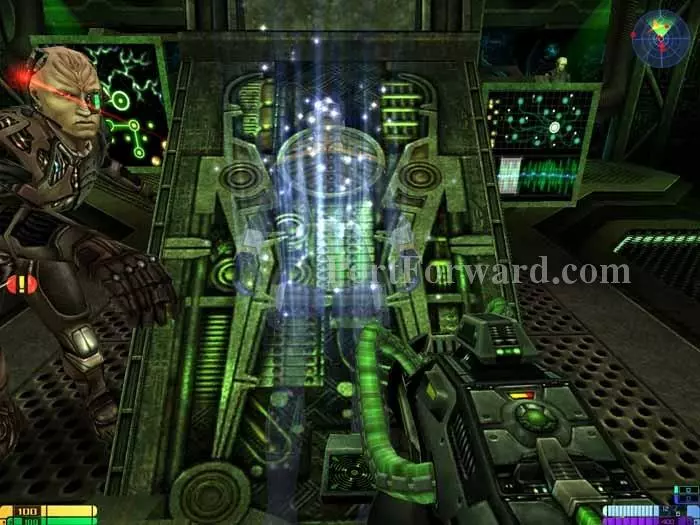
With the third dampening field disabled, Voyager is free and your crew mates safely return to the ship. You, however, must now battle the level boss, Advanced Borg Drone.
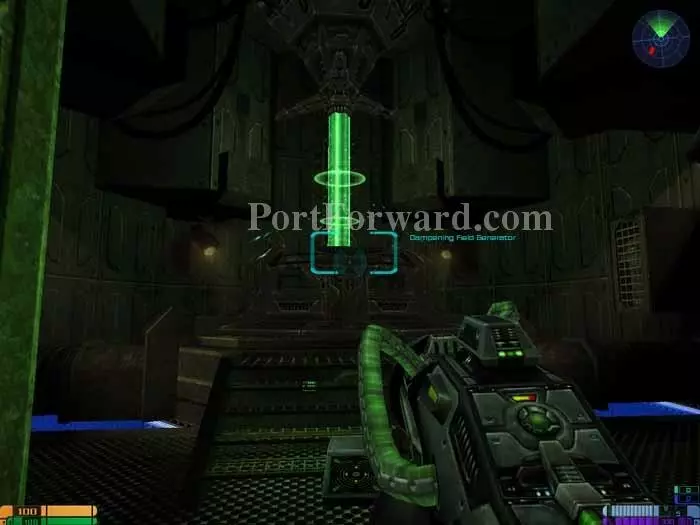
Use your tricorder to modulate the shield control nodes, then destroy the Borg distribution nodes. This will temporarily disable the drone. Hammer away at him until his health is drained to finish the level.
More Star Trek: Elite Force II Walkthroughs
This Star Trek: Elite Force II walkthrough is divided into 12 total pages.


