Step 1:
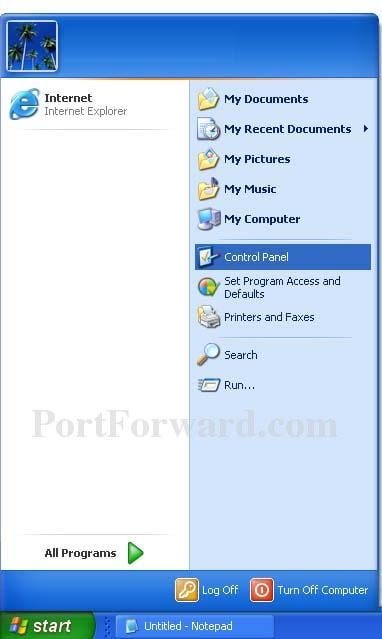
Click the Start button to open the start menu. On the start menu click the Control Panel button. Which should bring you to the control panel.
Step 2:
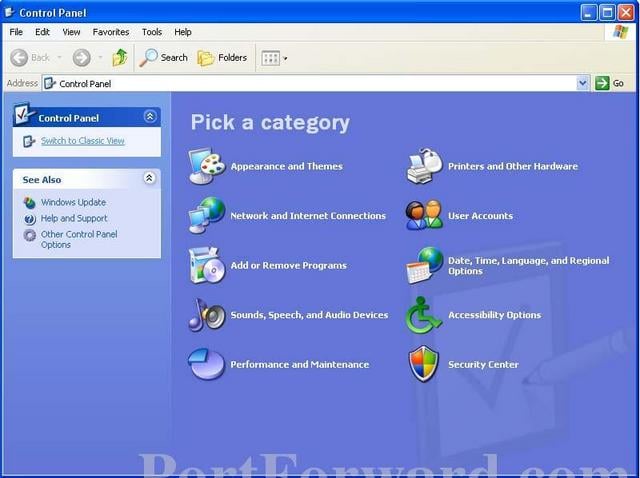
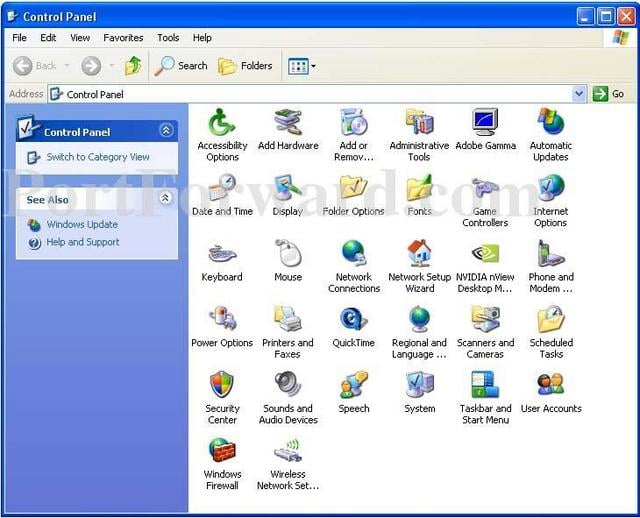
In the upper left hand corner of this screen click the Switch to Classic View link. Your control panel should now look something like the following screenshot.
Step 3:
Double click the Windows Firewall icon to open the properties of your windows firewall.
Step 4:
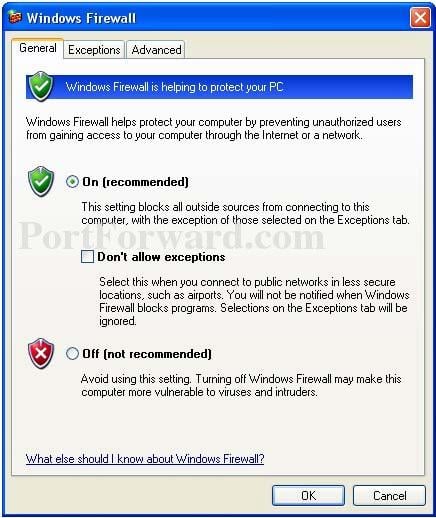
If the firewall is on, you will see a green dot in the On radio button. Make sure the Don't allow exceptions box is unchecked. Then click the Exceptions tab at the top of your screen.
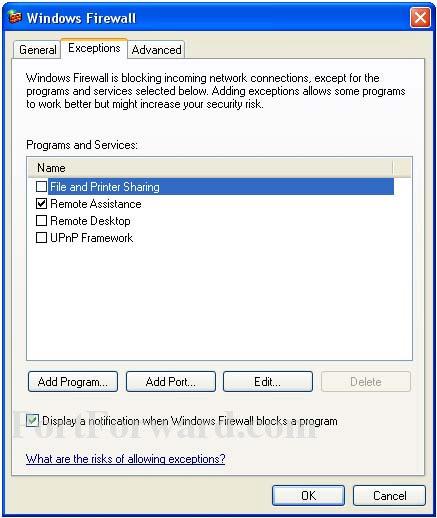
Step 5:
You will probably see some common programs in the Program and Services box. This does not mean that the ports these programs use have been opened for forwarding. At the bottom of the screen there is a Add Port button. Go ahead and click it now.
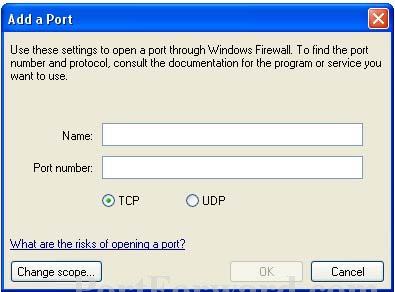
Step 6:
Enter a name for the port you want to forward. I would enter the name of the program these ports are being forwarded for followed by the port number you are forwarding into the Name box. This firewall forces you to forward one port at a time. Why? Who knows. This means you will have a LOT of work ahead of you, if you plan on forwarding a large port range. Enter the port you wish to forward into the Port Number box. Let's take a look at the Change Scope option. Click the Change Scope button to get there.
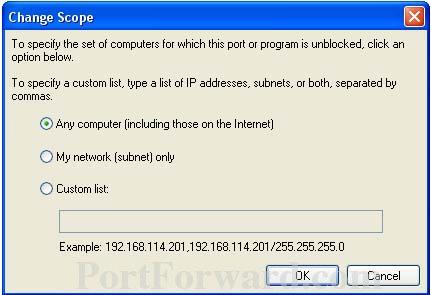
Step 7:
The change scope button allows you to set which ip addresses can transmit information to this program. You can set it to let this program communicate with any computer on the internet. It can also be set to communicate with any computer on your network, but never a computer outside of your network. If you really want to be specific, you can list the ip addresses to allow this computer to talk with. The ip addresses would be listed one at a time separated by commas. When you are finished with this choice, click the Ok button at the bottom of your screen.

Step 8:
Once again click the Ok button at the bottom of the screen. You should now be back at the exceptions window.

Step 9:
Make sure the program/port you were adding has a check mark in it's checkbox. Then click the Ok button at the bottom of the screen to finish this configuration.


