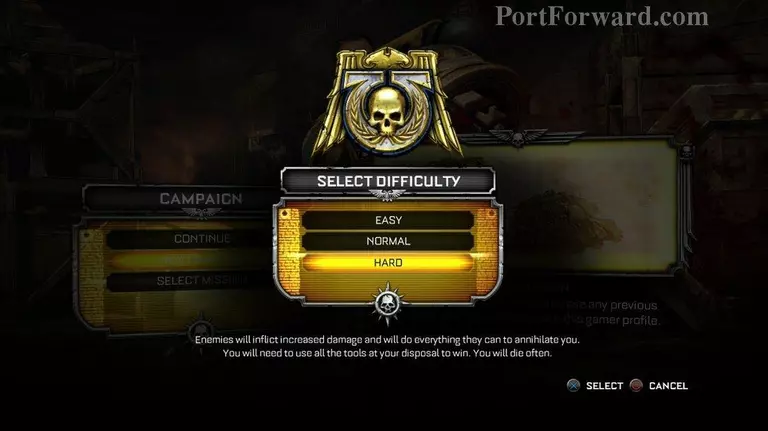
I'm writing this guide for the Hard difficulty. Hard in this game is pretty easy compaired to Hard difficulty in other games.
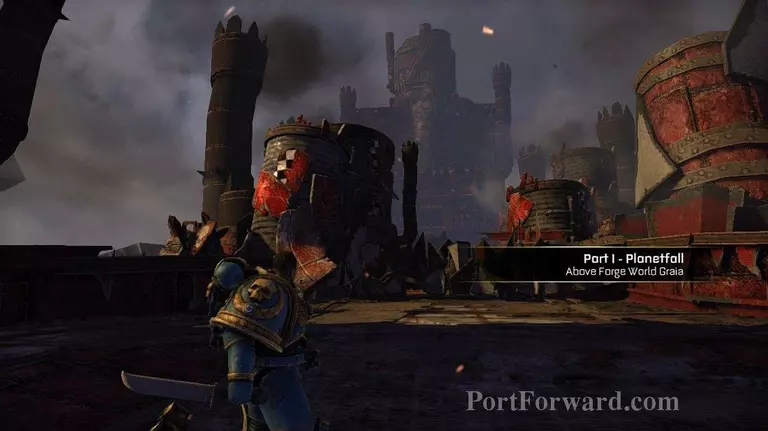
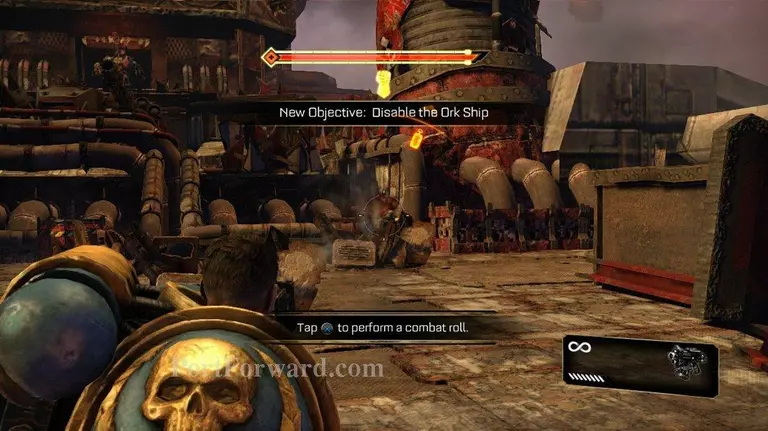
You've landed on an Orc ship. You need to take this thing out, and then make it to the planet's surface.
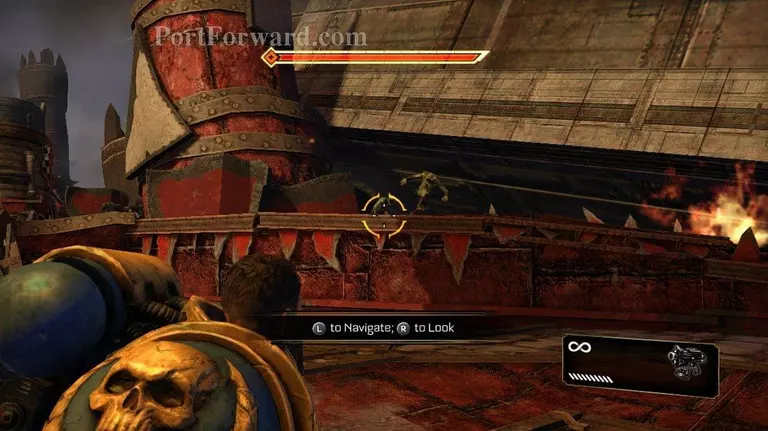
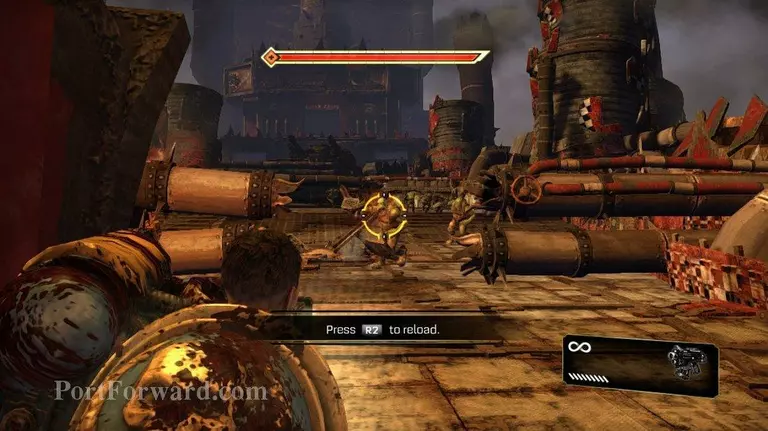
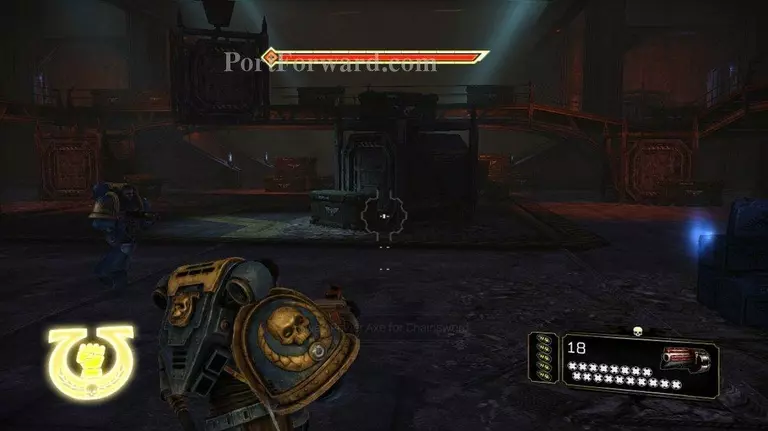
Several gretchen will attack you here. Your gun has infinite ammo so you might as well send some bullets their way. When your clip is empty, just hit R2 to reload.
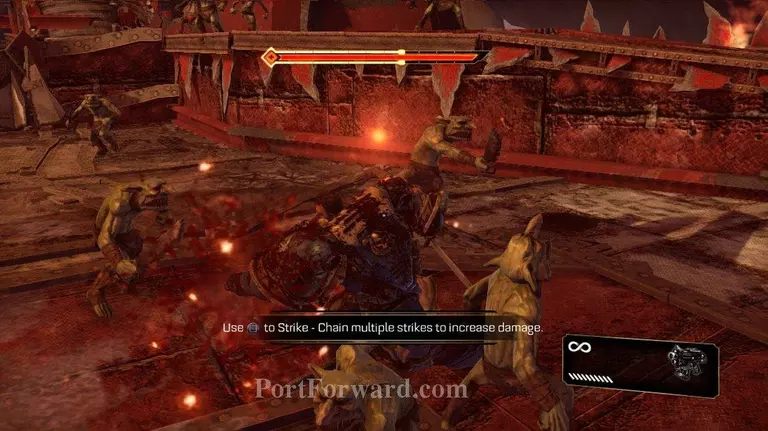
These enemies are so weak you can just press circle to kill them.
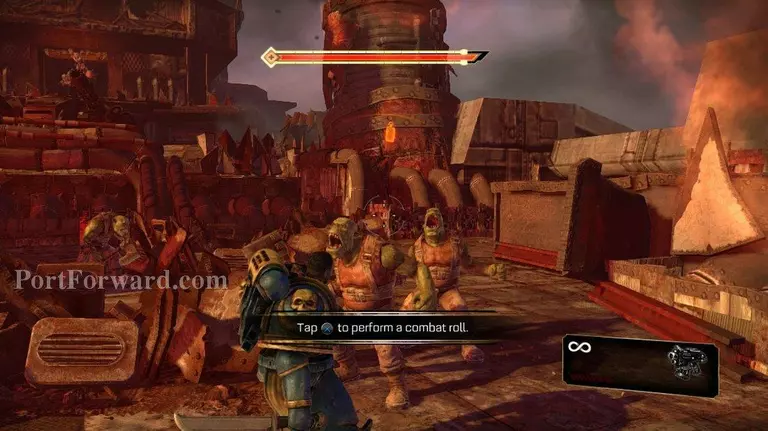
Eventually two orcs will show up. You can take them out with your knife, or try shooting them. The knife was easier for me.
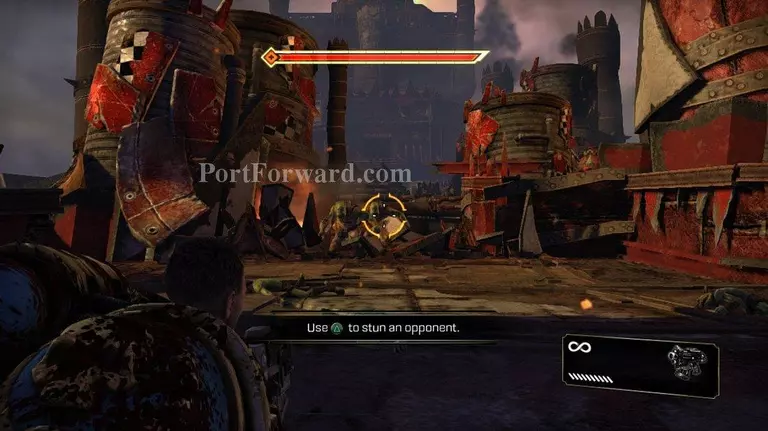
You can also press triangle to stun them, and then press circle to kill them. Doing that will recover some health if you happened to lose any.
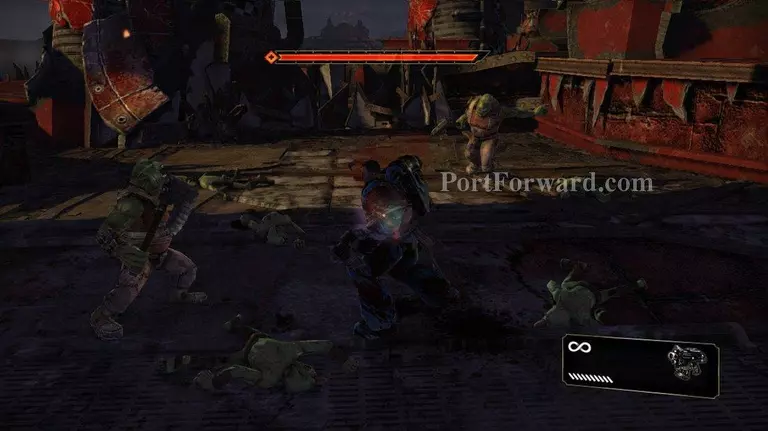
Another group of orcs will rush you. There will be more of them this time. Throw bullets at them as you are walking backwards. Orcs do not move fast. You can kill a lot more of them on a fighting retreat.
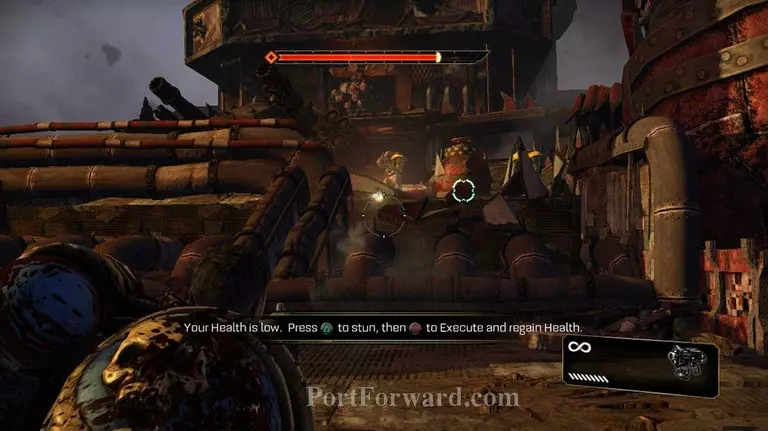
You will have to mop up a couple with your knife. Be sure to stun them(triangle) and then execute(circle) them to regain any lost health.
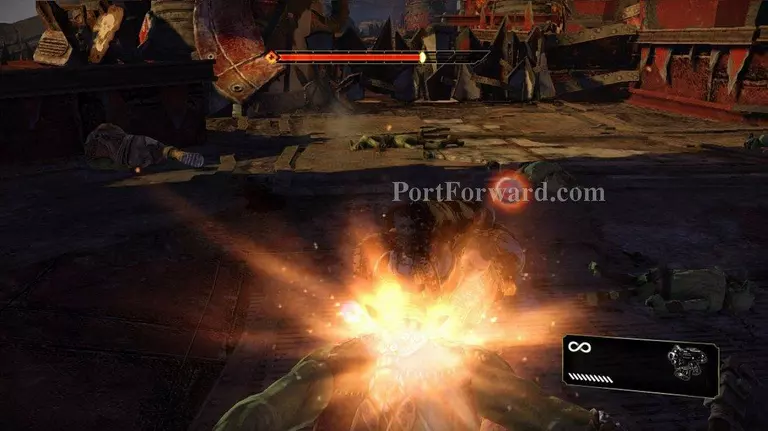
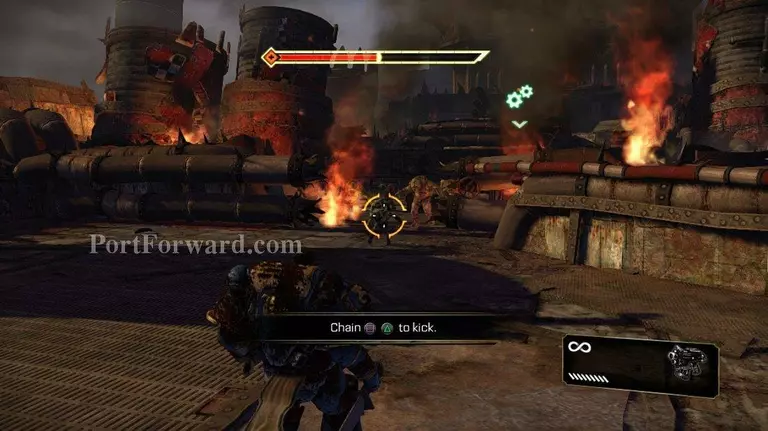
Reload and move forward. To your right an orc gunner will appear. Next to him is a bomb. Shoot the bomb to take out the gunner.
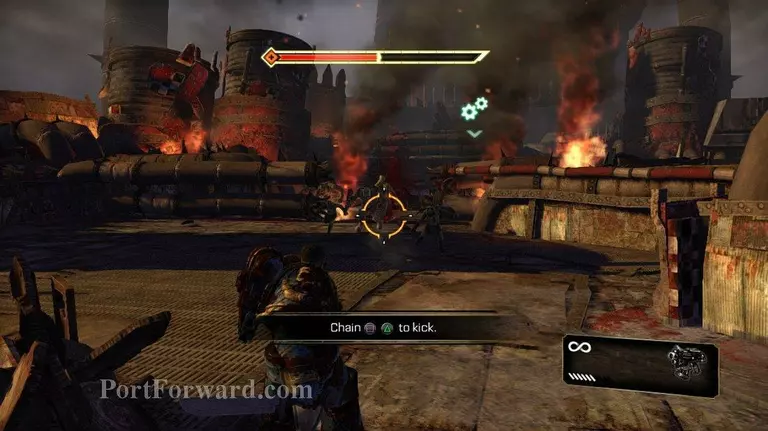
Once again, a common theme for this game, orcs will rush you. Fighting reteat while you pump shells into them.
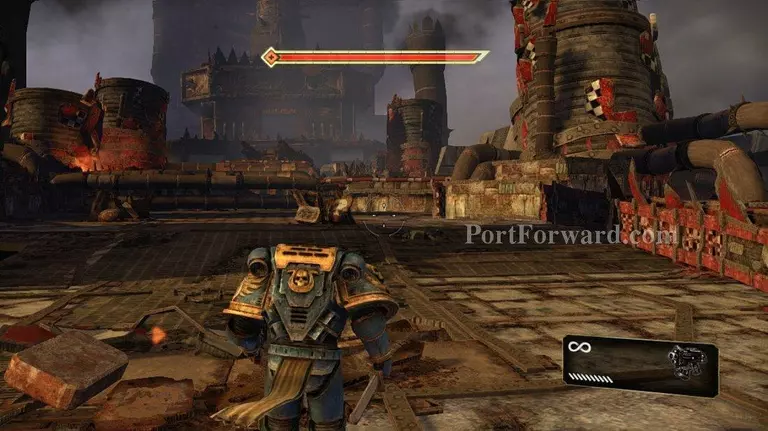
After killing that group of Orcs and Gretchen, move forward.
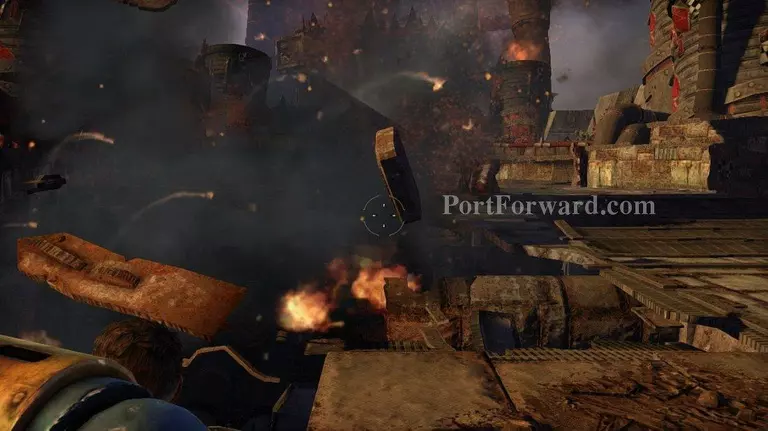
The ground will explode in front of you. Work your way to the right after the explosion.
There will be a shooter, and a bunch of regular orcs coming at you. Once again a fighting retreat will serve you well here.
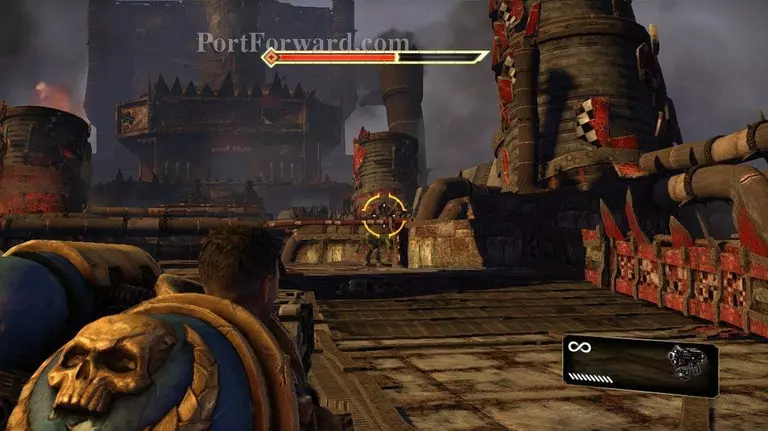
After that batch of orcs, move forward. You will see a shooter next to a bomb on your right. Shoot the bomb to take him out.
The bomb will blow up the pipe that is blocking your way. When the pipe is gone you will see a couple more shooters along with a couple regular orcs. They will not run forward. So take out the shooters first and then take out the other orcs.
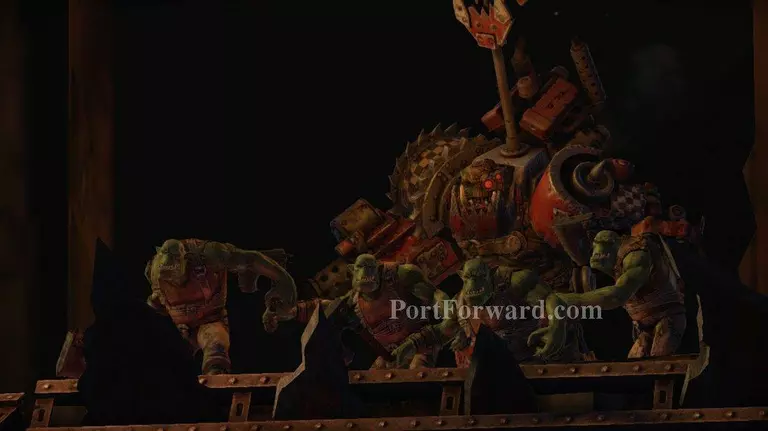
As you move forward you will see a cut scene with the Orc Warlord in it.
Several shooters and a wave of orcs will rush you here. If possible take out the shooters first, and then do another fighting retreat to clear the orcs that are heading your way.
This wave of Orcs will be slightly larger than the ones you've seen before. So keep retreating and dumping shells into them.
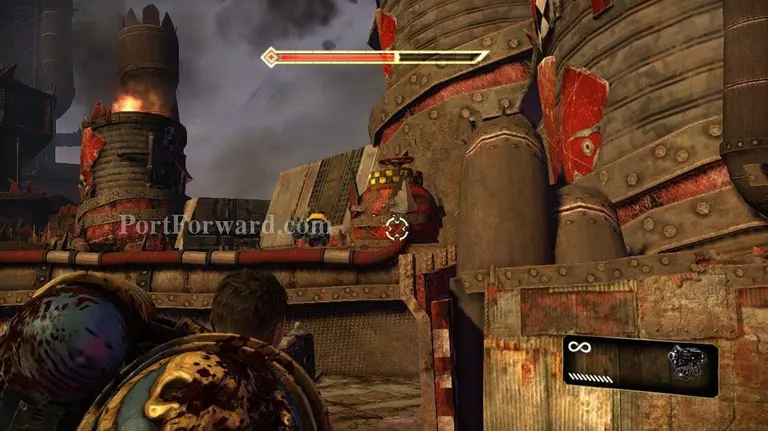
There is a bomb close to the big guns on this ship. Shooting it will take out a shooter or two.
You will be rushed by a second wave of orcs. These will be a lot easier because they will not have shooters with them.
A fighting retreat will work very well on these orcs.
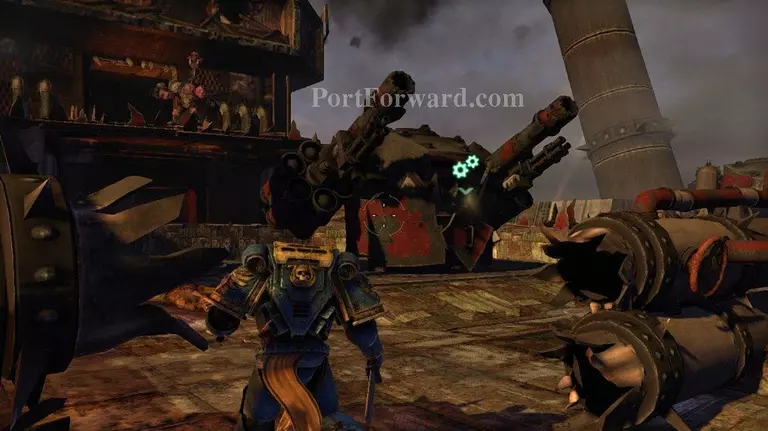
After those orcs are cleared, move up to the big gun. You will see that there is a gear symbol on the front of it.
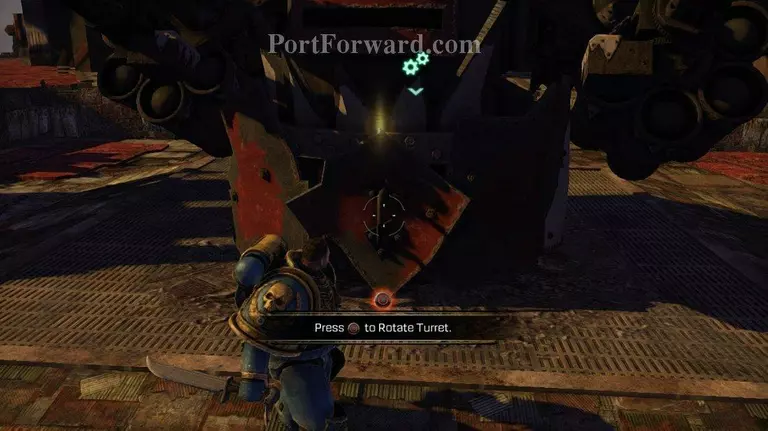
Press the button to grab the gun and turn it towards the ship.
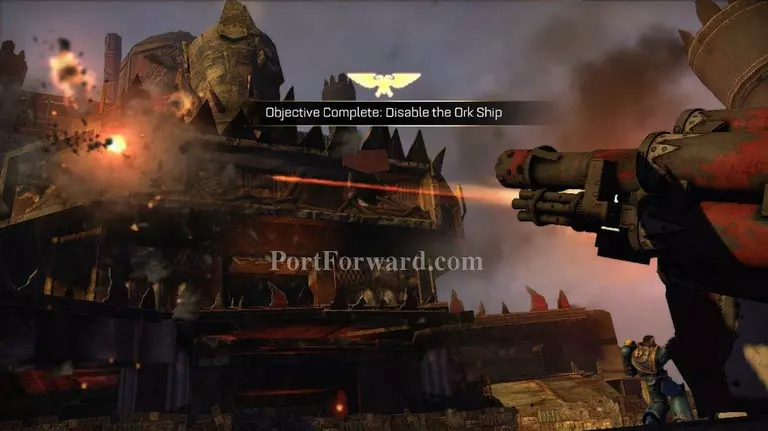
The gun will blow up the ship, and you will eventually end up on the ground.
And there's the money shot.
Chapter 2 Against All Odds
Well we've made it to Chapter 2
Keep moving forward. You'll find some orcs to fight eventually.
There are a bunch of gretchen chopping up corpses in your path. Fire some shots at them and they will run off.
Close to those gretchen there will be a couple red barrels next to a wall. Shoot the barrels to blow up the wall. You will find a servo skull up this way. Once you've picked that up continue on your way.
Throughout this game there are weapon and armor pods as shown in the screenshot. This pod will give you your primary weapon. I still always use the pistol to try to conserve ammo. There's really no need for me to do that, but I like to have ammo when I get to a harder section of the game.
You will be rushed by a single shooting orc here. Take him out and move on.
As you walk forward, you will see some orcs on the ledge above you. I take as many of them out as I can with my pistol. I don't know if that helps later on, but the pistol has infinite ammo. So I might as well.
Once again you'll encounter orcs on a ledge above you. Take out as many as you can before they run off.
You will enter a large room where Leandros is fighting a couple orcs. This will be a larger fight. When those two orcs are dead, orcs will start coming at you in waves.
There will be lots of shooters up on the ledge. Try to take them out first. Their fire will take your shields down pretty fast. There's a wall close to where you entered that you can shelter behind when your shields get low. Then pop out and take down a couple orks.
Here's a good screenshot of the wall to shelter behind.
It's pretty easy to pop out from behind it and take out an orc or two.
When the fight is close to over a group of regular axe swinging orcs will appear. Leandros will run up and fight them. Let him do that while you mop up the shooter orcs up above. When you are done with those go ahead and help Leandros mop up those axe swinging orcs.
When the cutscene finishes, a group of gretchen will attack you. This is a great way to regain health if you are low. Just hit circle on the ps3 to smash a gretchen and recover some health. Gretchen attacking you = Hey I just found a med pack.
There are two boxes of ammo here. Pick them up before you leave.
Continue on your way. You will eventually run into a couple of orcs killing a two guards men. Kill them, and continue on.
You've run into a large group of orcs attacking a guard outpost. Keep moving forward as you dump shells into the orcs. You will eventually get to the guard post.
By this point the guard post is pretty overrun by orcs. They are regular weak hand to hand orcs, so it's pretty easy to take them out. Just whip out your knife and slice them to bits.
Pick up ammo if you need some. There are quite a few boxes laying around. After the fight the guardsmen will open a door that will lead you onward.
You'll end up walking through a ton of wounded guards. Just keep walking.
Eventually you will meet up with your Segeant.
There's also a weapons container here. Walk over to it and pick up a chain sword. It's a much better hand to hand weapon.
Now that you've got a new toy, they throw some orcs at you so you can try it out. These are just regular orcs and your new sword will make short work of them.
As you move forward you will enter a trench. There will be shooters on the left and right top side of this trench. Take them out first. Then mob up the orcs in the middle last. Orcs with the height advantage need to die quick, because they can almost always keep a steady stream of bullets hitting you.
The regular ground fodder is really easy to take out once their support is gone.
When they are all dead move forward slowly. If you inch your way forward, only a couple of orcs will appear at a time. They are much easier to take out when they are not in force.
As you move forward you will encounter a couple shooters.
There is a fork in the path to the left. If you follow it you will come to a barricade.
Shoot the red barrels here. I think there is a servo skull here. There are a couple of ammo boxes. Then turn around and go back to the fork in the road.
They'll introduce the squig here. These are basically bombs on legs. Always shoot the squigs first. Hopefully you will hit them when they are in the middle of a huge pack of orcs. The good thing about them is they blow up. The bad thing about them is sometimes they get too close to you when they do it. One shot from just about any gun will cause them to explode.
There's a little path up a knoll here. I usually take this route.
You'll be rushed by the occasional squig from this point forward.
Drop off the ledge and continue on.
Here's another squig surrounded by a group of gretchen. Shoot the squig before it gets too close.
Next you'll come to a guard post that is about to be over run by orcs. Make your way behind the barricades before the orcs start coming.
There are quite a few barrels here, that you can use to destroy clusters of orcs. When a group of shooters get close to a barrel, use it to blow them up.
Take out the shooters first. No one else seems to target them, so it's really up to you. If you get a bunch of shooters in the battle, they will take down your shields and kill you quickly. Let everyone else worry about the other troops.
Generally there will be a wave of gretchen followed by a wave of orcs. There will also be a couple of shooters that appear with every wave.
Keep taking them out, as they keep coming. There's a box of grenades nearby, so don't be afraid to use your grenades when you see a cluster of orcs.
Before this fight is over you a large nob will appear and attack you.
Pour fire into him as he is running at you. If he gets too close go into hand to hand with him. Hit square twice followed up by a triangle to stun him. Then get near him and hit circle to execute him. You'll probably have to pound circle, because he will try to get out of the execute.
Here's a shot of him when he is stunned.
After the fight the guards will open a door that will lead you to their Captain.
Captain Mira has kept the guards men alive since the start of the orc invasion.
There's an upgrade in this pod. Be sure to grab it because it will come in handy. You can always tell the difference between the weapon or shield upgrades. I think the weapon upgrades are blue, while the shield upgrades are yellow.
Follow captain Mira outside. Continue on the path, and you will eventually find some more orcs to fight.
Several orcs come out of a machine called a digger. This machine comes up out of the ground. Really you don't see too many of these. Honestly, who cares how they get here. Hey look! It's orcs lets kill them.
There are quite a few orcs to kill here, because more join the ones that came out of the ground. Fortunately they are all grunts. So you can wade in with your chain sword and take them out without any real risk.
After the orcs are all dead move forward.
There will be a shooter and a grunt here. Take them out before you drop over the ledge.
When you drop down you be rushed by two orcs. Take them out. Since you took out the shooter and grunt before you dropped down these will be really easy.
There are a couple more grunts up ahead. They are taking out some guardsmen. Take them down and move ahead.
As you move forward you will see a blast that will kill a gaurdsman who is manning a heavy weapon. Move up and take control of that gun.
When you are on the gun you can leave it where it is or choose to rip it off. I usually leave it on it's tripod because it had infinite ammo that way.
Just keep the yellow gage in mind. It's the weapons heat. So pause when you can to let the thing cool off.
You will be rushed by waves and waves of orcs here, but this gun will take them all down pretty quickly.
There's nothing like having your own troops walk through your line of fire.
Just keep firing into the orc mass until they are all gone. Take the shooters out first of course, because they will be the only ones that will hit you.
You can tear the weapon off and take it with you, but it's pointless here. Even if you take it with you the captain will discard it when he gets close to the next weapon upgrade.
There's the weapon upgrade, and there goes your big gun. I guess this is actually a weapon downgrade, because the captain just tossed the best gun in the game like it was a used coke can.
Great now you've got a stalker bolter. It's one of the two sniper rifles you get in the game. I prefer this gun over the laser cannon.
Moving forward you will get a cut scene about the orcs invading the defense weapon. Mira will leave you at this point.
Moving forward you will come across a bunch of shooters. I'm sure they put this in here so you can try out the stalker bolter. Honestly you should probably use it to take these orcs out. There's plenty of ammo refills up ahead.
There will be one shooter to the right, and two or three up ahead. Take them out.
There's an orc that will shoot down at you through a hole in the ceiling here. It will be pretty easy to take him out.
There are a couple gretchen you can take out before you jump over the ledge. Or you can jump over and regain some health.
Make your way through this next section. Grunt orcs will run at you two at a time. They will be very easy to kill.
Here's your second set of two orcs. I really wonder why they didn't put more orcs here.
There's a wall you can blow up here, with some grenades behind it. I think there's also a servo skull here.
Eventually you will come to a door, and a bunch of orcs will run inside. When the door closes, you will be rushed by a wave of grunts.
These grunts are really easy to take out, but they do come in force. It's easy to take them out with melee, but don't forget to stun the last couple to regain any lost health.
When the orcs are head, gather any ammo if you need it. Then go over and open up the door.
Continuing forward you will come across a drop pod with a jump pack in it. Jump packs are pretty fun. You don't have to worry about fuel with the jump packs. They will run out of fuel at a set point in the game. Jump packs are really fun with a thunder hammer, because you can stun a ton of orcs with the combo.
Now that you've got the jump pack, it's a good idea to know how to use it. If you are moving when you jump you will naturally travel in that direction. Basically if you want to jump a large distance when you jump, run in that direction prior to jumping. In the air you can control the direction you are traveling, but not as much as you control the direction you are traveling with your initial run.
When you are in the air you can also press X to preform an attack called ground pounding. You will see yellow cross hairs on the ground where you will land. So as you are in the air, aim and then press X. Your jump pack will fire and you will move quickly in that direction and then pound the ground. Pounding the ground will kill all surrounding grunts, and stun almost all tougher orcs.
It's a really easy way to regain health.
This area is chock full of orcs. Take out all the orcs on the platforms that are up above while letting the rest of your squad mop up what's down below.
When all the orcs up above are dead, help your squad by unloading into the orcs they are fighting. When they are all dead, move on to the next platform.
In this area you encounter orcs that launch missles. We'll call them shootas. The shootas are usually up above on the platforms you are clearing, but occasionally they can be below as well. Be sure to take them out as you find them. They can do a lot of damage with a single shot.
Here's a picture of a soon to be dead shoota.
When all the orcs are dead in this section, go through the door with the green button. In the next section you will find more of the same.
Once again go to the higher ground and stay up there. There's a bridge that I'm standing on, and yet there's another level above me that I'll move to. There are two shooters up here so take them out.
Run at the wall here and jump.
You will find yourself on a higher platform with two shooters. Take them out and then move on.
If you are having trouble remember to stay up on the platforms. It really helps. Move from platform to platform taking out orcs as you come to them. I like occasionally jumping down to pound the ground, taking out a mass of grunts. If you do that, make sure you don't get stuck down there.
Rember your priorty is to take out the shootas and shooters on the platforms above. If you leave them around too long, they can concentrate their fire and kill you.
There are some barrels here you can shoot to take down a platform of shooters.
When you are done with the orcs on the platforms, help your squad out by cleaning up the orcs on the ground.
When all of the orcs are dead, go up the tunnel. The captain will automatically ditch his jump pack.
Chapter 3 Belly of the Beast
Yep, we've moved on to the next chapter.
Continue forward as always. You will see some orcs moving above you. They will not fire back, and you can safely ignore these.
In the next room you will find the Vengence Launcher. Pick it up. It's a heavy weapon. I don't really use it much.
Once again orcs will be moving on a walkway above you. You can safely ignore these or take some pot shots at them as they pass.
Eventually you'll make your way through two green doors.
Immediately after the second door, you will find five or so grunt orcs. Take them out with your pistol or whatever weapon you prefer.
At the end of this hall way is an armory, with a big melta bomb sitting on a table. Why is the melta bomb still there with so many orcs around? I blame the writers. Anyways, walk over to the table and you'll hear your squad talking before you can pick up the bomb.
The door actually closes behind you. After you pick up the bomb the door will open again, and the room will be filled with.. Guess what!.
Yep, Orcs.
There will be a wave of grunts.
Followed by a wave of shooters. Headshoting with your stalker will make these guys go down fast. There are quite a few of them. They can do some damage if left alone for too long.
After the shooters there will be another wave of grunts. Finish them off and you've cleared this room.
There are quite a few buckets of ammo and grenades here. So be sure to restock before you move out.
Go back the way you came, and as you get close to a previously sealed door it will open.
There will be a couple shooters and a couple grunts charging you through the open door. Take them out.
Click the green button to lower the elevator to the next level.
There will be a shooter running for cover here. Take him out if you can.
Through this section you will be rushed by squigs and have shooters shooting at you. It's pretty important to conserve ammo here. You will deffinitely need ammo at the end of this section. You do not want to be running low when you hit the end of Chapter 3.
There will be three or four shooters here. Keep your ears open for squigs they usually make a roaring noise when they are around.
There will be a couple shooters up on the walkway slightly above this level. Take them out.
Once again you will be rushed by a couple squigs followed by some more shooters.
Really there's nothing critical here. Just take out the mobs as they come at you, and watch out for squigs.
Eventually you will make it to a door to open.
On the other side of the door is a new enemy. They are orcs weiring bright red shoulder pads with two chain swords. These guys are pretty bad if they get to melee you.
There are some grenades in the next room, so you can toss a couple grenades at these guys. A couple well placed grenades will make short work of them.
Press the green button to bring a shell up.
then walk over and place the melta bomb on the shell.
Then pound O to push the shell in to the loading rack.
When the shell has been loaded, go back the way you came. There will be some gretchen running along the walkways above you. Don't waste ammo other than pistol on them. Make sure you recover any ammo you have lost on your way back to the elevator.
When you get back to the elevator, the door will open. You will be attacked by a Nob and four shooters. Ignore the shooters, and worry about the Nob. He will come charging at you.
Hopefully you can take a couple swings at him, and then stun him with triangle. Then mash O to execute him.
Nobs are pretty dangerous, but fun to take down.
After taking down the Nob, the shooters are easy to mop up.
After the battle get on the elevator and ride it up.
You will come to a section with ammo reloads. Load up you are going to need it very soon.
There are stacks of crates in this area. You will be rushed by some grunts as you move forward.
After you take out the initial grunts, more grunts will push crates over in front of you. You'll be charged by a group of grunts and gretchen.
There will be a couple of shooters next. As you move forward another wave of shooters and grunts will come at you.
There is a stack of red barrels on top of some crates here. If you time it right, you can take out a bunch of orcs with them.
Move forward, be wary of the shooters still on top of the crates. When you've got them taken down there's little between you and the next lift.
You'll come to an area that gives you a purity seal. This seal will allow you to use your fury to snipe with slowed down time. Basically greatly enhancing your sniping abilities. Be sure to replace any ammo you may have lost. The next section is the tough section.
You'll be rushed by four orcs here. Take them down, use them to regain any health you may have lost.
Leonitus will push the shell back on to the chain for loading. While he is doing that you will need to cover him. That's easier said than done.
Shooters will start appearing on the platform above. Use a grenade or two to take them down as quick as possible. These guys do a ton of damage if left alive, and you will not have very much time to take them down later.
You'll be attacked by a ton of gretchen along with some squigs. I try to use weapons that have a blast radius here. Grenades or your vengence launcher will do nicely. The key is to keep the number of orcs low.
Switch to your pistol as quick as you can to take out the squigs. If one gets to close combat roll out of the way, once they stop to explode.
If your shields need to regen, you can duck behind the corner here. Don't stay here too long, because the crush of orcs will be adding up out there. You will eventually be gang rushed by tons of orcs back here, and that would be bad.
I got rushed by a couple squigs and then by a Nob while I was waiting for shield regen.
Nobs are bad bad. I got lucky and got him alone. If he would have come with a rush of grunts, I would have died.
All in all this section went pretty easy for me. Sometimes it can be a bear.
Clean up the orcs that are left, and you'll be free and clear. The shell will be on it's way and you'll be on your way out of the planitary defense weapon.
You'll get a cut scene with the big gun blowing up, and you running out of there. Well it looks like the guards men will be getting resupplied. I wish the same was true for you. They could have given you a couple seconds to grab what you could.
Chapter 4 Titans of Craia
Well we've made it to Chapter 4.
You'll eventually come to an area with a bunch of orcs trying to regroup. You don't even have to kill them if you don't want to. They will mainly run away through the two doors at the far end of this section.
There are some ammo and grenade crates here. Refill your stockpile here, and then move on through the double doors.
Once again there is more ammo to refill your stock pile with.
There is also a red can next to a baricade. Blow it up for some more grenades and probably a servo skull.
You need to board the Ram train before it takes off. Don't worry. Take your time through this section, and the train will wait for you.
There are a couple of orcs and a couple of squigs you can kill across the way. I like taking the squigs out from a distance, because when they get right up on you they can be a pain.
Grunts, shooters, and the occasional squig will rush you as you move forward. There are not too many of them, and I was able to make my way through this section with only my pistol. That's me. Ammo conservation king.
As I said shooters, grunts, and squigs.
If you look around here, you will see that there is a hidden servo skull.
As you cross this bridge you will be rushed by a bunch of grunts. Take them out and move forward.
When you head down the stairs you will be attacked by a couple of shooters. Take them out quickly.
A train will pull up with some grunts on it. They will be easily dispatched. Keep you eyes open for squigs here. If you take too long finishing the grunts, a squig or two will show up.
Keep moving forward. You will be rushed very often by squigs at this point. There are a couple of shooters up ahead as well.
If you are careful you can use the squigs to take down the shooters.
As you move forward be very careful of squigs. They will be coming from in front of you and up above you. When they are all gone move forward and board the train.
Now that you are on the train open up the door and move forward.
Move forward. You will be attacked by several grunts and a chainsword orc. Use a combo to stun the chainsword orc if he gets too close.
After you finish off that wave of Orcs you will be attacked by a Nob and several grunts. Dump fire into the Nob, and worry about the grunts later.
You might have to combo the Nob, but you might not. I dumped enough bullets into him that he went down right after he got to me.
The next wave of orcs will consit of some grunts and another chainsword orc. Consentrate on the chainsword orc.
You might have to combo him like I did. These guys fall pretty easily.
Next up we have some shooters along with some grunts. There are quite a few shooters here, but you come across them one or two at a time. So they aren't too hard to kill.
Oh I guess there's also another chainsword orc here. You know what to do on these guys by now.
As I said there's quite a few shooters here. I ended up putting them to the sword. Sometimes a bit of melee practice will keep your skills sharp.
Okay, you are now at the end of this section. On top run up and man the plasma cannon. Rip it off and walk backwards towards the wall.
When you are about where I am in this photo, you are in the right place. Take pot shots at the ship you are trying to destroy. Don't worry about trying to take it out too fast. Just take your time aim and fire.
Eventually the ship will come up and drop a couple chainsword orcs and a Nob on the deck in front of you. That's why we chose this position to fight the ship. You don't want those guys dropped on top of you. I found that out the hard way.
When they land on the deck forget about the ship until the orcs are dead. Your plasma cannon will take them down fast, but you can't let those guys run around unchecked. You've got to take them out right away.
When they are gone, go back to working on the ship. If your shields get low at any point, take cover behind the walls and let them regen. This section is really easy once you know what to do. Prior to that though it's pretty tough.
When the ship is dead, you will get a cut scene. The ship will end up taking out the train, and that's that.
Part II - The Inqusitor
Well we've made it to Chapter Five, or part 2, or whatever they want to call it.
As you move forward you will get a message from the inqusition from a servo skull.
Move forward. You will have to trigger this switch on the wall to lower a bridge.
Now you will start to encounter orcs in large forces. I use grenades to thin their numbers.
I think there's about three waves of grunts you need to deal with here.
After you deal with them fight your way forward. There will be an odd orc for you to take out. They may be running, but it pays to take them out now or you will have a bigger group of them to deal with later. Be sure to grab any ammo you can on your way.
Alright now there's another bunch of grunts to deal with.
After a short while another bridge will come down, and more orcs will join the fray.
One of those orcs will be a Nob. Forget about the rest of the orcs, and consentrate your fire on the Nob. You will probably have to combo him to kill him, but it's good to get some damage on him when you can.
The Nob along with the grunts can be pretty tough.
When the Nob is dead, it's all about regaining health. Use the remaining orcs to get your health back up.
As you move forward you will encounter three shooters. They will come at you one at a time.
The second shooter is here, and the third will be right around the corner.
Next you will come across a bunch of grunts and a Nob operating the crane. I start this battle by tossing a grenade into their room.
Then I pour shot after shot into the Nob.
I still had to take the Nob down with a combo. With the other orcs beating on me, it's nice that the Nob made me full health again.
When the Nob is dead it's all about cleaning up the remaining orcs.
Pushing the big green button makes for a bunch of suprised orcs.
After the cutscene and the communication, gather weapons and ammo and then move onward.
Hit the button on the door to drop the bridge. There are quite a few shooters out here. Take cover behing a crate on your left and start taking them out one at a time.
From cover they are pretty easy, but watch out for their grenades. After the shooters are dead several squigs will rush you.
The shooters will keep coming. So just keep putting them down.
There will be a couple shooters up top behind barricades here. Take them out as you can. As I said before there are a lot of shooters here.
When all the shooters are gone you will see that your way forward leads you into a pit.
Drop down and be prepaired to take out some gretchen. They will come at you in force here, along with three or four shooters that remain up above. Honestly this is a pretty easy area, that they hope you use some of your ammo on.
There are a couple red barrels here to help you take out the gretchen. Shoot them when the gretchen are close by to take a big chunk out of the group.
When this area is done, you will be rushed by four or so grunts. I guess they wanted to throw you a couple health packs after that battle.
After those you will be attacked by a couple more grunts and shooters. Take them out and move on.
There will be a couple of them up top. These are pretty easy.
Eventually you will come to the area that is in the screenshot here. The battle to come will be one of the hardest battles of the game.
Work your way around the ramp, and then drop through this hole.
Pick up the Power Axe from the weapon pod. You'll need it very soon.
Quickly gather ammo if you need them.
The doors will open and an orc hord will pour out.
There will be at least two huge waves of grunts attacking you. It's hard to count the waves since you are almost constantly overwhelmed with orcs.
It's important to let your squad take the brunt of the assault. Save your Fury. I know it's hard to save it, but you'll thank me later.
When the grunts thin out, you'll have a bunch of shooters to take out. Take them out as fast as you can. Just dump ammo at them, because you've got 2 Nobz next. If the shooters are still alive you will deffinitely die.
Now you've got two Nobz coming straight at you. You are probably low on health and low on ammo. Now's the time to use that Fury. The fury will take the Nobz out quickly.
After the Nobz are down, you are back on clean up duty. There's going to be a few orcs but they should go down quickly.
When the orcs are all dead get on the platform with the guardsmen on it.
Now move forward. As you move through this area gather ammo to replenish your supply.
Hit the green button to operate the next lift.
You'll get a good view of the Titan Invictus.
Chapter 6 Lair of Giants
We've reached Chapter 6.
You are going to have to go a long ways before you find more orcs to kill. So go ahead and go through the door.
Eventually you will find some gretchen on top of a couple pipes to take out.
In the same area an orc will open a pipe and other orcs will start jumping out of it. Shoot the one holding the pipe open to stop the flow of orcs.
Next there will be a couple shooters on top of another pipe. Take them down. It will be prett easy to take them out with your pistol.
And those were the last orcs you will see until after you reach Inquistor Drogan.
Go through the nearby green buttoned door. In the next room you will get a cutscene with the boss orc.
Yep there he is.
You'll be rushed by some grunts. Not reall large groups of them just enough to wet your whisle. There will also be a couple chainsword orcs thrown into the mix. You can use a bit of ammo here if you are full up, because there are three or four reloading boxes laying in this area.
I think there were two waves of grunts and chain sword orcs. With at most 2 chain sworders thrown into each grunt group. All in all, just minor cannon fodder thrown at you.
As you move forward you will find a machine gun orc, and another wave of grunts and chain sword orcs.
I looks like quite a few of them, but honestly there is just one wave here. They die quickly.
When all the orcs are cleaned up, proceed through the door with the green button.
There is an upgrade to your pistol in the next room. You now have the plasma pistol. It does way more damage than your previous pistol.
When you get back on the walkway above the weapon pod, an orc summoner will summon some new orcs for you to fight. These guys are have an axe and a shield. They are pretty tough. It's easist to take them out when one of your squad is fighting them. You can also shoot them if they are not runnig straight at you.
As I said easier if someone else is fighting them.
Grenades do wonders for them as well, since you can hit them from the other side of the shield with a well timed grenade.
"They also are not impossible to hand to hand. A combo/stun will turn them around. Then you will be able to get a couple swings into them while they reposition.
After they are dead make your way to the elevator and press, yep you guessed it, the green button.
Well you've made it to the last battle in this chapter.
You'll see the boss orc and the summoner appear. You can't kill the summoner here. Trust me I've tried.
The summoner will summon two Nobs to fight you. Hopefully you've got a fury saved up. If you do, then use your fury and kill these two Nobs. If you don't, well good luck to you. Perhaps grenading them or empting clips into them as they charge you will help. Doubtful.
With your fury running these guys are really easy to kill.
After your fury runs out, melee the gretchen and other orcs around to build up your fury again.
Eventually a couple shielded orcs will be summoned into the fight. Take the first one out. Hopefully your fury will come back and then you can use a second one to help you take these guys out.
When both of the shielded orcs are gone, run over to the console and press circle to trigger the servator.
The Orc Boss will blow up the arm that was supposed to pick up the device.
After the arm blows up wait for a bit, and then walk over to the power source and press circle to pick it up.
You'll get lit up light a christmas tree, and this chapter will end.
Heart of Darkness
Well you didn't die. That's a good start. You are now cut off from the rest of your squad. So find the exit and start moving forward.
The exit looks like this huge sewer pipe with good reason.
A little ways into the sewer pipe you will be attacked by a small group of gretchen. I guess this is as good as any way to regain health.
Afte those you will find a couple ammo boxes. Two of them will be behind some rubble. Just shoot the red barrels to blow it up.
You will come to a room with some Shooters on walkways above large pipes. Do not run into this room. Just take out as many orcs as you can from a distance.
You will be rushed by a group of gretchen. Take them out and then back to work on the shooters. Be careful not to go too far into the room until you've taken out most of the shooters.
There are shooters on that side of the pipe as well. Along with some gretchen and grunts below them.
When you start shooting in that direction the grunts will run at you. The gretchen might come as well, but they might just stay put.
When all the orcs you can see are dead start making your way into the room. The pip will explode and a couple of orcs will pop out.
They are much easier to deal with when the room is cleared of other orcs.
Becareful of shooting the red bombs when you are too close to them. They will take your sheilds out in one blast. If your shields are gone when you blow them up, they will kill you outright.
As you move further into the room a large wave of orcs will emerge from the pipes. Do a standard fighting retreat to thin their numbers, and then finish off the stragglers with melee.
There are quite a few in this last wave. Thankfully they are only grunts, so take them down as you can.
After they are all dead continue on into the pipes.
You'll find a shooter all by his little lonesome. Everyone loves a health pack.
As you are passing under a grate a squig will fall out of it.
As you move forward you will come across a couple more shooters. Take them out and continue on.
This room is no joke. You need to be careful here. There are small red pipes down here. They are actually bombs.
Go ahead and drop down into the section. Get ready for a wave of orcs when you do.
The first wave will not be too bad.
It will consist of grunts and chainsword orcs. All in all pretty easy to take out.
I was finishing an orc here with my shields depleted and accidentially hit the pipe.
That took my health down to nothing.
Even almost dead I didn't use my fury, because there's a big fight coming up soon.
Slowly work your way forward.
Orcs will come out of a pipe on the ground. When they appear start moving back, because you don't want to trigger more than one wave at a time.
If you are hurt, use this wave to heal up. There will only be grunts in this wave.
Once again move forward. A door will open at the far end of this room, and a large wave of grunts and chain sworders will attack you. They will be shortly followed up by a large Nob.
Do what you can to take out as many as you can as quick as you can.
The big Nob seen here to the very right can really lay some smack down. I ended up using my fury here to take him out quickly.
When they are all dead continue forward.
You will be attacked here by quite a squig. As you get close to this grate another squig will fall down out of it..
After taking care of those two squigs, a shielded orc will appear. He will charge at you along with a whole line of squigs.
They best way to take him out is to wait until a squig gets close to him, and then shoot it.
Continue forward. You will come to a room with a weapon pod in it. The pod will contain a Melta Gun. That's probably my favorite weapon in the game. When the poop hits the fan, you pull out the melta gun.
You will be rushed by a wave of grunts here. The wave will not be very big. Just take them out.
That wave will be followed up by another wave of grunts with two chain sword orcs along for the ride. Really these are just filler waves. Just take them out and move on.
Eventually you will come to this long hallway. At the end of it is a group of orcs gathered around some weapon drops.
They mostly run away when they see you. Some of them will stay to fight. They are but a minor annoyance.
Continue forward. Eventually you will get to an armor drop that contains a new purity seal. This particular purity seal upgrades your fury attacks.
The next room is plum full of orcs and squigs. There are shooters and lots of grunts. The key here is to draw the ones that are there to you.
When the orcs on the upper level are all dead, start looking over the edge of the platform and killing the ones below you.
When the ones below you are cleared out, start moving forward. When you get far enough along, a group of grunts and shooters will drop out of the pipes. They will have a chain sword orc along with them. Take out the group and then creep forward.
As you move forward, a group of orcs will spawn below you. It will contain some grunts, shooters, squigs and a shoota which shoots missles.
Force the grunts and squigs to fight you on the walkway. Which will separate them from the shooters and shoota.
When they are dead lean over the side and start taking out the shoota and shooters. Take out the shoota first, because his missles are dangerous.
When all the orcs are dead head down to floor level. They will send several gretchen at you. Free health packs! Woohoo!
Move forward and you will meet up with the rest of your squad.
Next we have another large battle. Look over the ledge, and once again start taking out orcs. There are quite a few shootas and shooters in this room.
As I said this area is mainly full of shooters and shootas. Take them down. Duck behind the corner if your shields get low. When they are taken out start moving forward.
When you go down the steps you'll be rushed by five or so grunts along with two shooters. Take them out and move forward.
A digger will appear as you move forward. It will drop off some grunts and a couple shootas. There might be one or two shooters as well in the mix.
It was kind of hard to tell during the combat.
When they are dead go up the ramp. That will end this chapter and move us on to the next one.
Chapter 8 Whispers of the Dead
Well we've made it to chapter 8.
Moving forward you will eventually come to a weapon pod, and get a cut scene.
After the cutscene go to the weapon pod. You will get a laser rifle there. It's a very good long range sniper weapon. I still like the Stalker Bolter better, but the Laz gun has more power. I've heard that Orcs just don't respect anything except a huge hunk of metal hurling at them. So laz guns don't count.
This guy is the ultimate shooter. He's like a Nob shooter.
Start taking out the orcs that have spawned with the laz gun. There will be two shoota nobs, and lots of shootas. Take down the Shoota Nobs first. And watch your health because they do a lot of damage. Head shots help on the Shoota Nobs.
When you are done killing orcs walk back to the weapon pod and pick up your Melta Gun. Then continue moving forward.
You'll enter an area with some ammo and a bunch of gretchen. Take out the gretchen to regain health if you lost any.
There is also a shoota up on a ledge here. Take him out before you collect the ammo.
You've come to a weapon dump. Swap out your melta for the stalker bolter.
This section is pretty fun. There's a couple of Shoota Nobz on the other side, along with shooters and shootas. Use your Stalker Bolter to take them down. Basically take them all out, and forget about saving ammo on the Stalker Bolter.
Just keep pounding them until they are all gone.
When they are all dead on the other side of the room, go back to the weapon pile and grab your Melta gun.
You'll round the corner here, and you'll be attacked. A huge wave of chain sword orcs will rush you. Along with a couple squigs.
Your Melta Gun will make short work of these orcs.
Once again when you are done with those orcs go back to the weapon pile and refill your Melta Gun.
An orc ship will plunge in to the ground, and shootas and shooters will pour out of it. Take them out.
When they are all dead ready your Melta Gun again.
Move forward just a bit and you'll run in to a hoard of chainsword orcs charging you. Oops their mistake. Fire up your melta and take them out.
Melta Guns really make orcs vanish quickly.
As you move forward you'll eventually come to another ammo dump. Swap out your melta for a stalker bolter. There's going to be a lot of orc sniping in the next room.
This room will have quite a few shootas and shooters in it. There will be two Shoota Nobz on a ledge up to your left. The best thing is to just start taking out shootas and shooters.
When they are dead look up to your left for the Shoota Nobz.
Also be aware that two Nobz will charge you. They will come one at a time which is pretty nice of them. Take them down however you want to, then go back to killing shooters, shootas, and Shoota Nobz. When everything is clear, you can go back and grab ammo if you need it. I would keep the stalker bolter for a while though.
As you go up the stairs a Shoota Nob, some shootas, and some shooters will spawn on the side opposite you. Forget about the rest, just take down the Shoota Nob. The others will run off to regroup.
Continue up this bridge. At the top you will be greeted by the orcs who ran off. I usually pop my head over the top and lob a grenade their way.
Here's a present for you.
Continue forward. There is one more Shoota Nob for you to take out. He is hiding in a ruined building, and will open fire when you get close to him.
After he is dead just move forward until you meet Inquisitor Drogan.
Move forward collecting ammo.
You will eventually come to a guard outpost being attacked by a bunch of orcs. This area is actually pretty tough. There's a wall to the left in the screenshot here. If your shields get low you can shelter here, while they reset.
There are a bunch of shooters to start with. Take them out, and then a Nob will appear. At the same time the as the Nob appears there will be about seven or eight shootas appearing on the ledges above.
I recomind sheltering behind the wall when you need to regen your shields.
And then coming back out to sniper some shootas off of the wall. They do way too much damage for you to just stand out in the open and pick them off.
You will eventually be rushed by a large group of grunts. But they are easy to take out. When they are dead go back to working on the shootas.
After the battle you will get a cutscene. Your character desides he will go off on his own to draw the orcs away from the rest of the squad.
Moving forward you come across a weapons pod with a thunder hammer and a jet pack in it. The combo of the two happens to be quite fun.
Move forward. You will come across a small squad of orc grunts with a Nob. These guys are really easy to take out with your jet pack and hammer. Just jump up and ground pound in the middle of them. The Nob will be stunned. Walk up to him and execute him.
There is a servo skull here. Be sure to pick it up.
Moving forward into this room. There will be an orc summoner here. The key here is to do damage to him, and not the orcs he summons. When he gets low on health, he will vanish and the orcs he summoned will die.
Just keep dumping ammo at him. You will eventually take him out.
Land on the pillar in the middle of the room, and then walk up the bridge towards the green hand marker.
You will enter a room with several shooters, shootas, and a Nob or two. These are all very easy to take out. Just jump up ground pound, and then execute. Rinse and repeat.
The orcs in this room will be dead in no time. I tend to gloss over the very easy battles. Hopefully they are easy for everyone.
Moving forward you will be attacked by several grunts. This is a prelude to a huge battle you will have to fight though.
As you get close to the main room, the orc summoner will appear on the bridge in front of you. He will continually summon grunts, shooters, shootas, Shoota Nobs, Nobs, and gretchen. It doesn't matter how many orcs you take out.
The only way you can get past this area is by killing the orc summoner. There is a door filled with a green mist. He is very often next to that.
The summoner has a kind of green shield around him. As he gets more and more damaged his shield will turn from green to red.
You can smack him around a bit, and then he will vanish to reappear a short while later. So ground pound the other orcs for a while, and then go back to the green door to beat on the summoner for a bit. Eventually, you will kill him. When he dies all of the orcs he summoned will also die.
Continuing forward you will arrive at a large Imperial Guard base. Captain Mira will meet you there and let you board one of her Valkries.
Part III The Weapon
Well we've made it to Chapter 9.
You will be asked to man a gun as you are flying to your destination. Take out the orc rockets as quickly as you can. It seems they can hit you a lot easier than you can hit them.
Half way though your flight, you will be asked to shoot the orcs off of this valkrie. Do that and then go back to taking the orc rockets out of the air.
A large orc ship will appear beside you. The key on this is to shoot all the orcs off of the ship. So key in on them and take them out.
The ship will move behind you and then to your valkryie's left side.
You will eventually get a cut scene of an orc killing the piolet. Then your ship will crash.
You are going to be mobbed my a large number of orc grunts and a couple chain sworders here.
I ended up using my fury to get through this first wave.
After the first wave there will be more orcs and chain sworders rushing you. They will not come in as great of a number. I even thined them out further with a grenade or two.
You will have small groups of two or three chain swording orcs rushing you. They are not too bad, but keep in mind the shootas that are posted in the tower. Try to stay behind some shelter as you fight or those shootas will take you out.
When the grunts and chain sworders have been taken care of, start sniping the shootas.
After the shootas are dealt with, move forward. You will be rushed by a small number of grunts and gretchen.
Moving forward a little bit more, will bring you to another small group of grunts and chain sworders. Eventually you will run out of orcs to kill here, and you'll be able to get to your pick up point. The hardest part of this small section is the initial wave of orcs.
Yea! We can finally have a Melta Gun and a Stalker Bolter at the same time. The Melta is a much better heavy weapon than the Vengeance Launcher.
Be sure to grab the power axe laying on a box here. It's way better than the chain sword, and you will be doing some hand to hand fighting before this chapter is done.
Move forward until you see a shooter poping shots off at you. When you get to this point you'll encounter several shooters and shootas on high ground. As you move forward you will be rush by waves of grunts and chain swording orcs. Really it's better to take out the shootas quickly or you will be constantly hit by rockets.
There's two shootas in the photo and three of them in that direction. Take them down fast.
You'll be hit with a small wave of orcs. They will be pretty easy with the shooters and shootas gone.
As you move slightly forward, you will be hit by another wave of orcs. This one will be slightly larger than the last one.
Moving forward you will come to a bridge with an orc shooter on it. When you kill him, an orc pod will drop and take out the bridge. We'll have to find another way to get over there.
As you move forward you will be rushed by a chain swording orc and a shoota.
Rounding this corner you will run in to a ton of shootas. They can be rather unforgiving. You need to take these guys out fast. Their combined vollies will vanish your shields and health in the blink of an eye. So I'd switch to the stalker bolter, and not waste time with the pistol.
I think there are four of them. They are tough and hard to hit.
As you move forward an orc pod will fall from the sky.
Four chainsword orcs will pop out of it. You can scrape them off on your squad by backing up and shooting at them. Then you can select one or two to take out at a time. You really don't want all four of them bashing on you at the same time.
When they are gone take out the shootas that have appeared on the battleground. There should be three of them.
Another pod will drop as you move slightly forward.
It will be filled with shootas, chain sword orcs, and a Nob.
I didn't want to mess with these guys too long, so I whipped out the Melta and let them have a taste of fire.
As always the Melta is your best friend.
When you finish the melee, switch back to your stalker bolter and take out any shootas that have been left hanging around.
Moving forward. You'll come to a stock pile of ammo next to a downed bird. There are a lot of orcs coming up. Conserve ammo when you can because the end fight is really nasty.
My stalker bolter was pretty low on ammo, and there is a laz cannon laying by the downed bird. So I decided to use my stalker bolters to take out all of the shootas from a distance. There are quite a few shootas, some grunts that will charge you on the first shot, and a Nob across that bridge.
There's a Nob on the other side of that bride as well. When you start shooting him he will charge you.
He comes alone so he is fairly easy to take care of.
When you end up crossing the bridge there might be a shooter or two waiting for you. Now that they are thinned out it's easier to melee them than it is to shoot them. It also helps conserve ammo, which you will need shortly.
There are two shootas to the right. When you run down to melee those two, there will be another one behind you.
All in all the shooters are pretty easy to melee, assuming that you can dodge the missles they are shooting at you.
The last shooter should be waiting on a hill side behind a rock.
Across the gully there should be three more shootas, and another shoota on the bridge. That's assuming you haven't already taken the shoota on the bridge out. You can snipe him from next to the downed bird before you ever get to this area.
The key is to take out everything you can on the other side of the bridge.
Two orc pods will drop in when you get close to the bridge. I find it easiest at this point to run back the way you came.
Run across this bridge and then make your stand there. A ton of orcs dropped with those pods. Shootas, a bunch of chainsword orcs, a Nob, and a super Nob. They will all be showing up here minus the shootas. It's enough to deal with without the shootas lobbing always on target missles at you.
Take out as many chain sworders as you can when they start to arrive.
Don't mess around too long. I'd whip out the Melta and reduce their numbers quickly. You don't want to be messing with chainsworders when the Nobs arive.
Take out the frist Nob that gets to you quickly. Hopefully the long run to get here has separated them a bit. Don't mess around in this section. Empty your Melta if need be, because there are enough reloads to fully reload it before the next battle.
I had just enough time to take out the Nob before the super nob showed up.
Even then I kept hitting him with my Melta.
I had just enough juice left to melt him to execution.
When you are done with that huge wave of orcs, go back to the downed bird. Restock whatever ammo you can restock. I switched out the Stalker Bolter for the fresh Laz Cannon. Then pick up every ammo crate you see until the next big battle. We should be on ammo conservation mode from now until then.
You might have a couple shootas to mop up in this area. When they are tagged and bagged, head off to your right.
You will be rushed by a chain sword orc and two grunts. Further on there will be two shooters.
Keep moving forward. You will eventually see a large door with some ammo crates in front of it. This is the place where the next big batttle will take place. Don't worry about blowing your ammo here. This is a huge battle, just worry about coming out alive.
The best way to fight this battle is to pick up the Thunder Hammer on the crate in front of the door. It's really the easiest way through this section.
A wave of orcs chainsword and grunt will drop off of a cliff face to the right.
An identical second wave will drop into the area before the first wave even gets to you. They will start coming in slightly to the left of where the first wave entered.
I think their might be four or six chainsword orcs here. Along with a ton of grunts. It's hard to tell with the Thunder Hammer making them go poof so quickly.
An orc pod will drop in. The cool thing about the Thunder hammer is that you kill the orcs so fast that you have time for your shield to regen before the next bunch gets to you.
A nob will attack you next.
A group of orcs and chainsword orcs will be right behind that nob, so finish him quickly so you can work on the next batch.
Another pod will drop into the area. There's about four shield orcs, a couple chainsword orcs, and a ton of grunts that come out of it. Thankfully these are all short work for your thunder hammer.
When the last batch of orcs are finished, two Super Nobs will appear out of the last pod. You don't have to fight these Nobs. Just run them around for a second or two and the door will open.
When the door opens, run through it to get to the next section.
We've got weapon swaps and ammo reloads inside. When you are finished swapping and reloading, follow the Inquisitor through the next door.
Move forward a little bit, and you'll trigger waves of orc grunts. The grunts will come with squigs so be on the look out for them.
This is a good place to refill your health if you need to. But don't get caught in an execution, with a squig on top of you.
When you have cleared the field of grunts and squigs move forward. You'll come to a shooter. Take him out.
There will be the occasional orc and squig attacking you as you continue on.
You will go through one set of pillars, and close to the next set you will trigger another wave of orcs and squigs.
The orcs will be grunts, and there will be a lot of them. Anyways, shoot them and move on. I would shoot them rather than melee them, because it's bad to be in melee when a couple squigs show up.
There will be a couple chain sword orcs that appear in a wave a bit further in. Probably four of them.
As you pass under a pipe, you'll see that there are a bunch of shootas on top of a nearby walkway. Shoot them while you are under the pipe, that way their missles will not be able to hit you. When they are all dead move on.
When you get on top of the walkway, you will be attacked by a swarm of gretchen. At this point you should really have no need for health packs.
Chapter 10 House of Secrets
Well we've made it to Chapter 10.
Okay we're going to be taking out some turrets. The first one is right where my cross hairs are pointing in the screenshot.
In this room there is one turret on the left and one on the right. In the middle is a rocket launcher.
After the turrets are taken out the launcher will wake up. It wakes up as you move further into the room. Anyways take it out and move on.
There are a whole bunch of turrets and launchers in this room. Move forward very slowly. Take whatever shoots at you, let your shields regen, and then inch forward.
There is a turret right in the middle here. I took it out without being able to fully see it.
There's another turret here on your left. There is another turret on the right side of the room. This room is mirrored left to right.
As you move forward on this side, a launcher will wake up.
Then there will be two turrets that wake up on either side of the door you will exit through.
Clear the other side of the room and then make for the exit. The other side of the room is setup exactly the same as the first side we took out.
Use the green button to open the door.
There are two turrets on either side of this room on tracks. You can see that there are explosive canisters set into the wall right next to the tracks. So if you happen to shoot these when a turret is making a pass, they will take out the turret.
That or like me you can just shoot the thing. I screwed up here. I had selected my Melta somehow, and wasted a shot on it.
Here's a shot of the turret on the other track.
Okay on to the next room. There are quite a few turrets and missile launchers in this room. Just move forward slowly and take them out as they wake up.
Two turrets will wake up at the same time. They are on tracks, so they are a little harder to hit. Anyways take them out.
As you move forward you will encounter a missile launcher.
Next up will be another turret on the right side of the room. It will be stationary.
Once again there is another turret on the left hand side of the room. It is stationary as well.
When they are all dead open the door on the right hand side of the room.
There will be a turret in here. Take it out before going in.
When everything is dead go back out into the main room and then exit through the door with the green button.
You will eventually come to a weapon pod. This pod will have a bolter upgrade in it.
We've entered another room full of turrets and launchers. Slowly work your way forward taking them out as they wake up.
There's a turret on your left mounted under a walkway.
There is another one on your right mounted under the walkway.
Sneek in to the room on the right if you need some ammo refills. There is a turret in here, so take it out.
When you are done here, go back in to the main room and exit through the door.
As you move forward you will come to a spot where there are missile launchers on tracks on each side of the hallway. Take them out and continue forward.
Here's a shot of the second launcher on a rail.
At the far end of the walkway there will be a turret on the ceiling.
Keep moving forward until you reach this room. There are three launchers and two turrets here. Two of the launchers will wake up first.
After you take them out the last launcher, and two turrets will wake up. All three of these will be on tracks. When you finish with them exit the room.
There is a fury upgrade in the room. This is the control room. You will get a bit of a cut scene in here.
You will be rushed by orc waves from each side. I shoot the barrels on this bridge when they get close to help thin them out.
There will be quite a few orcs here. So I decided to use the Melta to help clear out a few. Right in the middle of combat two squigs will show up. That will be the death of you if you are stuck in hand to hand combat with some orcs.
After the initial surge or orcs there will be a swarm of gretchen.
Those will be followed by a couple more orcs and two squigs. If you were still in a huge pile of initial orcs those squigs would be bad news.
Finish mopping up what's left of the orcs and move on.
Exit this room through the door close to where you came in at.
Chapter 11 Point of No Return
Well we've made it to chapter 11.
There will be some grunts in this room along with three or four shooters. Really nothing to worry about, I just ended up meleeing all of them since they came very slowly.
Yeah it was really pretty easy.
When they are all dead, walk over to the console and shove it back in to the wall.
Then walk up and hit the green button to fire the weapon. You'll get a huge cut scene here.
After the cut scene you need to leave the room the same way you got in to it. You'll be attacked by groups of two or three demons. These guys are easy to handle.
Just combo them. Square Square Triangle. The other demons can't seem to hit you when you are doing this. It takes them out really quickly. Do this all the way back to the elevator.
There are two demons to start with. Pretty easy to take out if you are good at combos.
Two more will attack you on the stair down to the lower level.
Then three more will attack you right before you reach the lift.
All in all these are pretty easy to take out.
Ride the lift to the bottom of the shaft.
When the lift opens you'll see a group of four demons fighting two orcs. You can lead off with a grenade here if you want to.
You can forget about the orcs, because the demons are much tougher than they are. Just focus on taking the demons out.
Try to let your squad take the brunt of the demon's assault. Do that at least until you've got a fair number of demons dealth with.
The demons will just keep on coming. I don't know how many you have to deal with, but it's a good number. They just keep warping in.
When they are all dead move forward down through the control room.
You can restock some weapons here if you used any ammo.
Though the door are some orcs and some demons fighting. Once again the demons will start warping in. The key here is to draw some of the demons to you so you can kill them. You do not want all of them.
It's also a good idea to keep your entire squad in the fight. If you've got too many demons on you, run past a squad member to scrape some demons off onto him.
The combo execute move really works well here. When you execute a demon, the rest of the nearby demons are stunned giving you time to execute another one. As long as you don't have too many demons you can take out a good number of them while gaining health.
Just keep at the demons until they are all dead, and then find the green switch on the wall. Hitting that green switch will open up an entire wall.
Part IV Dying of the light
Part IV - Dying of the light.
You'll come across a pod that contains an Iron Halo, which will upgrad your shields. I also picked up a Thunder Hammer. I think you will be better off going with the Power Axe. There is a lot of long distance combat ahead.
You'll enter a very large room with Chaos forces and orc forces shooting at each other. Concentrate on taking out the Chaos forces first.
There are Chaos Space Marines and ground troops I take for Chaos guardsmen.
When the chaos forces are dealt with, switch over to the orcs. There are a couple of shootas here and a shooter.
When they are dead you will be rushed by a demon or two, and then you'll have to deal with this Chaos Marine at the far end of the room.
Continuing forward you will reach a weapon dump.
Then you'll get a cut scene where Leandros thinks you've been corrupted by Chaos powers.
Move forward a ways. You'll see Chaos energies forming up ahead.
There are a bunch of Chaos guardsmen for you to take out. Do so from a distance.
When the first wave is dead, move forward a little and more Chaos guardsmen will spawn. A Chaos marine will spawn with them.
Once again take them out from a distance.
You'll have to keep rolling from side to side to avoid the Chaos Marine's volleys. Eventually he will die.
Move forward a bit more, and you will cause three Chaos Demons to spawn. Back up and fight them.
As always they are very easy to kill.
Move forward a bit more, and another Chaos warp portal will open. Four more Chaos guardsmen will appear followed by another Chaos Marine.
The guardsmen tend to clump up next to the stairs, so a grenade works very well here.
After the guardsmen are done, you can run up and finish off the chaos marine.
As you run down the stairs, a couple friendly Guardsmen will run through the door followed by four Chaos Demons.
Take out the demons, and then you'll get a cutscene with the guardsmen.
Moving forward you will come across another weapons dump.
You'll enter this large room with a statue in the middle of it. Go to the left, and start clearing out the orcs. There's a fair number of shootas in here. You don't want their missles pounding you when you get out in the open later.
Here are the shooters down below. They are occupied with the Chaos forces outside. They will not even notice you until you start smacking them around.
Go up the stairs and deal with the remaining orc shootas. I think there are four of them up here as well.
Across the courtyard there are a bunch of Chaos Guardsmen. I rush across and take them out.
When you finish the guardsmen off, go up the stairs.
There is a Chaos Marine up here. I just get close and melee him to death. They are easier to deal with up close and personal. When their shields go down you can execute them.
There should be another Chaos Marine in the courtyard. Go down and take him out.
Now head over to the stairs that lead to the exit of this section. There should be a demon or two running at you. Take them down.
There's another Chaos Space Marine at the top of the stairs. Rush up and melee him to death.
There are several shootas up high. You might not even want to worry about these. I just rushed forward meleed the three shootas on the bridge to death and then jumped on the elevator.
Yep here's the last of the three shootas on the bridge. He's about to go splat.
The elevator will take you down to Mira.
You'll get rushed by a couple of grunts.
The room that you come into is chock full of shootas and shooters. Hide behind the crates here, to let your shield regen.
Then pop your head out to waste some orcs. Rinse and repeat until all of the orcs are dead.
This is a pretty low risk area. Nothing is going to charge you. So I kept my pistol equipped the entire time, and just took everything out with it.
I swapped my Thunder Hammer out for a Power Axe. I don't know why, but I like the Power Axe better if I don't have a Jump Pack.
Go up the stairs. There's a bunch of orcs intent upon taking out a human guardsmen station. So take them out as you come to them.
There's a large bridge over the area that you will have to fight across. There are lots of shootas and shooters up here. I actually melee my way across this bridge.
It's pretty easy to do since the orcs are focused on the humans below.
When you get back down to ground level whip out your Stalker Bolter or Laz Cannon, and have at it. There are quite a few shootas and shooters to take out.
You will be rushed by shield orcs. I think they come two at a time, and they always come with a squig or two. So shoot the squig to do some damage to them before they get to you.
When they get you to you'll have to melee/combo them to finish them off.
Beware of the squigs because they will rush you seamly at random. Just keep your ears open for the sound they make. After taking out a couple waves of shield orcs you will have a large wave of grunts along with a squig or two.
There's a Shoota Nob that will appear on the walkway above the battle field. Take him out quickly because he can dish a lot of damage fast.
After that it's really just a little bit of orc mop up to finish this room.
Reload weapons and ammo before continuing on.
There's quite a bit of a walk ahead of you before you get to the next combat.
There's a weapon pod here with a Plasma Rifle in it. I picked it up, because sometimes it's nice to use a new weapon.
In the next are there's a Heavy Bolter just sitting there for your taking. Walk up man it, and then rip it off of it's tripod.
There are a couple orcs on top of some rubble over here. shoot the barrels to remove them.
There will be chainsword orcs, squigs, shootas, shooters, grunts, and a Super Nob in this section.
Start laying waste to them with the heavy bolter. I find firing in short bursts really helps conserve ammo, while doing maximum damage.
Wave after wave of orcs will come at you but they are really easy to take out with your heavy bolter.
At the end of the fight, you might have to go hand to hand with a Super Nob. I just retreated while fireing until he was ready for execution.
After the mop up, you'll head off to another section. Where you will have to repower some sentry guns.
There are some orcs that the guard are fighting. You can stop and take them out or just continue on your way. Whatever you do, do not waste any ammo on them. Use your pistol if you are going to take them out.
I grabbed the Thunder hammer again, because I know that there is some very tough melee coming up. It's going to be much easier to do with the hammer.
Two diggers will come up out of the ground at the same time. The chainsword orcs on them are a pain if you don't have the hammer.
With the hammer they go down really fast. Take them out.
After they are dead, move forward a bit. You will encounter three shooters. Take one or two of them out with your pistol.
Then switch to your bolter. A super nob will be running at you. He's got a long ways to run, so you should be able to empty two full clips into him. When get gets close he will be very ready for execution.
Execute him, and then back up. There will be a huge mass of orcs coming at you. They will consist of chainsword, shooters, and squigs. I back up and lob one grenade after another into them to thin them out.
Here is the start of the mass of orcs.
When they are all dead move forward a little.
Start sniping orcs with your pistol. There's a lot of them out here. You don't want to get too close. If you get rushed by a bunch of chainsword orcs and grunts, while about six shootas are lobbing missiles at you.
So just stay back and snipe the orcs. When you hit a melee orc it will come running, but not bring a mass of orcs.
There are quite a few orcs here, just keep plugging away and they almost all die.
When you've wiped them out run up and hit the green button to repower the defenses.
You can now head back the way you came grabbing ammo.
You can rearm out here. When you get close to the door it will open and Boss Grimskul will grab your foot and pull you through. Make sure you've got a Melta gun for the next section.
You'll get a bit of a cutscene, and then you will end up fighting him.
Okay. Boss Grimskull. He's pretty easy as long as you've got the Melta Gun.
Just fire melta shot after melta shot into him. There is endless ammo in this room. When you run low on ammo just go pick up a box.
He will charge you when he does just side step.
Eventually he will knock a hole in the wall and have some grunts and gretchen help him.
It doesn't matter if he has friends. You've got a melta gun with infinite ammo. Just torch them and continue working on him.
Eventually he will jump up on top of a wall.
Squigs will start pouring over the wall where he ist standing. I switched to the bolter at this point to take them out. I really should have just let them have it with the melta gun. Hey we've got infinite ammo.
When the squigs are dead run up and let him have it with the Melta again. Sure he's up on a ledge but he's not out of range.
Eventually he will fall on to the ground. You just walk up and execute him at that point. One boss down. One to go.
Chapter 13 Wake the Sleeping Giant
Moving forward you will come to a room that opens for you. It is basically a giant weapons locker. In the rooms further in you will find Chaos Gaurdsmen and Marines. Pick what weapons you will. Something long range would be good.
You'll walk out into this area, and be attacked by a bunch of Chaos Guardsmen and one Chaos Marine.
Their fire is pretty heavily concentrated so they will keep you pinned down fairly well. Just keep picking off guardsmen. When they are all dead focus on the Chaos Marine.
Duck back behind cover when your shields get depleted.
I finally got tired of messing around and took one of the Chaos Marines down with my stalker bolter.
After you get the first batch of guards taken out, a door will open and more guardsmen will pour out. Along with two more Chaos Marines.
When you get all of the guardsmen killed run up and melee the Marines.
When all Chaos troops are dead move forward.
There's a spot where you can rearm on to the next battle.
In the next fight you will find a large number of guardsmen. One of them will be manning a heavy bolter. Take him out first, and then work on taking out the rest of the guard.
I usually take out the guy manning the heavy bolter and then move in to the right. The heavy bolter can't make very wide swings when it is mounted on the tripod. These guys are too weak to rip it off the tripod, and there's no cover for you out here anyways.
The fight is easier once you are inside.
It's even easier once you've ripped that heavy bolter off of it's tripod.
Most of the chaos forces have run down this ramp. Don't chase them down there yet. Just walk around the platform you've got and take them out with your huge gun.
When you go down the ramp you'll get a cutscene, and a new type of Chaos scum will appear. This one is a summoner like the orc summoner.
This guy kind of floats in the air. Anyways just open up on him with the heavy bolter and he'll be toast.
Then mop up the rest of the Chaos forces before going through the green door down there.
The next room is full of Chaos marines with laz guns. The guy on the walkway is the first one I took out. It's pretty easy to take them out when you have a heavy bolter.
There's another one straight across from you. Take him out next.
Move down the ramp a little ways. There's another Chaos Marine down here. Take him out.
The last one is on top of the platform above the door you have to go through. I would take him out before moving on. These guys have lazguns. So two hits will kill you outright.
After that move forward. You'll have to go quite a ways before you get into another combat.
Your next combat comes in an area that looks like this. There will be tons of guardsmen here.
After you start the combat a Chaos portal will open up. Six more guardsmen will step out along with a Chaos Marine.
The key to the first part of this battle is to take out the guardsmen.
When you take out enough guardsmen, Chaos demons will appear. Take them down next.
There's quite a few of them, but they really are not that bad. Just keep at them until they are gone.
Now focus your attenshions on the Chaos Marine that is wander around back there. If you can draw him to you, melee him. If you can't, do not approach him. Moving towards him will summon more stuff to fight.
When the Chaos marine gets low on health he will charge you. Just take him out, and the next round of Chaos troops will spawn.
This wave will consist of two Chaos marines and about six guardsmen.
Take out the guardsmen first.
Then blast away at the marines. When they get low on health they will come running at you. When they are both dead move forward.
When you get close enough this guy will spawn. He's a chaos captain, and he's got a wicked looking mace.
I tend not to mess around with this guy. When he swings roll backwards. I use my Melta Gun on him. Takes him down to execute mode in about three shots. Really works well. Yeah it might be cheese, but the melta gets you through the tough parts.
This guy will still be moving when he is ready to execute. So when you see the red dot, just move up to him and hit circle. Then pound circle to execute him.
When they are all dead gather some ammo and move forward.
Move forward and you will come to a room full of weapons. The next thing you fight does not go down to heat or plasma. So you want to have some kind of shells to hit it with.
Eventually you will come to a room with a weapon pod below you.
The weapon in the pod is called a storm bolter. It's a very high rate shelled weapon. It might work nicely on the next Chaos scum you find.
Continuing onward you'll find these hovering Chaos drones. They are very tough and can do some damage with the cannons that are mounted on the front of them. They are also fairly hard to hit.
I used my regular bolter to take this guy down. It took about half of all my ammo to do it.
When the drone is dead move forward again. You'll come to a lift that will take you to the top of the titan.
You can walk around a bit, but really you want to fight from where you started out on the titan. It provides a little bit of cover for you.
Three of these summoners will spawn. Fortunately they will not summon anything. They will simply try to shoot lazers at you.
Go back to where you started on the titan. Now you'll only have one of those summoners to worry about. Quickly take it out.
Hopefully you manage to kill it before the drone arrives. The drone will hover over you peppering you with shells. Use whatever shelled weapon you want to take it down.
When it is dead move back out to the front of the titan.
There should be two summoners left. They are stationary so they are pretty easy to kill. Take them down.
You will finally get a way to get off of this titan. Go over to the green hand to receive the next cut scene.
Well great you've blown up the orbital tower.
Chapter 14 Victory and Sacrifice
Moving forward you will come to a room that will let you rearm. Grab as much ammo as you can. Bolt weapons are the best. You will face a whole bunch of Chaos Marines next.
When you jump off this ledge you will get a cutscene, and then Chaos Marines will appear.
Take shelter behind the boxes in the middle of this area. They provide the best shelter from all sides.
Take the Chaos Marine on your right out first. Just hammer him with your weapons until he falls on his knees.
If you run dry while when he is on his knees, switch to a different weapon and finish him off. If you try to reload, you will take too much time and he will stand back up.
Now move to the Marine who is the furthest to the right. There are a couple barrels here you can blow up to help damage him. Pour on the fire until he falls and then keep pouring it on until he is dead.
As you are doing all this keep an eye on any incoming grenades. You may have to roll away from a grenade or two before this combat is finished.
There should be two Chaos Marines and two Chaos Guardsmen on the last platform. I lead off with a grenade up there. If you land it right, it will drop one of the marines to his knees. If that happens finish him off quickly.
These guys are hard to kill because they have a habit of walking in front of each other. When one dies, there will be another flash of Chaos.
Another Chaos Marine will appear on each platform. These will have heavy weapons. I find the heavy weapons easier to dodge than the straight out gun fire.
Finish taking out the Marine that you have already wounded and then start working on the heavy weapon troops.
These guys are not as tough as the first group. Anyways take them out to finish this room off.
When kill the last of the marines, two Chaos guardsmen will appear on the platform you are on. You can use these guys to heal up.
When they are dead continue on.
You arrive on the scene and get a large cut scene. After the cut scene run around gathering ammo. You are deffinitely going to need it.
Fortunately there are serveral boxes of ammo laying around. So you'll have a little bit of ammo no matter how low you were to start.
Three chaos gates will spawn with a summoner at each gate. Tons of Chaos guardsmen will pour out of the gates. The only thing you can do is to take out the summoners. Forget about the guardsmen.
Take out the right one, then the left one. After you take out a summoner try thinning the number of guardsmen in front of them.
Some of the guardsmen will respawn, and some will not. Getting their numbers down is key though, because their grenades are annoying.
When all three summoners are dead, two Chaos Marines with heavy weapons and two Chaos Captains with huge maces will spawn.
Worry about the captains first. I just started blasting away with the Melta Gun, because these guys are very tough.
It also helps if you can brush one off on your Leonidus. Anyways just roast them until they are dead.
When they are both dead make your way down to deal with the two Chaos Marines with heavy weapons. They are easiest to deal with in melee.
They also provide you with a good chance to heal your wounds prior to moving on.
When they are dead Mira will send a bird to pick you up.
Part V Prince of Daemons
You are going to have a ton of Chaos Guardsmen here. Start picking them off as soon as you can.
Occasionally when a guardsmen is about to die, they will turn into a demon. The demon will then run at you...
Providing you with a health pack incase you need it.
Keep taking out the Chaos guardsmen until there are only a couple left.
The last few you can run up and melee.
There is plenty of ammo laying about. So you can resupply before you tackle the rest of this area.
There are two guardsmen at the top of the ramp. They are sheltering behind a barricade. It's kind of hard to see them because they don't fire at you when you approach.
This next section will have a summoner, who summons guardsmen, and a ton of chaos guardsmen. Focus on taking down the summoner. Until he is killed if you take out a guardsmen, the summoner will just summon another.
When the first summoner dies, a second one will spawn. He will bring two Chaos Marines with heavy weapons on the to battlefield.
As always focus on taking down the summoner.
When the second summoner is dead, you will be free to start taking out guardsmen. Remember to dodge the heavy weapon fire. Really the guardsmen go down easily.
When you have all of the guardsmen taken care of, walk up and melee the Chaos Marines. They go down quickly.
Grab some ammo and then continue on.
As you move forward four guardsmen will appear. When you kill a guardsmen a demon will spawn. So eventually you will be fighting four demons.
They really are not too much trouble, even if you hit them head on like I did. I would have been better to let them run into a grenade I left on the deck for them.
As it is, they took my health down quite a bit further than I would have liked. Oh well time to move on and look for another health pack.
Up ahead you'll find a Chaos Marine with a Laz gun. Basically one shot will take out your shields. So target him and take him down. Hit him hard and keep hitting him until he dies.
There is another Chaos marine down here, but at least he doesn't have a bolter. Take him out next, and then go back to the stockpile and select your weapons. Make sure you grab the Melta. There is a spot later to change up again.
Jump down and move forward.
You will be attached by a Chaos Marine with a huge mace. I just use my Melta on these guys. It's the only thing that seems to hurt them.
When he's dead, continue onward. You'll run into four Chaos Guardsmen. I used these guys to heal up.
You'll run into another weapon dump before the next big battle.
There's a warp gate that opens up and spews all kinds of Chaos filth into the area. You'll have a couple Chaos Marines, some guardsmen, and a whole bunch of demons to deal with here.
Place a bunch of shots around the area, and then back off. This will draw some of the demons to you. It's nice to take them out back here where you've got some shelter from the heavy weapon fire.
"They will get to you eventually.
When they are dead move in to the left. You can kind of circle the pit in the middle.
There are two Chaos Marines with heavy weapons here. Don't focus on them too much, because you are about to be hit with a couple waves of demons.
The demons will drop out of the warp gate, and then the gate will close.
The demons are pretty easy to take care of, and you will not be bothered by the Chaos Marines too much.
I think there are three more demons that come up from the pit area, while you are up here.. So that is six demons to take out.
When the demons are all dead, focus on the Chaos Marines. They will be easy to take down.
Move forward and start taking out the Chaos Guardsmen that are down in the pit.
There is another Chaos gate here in the pit. There is also a Chaos Guardsman manning a turret. Take out the guy on the turret first.
Then go to work on the demons that came out of the gate.
There will be another batch of demons to deal with before you are all done.
When they are all dead walk over and tear the turret off of it's tripod. It's nice to have a big heavy weapon with you.
Continue on.
I ditch the Heavy Bolter here for a bit. You really want to lug it along with you, but conserve ammo.
You will be attacked by two groups of three demons. Finish off the demons in the first group quick, because the second group will be right behind them.
It's not fun to be partying with six demons at the same time. Three or four is a much more manageable number.
When the demons are dead go back and pick up the Heavy Bolter.
There's another Chaos gate up ahead. I ditch the heavy bolter here again for a short while, while I take out the Chaos Guardsmen. There are two groups of four that will spawn here.
When they are dead pick up the HB and then jump down.
A summoner will spawn. I use the Heavy Bolter to take him out, and then toss it off to the side again.
You will have a wave of demons and guardsmen to contend with now.
The demons are not too bad because there are only three of them. They go down pretty quickly.
The guardsmen are pretty easy to bring down as well. When everything is dead, grab the Heavy bolter and continue onward. You'll reach an elevator that will bring you up to the next level.
Chapter 16 The Spire of Madness
Well you need to cross this bridge, and it's heavily defended by Chaos forces. Luckily you brought a heavy bolter along with you.
Move forward taking out Chaos troops as you go. Don't forget to keep an eye on your shields. You have a big gun, but there's a lot of troops on this bridge and you will still take some damage.
Keep pouring it on the Chaos troops. When enough of them have died, Captain Titus will order the other Marines forward.
When you are past the initial section you will be swarmed by Demons. I don't know how many there are, let's just say lots!
Keep pumping them full of lead until your heavy bolter is out of ammo. When that happens move up and engage them in some hand to hand.
There's also a couple summoners here. They are very close to the ground. Take them out as quickly as possible.
Here's a shot of the second summoner. When both summoners are dead the warp gate will close.
Mop up the remaining demons and then move forward a bit. There are Chaos Guardsmen and Chaos Marines up ahead. Move forward and take out the guardsmen.
You'll get a message about a drop pod full of ultra marines about to land.
They'll exit the pod and join the fight. The rest of the Chaos Marines and gaurdsmen will be taken out in short order.
When they are all dead move forward and man the Auto cannon. Leave it on it's tripod, and start opening up on the enemies.
About half way though this battle you'll see two drones. Fortunately they are easy to take out with the auto cannon.
When everything is dead move forward.
A thunderhawk will land and take you to the tower.
You come out of the thunder hawk with a jump pack and a thunder hammer. That will really help you out in the next section.
I take out the guardmen down below with a pistol, before jumping over. You can just jump over and end them with one well placed ground pound.
You will be rushed by demons here. Just jump and ground pound.
I think there are six or so demons that attack you here. Just ground pound them. When they are stunned it just takes a swipe or two with your hammer to finish them off.
There are several guardsmen sitting up on the next level. The best thing to do is just jump up there and end them with a ground pound.
If you are having trouble making the jumps, just make sure you are running in the direction you want to go prior to jumping. It really helps you move through this section.
When you jump to this section you will be attacked by some demons just ground pound them to death. My capture device screwed up here so I don't have a photo. I didn't realize it until it was too late to go back.
There is a summoner that moves over here, and then jumps to the next platform. The best way to deal with him is to jump to the next platform.
I ground pounded when I came over and stunned the summoner. Well he's the first guy I'm going to take out.
That's the first time I executed one of those guys.
Alright finish off the demons over here and then move onward.
When you run forward your jump pack really takes off in that direction making it very easy to jump these gaps.
You'll be assulted by some Chaos guardsmen here. Just ground pound them, or use them as health packs by hitting circle.
After the guardsmen, you will be attacked by a group of demons.
There is a lone Chaos Marine up ahead. Take him out with your pistol to conserve ammo.
Move on to the troops in the corner. There's one Chaos Marine and a bunch of Chaos guardsmen. Jump up there and ground pound then finish off the Marine by meleeing.
Becareful because a buch of gaurdsmen will have spawned on the next platform. That's your next stop after taking care of this one.
There are some guardsmen and couple demons on this platform. There is also a Chaos Marine. Ground pound to take them out.
After you ground pound the Chaos Marine will most likely be stunned. Execute him. He poses the greatest risk.
There's a large force of Chaos Guardsmen and Demons coming out of the warp gate. Fly up and ground pound to take them out, and to stun the demons.
Finish off as many demons as you can before they wake up.
Moving on, you will come to a weapon stock pile. If you want to change up a bit nows the time. You just lost your jet pack, so your tactics might want to change a bit.
You'll run into another drone. I actually take this guy out the hard way with my pistol. Trust me you do not want to fall short on ammo when you get to the end of this game, and that's right around the corner.
You can hide in the door way, while you wait for your shields to recharge.
There is a Chaos Marine and four guardsmen up on that walkway. Lob a grenade up there, to clear out the guardsmen.
After the guardsmen are dead the Marine is easy to take out.
After the Marine dies, you will be rushed by four Chaos Demons.
Moving up. You'll be up against two Chaos Marines, a bunch of guardsmen, and a summoner.
The summoner doesn't seem to summon too many extra guardsmen. So I thin out the guardsmen before working on the summoner. It's just easier that way.
When the summoner is dead, finish off the Chaos guardsmen.
When the guardsmen are dead, walk up and melee the to Marines.
When you come out of this room you should be full health.
"Continue forward. You should get to a large weapons/ammo dump. In the next room is the fight before the boss battle. Restock and prepare.
Chapter 17 Main Against Daeman
Chapter 17 Man Against Daeman
Man he's an ugly sucker.
You'll be charged by six demons here. They will get pretty close to the red barrels. When they get close enough shoot the barrel. That will damage a few of them, but it will not take out any of them.
Switch over to your Melta. When they are close enough and grouped enough give them a blast. That will kill all of the ones that get caught in your range.
Finish the rest of them off with regular old melee attacks.
When they are all dead you will be faced by a wave of Chaos Guardsmen. They will come with three Chaos Marines.
They are all big threats. These boxes are a good place to regen your shields. Pop out and take out a guard or two. Then get back here to regen.
Grenades are a huge concern at this part. You can't leave cover or you will get blasted by a ton of fire. The grenades pop right into your cover, and all the guards throw them often. Taking out the guards really help reduce the number of grenades thrown your way.
When you get a Chaos Marine in your sights without any guardsmen, open up on him and hit him until he is dead.
When you've got one or two Chaos Marines left, melee them to replensih health.
After the last marine dies, two summoners will appear. They summon at least two waves of six demons each.
The demons are hard to take out with the summoners blasting away at you.
You can use a melta blast here to take them down faster.
When the demons are finished off, go back to working on the summoners.
Next you will fight two Chaos Captains, and six demons at the same time. Just melt the captains until they are dead. Do not try to execute one of them, because the demons will gang up on you and finish you off.
Try to catch both of them in your Melta blasts. When the two captains go down, the demons are easy.
Just keep blasting them with your Melta until the captains go down.
When the captains are dead give the rest of your Melta to the demons that are trying to kill you.
When they are all dead the Nemoroth will keep spewing stuff at you about how he's unstoppable, and then you'll get a cut scene.
You can use your stick to control where you are at on the screen. And you can fire you weapon like you normally would.
Eventually you will speed up and catch him. Then you'll be asked to pound the button shown at the bottom of the screen. The first one is triangle.
The next one is circle. You use it to prevent him from crushing you.
Shortly thereafter you are flying behind him again. Keep moving around the screen so he can't hit you with his bolts.
The next button sequence is pound square and then press X to dodge.
I think you do the pound square and then press X to dodge five times.
Then they have you pound triangle beat on his head.
He will try to crush you again so pound circle to break out of his grip.
Keep pounding circle and you will rip his head off. End of ugly sucker.