
Your Jensen Scandinavia LYNX9000 router protects your home network by limiting incoming connections from the internet. Sometimes it is necessary to unblock some of those connections like when you want to create a direct connection for gaming, use a specific application, or set up a new device on your network. This process is called forwarding or opening a port. In your Jensen Scandinavia LYNX9000 router you many need to open a port, which means assigning a port number or set of port numbers to a specific IP address. This routes the incoming data to the correct device on your network.
Follow these steps to open a port in your Jensen Scandinavia LYNX9000 router:
- Set up a static IP address on the computer or device that you are forwarding ports to.
- Login to your Jensen Scandinavia LYNX9000 router.
- In your Jensen Scandinavia LYNX9000 router, navigate to the Port Forwarding section.
- Click on the Advanced tab, which is at the top of the screen.
- Find the NAT link at the left of the screen and click it.
- To forward a range of ports click on the link that says Port Forwarding.
- To forward a single port click on the link that says Virtual Server.
- Go ahead and create a Port Forwarding or Virtual Server entry.
The process of opening ports in your Jensen Scandinavia LYNX9000 router may seem daunting. Remember, however, that you are not alone and do not have to feel discouraged. Let us walk you through the steps for opening ports in your router. Let's get this figured out!
We think that forwarding a port should be easy. That's why we created Network Utilities. Our software does everything that you need to forward a port.
When you use Network Utilities you get your port forwarded right now!
Step 1 - Setup A Static IP Address
In order to ensure that your ports remain open in your device even after it reboots, it is important to set up a static IP address in your device.
-
Recommended - Our free program will setup a static IP address for you.
â Download Network Utilities today!
-
Or follow our Static IP Address guides to setup a static IP address.
After setting up a static ip address on your devices you need to login to your router.
Step 2 - Login To Your Jensen Scandinavia Router
In order to login to the Jensen Scandinavia LYNX9000 router you need to use a web browser. The Jensen Scandinavia LYNX9000 router uses what is called a web interface where you can access and control router settings.
Go ahead and open up your favorite web browser. If you don't have a favorite or are not sure what this means, open up Chrome, Firefox, or Edge.
If this step is confusing, we have simplified it for you with this link: Login to your LYNX9000 Router
Find the address bar once you have opened up a web browser. This is usually located at the top of the page, like in the image below.
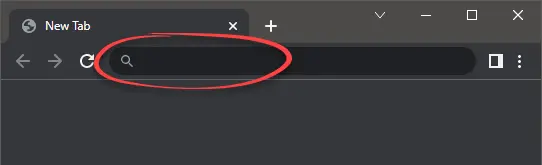
Above is an example of what a web browser address bar looks like. Find the address bar in your web browser and type in your router's IP address.
The Jensen Scandinavia LYNX9000 router's default IP address is: 192.168.38.1
Once you have finished entering your router's IP address into the address bar, click the enter button on your keyboard. A box similar to the one below should appear.

Go ahead and enter the username and password for the Jensen Scandinavia LYNX9000 router in the spaces available. Remember if you have changed them in the past, you need to enter those values.
- The default Jensen Scandinavia LYNX9000 Router Username is: admin
- The default Jensen Scandinavia LYNX9000 Router Password is: 1234
Enter your username and password, and then click the Log In button to log in to your Jensen Scandinavia LYNX9000 router.
Jensen Scandinavia Usernames and Passwords
If the username and password did not work, go to our Default Jensen Scandinavia Router Passwords page for help.
If, after trying the above list of passwords you still can't log in you may need to consider a reset for your router. Learn how to do that by reading our How to Reset a Router guide. **Note:**After resetting the Jensen Scandinavia LYNX9000 router your username and password revert back to factory defaults.
Step 3 - Find The Port Forwarding Section
You should be on the home page of your Jensen Scandinavia LYNX9000 router once you have successfully logged in. Find the Port Forwarding or Virtual Server section of your router.
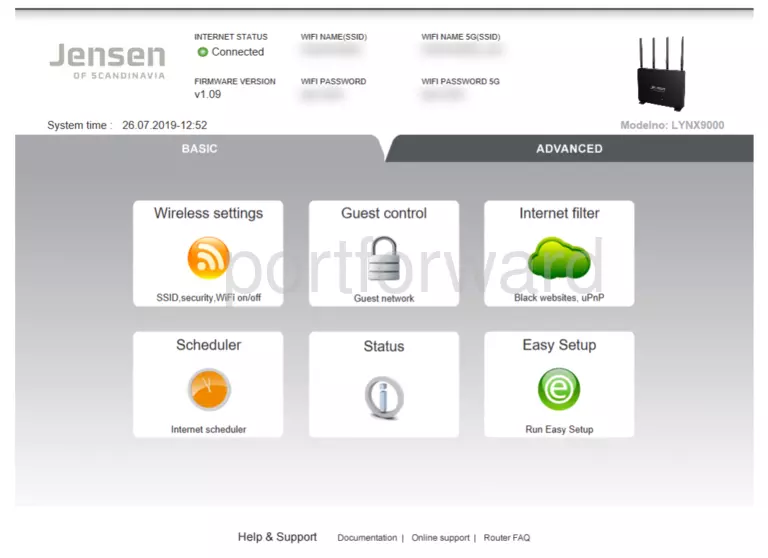
- Find the Advanced tab located near the top of the screen and click on it.
- Find the NAT link at the left of the screen and click it.
Step 4 - Create A Port Forward Entry
Opening a port to a specific device may solve problems that you are having on your network. Make sure that it is necessary though, before opening a port, because you are effectively creating a pinhole in the firewall portion of your router that could lead to malicious traffic on your network. The risk is exceedingly low, though, so don't let this warning stop you from making this change if you need it.
Here are the ports to forward for Xbox Live:
- TCP Ports: 3074
- UDP Ports: 3074
If you are looking for the ports for a different application you can find it by either:
- Browsing our List of Games
- Check out our our List of Games by Genre
- See our List of all Applications
Don't forget to sign up for NordVPN's promo deal before it's gone.

You might notice that most of our site doesn't have ads on it. This is because we use partnerships with companies like NordVPN to keep the site running. Thank you for supporting us by using our referral links.
Forwarding a Range of Ports
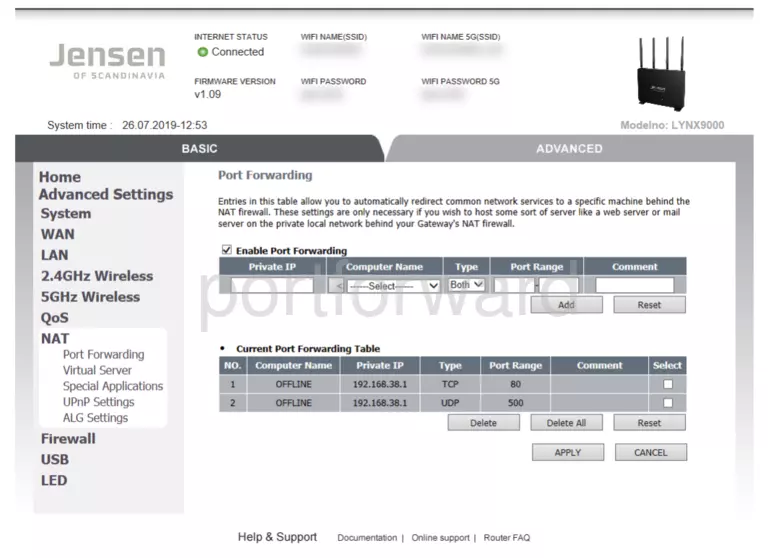
To forward a range of ports you'll need to be in the Port Forwarding section. If you're not already there, click the Port Forwarding link at the left of the screen.
-
Make sure to put a check in the box named Enable Port Forwarding.
-
In the Private IP box, enter the IP address that you want ports forwarded to. This may be the IP address of your computer or the IP address of another device on your network that you want to forward ports to.
-
In the Type dropdown box, select the protocol type of the ports you are forwarding. Choose Both if your router has that option. Otherwise, choose either TCP or UDP as needed. If you need to forward a port for both TCP and UDP and your router does not have the Both option, then you need to create two entries.
-
Enter the lowest number of the port range in to the left Port Range box, then the highest number of the range in to the right Port Range box.
-
Make up a name to put in the Comment box. The name does not have any effect on the functionality of the forward; it's simply there so you can know why it was created.
-
To add the entry, click the Add button.
-
Make sure to click the Apply button at the bottom of the page to apply these changes, when you are completely finished.
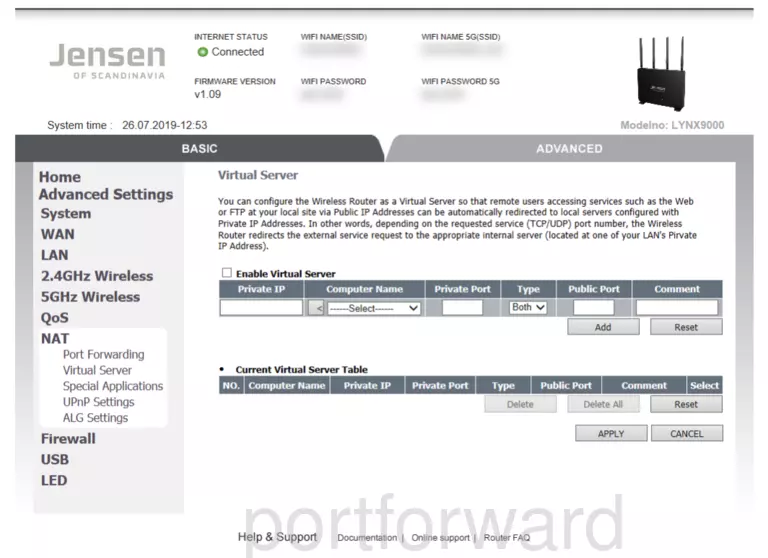
Forwarding a Single Port
Forwarding a single port is done in the Virtual Servers section, so go ahead and click the Virtual Servers link at the left of the screen.
-
Don't forget to put a check in the Enable Virtual Server box.
-
Go ahead and enter the IP address that you are forwarding ports to into the Private IP box. It is possible for this to be either the IP address of your computer or of any other device on your network that you want ports forwarded to.
-
Enter the port to forward in to the Private Port box.
-
Select the protocol type of the ports that you are forwarding from the Type dropdown box. If your router has the option of Both, then go ahead and select that. Otherwise, select either TCP or UDP as needed. If you need to forward a port for both TCP and UDP, but your router does not have Both, then you will need to create two entries.
-
In the Public Port box, enter the same values that you entered into the Private Port box.
-
Create a name for this forward and type it into the Comment box. Since the name does not have an effect on the functionality of the forward, choose a name that will help you remember why the forward was created.
-
To add the entry, click the button labeled Add.
-
Click the Apply button at the bottom of the page to apply these changes when you are completely finished.
Test Your Ports To See If They Are Open
Use our Network Utilities software, (which includes a free Open Port Checker tool) to test your network to see if you have forwarded ports in the Jensen Scandinavia LYNX9000 router correctly. Open Port Checker is the only online port checking tool that has Guaranteed Results.
Other Guides You May Be Interested In:
- We have software called Network Utilities that do all of this and more.
- Learn more about how to Setup your router.
- A full listing of all our games and applications that require port forwarding.


