If you're trying to get NAT type 2 on your PS5 then the first step is going to be to set up a port forward. It can seem like an intimidating task to log in to your router and create a port forwarding entry, but don't worry; we'll walk you through it.
If you are not sure what Nat Type 2 means be sure to read our Nat Types Defined guide.
A port forward is a way for data to get into your home network through your router. Without setting up a port forward then all data connections must be created from the inside of your network, which is usually a good thing.
However, when you are gaming, a lot of times you want people to be able to connect to your PS5. This is where a port forward comes into play.
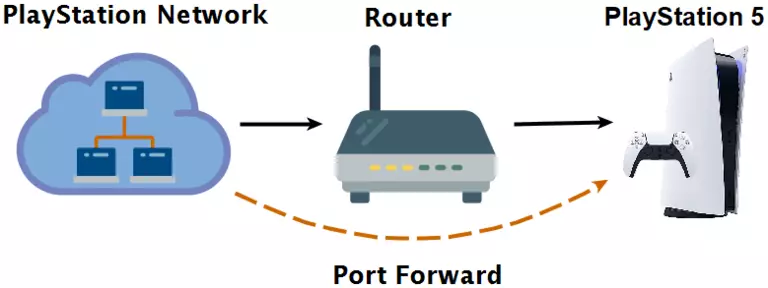
One other thing... When you set up a port forward it is also best to set up a static IP address pointing at your PS5. Having a static IP address for your PS5 guarantees that your PS5 will get the same IP address every time you turn it on. Without a static IP address, your PS5 might get a different IP address every power cycle, which will break your port forward. The static IP address step is actually the harder step of the two, but sometimes it is worth doing because it means that your port forward will continue to work for a longer time.
Find PS5 IP Address
The first thing we need to do is find some IP addresses. We need to know both your PlayStation's IP address and your router's IP address. Fortunately, there's an easy way to get both.
From the PlayStation menu, go to Settings and then scroll down to Network.
On the Network screen choose "View Connection Status". This will show you both your PS5's IP address and your Default Gateway address.
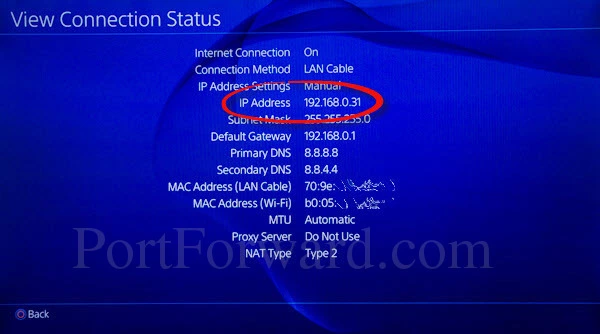
An IP address is a series of 4 numbers separated by a dot. It is very common for your PS5's IP address to start with 192.168.0 or 192.168.1, followed by a final number. Another series of common IP addresses start with 10.0.0. and are also followed by a final number.
Your Default Gateway is Your Router
In networking terms your default gateway is your home router.
Write down both IP addresses because you are going to need them in the following steps.
Login To Your Router
Now we need to log in to your router. Open up a web browser and type the IP address into the address bar and press enter. You can use any web browser that you like: Chrome, Firefox, Edge, Opera, or Safari will all work. They all have an address bar where you can type in either website addresses or search terms. In the address bar (circled below) simply put the IP address of your router.

In the example above the router's IP address is 192.168.0.1. Be sure to put your router's IP address in the address bar.
This should take you to the router's login screen.
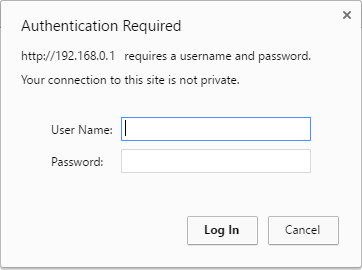
You need to know your router's username and password. If you've never set them, then it's likely that they are the defaults. You can find a list of Default Passwords here. When in doubt you can always try admin password or blank or a combination of the two.
| Username | Password |
|---|---|
| admin | password |
| (leave blank) | admin |
| (leave blank) | password |
Try various combinations from the list above. If none of them work we have many more to choose. Go find your router manufacturer on our Routers List and then find your router. You should see a list of all known usernames and passwords.
Find the Port Forwarding Section
Once you're logged into your router, you need to find the port forwarding section.
Sometimes it's called Virtual Servers, sometimes it's called Apps and Gaming, and sometimes it's just called Port Forwarding. Sometimes it's hidden under the firewall section, sometimes it's hidden in the security section, and sometimes it's in the LAN section. Look around a little and you should find it.
Here is what the Apps and Gaming section looks like in a typical Linksys router.

In this case, we've chosen Port Range Forwarding because it is the most flexible option in this router.
Create a Port Forward
A port forward is basically a setting that tells your router to take data that shows up on certain ports and send it to a certain device. In this case, the ports are the standard PlayStation Network ports and this device is your PlayStation.
Remember: A Port Forward takes data coming into your router from the internet and directs it at your PlayStation's IP Address.
As you configure a forward in your router you may be asked about TCP or UDP. If your router has the option of Both then just use that as it's simpler. For the PlayStation network on a router that supports both, here's the list of ports to forward:
If your router supports Protocol Both:
Protocol Both: 1935, 3074, 3478-3480
If you must forward TCP and UDP separately then create a forward for the TCP ports and create another forward for the UDP ports. For the PlayStation Network here are the required TCP and UDP ports:
If your router does not support Protocol Both:
Protocol TCP: 1935, 3478-3480
Protocol UDP: 3074, 3478-3479
Remember that you are creating this forward pointing at the IP address of your PlayStation device.
Here is an example of forwarding the PlayStation Network ports on a very common Linksys router.
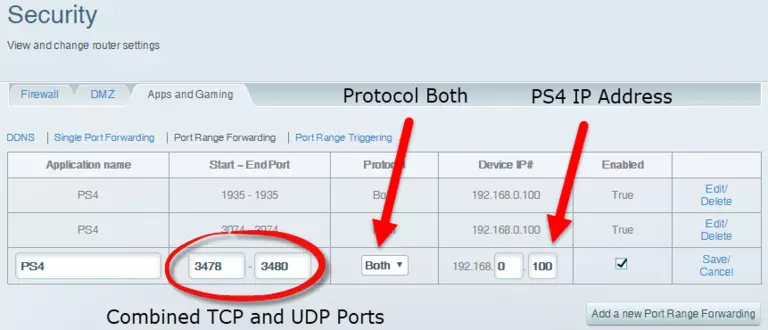
Since this router takes ranges of values, we've created 3 entries. Each entry has a range of values in it from the list above.
If this router did not support Protocol Both then we would have had to create 4 entries; 2 for TCP and 2 for UDP.
Network Utilities
If you follow all of these steps then you should have NAT type 2 on your PlayStation 5. If you just can't get it to work you can always use our Network Utilities software which comes with support. Our support team is happy to help you get NAT type 2 on your PlayStation.
When you use Network Utilities to forward ports in your router it automatically creates the correct entries for you. It can also combine multiple entries to maximize the limited available space in your router.
If you have any questions about this guide or about our software in general head to our Message System and let us know.

