
In this guide we will be explaining how to port forward on the TP-Link Archer C50 router. Your router has a basic firewall in place designed to block unwanted Internet access. Sometimes you want some of these blocked connections to the Internet unblocked. This process of unblocking the connections is called opening a port or more often a port forward.
We will walk you through every step in the process of opening ports for your TP-Link Archer C50 router.
In this guide learn to:
- Setup a Static IP address on the device or computer you want these ports forwarded to.
- Login to the TP-Link Archer C50 router.
- Find the port forwarding section.
- create a port forward entry
We think that forwarding a port should be easy. That's why we created Network Utilities. Our software does everything that you need to forward a port.
When you use Network Utilities you get your port forwarded right now!
Step 1
It is important to setup a static ip address in the device that you are forwarding a port to. This ensures that your ports will remain open even after your device reboots.
- Recommended - Our free Static IP Setter will set up a static IP address for you.
- Another way to get a permanent IP address is to set up a DHCP reservation.
- Or, manually create a static ip address with our Static IP Guides.
This step is important because you want a permanent IP address in your device. If you do not set up a permanent IP address in your device, then when you device reboots it may get a new IP address.
Use a VPN Instead
Have you considered using a VPN instead of forwarding a port? For most users, a VPN is a much simpler and more secure choice than forwarding a port.

We use and recommend NordVPN because not only is it the fastest VPN, it includes a new feature called Meshnet that makes forwarding a port no longer necessary for most applications. With NordVPN Meshnet, you can connect to your devices from anywhere in the world, completely secure, over a highly encrypted VPN tunnel.
Every time you click on one of our affiliate links, such as NordVPN, we get a little kickback for introducing you to the service. Think of us as your VPN wingman.
Step 2
In this step we show you how to login to the TP-Link Archer C50 router.
Your router has a web interface meaning you need to use a web browser to login.
Go ahead and open a web browser. It doesn't matter which browser you decide to use. Simply pick your favorite. Some of the more common browser choices are: Internet Explorer, Firefox, Safari, and Chrome.
After opening a web browser, find the address bar. This is normally at the top of the page like this:
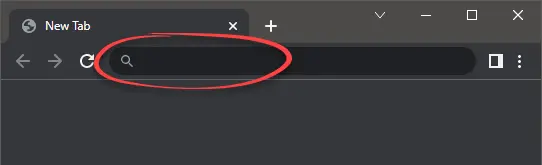
Above is an example of what a web browser address bar looks like. Find the address bar in your router and type in your router's IP address.
The default TP-Link Archer C50 IP Address is: 192.168.0.1
After entering the router's IP address, click the Enter key and you should be taken to the Login page:

If you see an image like the one above, you are in the right place.
- The Default TP-Link Archer C50 Router Username is: admin
- The Default TP-Link Archer C50 Router Password is: admin
After entering the username and password, press the green Login button to access the TP-Link Archer C50 web interface.
Password and Username Trouble
This is a very common place to get stuck. Here are several things you can do:
- First of all, be sure you did not enter the WiFi username and password in these boxes. That username/password combo is completely different.
- Second, try other common TP-Link username/password combos. Sometimes a router manufacturer changes the username and password with a firmware upgrade. Try these Default TP-Link Router Passwords.
- If that did not work, it is probably because you changed the username and password in the past and don't recall what you changed it to. If this is the case, try our Find Password App. It helps you figure out what you changed the password to. Learn more about this on our Router Password Cracker page.
- Finally if nothing else is working it might be time to consider a reset. A factory reset like this erases all personal settings including but definitely not limited to the password/username combo. If a reset is something you must consider, follow the instruction on this page.
Step 3
Now let's get you to the port forwarding section of the TP-Link Archer C50 router. To do that we need to start on the Network Map.
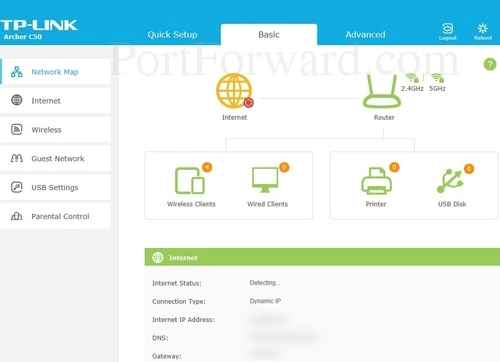
On this page, click the option at the top of the page labeled Advanced.

Now click the option of NAT Forwarding in the left sidebar.
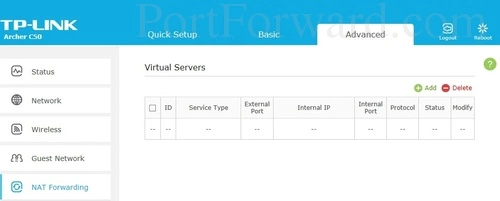
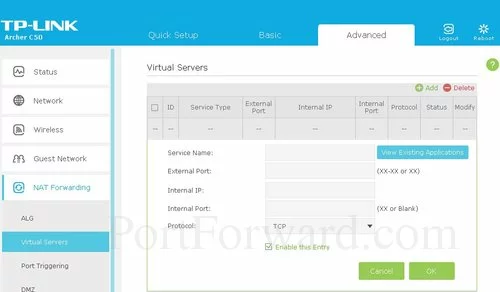
A new set of choices appears under that, choose the new option of Virtual Servers.
Step 4
Here are the ports to forward for Xbox Live:
- TCP Ports: 3074
- UDP Ports: 3074
If you are looking for the ports for a different application you can find it by either:
- Browsing our List of Games
- Check out our our List of Games by Genre
- See our List of all Applications
Don't forget to sign up for NordVPN's promo deal before it's gone.

You might notice that most of our site doesn't have ads on it. This is because we use partnerships with companies like NordVPN to keep the site running. Thank you for supporting us by using our referral links.
Make up a name to put in the Service Type box. The name does not have any effect on the functionality of the forward, it's simply there so you can know why it was created.
Enter the port to forward into the External Port and the Internal Port boxes.
Enter the IP address to forward these ports to into the Internal IP box. If you are forwarding ports so you can run a program on a device other than your computer then you can enter your device's IP address into that box.
Use the Protocol dropdown box to select the protocol type of the ports you are forwarding.
Enable the Enable This Entry checkbox by putting a check in it.
Click the OK button when you are finished.
Make sure that between each entry click the green OK button.
That's it, you did it.
Testing Your Ports
Don't forget to test the ports and see if they were forwarded correctly. In order to do this we recommend using our Open Port Checker. It is completely free if you get it in our Network Utilities trial version. Our port checker is guaranteed to work because it uses a local application to listen for the server trying to connect. This way we can confirm whether or not your port is forwarded.


