
This DotA 2: Farming and Warding walkthrough is divided into 11 total pages.
You can jump to nearby pages of the game using the links above.
Ward Placement
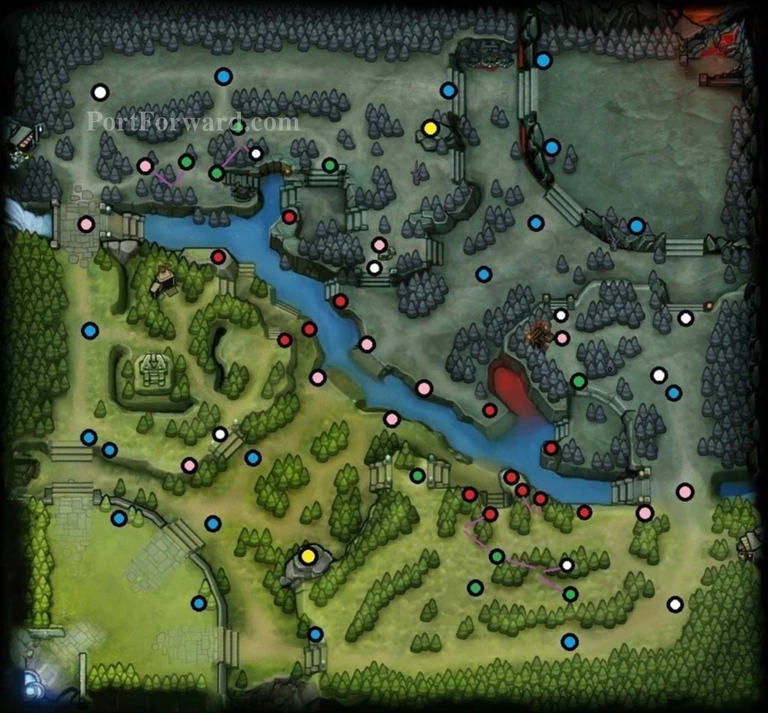
The whole map of Dota 2 and spot where to place the wards. Map credits to gso.

Yellow - The highest ground in Dota 2 where you can put the ward. The vision is the largest. Provide vision of the nearest lane and natural creeps camp.

Red - Placing ward here will give you vision at the rune spawning area. So that you can take the rune before enemy take it. At the right red spot, you can also have vision if enemy trying to go Roshan.

Pink - Place it here for additional ganking or hunting purpose. Usually use to hunt farming heroes.

Blue - Used to get a vision on enemy when pushing towers. Before pushing, it's better to have vision around that area to make sure it's truely safe.

Green - Jungle wards are used to get a vision on enemy's side jungle. This gives you benefit for hunting them or prevent enemy team from pulling or stacking creeps.

White - Situational wards. Only used when needed to get the vision at that area.
More DotA 2: Farming and Warding Walkthroughs
This DotA 2: Farming and Warding walkthrough is divided into 11 total pages.


