Playing the single-player adventure mode in Minecraft can be fun, but running a game server takes it to a whole new level of multiplayer goodness. By having your own game server, you get to decide what rules govern your blocky world. Your friends can join you on an adventure of your making. Use your collective imagination to build a vast empire, in this addicting game.

This comprehensive guide is dedicated to helping you through all the steps needed to host your own Minecraft server.
Installing Minecraft's Beta Server
First, you will need to go to the Minecraft Downloads Page.
If you are running a Windows Operating System (XP/Vista/7), download the latest version of the Multiplayer Beta Server, named "Minecraft_Server.exe". Create a new folder someplace convenient for you and place this file in it.
Check if Your Ports are Open
If you already launched the Minecraft Server, please close it at this time. Before running the Multiplayer Server, we need to check if the required ports are forwarded in your router. At first glance, there are multiple ways to accomplish this, but not all methods will give you a reliable result. We recommend downloading our free Open Port Check Tool. This is the best port checker on the Internet because you never get a false positive. There are many websites that have open port checker tools, but these aren't guaranteed to give you an accurate report of which ports are open. These websites only tell you if a TCP Connect was successful, and have no way of detecting if UDP packets (which most games utilize) can get through.
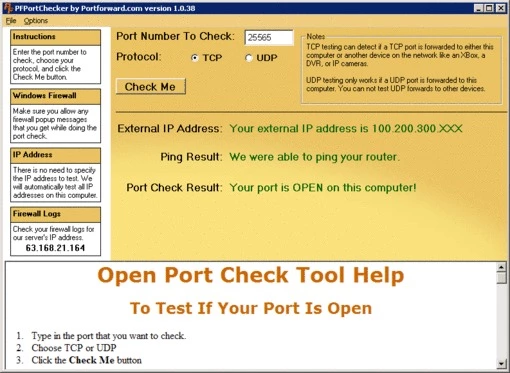
Using our Port Checker Tool, you will need to check if port 25565 is open for both TCP and UDP. Follow the steps listed on our Port Checker Help Page. If these ports are not open, you are likely behind a device that has NAT or a firewall. You will need to forward these ports to the computer hosting the Minecraft server software.
Port Forwarding for Minecraft
Why do I need to forward my ports to host a Minecraft game server?
Port forwarding is necessary in order to allow other people to connect directly to your computer. If you don't forward your ports, those connections will be rejected by your router, which won't know where to direct the game traffic.
How do I forward my ports? Is it complicated?
It is our mission at PortForward.com to make port forwarding easy for everyone. You can follow our free, simple port forwarding guides, which will walk you through the process. Just choose your router from the list and we'll show you a custom guide, made especially for your router and Minecraft.
I tried following your guide, but I still need help. Is there another option? Can you do it for me?
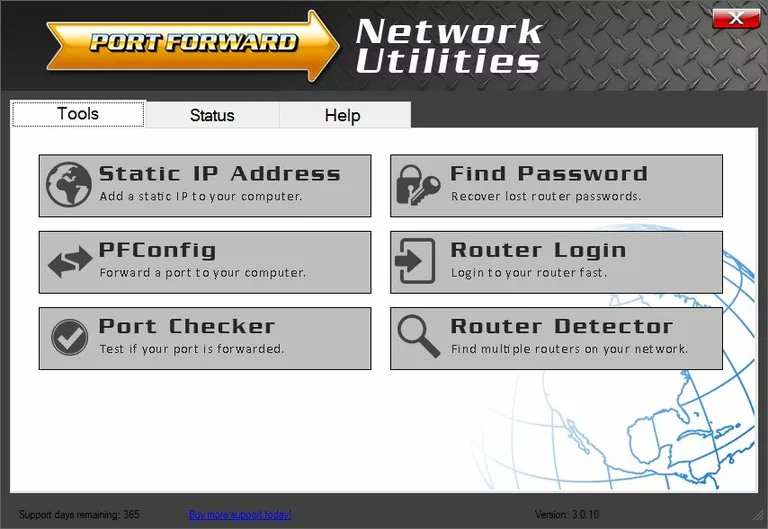
Yes, we understand that a walkthrough isn't enough to satisfy everyone. If you don't feel like forwarding your ports manually, or can't figure out how to do it, you can purchase our Network Utilities software that will do it for you. Our software comes with a 100% satisfaction guarantee. If it can't forward your ports, we'll do it for you.
Starting the Minecraft Game Server
Now that you've verified that your ports are indeed open, let's launch the "Minecraft_Server.exe" file.
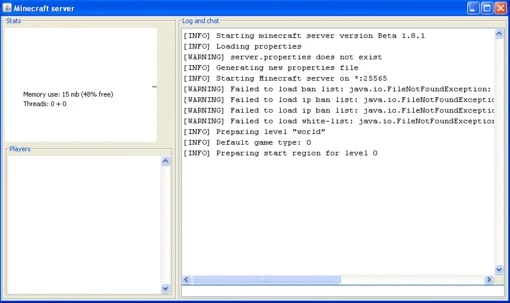
The first time you run it, you will get some warnings, this is normal.
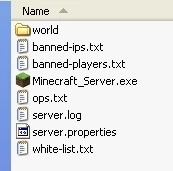
It will create several new files within the same directory you placed "Minecraft_Server.exe".

It may take some time for the server software to build the world. When it is done, you will see a help message in the "Log and Chat" window.
Customizing Your Minecraft Server
To customize your Minecraft Server, you must first close the game server. Look for a file in the same directory as "Minecraft_Server.exe", named "server.properties". Right-click on this file and edit it with Notepad, or your favorite text editor. By default, you should see the following text configuration in the server properties file...
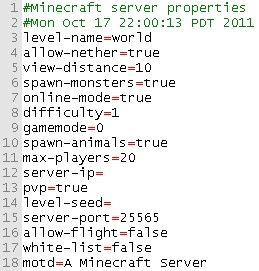
Here is a brief explanation for each option listed:
level-name: This is the name of your Minecraft world. If you change this, the game server will look for your world in a directory of the same name. So, if you change it to "level-name=theempire", then the Minecraft game server will look for a directory named "theempire". If the directory is not found, then it will create the directory and build a new world in it.
allow-nether: When this boolean value is true, players can travel to the Nether, a different dimension existing in your Minecraft world.
view-distance: This sets the amount of world data that the server will send to connected clients. Valid options range from 3 to 15, with 10 being default. If you have lag, reducing this value may help.
spawn-monsters: If set to true, monsters such as skeletons, creepers, and zombies will span in your game world. If your game world is about exploration and building, and not survival, then set this attribute to false.
online-mode: This option will check each connecting player's account name against Minecraft's database. Set this to true if your server has a connection to the Internet. If you instead set this to false, then people with fake accounts may be able to connect to you.
difficulty: This defines the difficulty of the game, such as how much damage is done by mobs, hunger, and poison. 0=peaceful, 1=easy (default), 2=Normal, 3=Hard.
gamemode: Set to "0" for Survival and "1" for Creative. The default is "0".
spawn-animals: If you want animals in your game world, such as chickens, pigs, wolves, sheep, or cows, then set this value to true.
max-players: The maximum number of players that you want to be connected to your server at one time. The default value is 20 players, but you can adjust this from 0 to 999. The higher the number, the more resources it will take. If you are just playing with a few of your buddies, it is recommended that you lower this to the exact number of friends you want to give access to.
server-ip: In most cases, you want to leave this blank. If you happen to have multiple IPs bound to your machine, you can specify which IP Minecraft will run on using this.
pvp: PVP stands for Player Versus Player. If this is set to true, then players can hurt each other. Even when set to false, you can harm someone by pushing them off a cliff.
server-port: This lets you change the port that the game server runs on. If you change it, make sure the port is open on your router.
allow-flight: Default value is false. This option requires you to add a flight mod to your Minecraft server and only works in Survival mode. It will allow your players to fly, making the game easier.
white-list: When set to true, the game server will only allow users to connect to your game if their username is in the "white-list.txt" file. If you don't want strangers entering your game, this is the way to go.
motd: This stands for "Message of the Day". When players connect to the game, they will see the message you write here. Example: "motd=Welcome to the Empire!"
Once you are finished making changes, save the "server.properties" file and close Notepad.
If you want to be able to make changes to any of these options in-game, you'll need to make your account be an Op (Admin). To do this, edit the "ops.txt" file, adding your Minecraft username into this file, and save it.
Now you can launch the Minecraft game server again and your new changes should take effect.
How do Other People Join my Hosted Minecraft Game?
At this point, you should have your game server running, but how do people join your game?
First of all, from the main menu in Minecraft, users must choose Multiplayer.
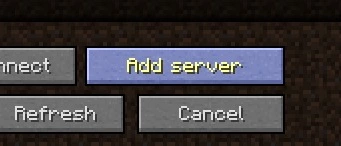
They will then need to add you to their list of game servers. To do this, they must click "Add Server".
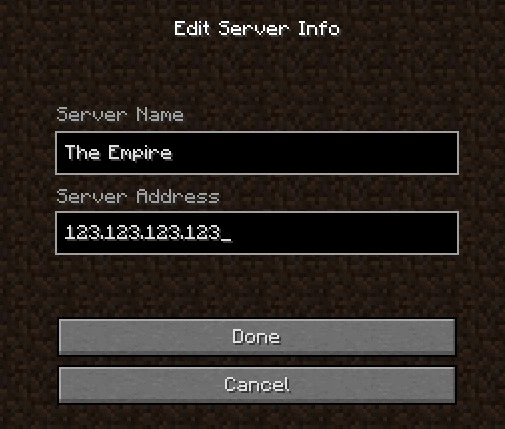
Next, they will come to a screen titled "Edit Server Info". They can type any name they want for the "Server Name" field. For the "Server Address" field, they must enter your External IP Address or Hostname. Your external IP is the address that your ISP assigns to you. Generally, your DSL/Cable/Wireless router will be assigned this address. The easiest way to find your IP address is to go to PortForward- External IP Address, where it will be displayed for you. Once the server name and server address are typed in, the user should click "Done".
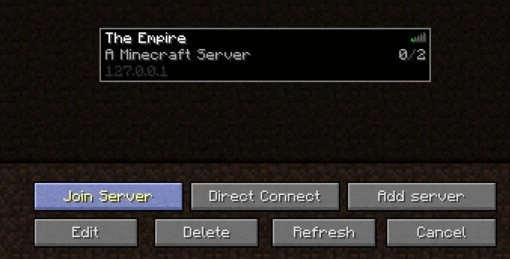
The user will then be back to the Multiplayer screen. Your server should now be listed and Minecraft will attempt communication with it. Minecraft will show how many players are logged in, in the pictured example you'll see 0 players out of a maximum of 2 players are connected. Click on the listed game server and then click "Join Server".
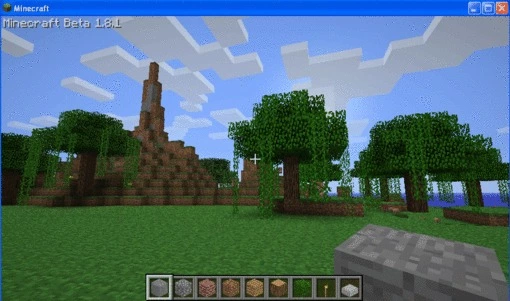
Now you and your friends can explore vast worlds, build huge structures, and mine into unknown depths!
From within the game, press 'T'. As an Op, you can then type '/list' to see the connected players. Type '/help' for many more options, like giving things to players, banning players, etc.
How do Strangers Find my Game?
If you want to play Minecraft with more than just your friends (why not make new friends?), then you'll need to post your server's information on one of the many Minecraft Server List Sites.
We have instructions for posting your server on 2 different server list sites. You can use either or both sites.
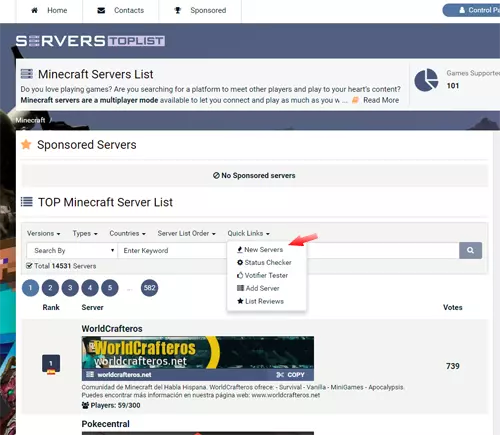
Option 1: Posting Your Minecraft Server on ServersTopList
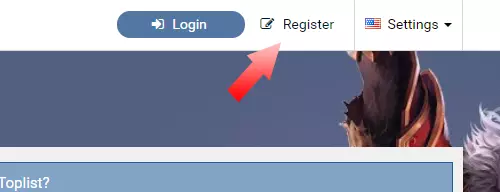
Start by going to https://serverstoplist.com/minecraft and clicking the Register button.
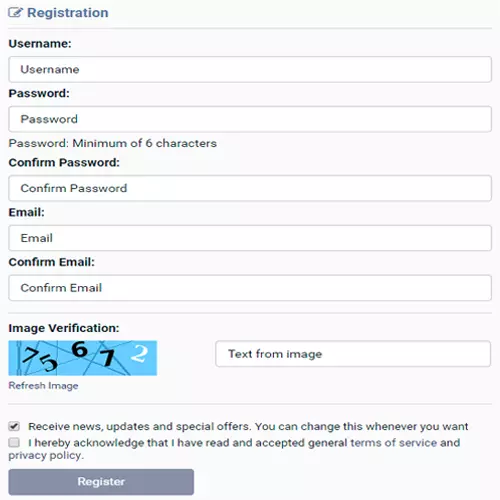
Fill out the registration form.
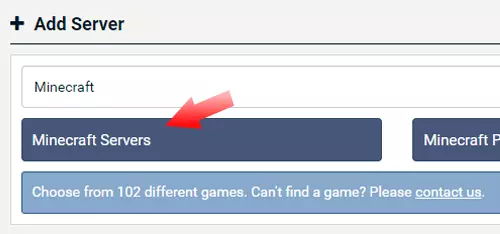
In the User Menu click Add Server.

Click the Minecraft Servers button.
In the Add Server form be sure to put your External IP Address in the box marked IP Address.

To verify that your server is listed, go to the TOP Minecraft Servers List and choose New Servers. Your server should be included in the list.
Your friends should now be able to find you through ServersTopList.
Option 2: Posting your Minecraft Server on Minecraft-Server-List
If you want to post your Minecraft server on Minecraft-Server-List, follow these steps.

Go to Minecraft-server-list.com in your web browser. In the top-right corner, click on "Add Server" to create an account.
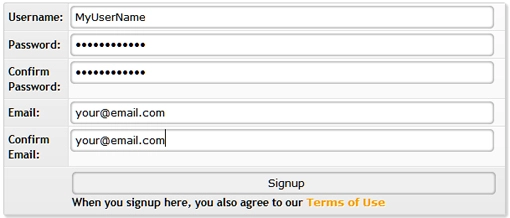
Fill in your desired username, email address, and password of your choosing. Then click the "Sign Up" button.
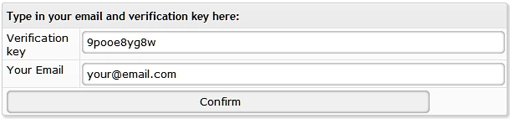
You will now need to check your email inbox for the verification email sent to you by Minecraft-server-list.com after signup. Click the link in that email. This will take you to a page where you can finalize your account activation.
Now that you've registered, you are ready to log in and add your server details. Click the "Login" link near the top of the page and enter your user name and password. This will take you to your "Dashboard" where you will be able to manage your server(s).
Click on the "Add Server" link near the top of the page to add a new Minecraft server to their database.
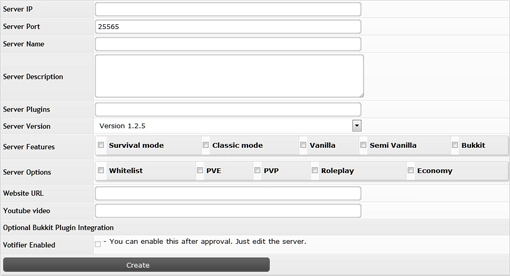
Fill in the name, external IP address, and port number (25565 by default) of your game server. You can also fill in a description of your server, a list of plugins, and select between several server types. It is important to make the submission as accurate as possible to get the kind of players that you are looking for.

Immediately after you submit your server information, your server will be visible on the "New" server list.
Option 3 - ServerTilt
You can also register your server on ServerTilt. While we do not have exact instructions posted here, the process is similar to the steps above.
Hopefully, you'll be meeting new players in no time ! If you build it, they will come...
Minecraft Default Ports
These are the default ports for Minecraft on every platform. You might need to know these ports if you are playing Minecraft on one of these platforms and want a friend to join your personal game instance.
Minecraft - Xbox 360
- TCP: 3074
- UDP: 88, 3074
Minecraft - Playstation 3
- TCP: 3478-3480, 5223, 8080
- UDP: 3074, 3478-3479, 3658
Minecraft - Xbox One
- TCP: 3074
- UDP: 88, 500, 3074, 3544, 4500, 19132-19133
Minecraft - Playstation 4
- TCP: 3478-3480
- UDP: 3074, 3478-3479, 19132-19133
Minecraft - PC
- TCP: 25565
- UDP: 19132-19133, 25565
Minecraft - Switch
- TCP: 6667, 12400, 28910, 29900, 29901, 29920
- UDP: 1-65535