
This Dragon Age - Origins: Awakening walkthrough is divided into 8 total pages.
You can jump to nearby pages of the game using the links above.
Chapter 05: The Righteous Path

Grab the initial request to deal with the trade route from Mervis in the city of Amaranthine. When you choose to take this quest head there to begin. As you enter you'll find a wagon that's been ransacked. Head a bit further into the woods and you'll meet

Keep heading toward the abandoned Dalish encampment in the center of the map and deal with the Alpha Hurlocks along the way.

Once you've reached the abandoned Dalish encampment investigate the strange items that are lying around. Once you've checked everything out it's time to head to down to the area on the map labeled 'Militia Survivor' where you'll find your next clue into why everyone is dead and why everything surrounding this occurrence is suspicious.

There's no shortage of charred Sylvans as you make your way over to the militia survivor but simply defeat them as you did the ones you met earlier. Once you meet the survivor, make sure to use the kind dialogue tree options and use the 'Maker have mercy on you.' dialogue option to ensure you don't lose any of your party members' approvals. As soon as the conversation with the survivor is finished a group of hurlocks attacks. Focus on the emissaries before dealing with anyone else as their ceaseless casting of spells will do you in.

Once those fiends have been taken care of head back to the abandoned Dalish encampment where you find the elf that taunted you just before.

You must take Velana in your party as you venture to the silverite mine nearby. Head to the silverite mine as indicated on the map. As you make your way through the prison to escape you can choose to collect your gear or not. If you forget to collect, it will be lost for the remainder of your playthrough so we advise collecting it.

You wake up locked in a cell deep in the mine, but luckily a mysterious woman frees you. Simply take them out and quickly equip yourself with their gear. They don't have enough to go around evenly so spread it out among your party members.

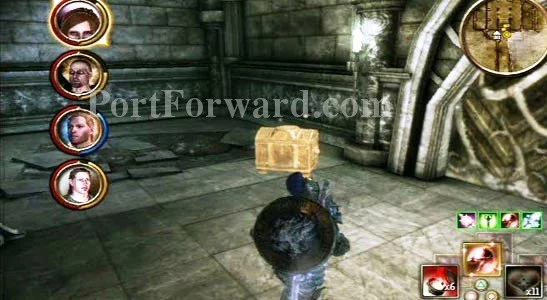
As you head further into the mine go to the room with the experimental switch and pull them to turn off the poison gas in the lower level. Head down to where the gas once was to collect the items there and move on. Be sure to check every chest as the armor and weapons you find are all you'll have until you find your own items later on.

Keep fighting your way through the mine; most of the enemies are simple hurlocks and hurlock emissaries but they are not very powerful in this area. Look for an archway with a stone wall instead of a door under it. Getting close to it reveals it to be a door leading to a secret room where a plethora of items awaits in a chest inside.
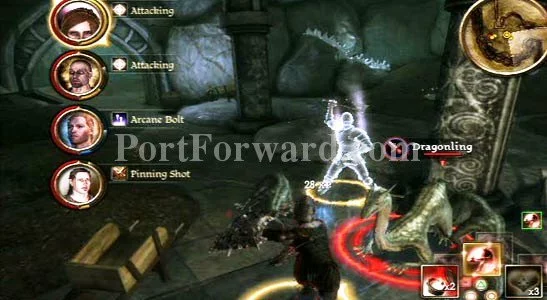
As you delve deeper into the caves you'll encounter groups of dragonlings. They can prove to be trouble if you don't keep your party reasonably spread out. Be sure not to miss any of them as killing them and grabbing the items on them is the only way to get them back. You'll also have to do some inventory management throughout this quest as your inventory will quickly fill with items you already had and items you've picked up in the mines.
"After you've collected yours and your party's items and reach a large stone door you will see a chest to left of it. In that chest are the remaining items taken from you when you were taken prisoner. Once you enter the next area it's time to face The Architect and his minions.

"After a bit of exposition with The Architect he releases two of his Dragon Thralls. These guys are no pushovers with their damaging flame breath and powerful physical attacks, keeping your distance is vital for surviving this encounter. Continue wearing away at their health until they're down for the count.

With the Dragon Thralls out of the way the quest ends with a scene between a dwarf and The Architect as you are placed back in the Wending Wood. The mission is now complete.
More Dragon Age - Origins: Awakening Walkthroughs
This Dragon Age - Origins: Awakening walkthrough is divided into 8 total pages.


