
You may need to assign a permanent IP address to your PlayStation 4 in order to get a NAT Type 2 connection. Assigning a permanent IP address to your PlayStation 4 ensures that your console always has the same internal IP address even after it is rebooted. Some routers allow you to manually assign an IP address, so you should check to see if that is an option in your router. If your router does not allow manual assignments, you can set up a static IP address in your PlayStation 4 console.
This guide is divided in to two parts. You should follow it from top to bottom.
How to Manually Assign a Static IP Address to Your PS4 in Your Router
In your router, look for a way to manually assign an IP address. Not all routers support this. This process will differ depending on the specific router that you have. If you find this feature in your router, simply assign a permanent IP address to your PlayStation 4 (in your router) and no changes are required in your PS4 console. Your router will take care of always assigning your PS4 the same internal IP address which will function the same as a static IP.
If you have a router that does not allow you to manually assign IP addresses, you will need to set up a static IP address within your PS4 console.
Follow these steps to assign an IP address in your router:
1. You can try to permanently assign your PS4 to the IP address that it is currently using. To find the IP address, power up your PS4 console and follow these steps:
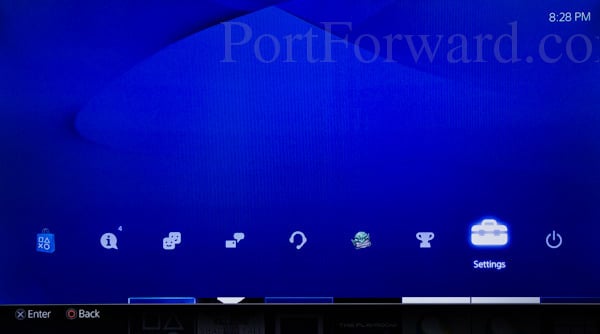
- In the PlayStation 4 main menu select Settings
- Select Network
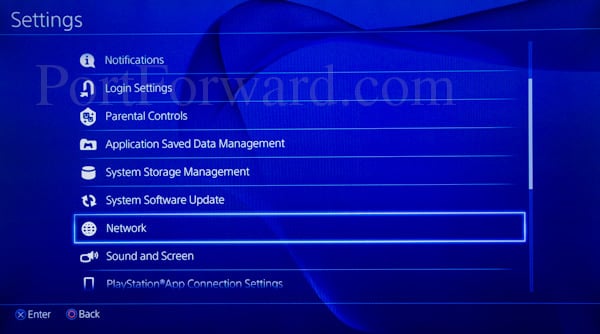
- Select View Connection Status.

- You should see the IP address listed.
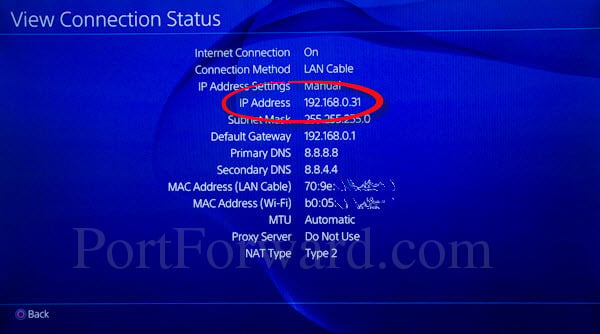
- Write down the IP address and also the MAC address of your PS4. You should also write down your router's IP address which is listed as Default Gateway.
2. Login to your router (through your computer) and permanently assign your PlayStation 4 to the IP address you found in step 1. For help logging in to your router visit our login guides.
Here is an example of a router that allows you to manually assign IP addresses.
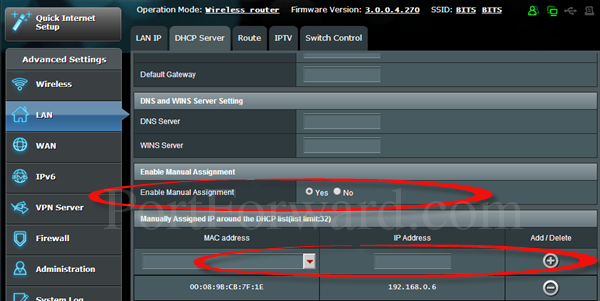
In this Asus router, there is a box to type the IP address into and then a drop down menu for the MAC address. Use the numbers that you wrote down in step 1 of this guide. In this example, after typing in the addresses there is an "Add" button to click.
Some routers do not allow you to assign IP addresses within the DHCP range of the router (the range of addresses that your router automatically assigns to devices on your network.) If this is the case with your router, you will need to choose an IP address to assign that is outside the DHCP range of your router. See steps 2 through 4 of the following guide ("How to set-up a static IP address in your PlayStation 4 console") for help with choosing an IP address that is outside your router's DHCP range.
3. After you have assigned your PlayStation 4 to a specific IP address, test the connection from your PS4 console to make sure it is working. To test the connection:
- In the PS4 from the main menu, select Settings
- Select Network
- Select Test Internet Connection. Wait while the test runs.
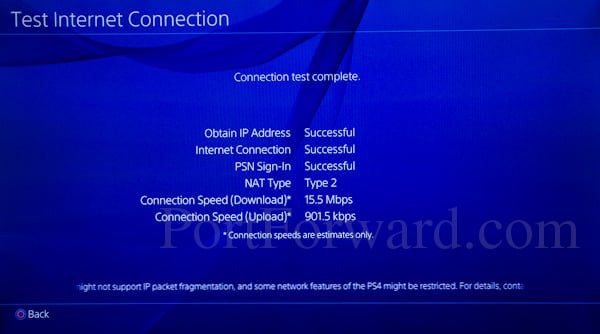
- When your connection is working properly you should see "Internet Connection Successful."
4. Forwarding ports, or opening ports, in your router points all traffic coming in on certain ports to a specific internal IP address. To get a connection with NAT Type 2, you will want to forward the following ports to the IP address of your PS4:
- TCP: 80, 443, 1935, 3478-3480
- UDP: 3478-3479
For help with forwarding ports you can visit these port forwarding guides.
5. After you have assigned a permanent IP address to your PS4 console and forwarded the correct ports in your router, you can test your internet connection. To test the connection from the PS4 console:
- In the PS4 main menu, select Settings
- Select Network
- Select Test Internet Connection. Wait while the test runs.
This a common networking problem that can be quite difficult to solve. Your connection should now be set at NAT Type 2. Good job making it through the guide and optimizing your network.
If you are not able to get a NAT Type 2 connection, check to see that you have entered in the correct information. Double check the data that you entered for the IP address and MAC address.
If you are still having difficulty getting a NAT Type 2 connection, check to see that your network is set up properly. You may have more than one router on your network. To determine if there is more than one router on your network you can run our free Router Detector software. It is important to only have one router on your network otherwise it is difficult to configure your network without running into problems.
How to Setup a Static IP Address in Your PS4
If you have a router that does not allow you to manually assign internal IP addresses, follow these instructions to set up a static IP address in your PlayStation 4 console:
1. Find out what IP address, subnet mask, gateway, and DNS settings your PS4 console is currently using. To find this info:
- In the PS4 main menu, select Settings
- Select Network
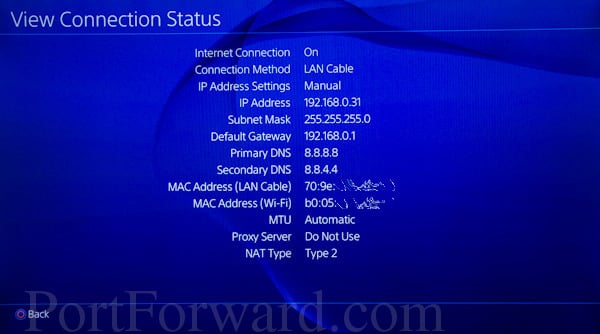
- Select View Connection Status
- Write down your IP address, subnet mask, default gateway, primary DNS and secondary DNS settings. You will need to enter these numbers into your console later.
2. Next, login to your router (through your computer).
- To access your router, type your router's IP address into your browser. You should be able to find your router's IP address in the list of settings that you wrote down for step 1 of this guide. Your router is listed as your Default Gateway.
- For help logging-in to your router visit our login guides.
- Find the DHCP range your router uses. The DHCP range is the group of numbers that your router uses to assign internal IP addresses to devices on your network.
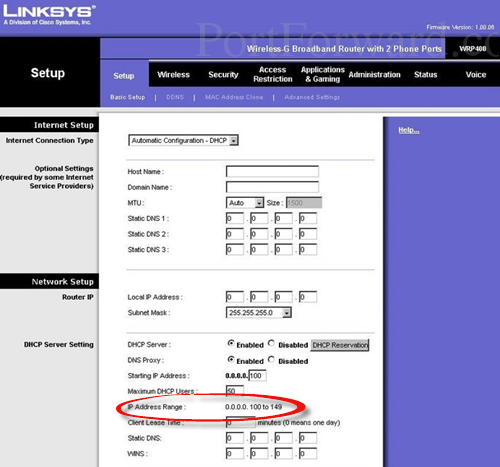
Here is a screenshot of a Linksys router. The DHCP range is circled in red.
3. You will need to pick a number between 2 and 254 that is outside of your router's DHCP range to assign to your PS4.
In the example above, this Linksys router uses the range 100-149 to assign IP addresses to devices on the internal network. I chose to assign my PS4 to 31. The IP address that I assigned to my PS4 is 192.168.0.31. (Be sure to use the first three numbers that are in your router's IP address, also known as gateway.) Here are a few more examples for you:
- If your router's DHCP range is 200-254 you could choose a number between 2 and 50 to try.
- If your router uses 50-200, you could try a number between 2 and 49.
4. To find out if this number is available ping the address using the Windows Command Prompt.
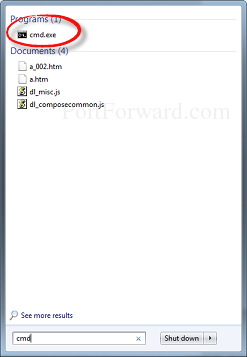
To open the Command Prompt:
- Click on the Windows Start menu
- Type cmd into the dialog box (in the Windows start menu)
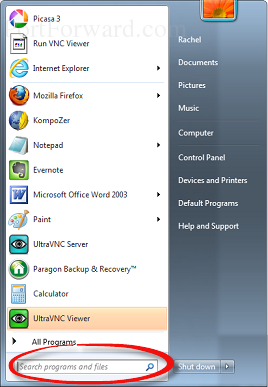
- Then click on cmd.exe (which should be listed over the dialog box). A black window with white text should open.
To check whether or not the IP address is available for you to assign:
- Type ping
- Hit the space bar
- Then type in the IP address you want to check. Hit Enter.
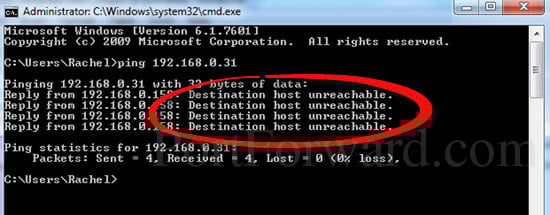
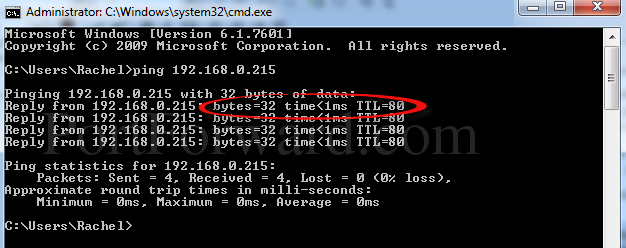
If you ping an address and do not receive a reply, then the IP address is available for you to assign. (See example above.) If you do receive a reply then that IP address is in use and you will have to try a different one. Below is an example showing an address that is already in use.
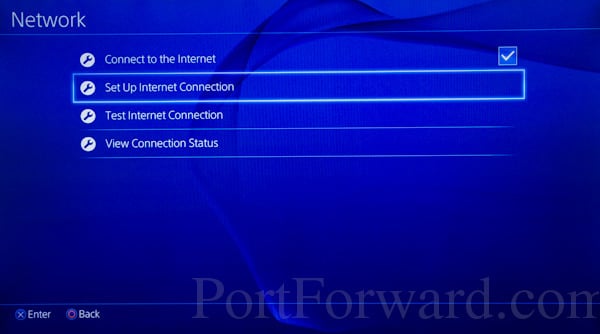
5. Next, go to your PS4 console to set the internal IP address to the number you have chosen.
- From the main menu, choose Settings
- select Network
- select Set Up Internet Connection
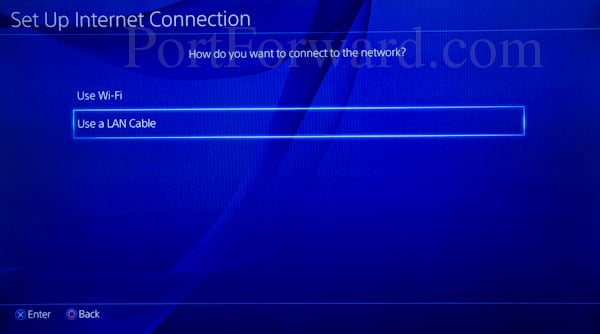
- Choose Wifi or LAN Cable depending on how your local network is set up.
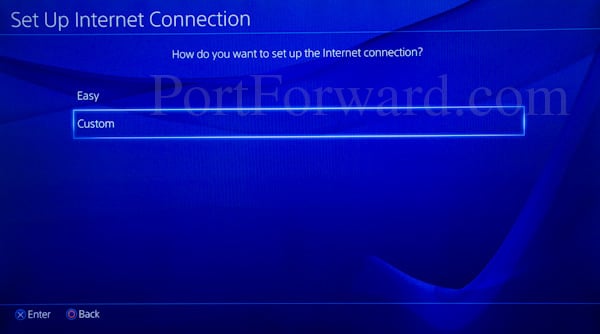
- On the screen titled "How do you want to set up the Internet connection?," choose Custom
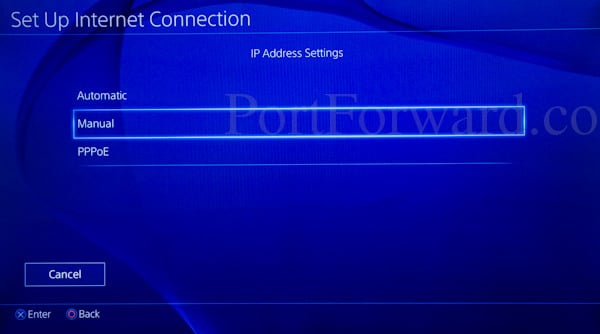
- On the IP Address Settings screen, choose Manual
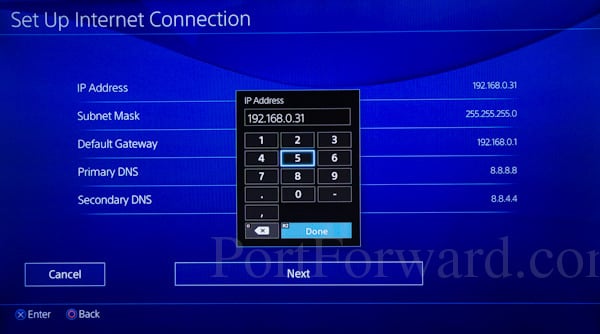
- Select IP Address
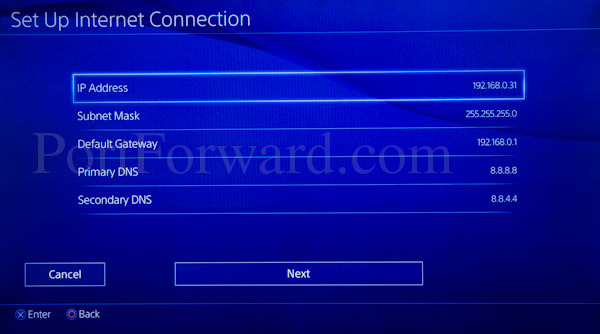
- Enter the number that you have chosen for the IP address. Select Done
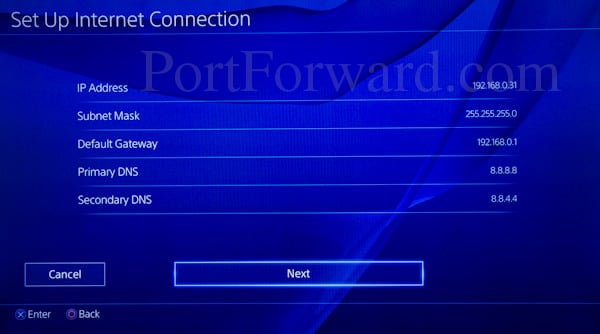
- Select Subnet Mask. Enter the number from the list of settings you wrote down for step 1 of this guide. Select Done
- Select Default Gateway, enter your router's IP address. Select Done
- Select Primary DNS, enter the number from the list you wrote down for step 1. Select Done
- Select Secondary DNS, enter the number step 1. Select Done
- Select Next
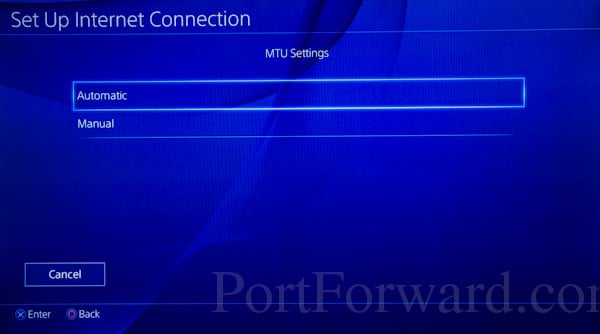
- On the MTU Settings screen, choose Automatic
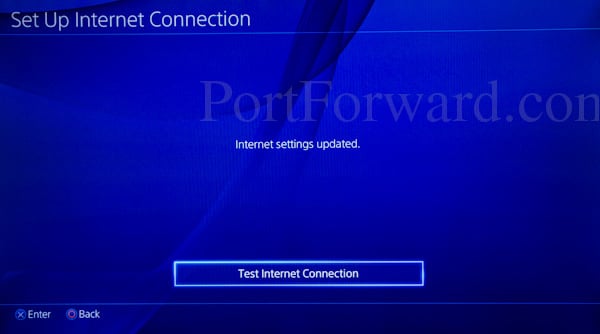
- On the Proxy Server screen, choose Do Not Use
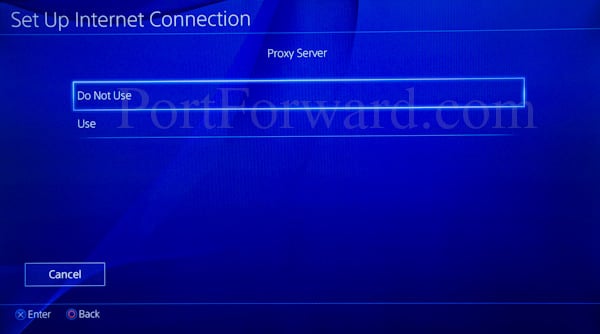
- Select Test Internet Connection. Wait while the connection is tested.
- Your PS4 should now have a static IP address. If you are having problems, make sure that you have entered in the correct information. To double check your numbers, from the main menu of your PS4, select Settings, Network, View Connection Status.
6. Forwarding ports, or opening ports, in your router points all traffic coming in on certain ports to a specific internal IP address. To get a connection with NAT Type 2, you will want to forward the following ports (in your router) to the IP address of your PS4:
- TCP: 80, 443, 1935, 3478-3480
- UDP: 3478-3479
For help with port forwarding you can visit our port forwarding guides.
7. After you have assigned a permanent IP address to your PS4 console and forwarded the correct ports in your router, you can test your network connection. To test the connection from the PS4:
- In the main menu of your PS4, select Settings
- Select Network
- Select Test Internet Connection
Your console should now have a NAT Type 2 connection. This a common networking problem that can be quite difficult to solve. Good job making it through the guide and optimizing your network.
If you are not able to get a connection with NAT Type 2, check to see that you have entered in the correct information. Double check the data that you entered for the IP address, subnet mask, gateway, and DNS addresses.
If you are still having difficulty getting a NAT Type 2 connection, check to see that your network is set up properly. You may have more than one router on your network. To determine if there is more than one router on your network you can run our free Router Detector software. It is important to only have one router on your network otherwise it is difficult to configure your network without running into problems.


