
This BioShock walkthrough is divided into 15 total pages.
You can jump to nearby pages of the game using the links above.
Point Prometheus
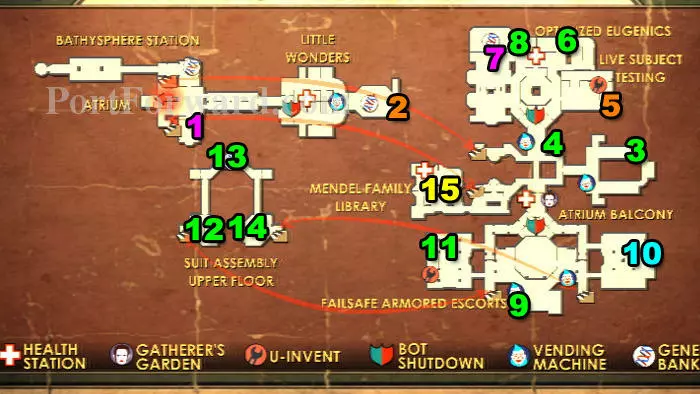
Here's a map of the level. Map - Point Prometheus
- Power To The People - Weapon Upgrade
- Safecracker 2 - Engineering Tonic
- Why Just Girls? - Audio Diary
- Changing Employers - Audio Diary
- Alarm Expert 2 - Engineering Tonic
- Extra Munitions - Audio Diary
- Power To The People - Weapon Upgrade
- Marketing Gold - Audio Diary
- Cheap Son Of A Bitch - Audio Diary
- Hacker's Delight 3 - Physical Tonic
- Missing Boots - Audio Diary
- Protector Smell - Audio Diary
- Mistakes - Audio Diary
- Protecting Little Ones - Audio Diary
- Damage Research 2 - Combat Tonic
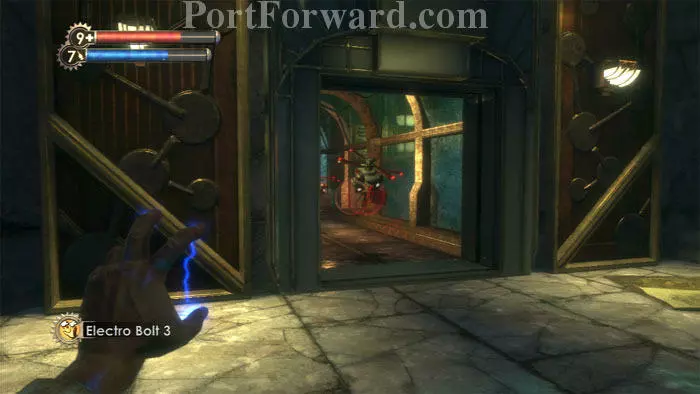
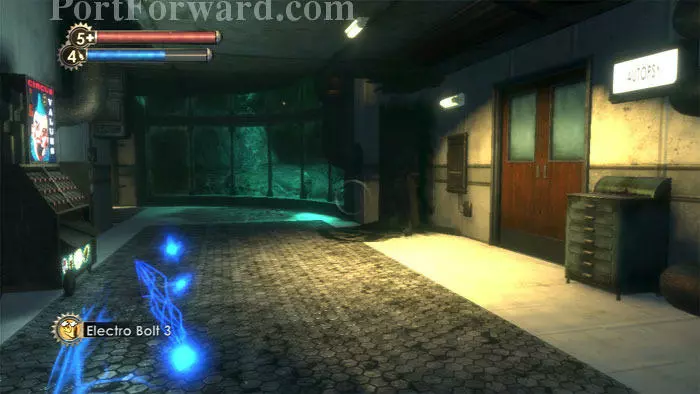
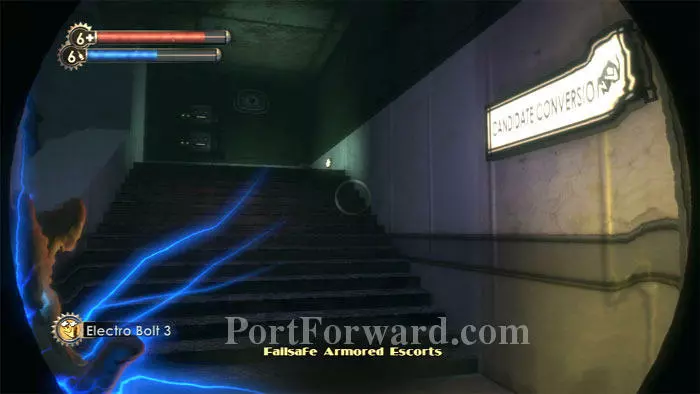
Ready your Electro Bolt as you race down this tunnel. Fontaine is about to send a pair of Security Bots after you, and with some quick hacking you can turn them into escorts.
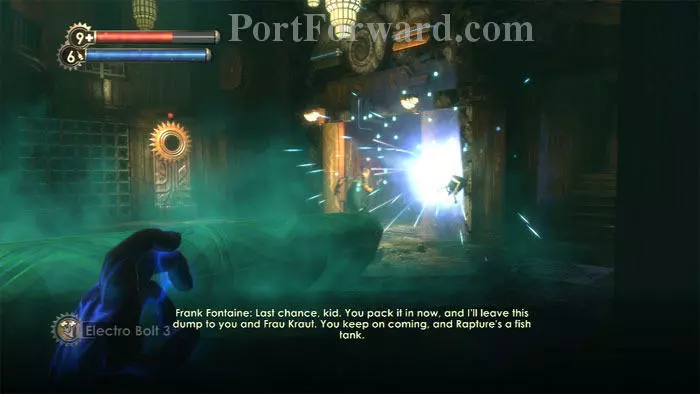
Find a Gene-Bank at the other end of the tunnel, then watch Fontaine escape through this door. Only a Little Sister can open it again.

Tenenbaum surmises that a Little Sister will open the door for you if you are suited-up like a Big Daddy. The first step toward becoming one is to find the Suit Control System on this nearby Big Daddy corpse. Note the Power to the People station ahead.
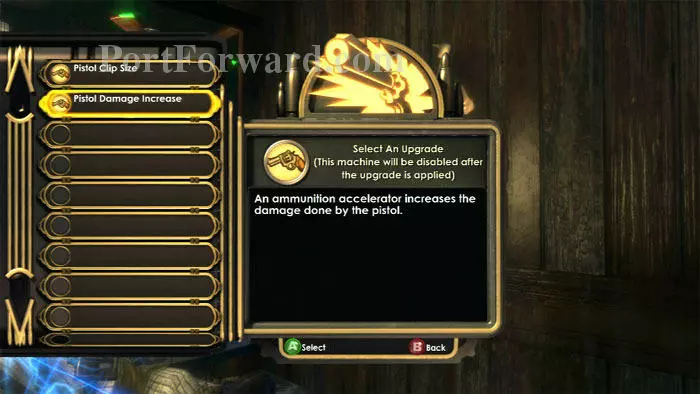
Choices are becoming rather limited; I choose Pistol Damage Increase. Find a First Aid Kit to the right.

You now have a new multi-part goal: sound like, look like and smell like a Big Daddy. There's more than one route you can take, but my preference is to start with the smell challenge. Start through these doors to the Little Wonders Educational Facility.
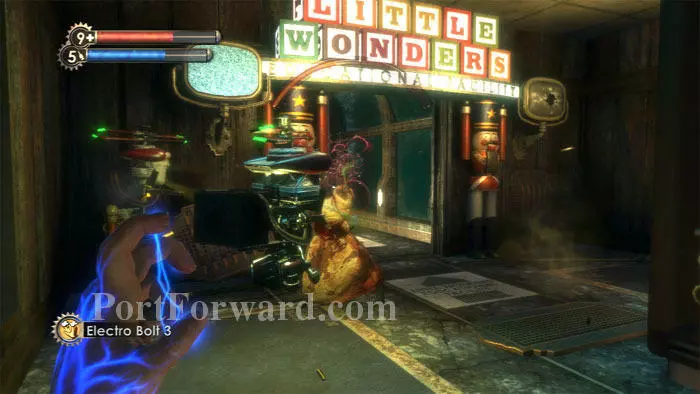
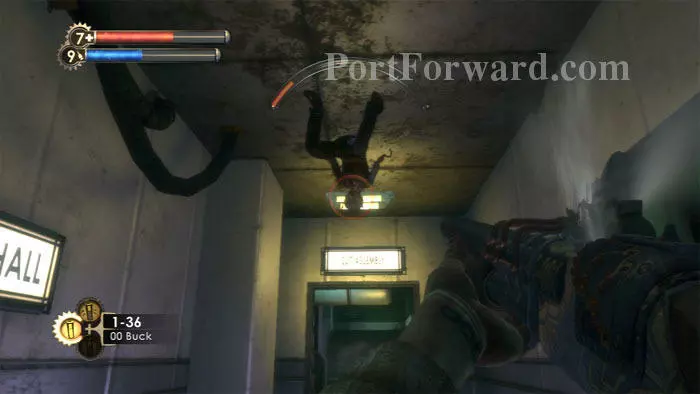
A Leadhead Splicer greets you on the other side of the door, and this Thuggish Splicer is playing dead near this tunnel entrance. A Bot-escorted Houdini Splicer patrols the overhang.

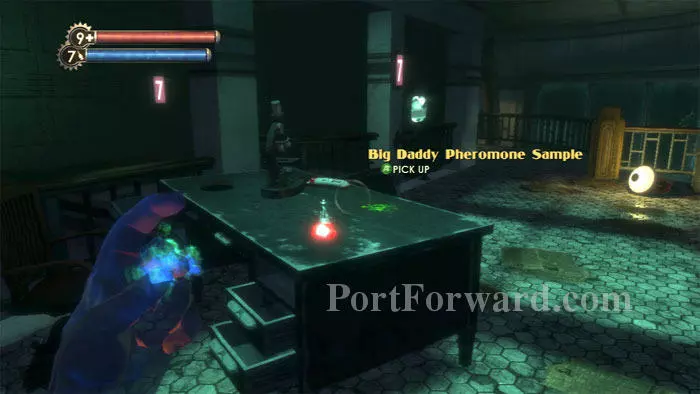
Once you're inside the tunnel, Tenenbaum informs you that you'll need to find 3 Big Daddy Pheromone Samples.
This next room is tough. You need to jump onto the overturned cabinet on the right, then hop onto the overturned desk on the left, then crouch through the window, all while being shot at by a pair of machine gun turrets. Try to hack them if you like, but it's much easier to lob a few grenades inside and destroy the turrets outright.
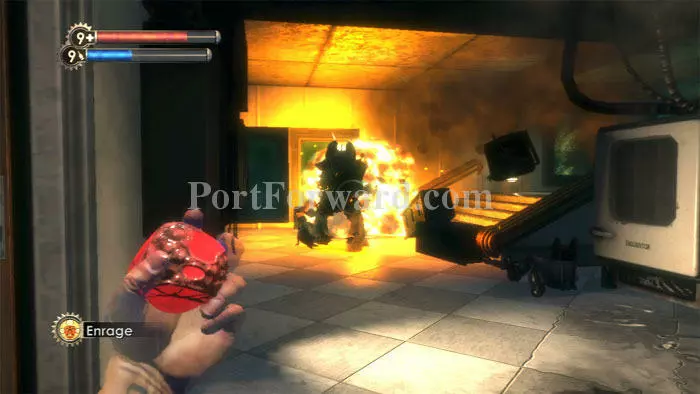
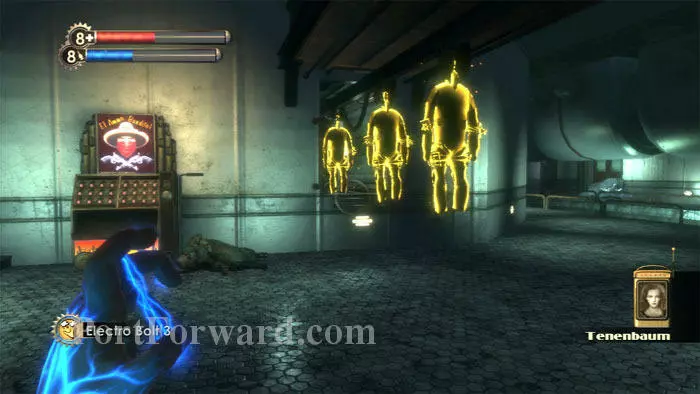
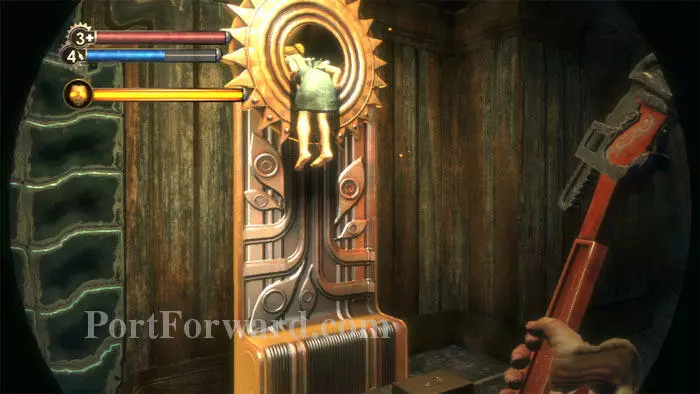
Through the next door I encountered the first of the level's three Little Sisters. Security Bullseye directed Fontaine's hacked bots to the Big Daddy. I finished him off with Electric Gel and brought my ADAM total to 250.
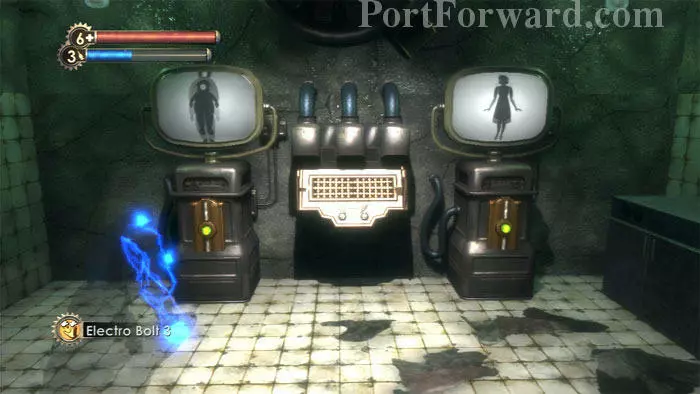
Search the room on the right and find these Skinner Boxes. The button under the Big Daddy image produces Potato Chips. The button under the human image reduces your health.

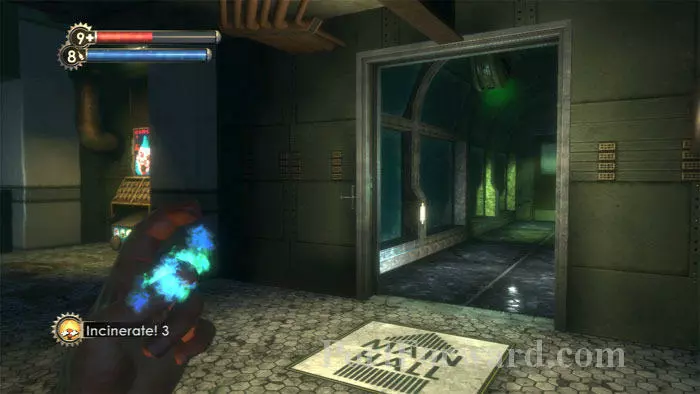
Use the Door Control on room 5 across the hall. Defeat a Houdini Splicer (Incinerate! 3 works well) then find two EVE Hypos and the first of three Big Daddy Pheromone Samples. Room 7's door is blocked.
Fill up at the Circus of Values and ready your Electro Bolt before entering Autopsy on the right -- a security camera is directly across from the door. Find a First Aid Kit on a sink in the right corner.
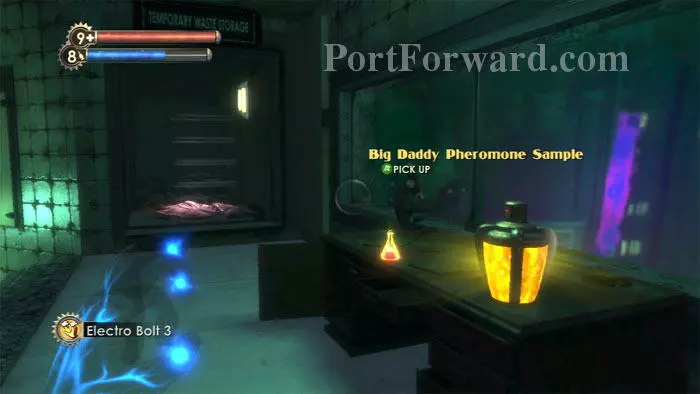
Big Daddy Pheromone Sample number two is in the back of the room next to a Safecracker 2 Engineering Tonic. Witness an apparition in Temporary Waste Storage on the left. Search the cabinets for supplies.

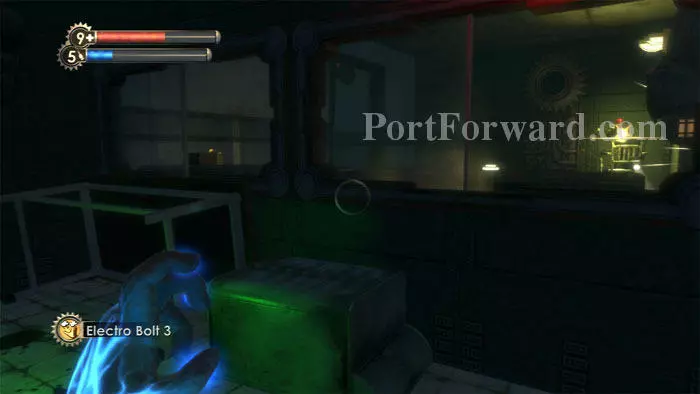
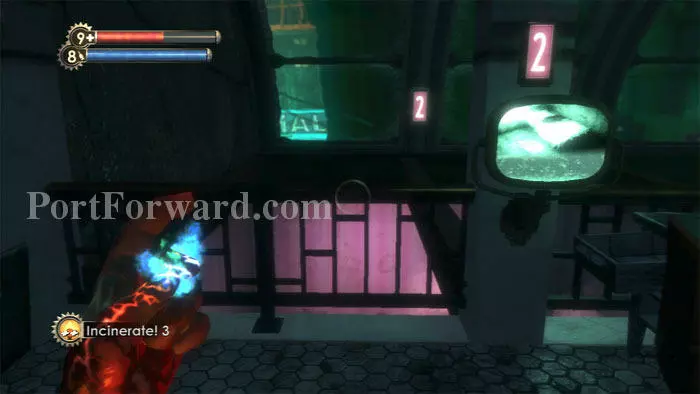
Follow the hallway around the bend to this corridor. Room 4 has nothing for you, room 3 has a corpse, room 2's door is blocked, and room 1 has an EVE Hypo. Ascend the stairwell at the end of the hall.
Keep left and find your third Big Daddy Pheromone Sample on this desk to complete the sub-goal of smelling like a Big Daddy. Tenenbaum's Why Just Girls? audio diary is on the desk ahead.
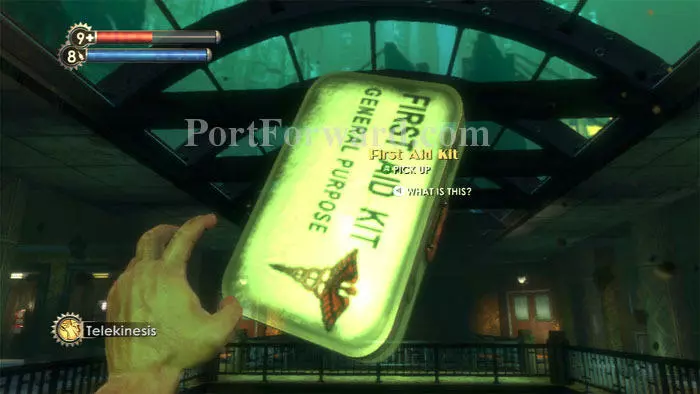
Rooms 2 and 7, blocked from below, can be access by jumping over the railings. Room 2 holds a First Aid Kit, and room 7 holds an extra Pheromone Sample and a bag of chips.

Exit both rooms by using these high-up Door Control panels.
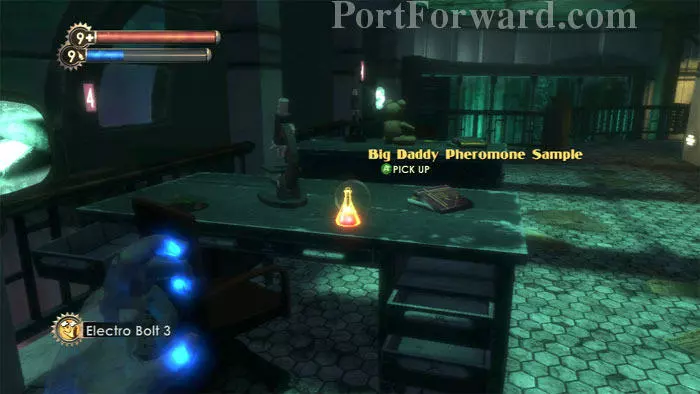
Yet another Pheromone Sample is found on this desk between rooms 5 and 7. A Pep Bar is also on this desk.
Fill up at the Circus of Values seen on the left before returning to the Main Hall through this door. Note the hacked security camera above the door.
Find this First Aid Kit on the beam ahead then keep right.
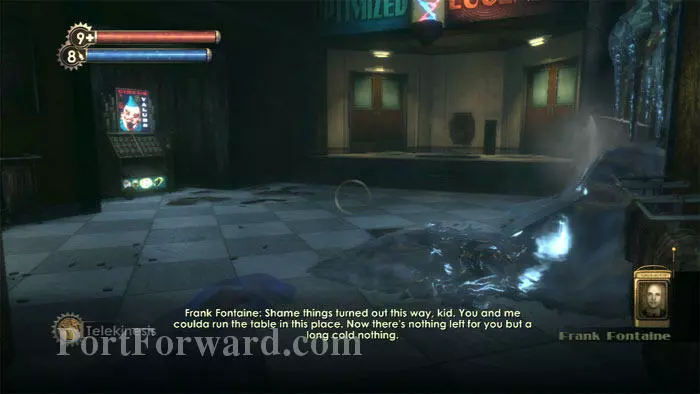
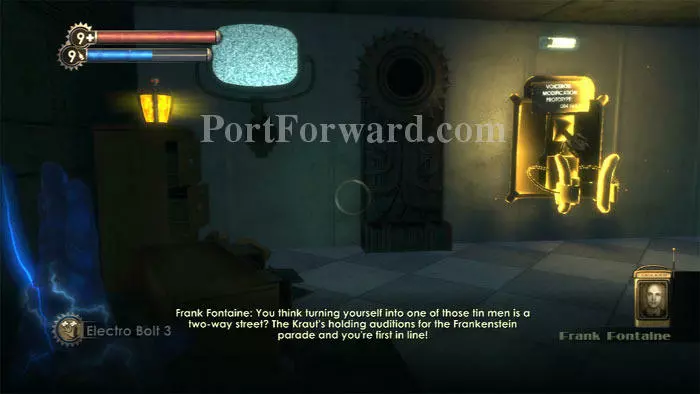
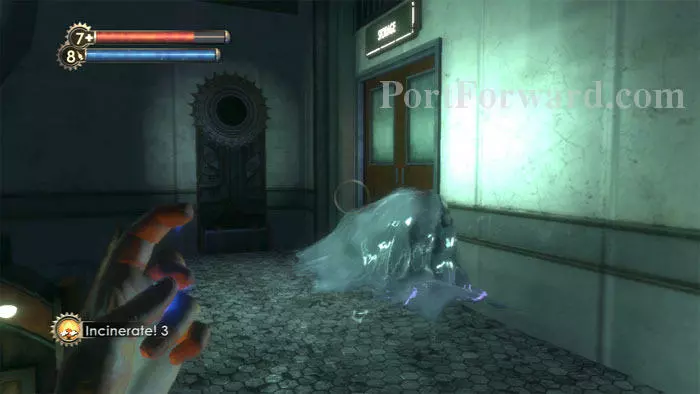
Listen to Fontaine then melt the ice blocking the door on the right.
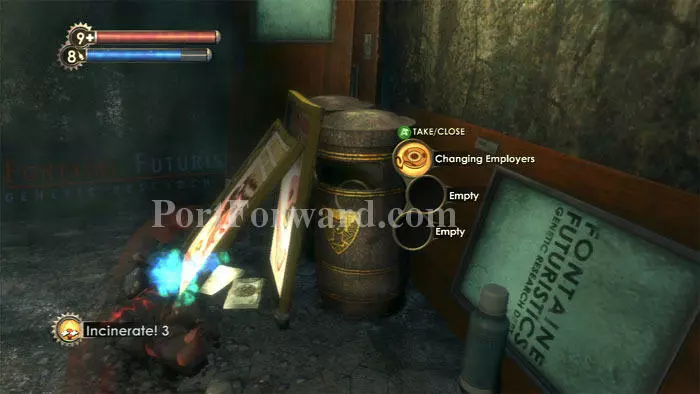
Find SuChong's Changing Employers audio diary in this Trash Can. Coffee and cash are also here.
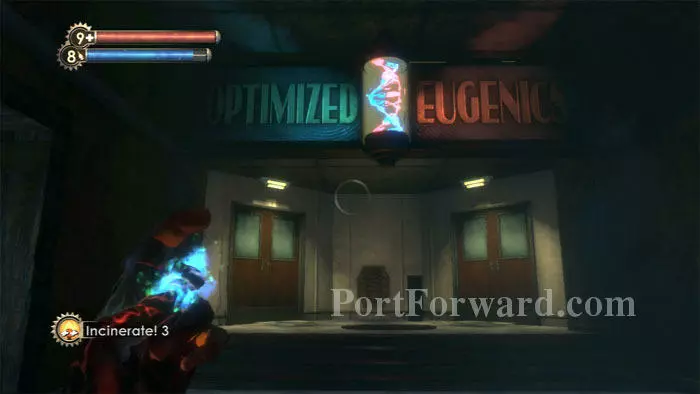
Time to sound like a Big Daddy. Enter Optimized Eugenics through the door on the right. Be ready to destroy/hack a security camera once the decontamination process is complete.
Keep right to find a corpse then find the Voicebox Modification Prototype here in the Live Subject Control Room. An Alarm Expert 2 Engineering Tonic is on the left. Film, Coffee, searchable desks and a U-Invent are in the room to the right.
Backtrack the way you came, ready to deal with this trio of possum-playing Splicers. Napalm is my weapon of choice.
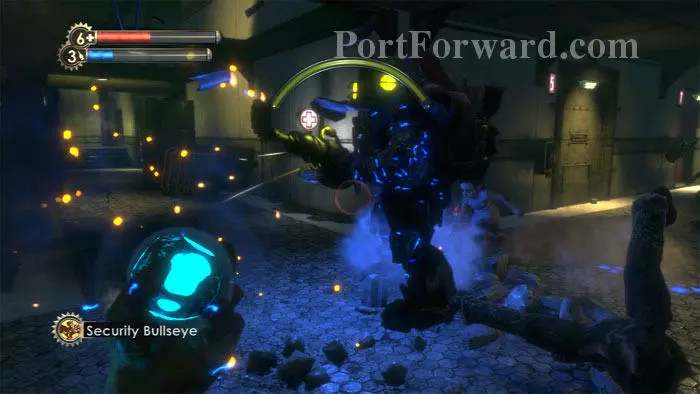
Keep right to enter Plasmid Prototyping, where I was able to convince this Big Daddy to take out a turret and a Splicer. Electric Gel allowed me to harvest the level's second of three Little Sisters, bringing my ADAM total to 410.
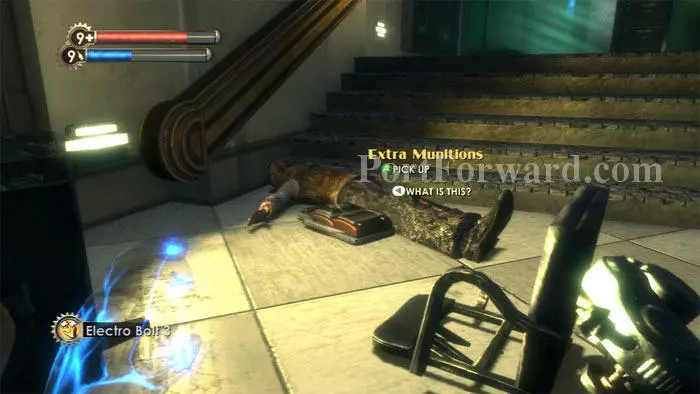
SuChong's Extra Munitions audio diary is here on the floor, and gives the code to the munitions room near the Protector Labs, 1921.
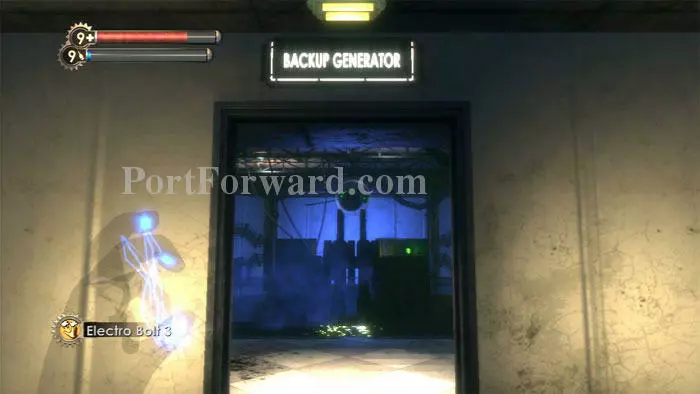
Be ready to shock/hack/destroy a security camera before entering the Backup Generator room across the hall. Find Napalm to the right.
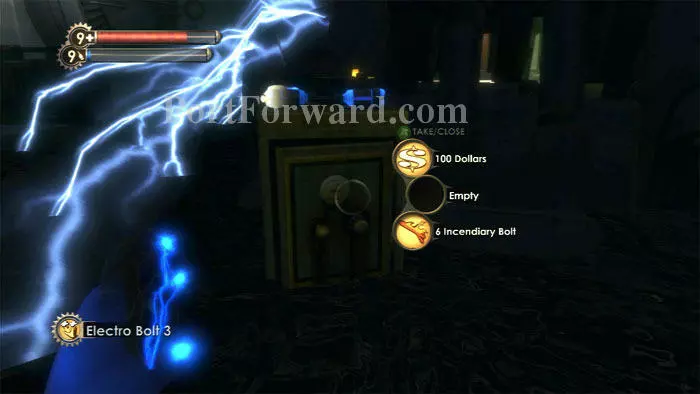
If you have Electric Flesh 2 equipped, as I do, you'll take no damage from the electrified water and can hack this safe immediately.
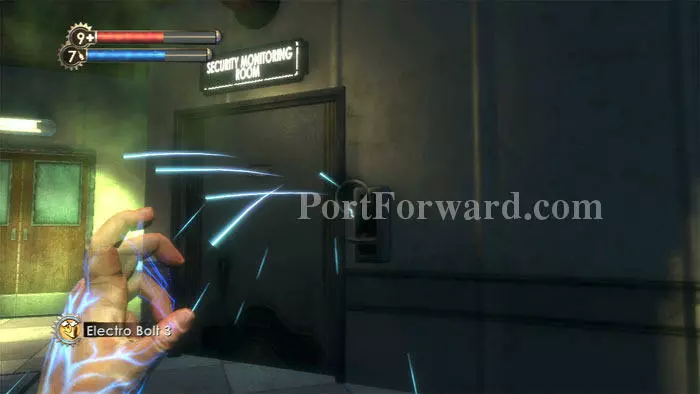
Otherwise, you'll need to zap the control panel granting access to the Security Monitoring room.
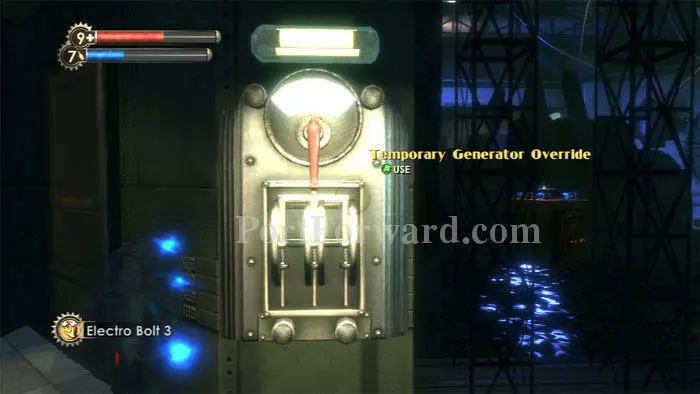
Then, use the Temporary Generator Override to (temporarily) shut off the power. You can now hack the safe before the power comes back on.
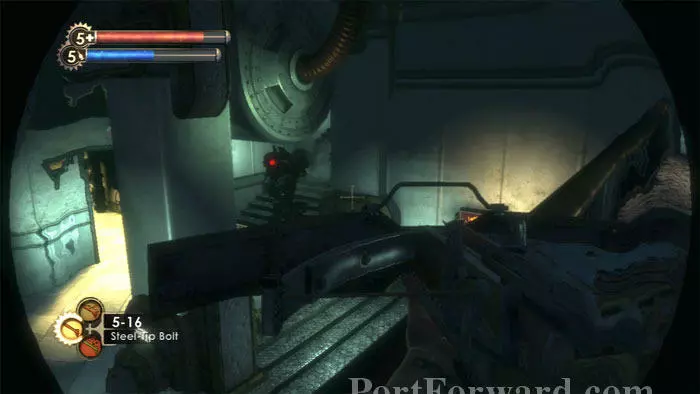
Next up is Eugenics Analysis. A pair of rocket turrets are to your left and Steel-Tip Bolts are on the floor as you enter.
Find this safe, a Proximity Mine and a First Aid Kit. Spot the Power to the People station ahead.
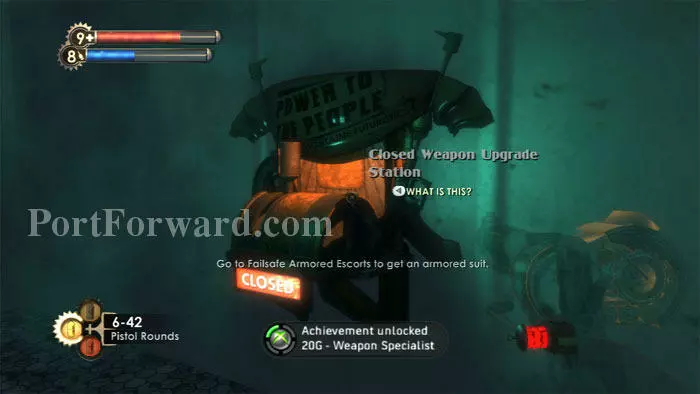
If you've been following the walkthrough, you should only have one upgrade option left (for me it was Pistol Clip Size). Congratulations on earning the Weapon Specialist Achievement!
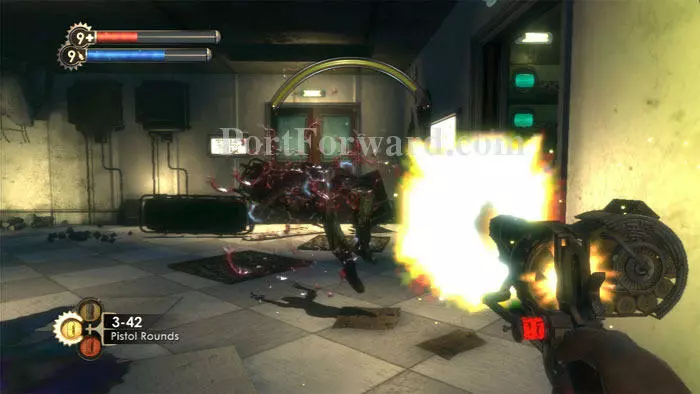
I try my newly-tricked-out Pistol on this Splicer blocking the entrance to Test Subject Storage.
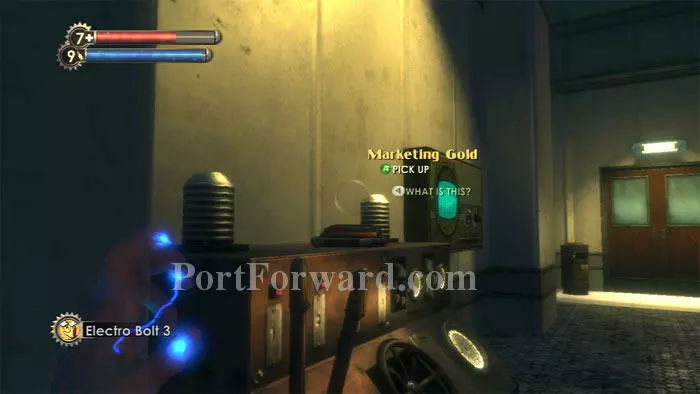
Andrew Ryan's Marketing Gold audio diary is on this machine. EVE Hypos, Incendiary Bolts and Pistol Rounds can be found on the floor, and Frag Grenades are on a machine near the other door.
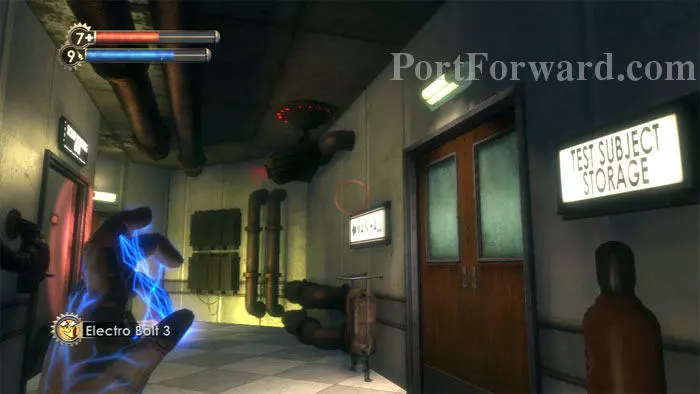
Exit Test Subject Storage, hack the security camera seen above, then return to the Main Hall.
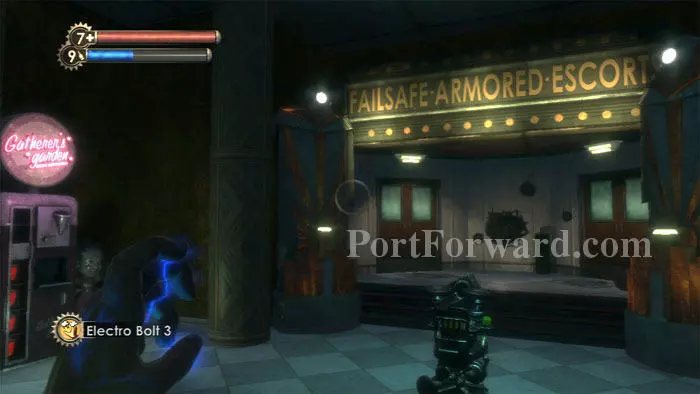
Across the hall is Failsafe Armored Escorts. Before entering through the door on the right, hack this turret. Use the Gatherer's Garden if you like -- I purchased Health and EVE Upgrades plus Human Inferno 2. Ideally, you want to leave this level with 160 ADAM, exactly.
Find a number of Security Bots to loot and hack in the Security Monitoring Room. Defeat this Spider Splicer before entering Suit Assembly, straight ahead.
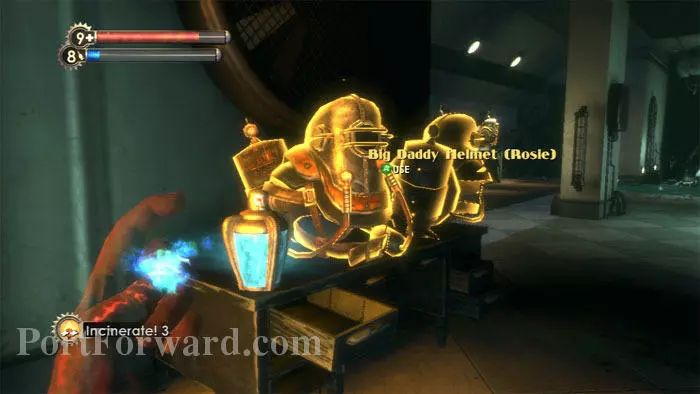
Keep left to pass through a pair of Securis doors guarded by two Splicers and a turret to find the Big Daddy bodysuits. Enjoy a 25% resistance to all damage while wearing the bodysuit.
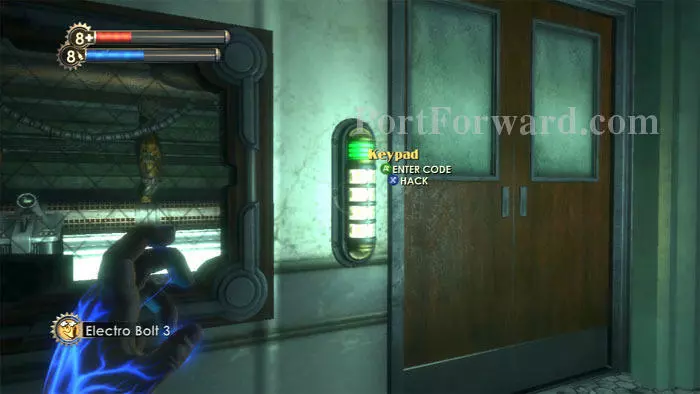
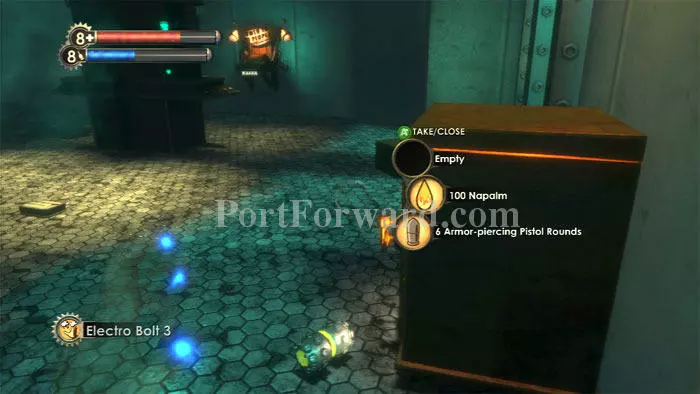
Follow the floor right to this door. The code 1921 gets you in. EVE Hypos, Proximity Mines, Armor-Piercing Pistol Rounds, Antipersonnel Auto Rounds, Incendiary Bolts, Electric Buck, Steel-Tip Bolts, Liquid Nitrogen and a Grenade Launcher are your reward.
Backtrack to the Securis doors to find the room's twin, blocked by ice. Melt the ice to enter.
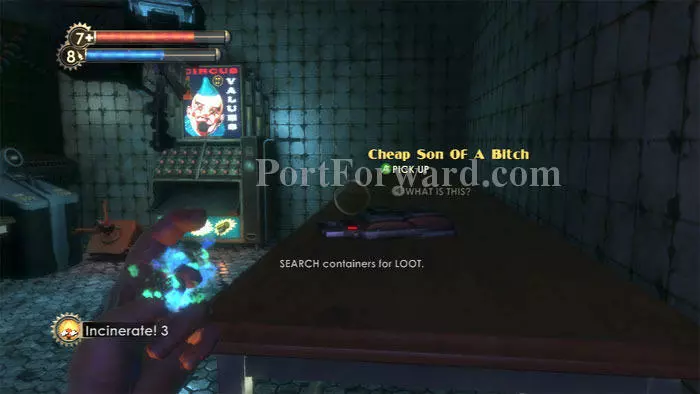
Alternately, both of these rooms can be accessed through crawlspaces where bodysuits are hung, seen to the left in this shot. SuChong's Cheap Son Of A Bitch audio diary, a First Aid Kit and a Circus of Values are in here.
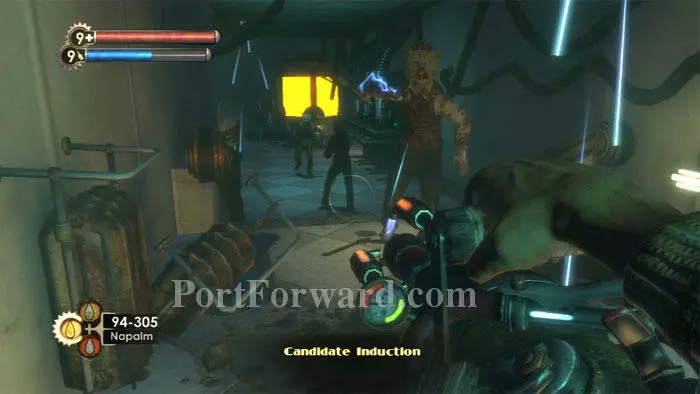
Inside Candidate Induction is the Big Daddy Helmet and a Hacker's Delight 3 Physical Tonic. Brace for an ambush before picking up the helmet. Napalm is found nearby.
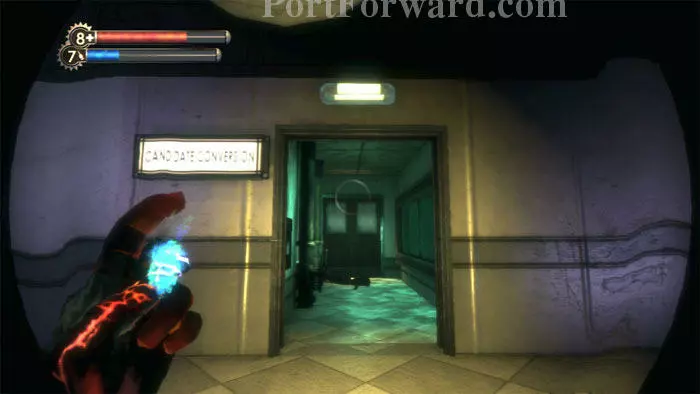
Lastly, head into Candidate Conversion. Beware a pair of turrets just inside the door.
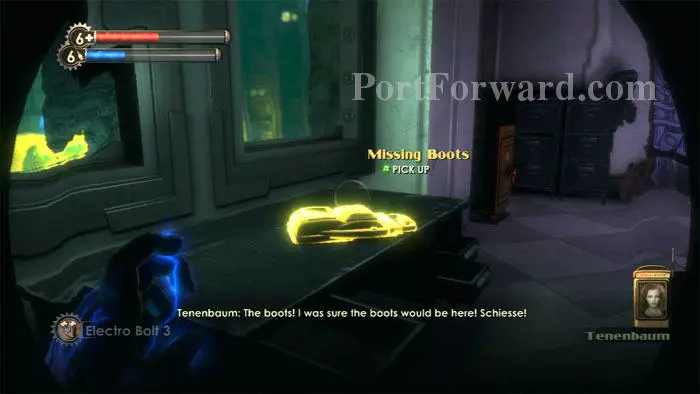
The boots aren't here. Instead, find SuChong's Missing Boots audio diary. Note the Safe to the right. A U-Invent, corpse, Crossbow and Steel-Tip Bolts are to the left.
Before rushing off to find the boots, ascend these stairs to grab the final three audio diaries of the game.
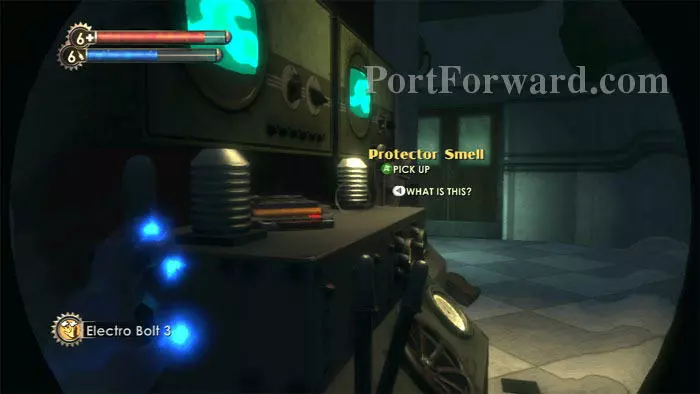
SuChong's Protector Smell audio diary is on this machine.
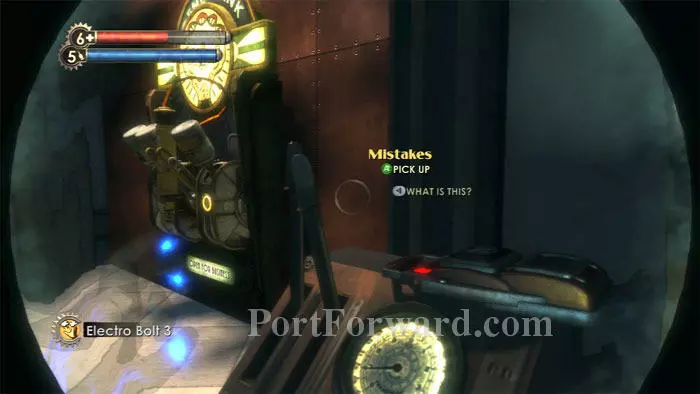
Andrew Ryan's Mistakes audio diary is next to the Gene-Bank. Find cash on the floor.
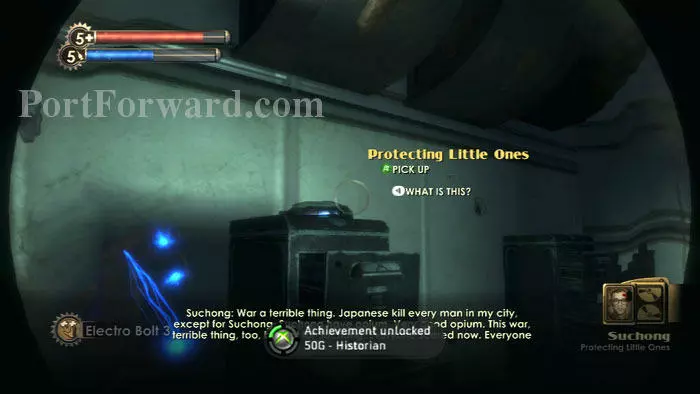
SuChong's Protecting Little Ones audio diary is on this file cabinet. If you've been following the walkthrough from the beginning, you should now have collected all of BioShock's audio diaries. Congratulations on earning the Historian Achievement!
The balcony is a good place to snipe the Big Daddy protecting the level's final Little Sister. Harvesting her brings my ADAM to 360.
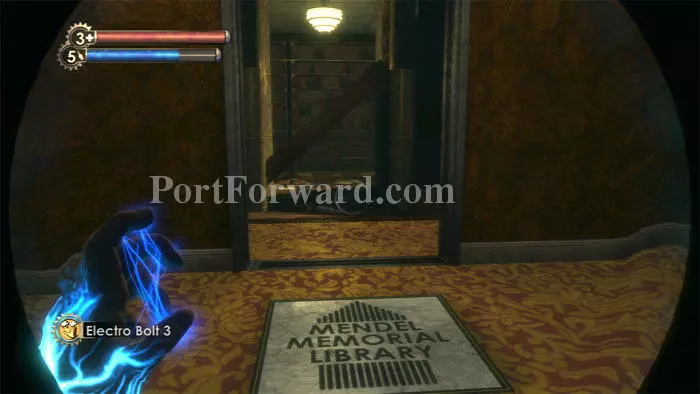
Exit to the Main Hall, turn left, then follow the signs to the Mendel Library. Beware a security camera and rocket turret to the right.
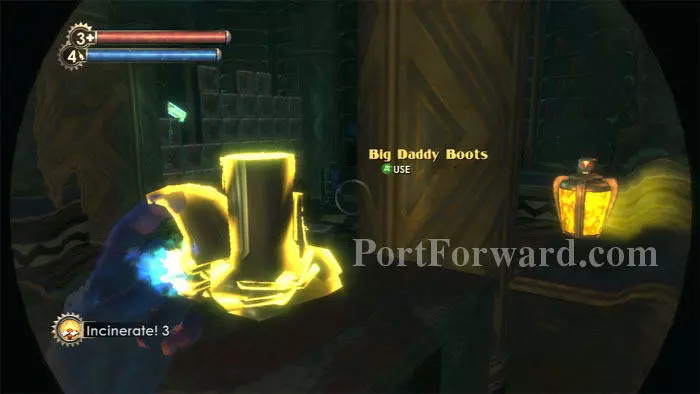
A solitary Houdini Splicer guards the Big Daddy Boots and Damage Research 2 Combat Tonic. Incendiary Bolts, Liquid Nitrogen and Pistol Rounds are available.
Exit the library and descend the stairs to the left. Tap your wrench against this Hidey Hole to summon a Little Sister. Follow her to the nearby Bulkhead to Proving Grounds.
More BioShock Walkthroughs
This BioShock walkthrough is divided into 15 total pages.


