
This Deus Ex: Invisible War walkthrough is divided into 11 total pages.
You can jump to nearby pages of the game using the links above.
Cairo
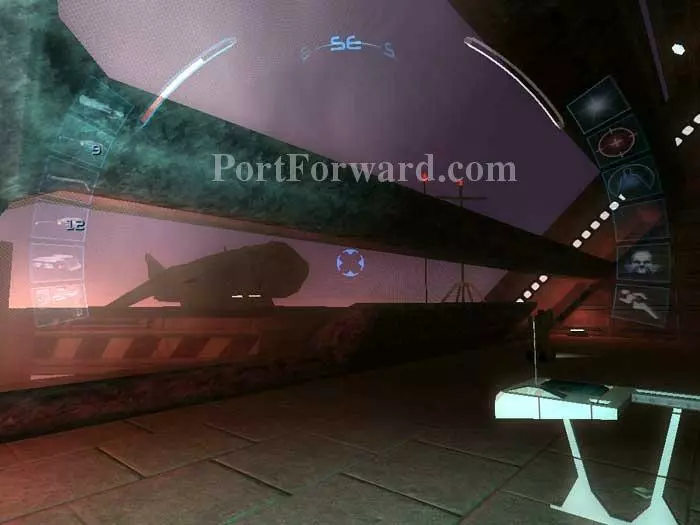
If Ava Johnson is your pilot, she'll drop you off at this small landing pad at the south medina. She didn't know about the lack of commercial air travel since the collapse and was flying to a nonexistent airport. If Sid Black is your pilot, he'll drop you off closer to the action - the arcology flight bay 23. He's even set you up with a pass for entering and leaving the arcology. Even though Sid provides a head start, the NPCs will send you back to the medina anyway.
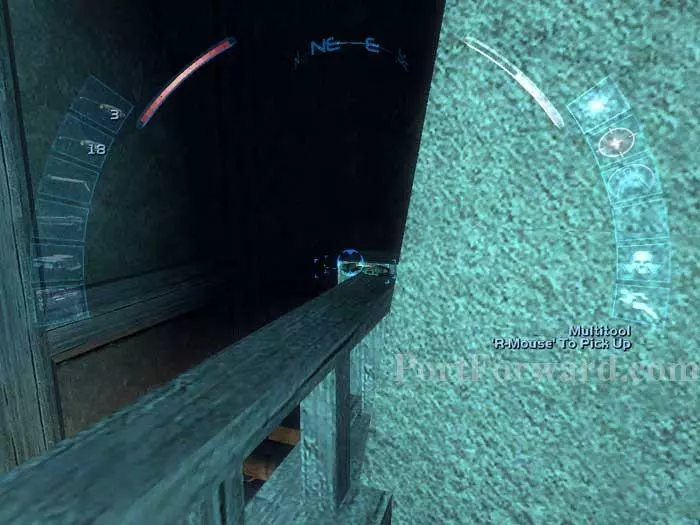
You'll find this multitool on the railing behind you.
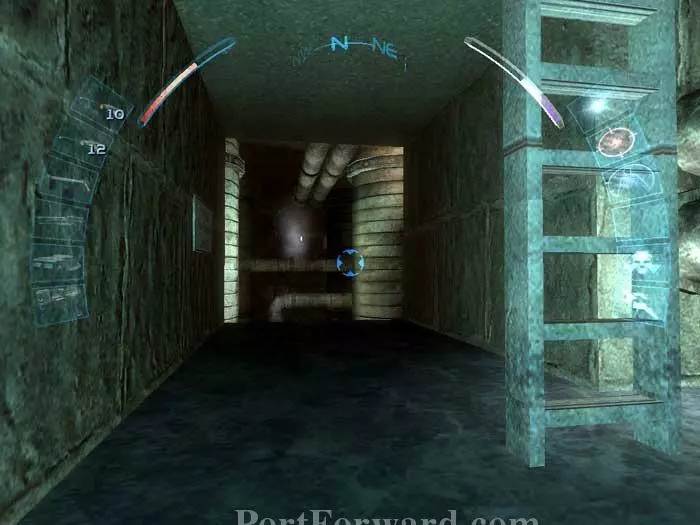
Ascend this ladder.

You'll find these binoculars on the railing, and a datacube on the opposite railing with an ad for employment in the arcology.
Don't waste your multitools opening this locker. Inside is a medkit and a stun prod. The truly valuable item is on top - an energy cell. A datacube on the nearby table instructs the management of this landing pad to cease operations due to an unpaid balance to the WTO.
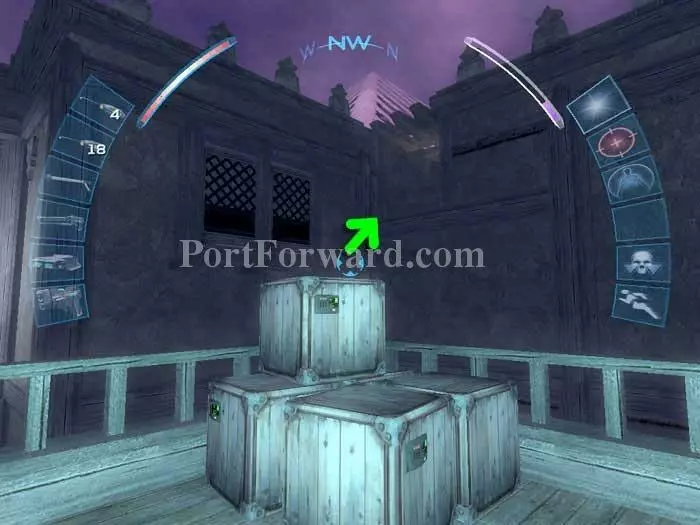
Head back down the ladder to where you were. (Don't go all the way down to street level.) Climb these crates and jump to the indicated opening. You'll find a sniper rifle and binoculars.
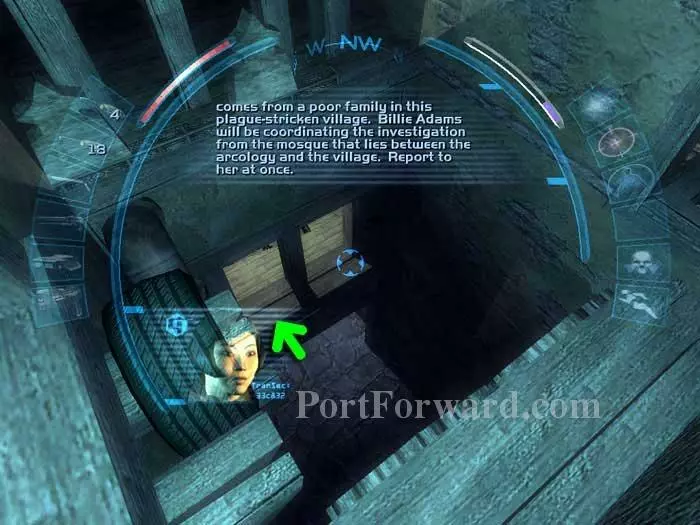
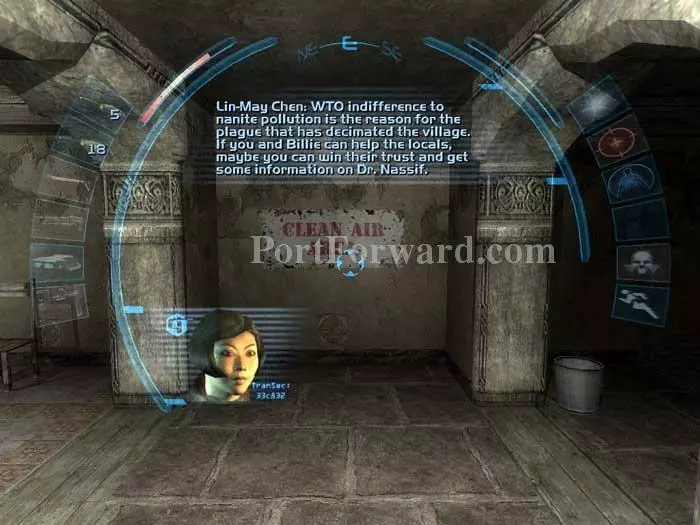
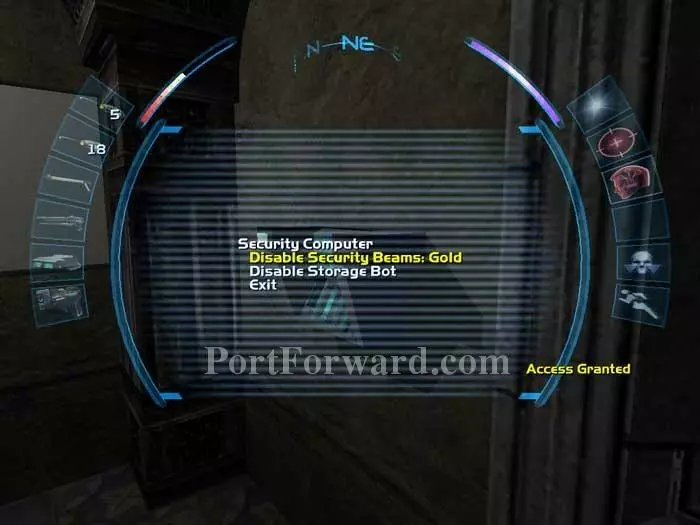
Lin May Chen gives you a new goal: report to Billie at the mosque. Drop down through the indicated window. (Alternately, descend the stairs on the right after disabling the gold beams.) Inside you'll find an EMP converter, two ammo clips and a spiderbomb.
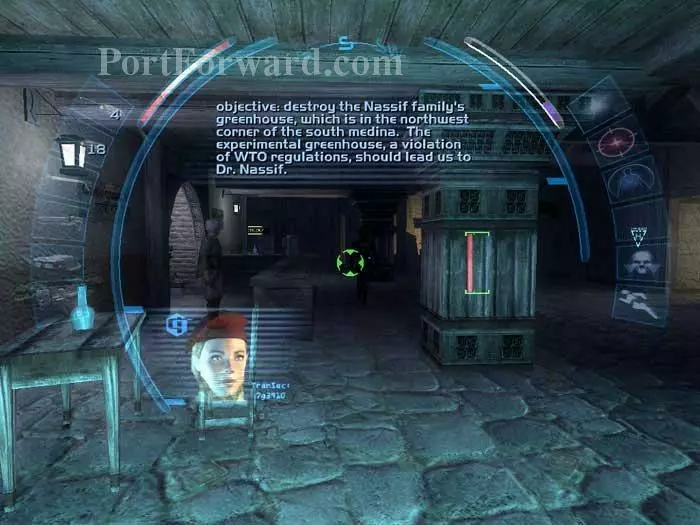
Climb out the window and drop down to street level. You receive a new goal from the WTO: destroy the Nassif greenhouse.
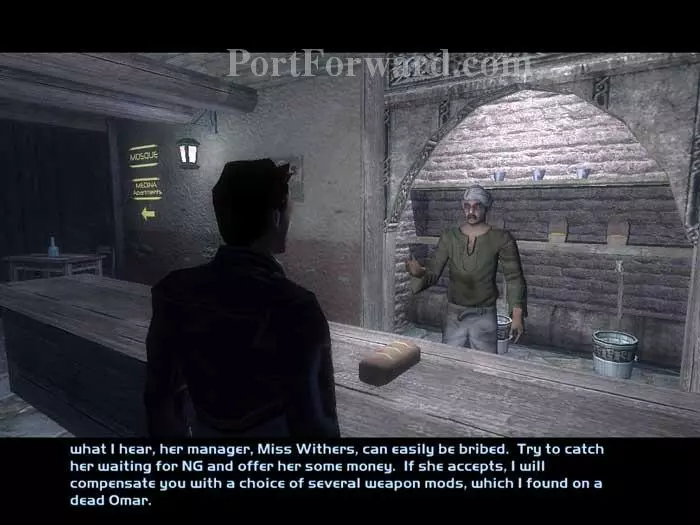
Talk to the Queequeg's manager to receive a new coffeehouse wars goal: bribe NG's manager for a QueeQueg's endorsement. Grab the medkit from behind the bar.

Talk to the sheriff and receive a local map.
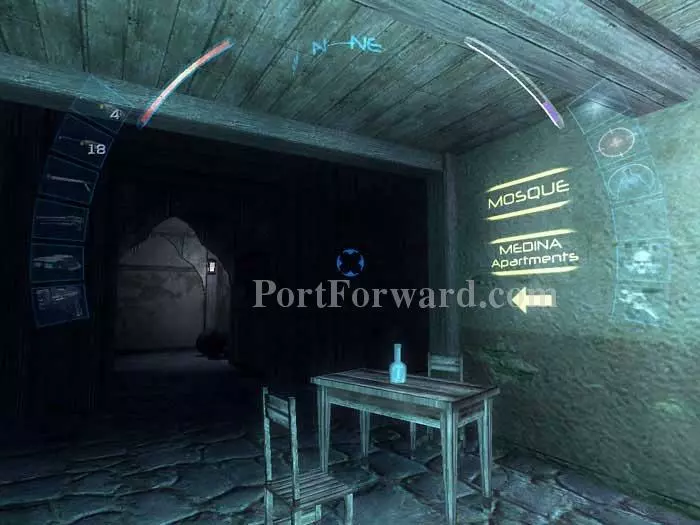
Up the alley to right is a locked locker holding phosphorous flares, 100 credits and a noisemaker grenade. Follow the mosque/apartments signs to the north medina.
Climb these stairs.
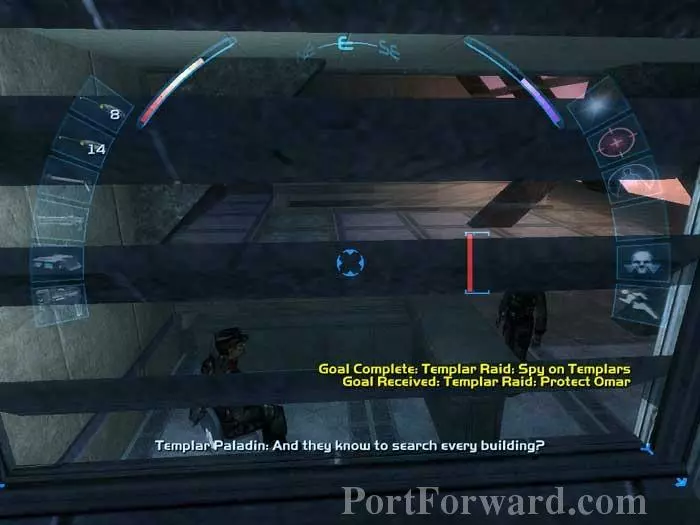
Speak with Leo Jankowski and receive a new goal: spy on the Templars. Note the multitool rear-left.
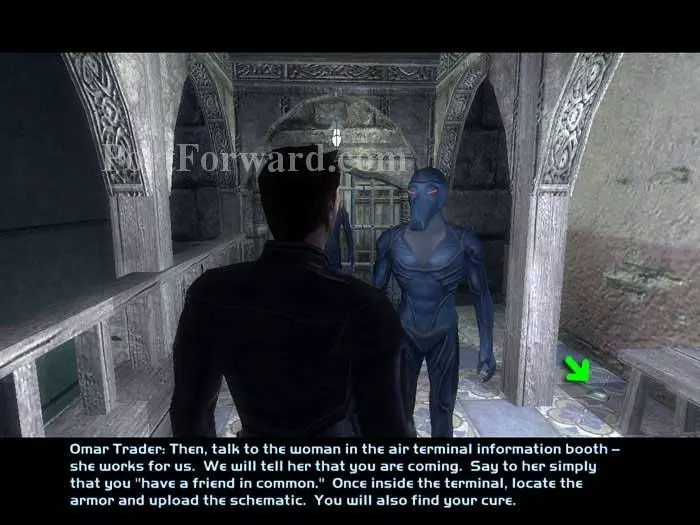
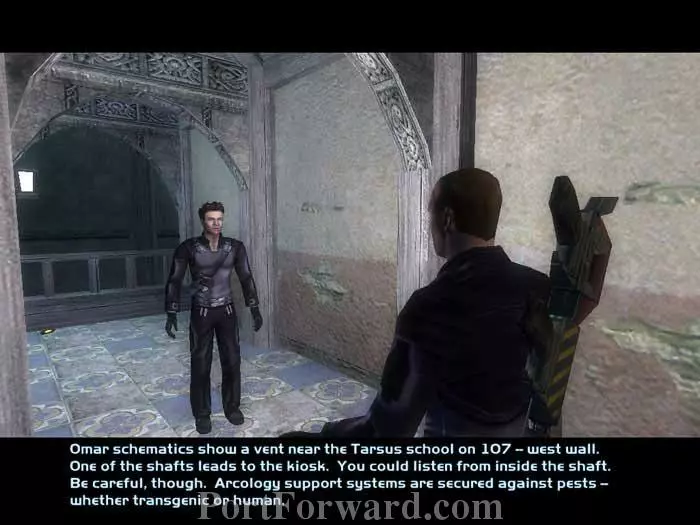
Talk with the Omar trader. He's selling black market biomods and prox mines. He also offers you two new goals: uncover a conspiracy and enter hangar 24. Read the indicated datacube for the hangar 24 keycode.
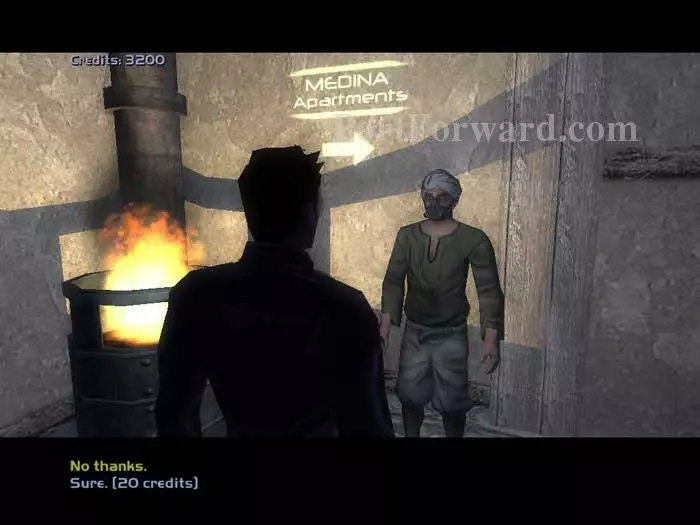
Go back down the stairs and follow the mosque/apartments signs. You can spend 20 credits on this guy's snake oil if you want.
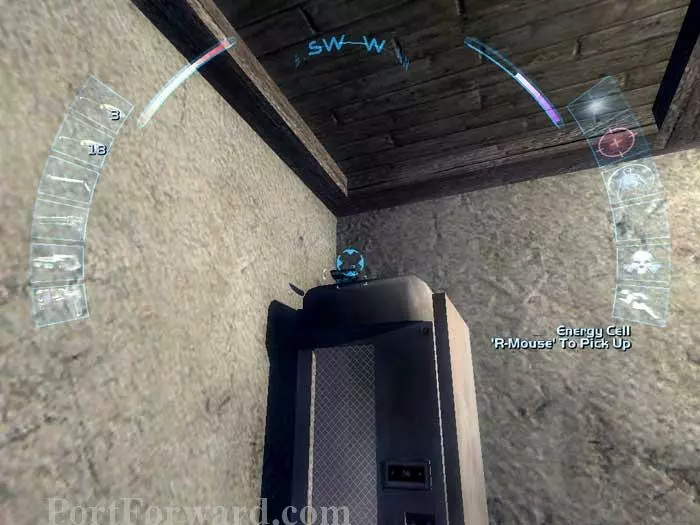
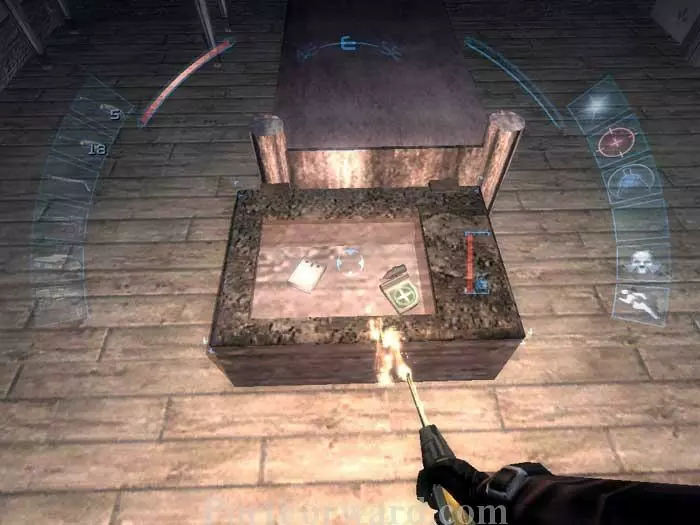
Ignore the mosque and apartments for the moment and follow the street northward to this holocomm. Grab the indicated energy cell. The chest lower-right holds a medkit and 100 credits.
Destroy the wooden pallet in front of this grate (the mag rail works well) then climb through the shaft.
Send in your spy drone to disable the security camera. Steer clear of Harvester to avoid knocking him unconscious if your spy drone is level 3.

Quietly open this chest and snatch the ammo clip, increased range mod, medkit and energy cell.
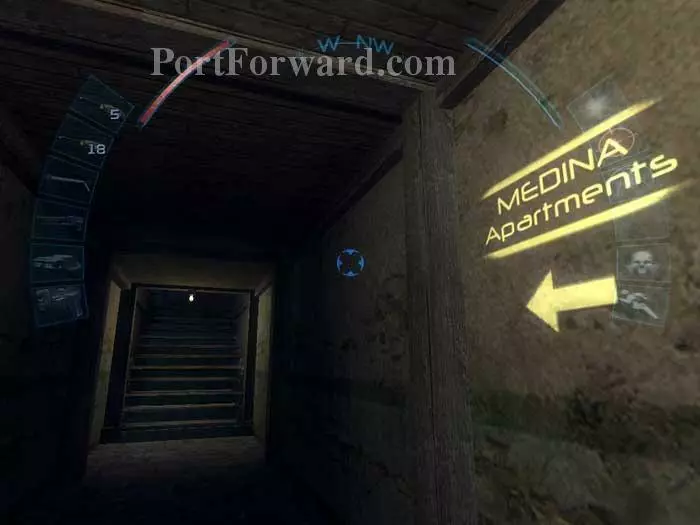
Exit back down the chute and follow the sign to the medina apartments.

Turn right and talk with Harvester -- he harvests biomods. He offers you a goal: kill the security chief.
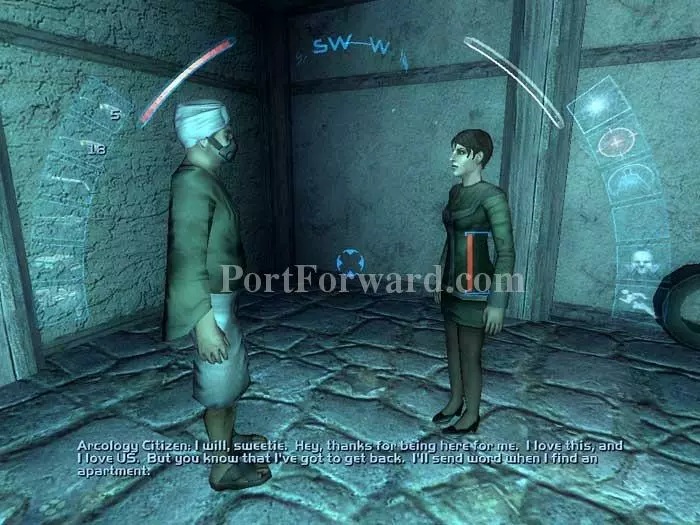
Before heading up the stairs take a moment to eavesdrop on the affair between the dying poet and the arcology citizen.
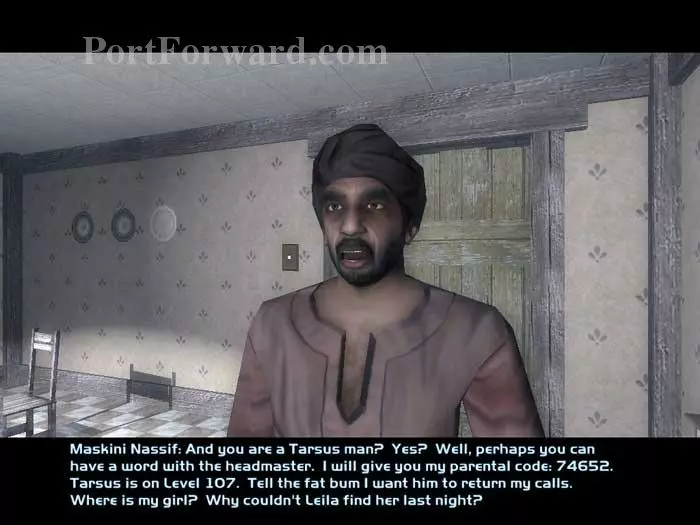
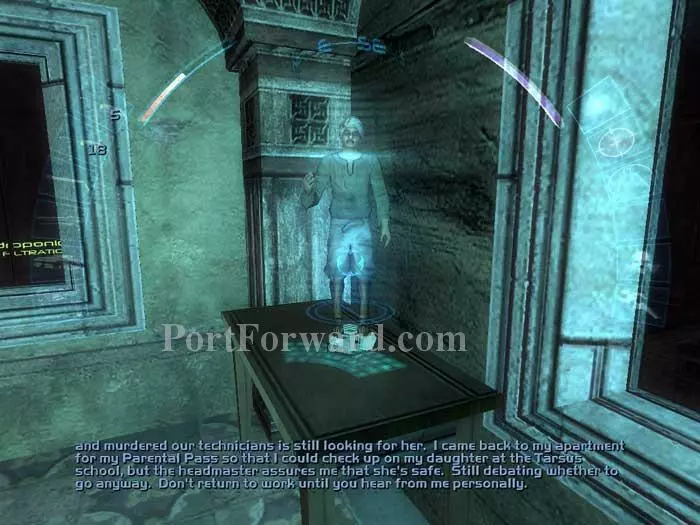
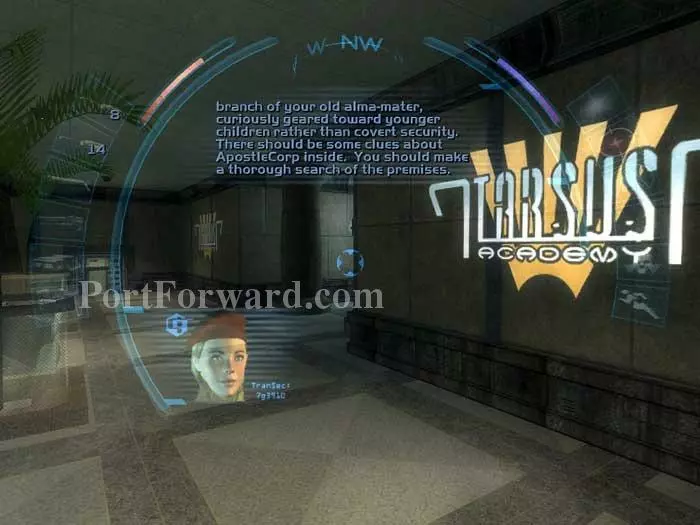
On the next level up, you'll find the unlocked Nassif residence. Talk to Maskini Nassif and he'll give you his parental code to Cairo Tarsus and a new goal: investigate Tarsus. Search the room for an energy cell and two ammo clips.
In the bedroom is this locked chest with a medkit and another Tarsus pass.
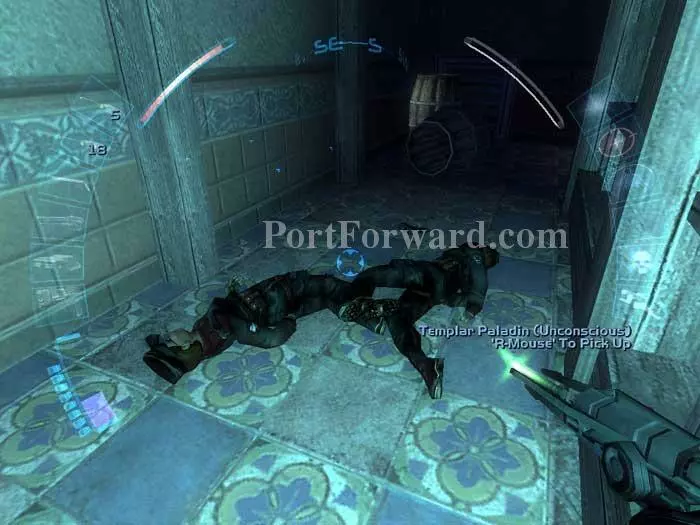
Return to the stairs and climb up to the next floor. Jostle the barrels seen in the background to get the attention of the Templars. Bring them down with your boltcaster when they emerge from their apartment.
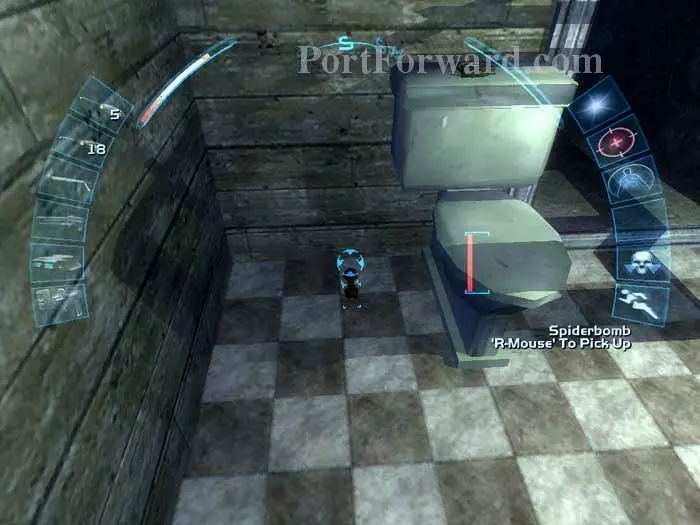
Pass through the vent behind the barrels. Destroy or disable the spider inside, and you'll emerge in this bathroom. (Be careful as another exit from the vent is a dead drop to the street below.) Note the spiderbomb and the medkit.
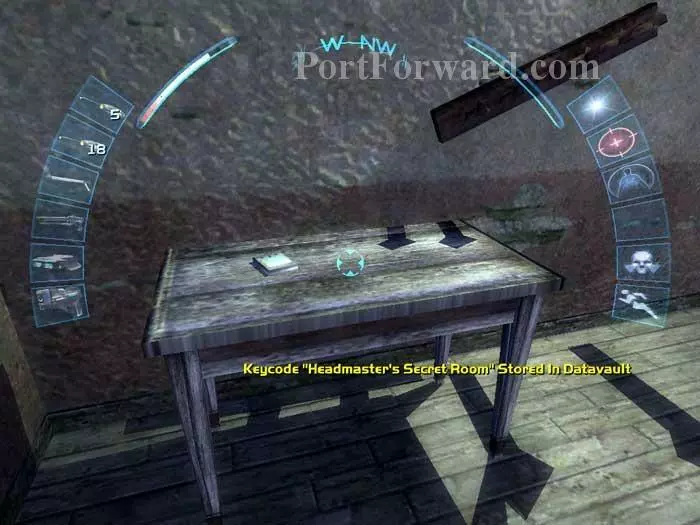
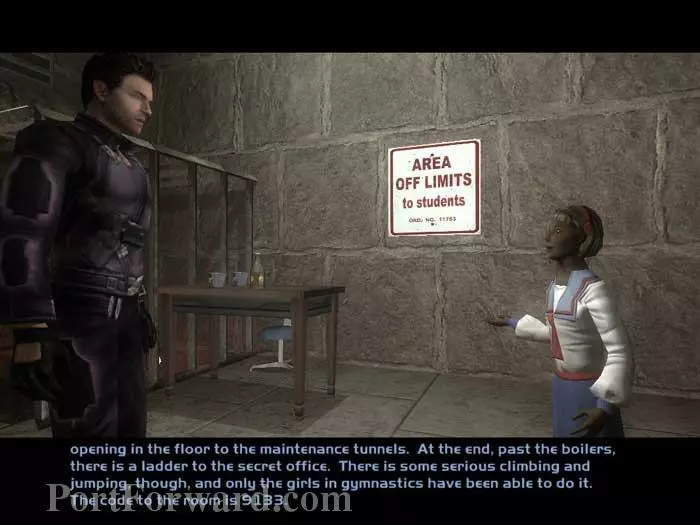
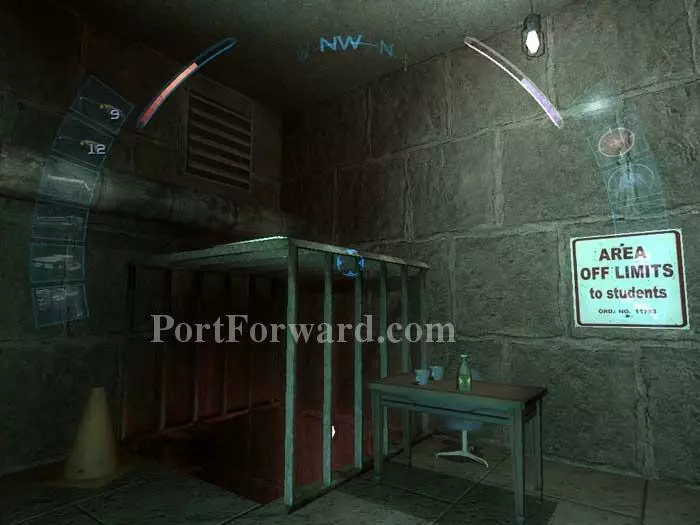
Read this datacube for the headmaster's secret room keycode.
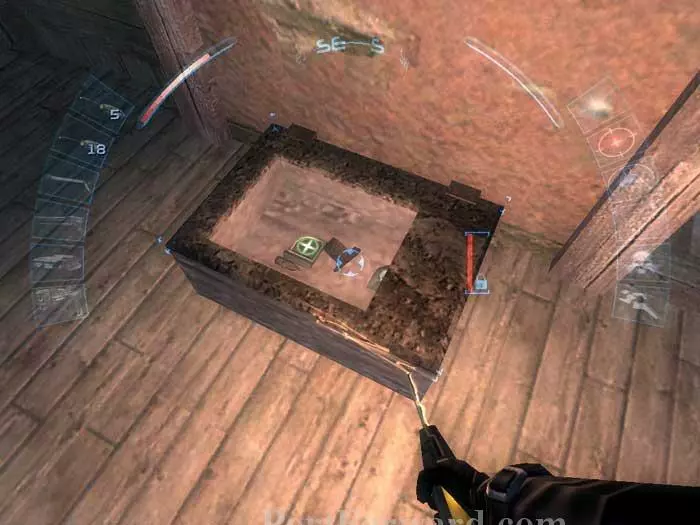
Open this chest for an energy cell, a medkit, and an ammo clip.
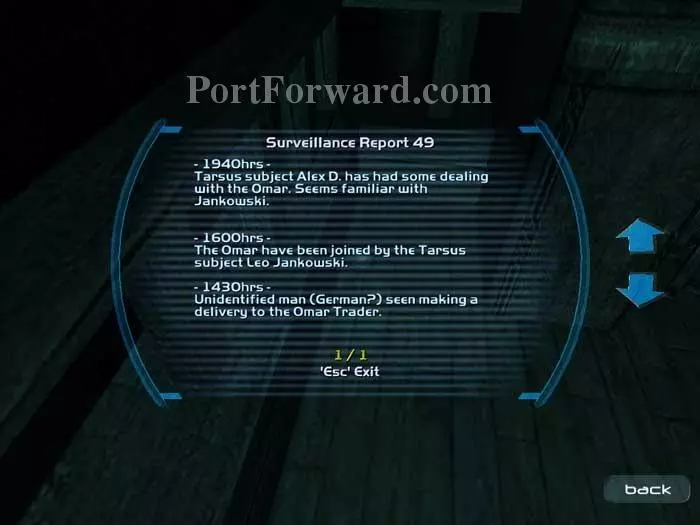
Head out to the balcony and read this datacube to learn that the Templars have been spying on Leo and the Omar. The adjoining room holds a sniper rifle, binoculars and an ammo clip.
View this holocomm message before leaving the apartment.
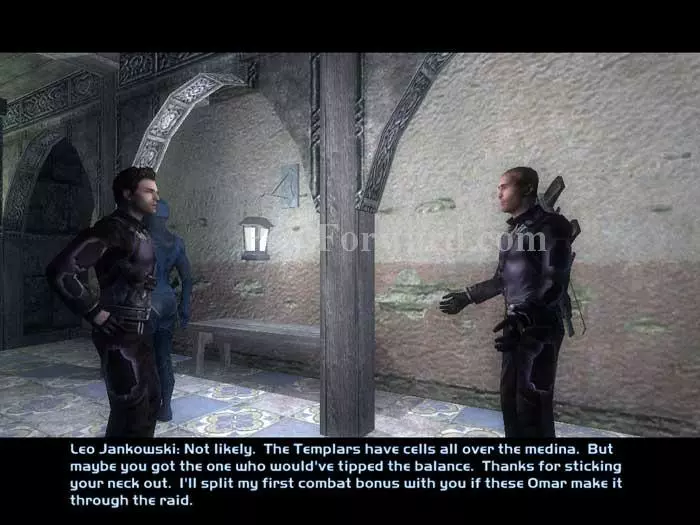
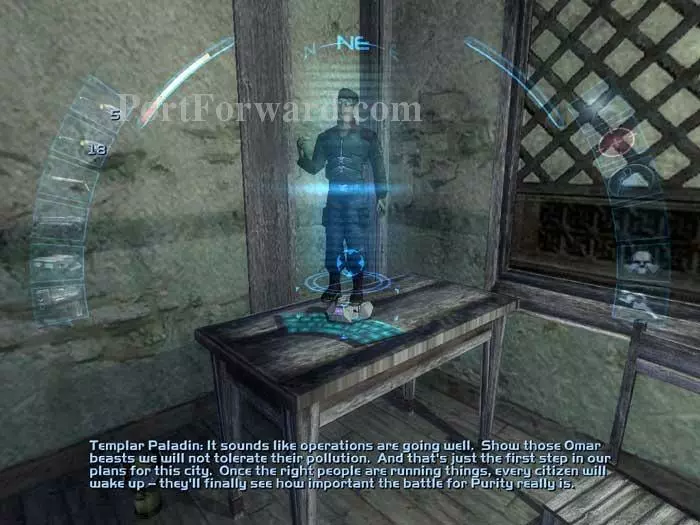
Return to Leo and tell him what you've learned. He offers to split his combat bonus if the Omar survive the impending raid.

Head over to The Order church.
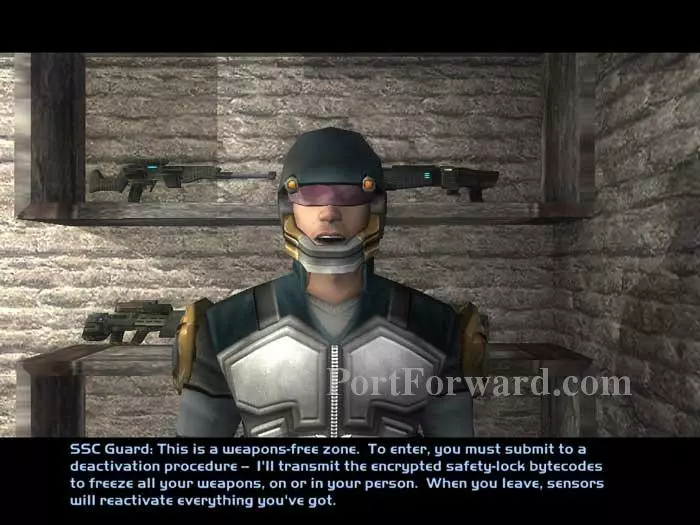
This is another weapons-free zone. Agree to the scan and enter the church.
Lin-May Chen offers this advice once you are inside. Head left.
Jump onto this barrel so you can reach the multitool visible on the beam. An energy cell is found in the basket beyond.
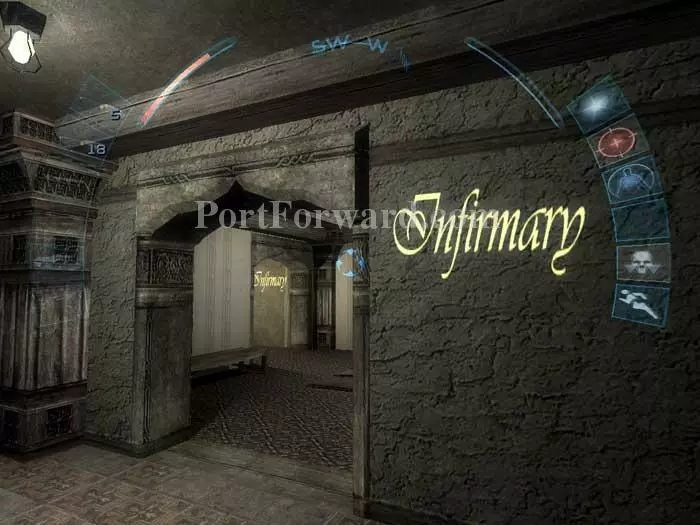
Head downstairs to the Infirmary.
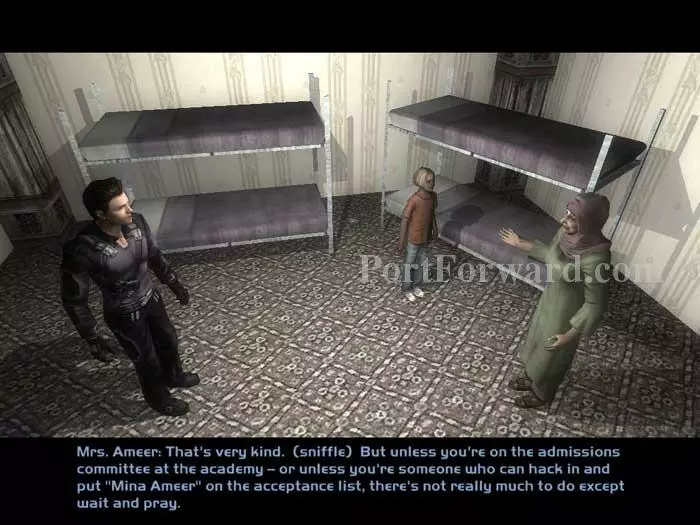
Speak with Mrs. Ameer to receive a new goal: Hack the Tarsus enrollment to accept her daughter. Spot the medkit in between the beds.
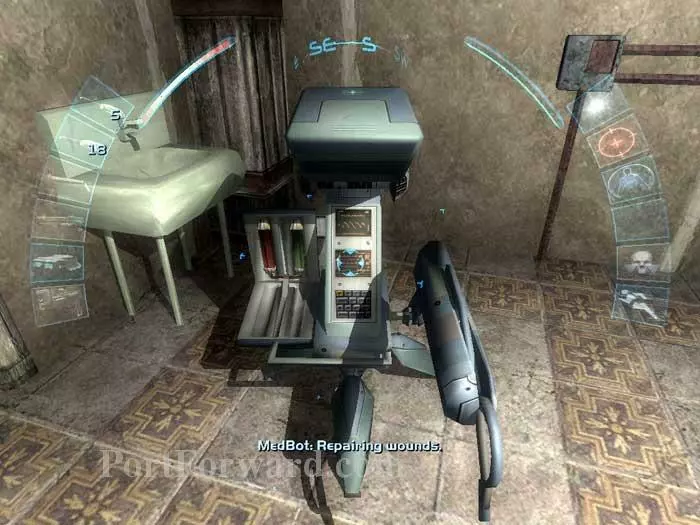
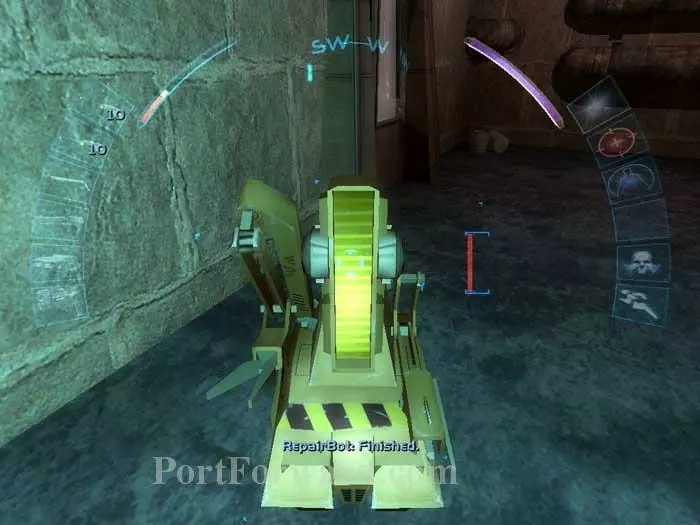
Heal your wounds at the infirmary's repairbot.
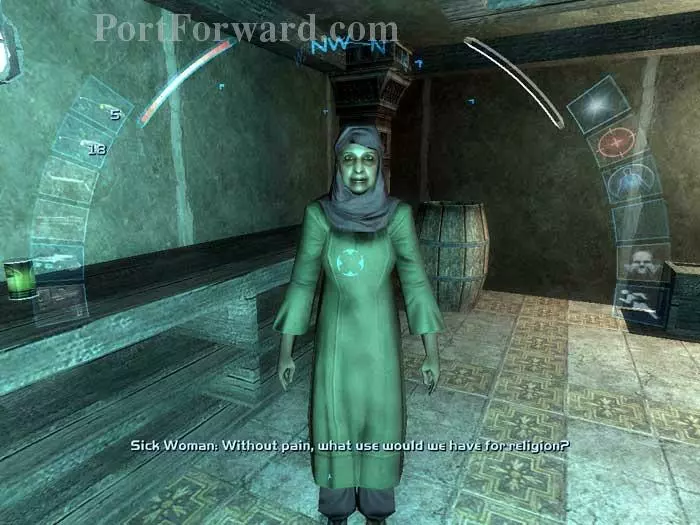
Talk with the infirmary's other patients, including this sick woman who asks an interesting question.
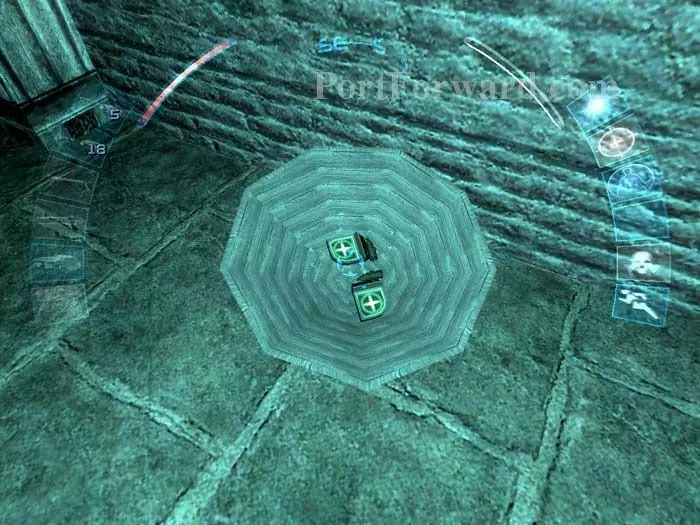
Head up the south stairs and you'll find two medkits in this basket.
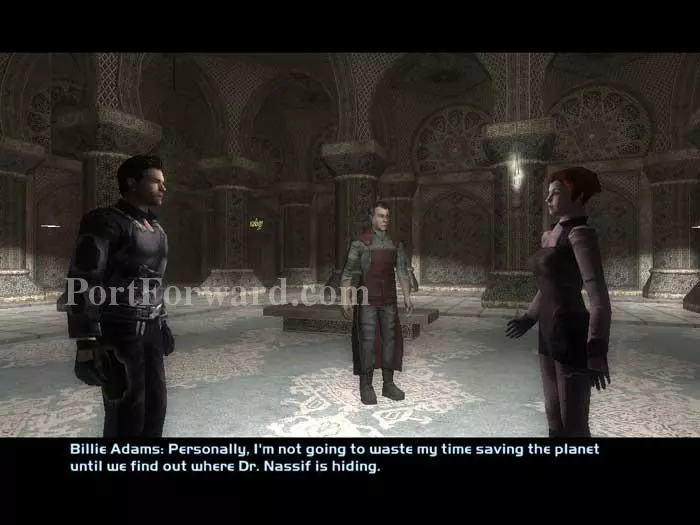
Pass through the large doors and you'll find Billie Adams here.
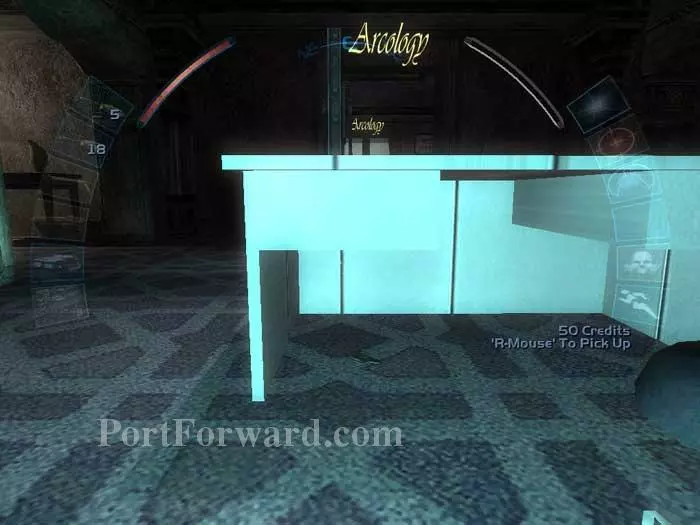
Grab the 50 credits from under this desk in the back room.
Upstairs you'll find Saman. Talk to him repeatedly to learn that he is planning a schism. The locked cabinet holds two energy cells, 100 credits, and a glass destabilizer. Binoculars are on the desk.
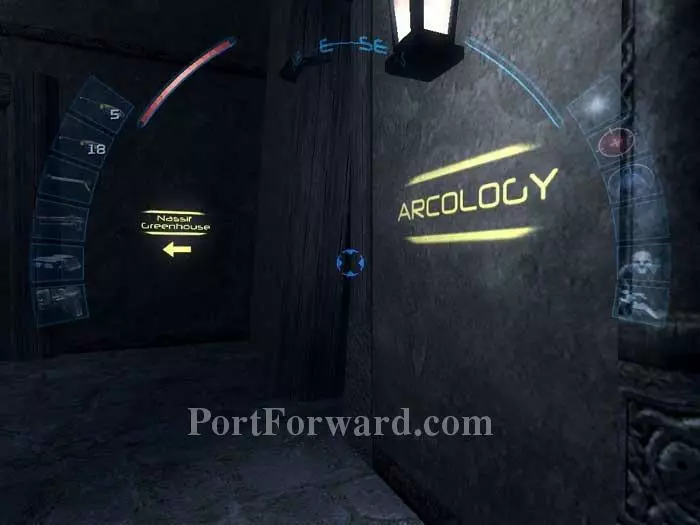
Exit the church and return to the south medina. Follow the Nassif Greenhouse signs.
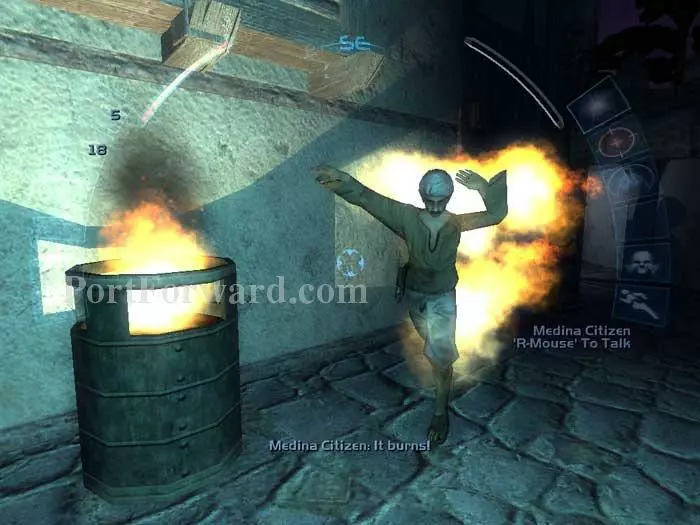
Along the way you'll encounter bandits. You can fight them or pay them off for 150 credits. They tend to catch themselves on fire.
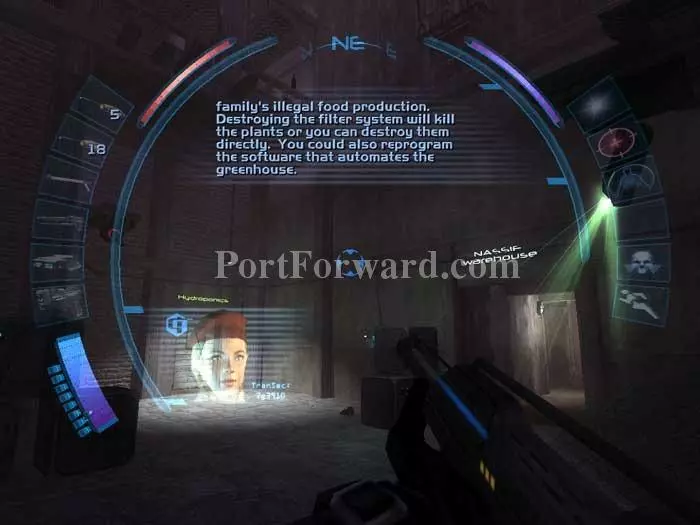
Upon entering the greenhouse, Donna Morgan advises that there are three ways to destroy the family's illegal food production: (1) Destroy the filter system. (2) Destroy the plants directly. (3) Reprogram the greenhouse software. Take out the security camera with your spy drone or the mag rail's EMP blast (alt-fire). Alternately, hack the security terminal visible straight ahead.
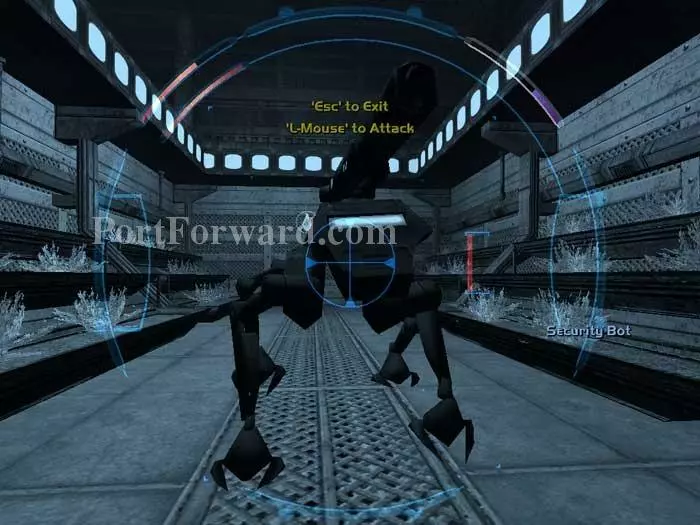
Enter the warehouse and take down the security bot with your method of choice. Note the spiderbomb on the crate to the right.

Climb these boxes or use your speed enhancement to jump to the indicated grate. Climb through for an SMG, two ammo clips and a baton (inset). Climb back down.
Two concussion grenades are along the east wall by an explosives crate. Climb this ladder to the north.
This holocomm has a message from Maskini Nassif.
If you can hack, you'll want to access this computer to the left.
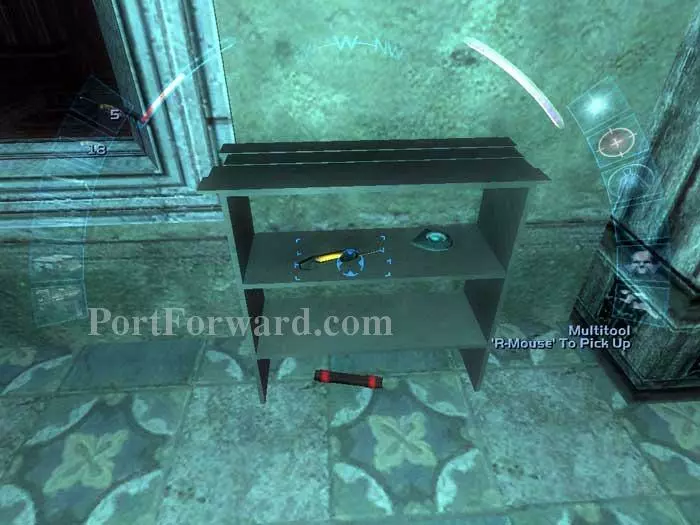
Across the room are these shelves with a multitool, an energy cell and a flare.
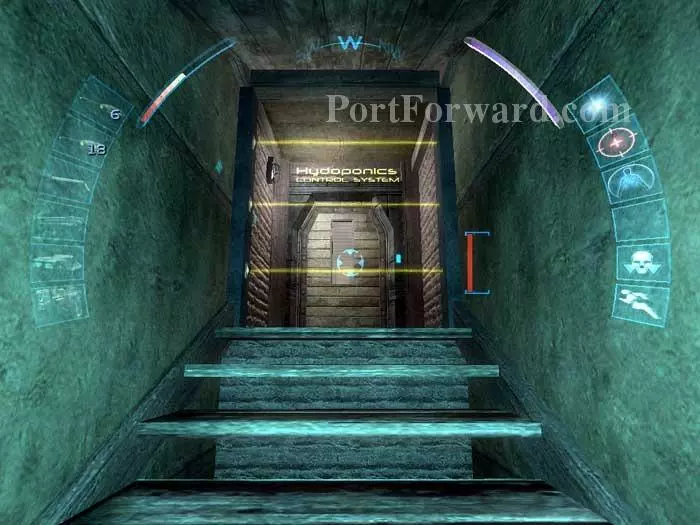
If you haven't already hacked these beams, disable them with an EMP blast before climbing the stairs to hydroponics control.
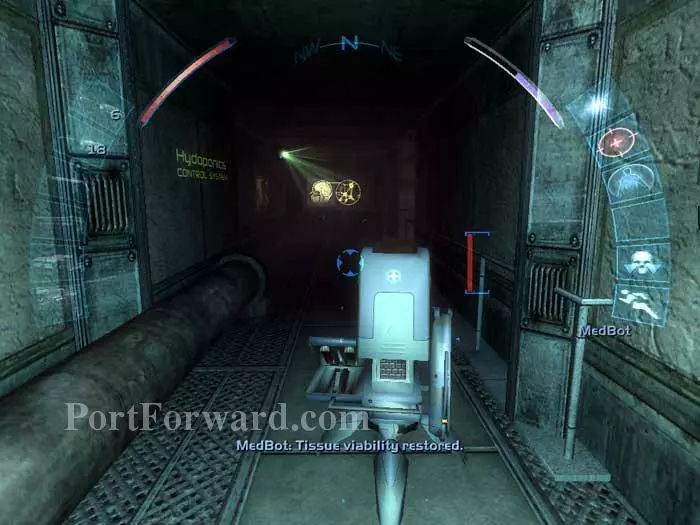
Heal at the medbot; disable the camera.
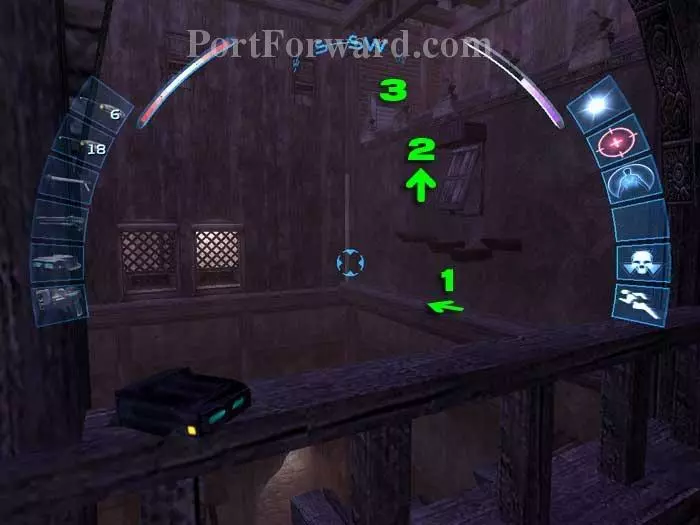
Head left to this balcony for a flashbomb, binoculars, and a nasty jumping puzzle. Climb over the railing and jump to the ledge on the right. Climb under the boards at (1), mantle above the window at (2) then onto the balcony above. Enter the grate at (3).

Here's your reward: the game's third secret weapon - the Hellfire Boltcaster. Also in here is an ammo clip, an ammo scavenger and a multitool.
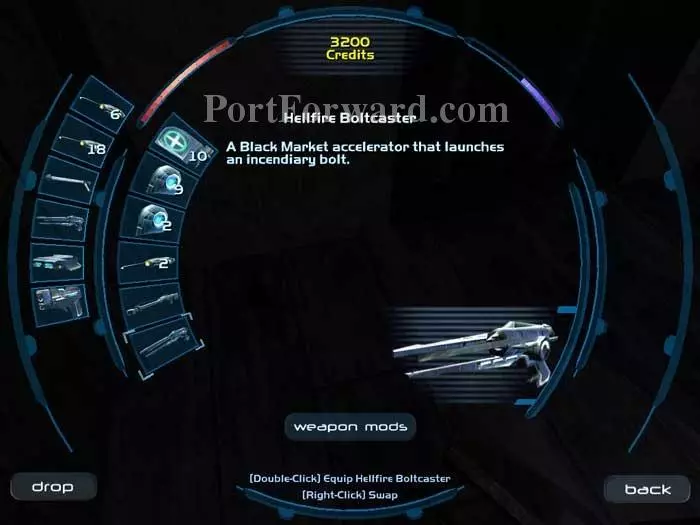
The Hellfire Boltcaster fires incendiary bolts rather than tranquilizers.
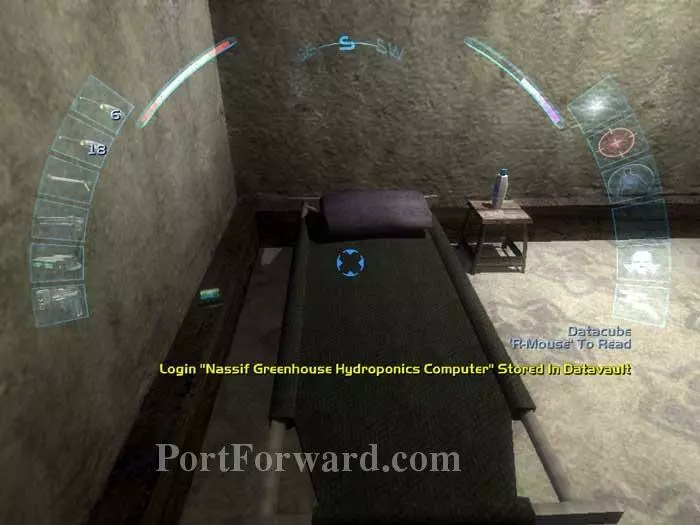
Backtrack to the balcony's neighboring room where you'll find an unlocked chest holding a sniper rifle and two ammo clips, an SMG atop a bookcase, and this datacube with the hydroponics login.
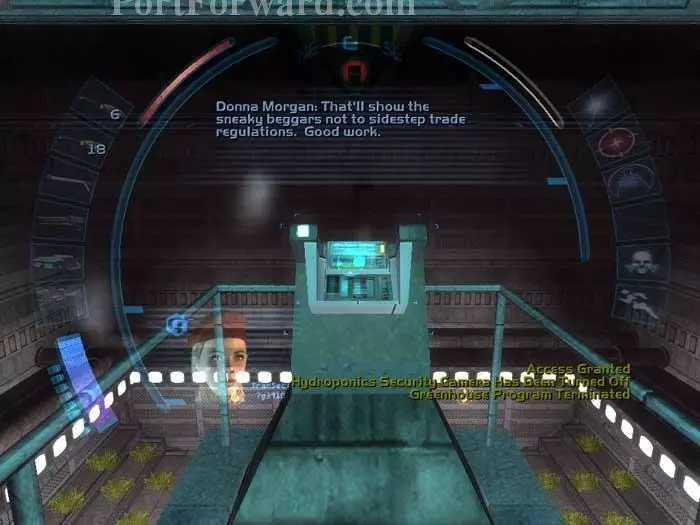
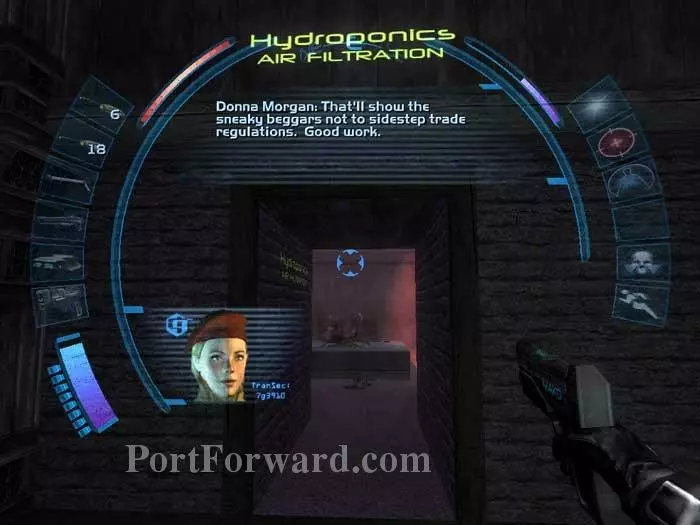
Continue to the hydroponics computer. If you don't have the ability to hack turrets you'll want to send your spy drone to disable that ceiling turret ahead. Use the hydroponics login to terminate the greenhouse program. Donna Morgan congratulates you on completing the goal of destroying the Nassif greenhouse.
Alternately, open this door with multitools or blast it open with an explosives crate. Place another explosives crate near the filtration unit then shoot the crate to destroy the greenhouse. This room holds a crowbar, an energy cell and a multitool as well.
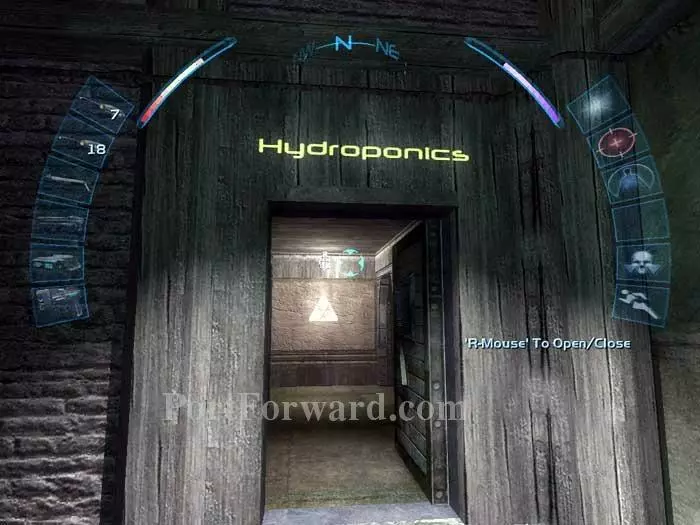
Backtrack to the greenhouse entrance and enter hydroponics.
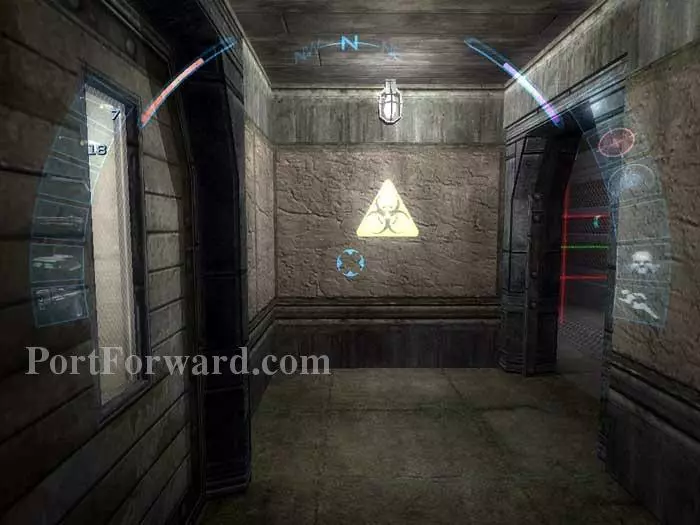
No need to disable the lasers on the right. Head through the door on the left and descend the stairs.
Disable or destroy the two spider bots on patrol. Grab the multitool from the cubbyhole on the right.
Continue to the the two hydroponics gardens. Destroy both security bots guarding the plants -- the spy drone works well.
An energy blade is atop the upper cabinet, which is locked and holds two energy cells. The unlocked lower cabinet holds a medkit.
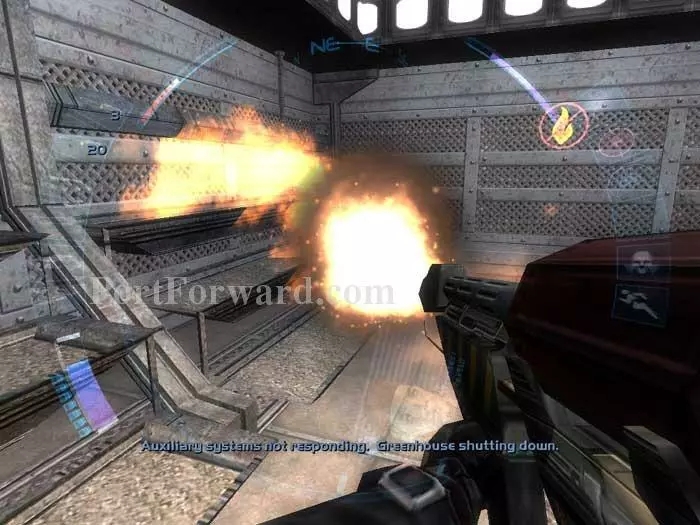
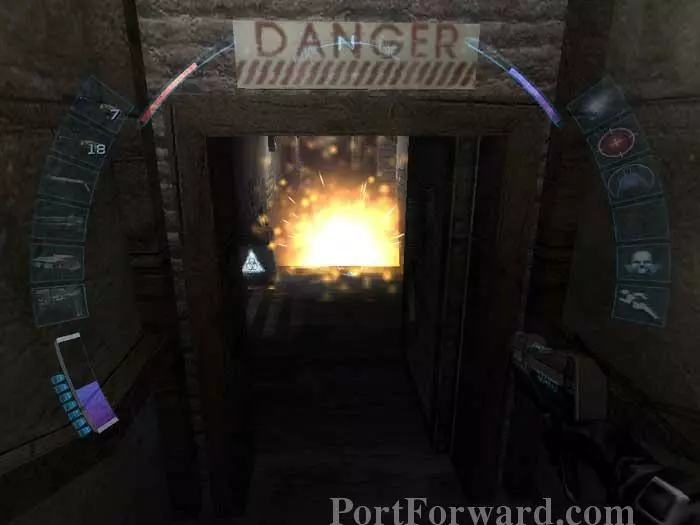
Note the "No Flame" signs on the walls. With a flamethrower (or the Hellfire Boltcaster) you can destroy the plants directly to complete the goal of destroying the greenhouse.
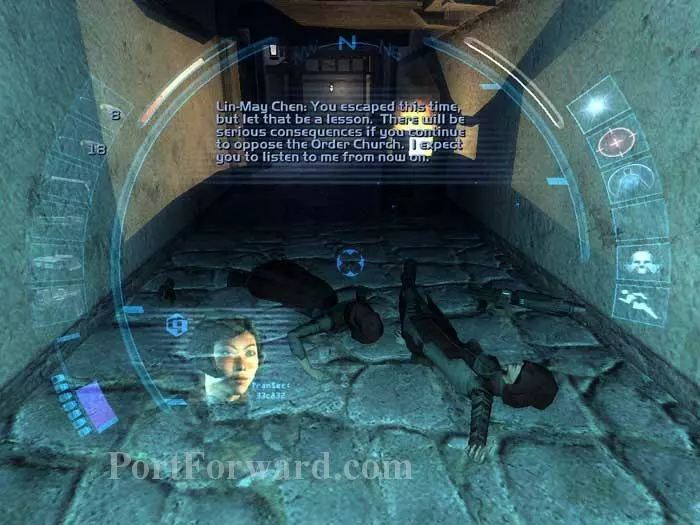
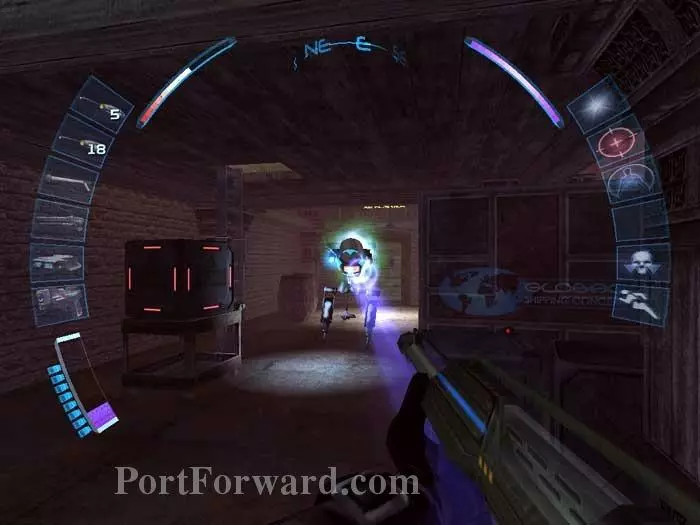
Lin May Chen is displeased. She sends two seekers to intercept you on your way back to the south medina. Scout ahead with your level 3 spy drone to take them out easily yet non-lethally.
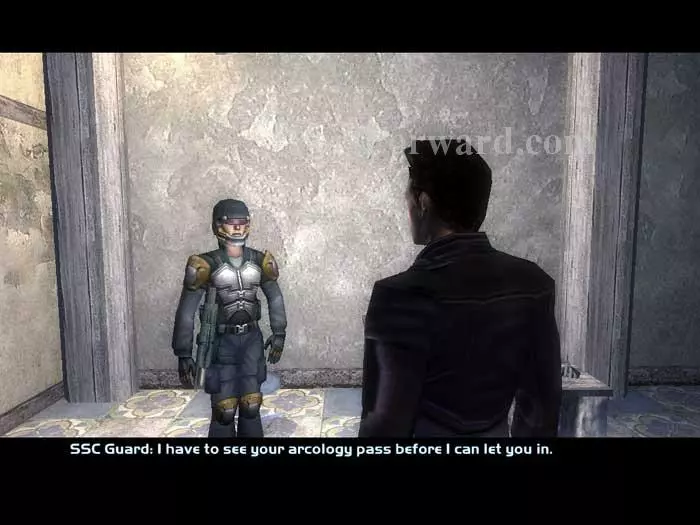
Follow the arcology signs to this guard. The nearby locker holds two concussion grenades and there is an ammo clip on his desk. Present your arcology pass (1) (2) to enter the arcology.

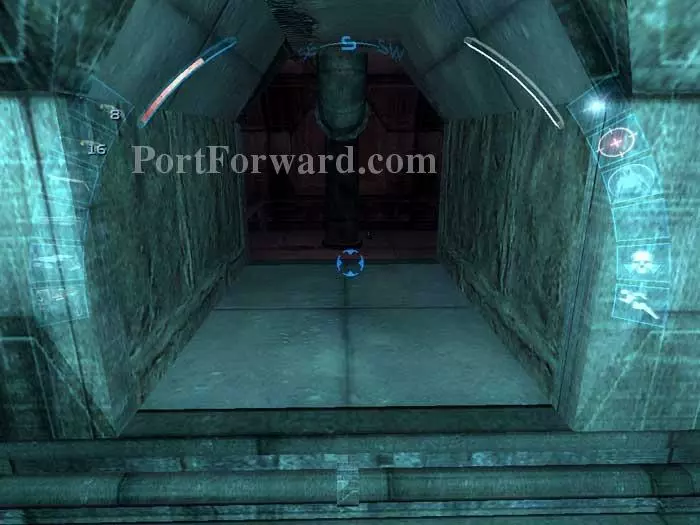
Follow the tunnel to this power box. Grab the 25 credits and read the datacube for a map. Multitools on the power box will stop the arcing, allowing safe entry to the adjoining tunnel.
Climb through here to another room. Inside you'll find a medkit, an energy cell, and an ammo clip.
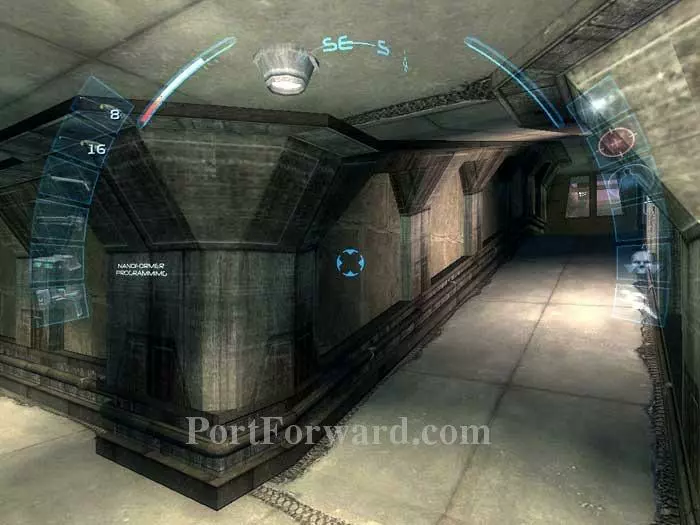
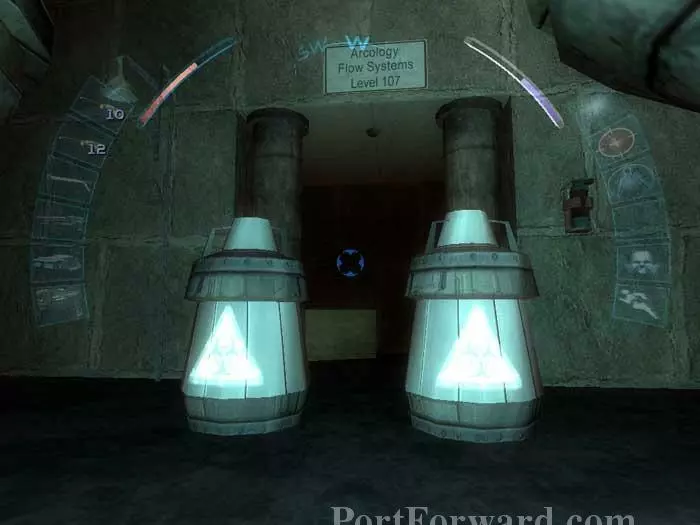
Return to the main tunnel. If you want, you can head to the left tunnel to nanoformer programming, but we'll be back later. For now, head up this ramp to the right and enter arcology levels 107-108.
Speak with the Templar recruiters and you have three dialogue options. Option (1) causes the Paladin to suggest you go to a clinic to be purified. Choose option (2) and the Paladin informs you that Templars will begin watching you and will be in touch once they've given you a security clearance. Option (3) results in the Paladin urging you to join the cause. Cloak and crack the safe behind him for the access to Archer's hidden office, a scrambler grenade and 100 credits.

Walk east to the Pequod's and talk with the manager. He'll offer you a new goal: bribe NG's manager. The safe behind him holds 100 credits and an increased range mod.
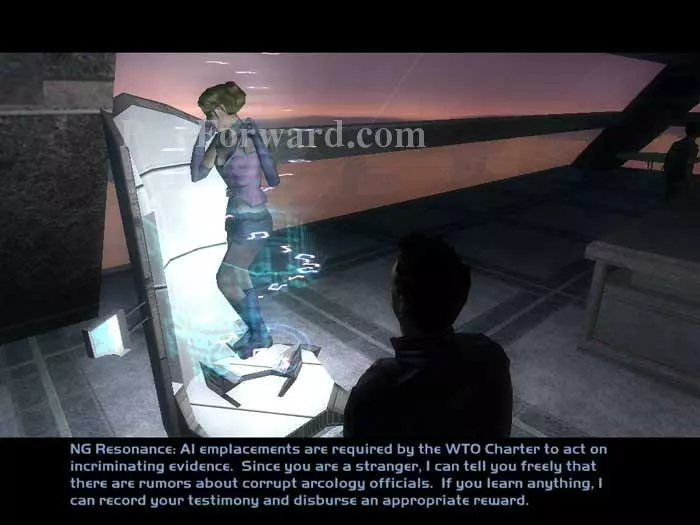
Talk to NG and receive another goal: find information.
Return west and ascend the stairs to Tarsus. Move the garbage can away from the grate visible on the left. Open the vent.
Send in your spy drone to disable these red lasers.
Climb through the vent, ignoring this shaft on the right (it leads to the SSC guard station). Instead, follow the shaft on the left.
Peek through the grate and spy on the Templars to complete the goal and receive a new one.
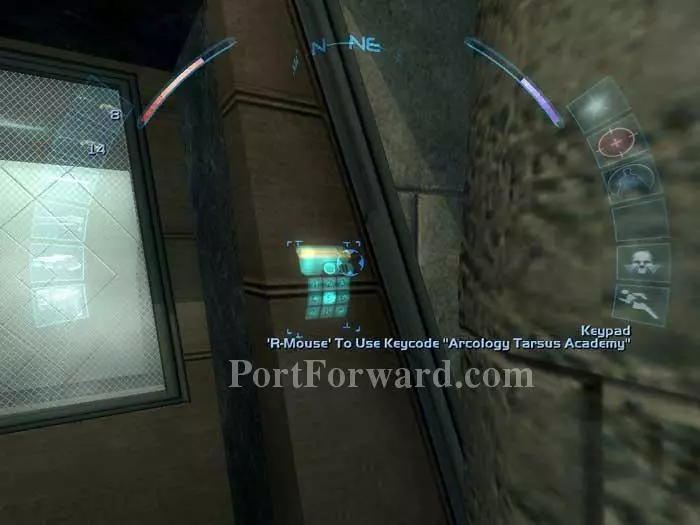
Exit the vent and use your Tarsus keycode (1) (2) to enter the elevator to the academy.
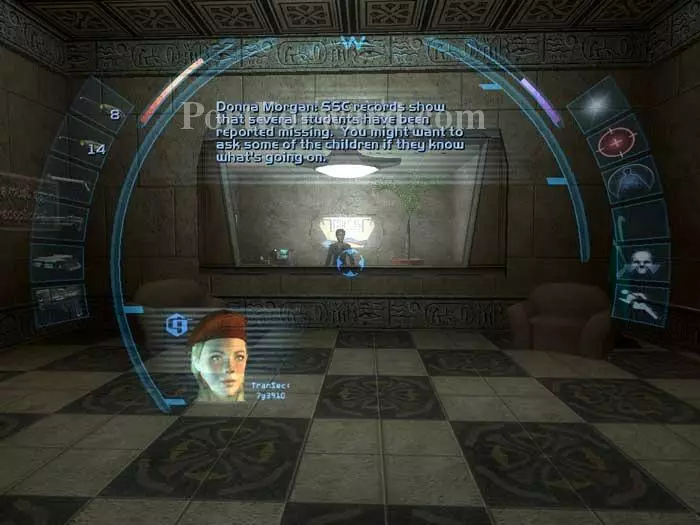
Approach the receptionist. Donna Morgan of the WTO gives you a new goal: find the missing students.
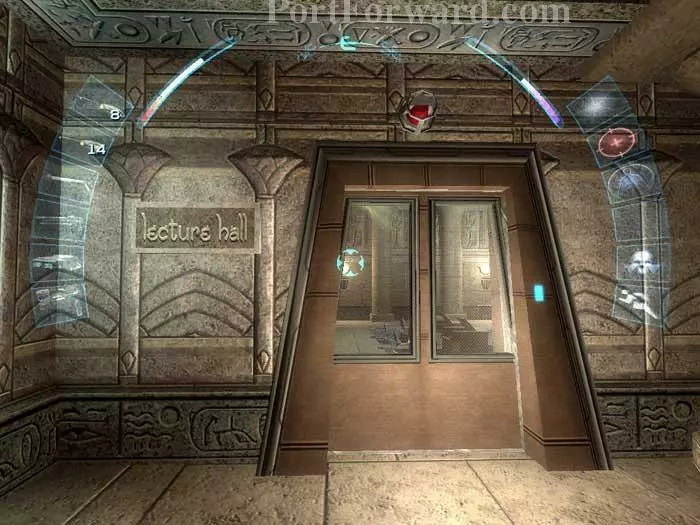
Speak with the receptionist then enter this lecture hall on the left.

Speak with the two students and their teacher.
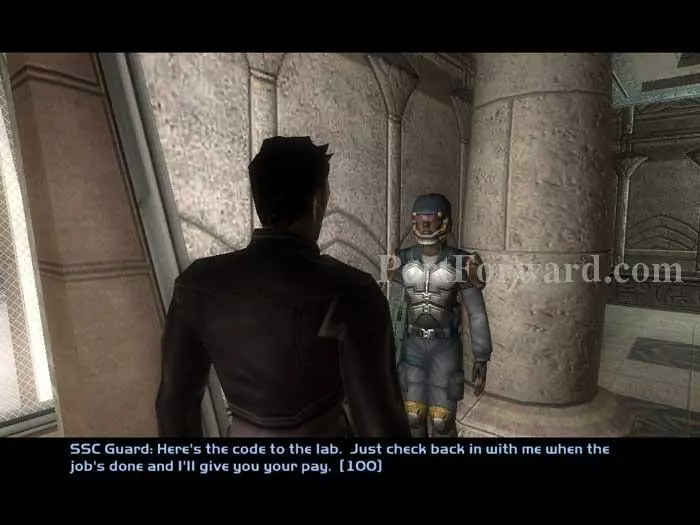
Continue up the hallway to the nanotech lab. Speak with the SSC guard to get a new goal: kill the greasel infestation.
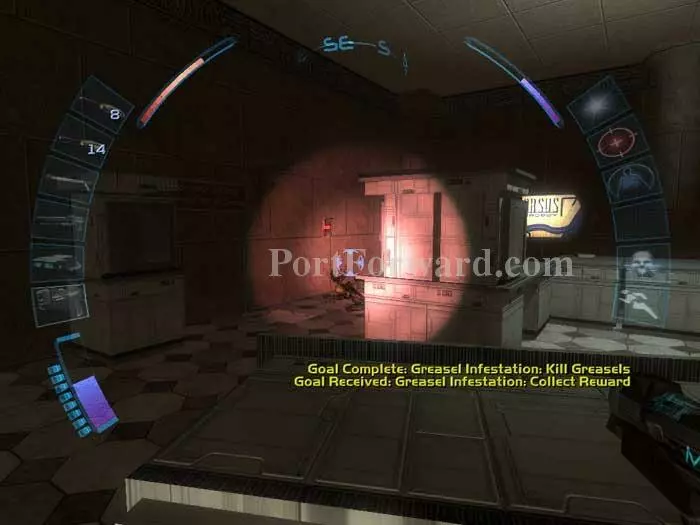
Enter the lab and take out the two greasels with your method of choice. Not surprisingly, I found the Red Greasel Hunter to be best suited for the job. Return to the guard and collect your 100 credits.
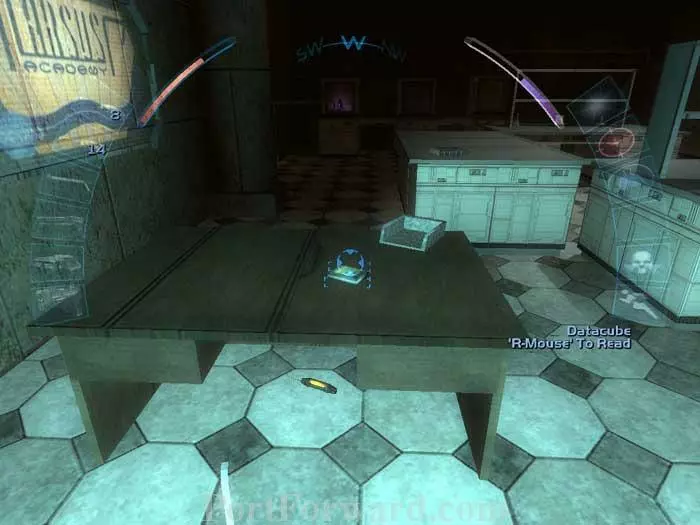
This datacube has some background on the red greasels. Don't miss this multitool under the desk.
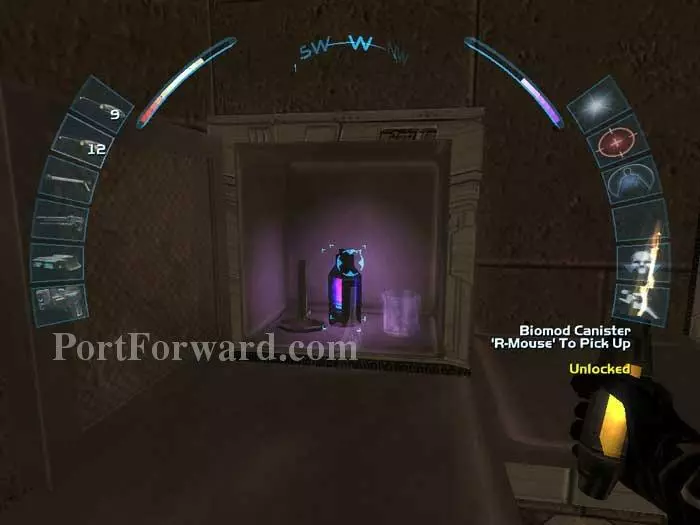
Search the surrounding cabinets for a medkit, an energy cell, and this biomod canister.
Here I use the canister to upgrade speed enhancement to level 2.

Climb down this vent to the left. Be careful, it's a long drop.
You'll enter in this room, where the missing girls are hiding. Talk with Eeva Nassif to learn that they suspect the headmaster of wrongdoing and she'll direct you to his secret office.
Begin by descending through this opening in the floor. Alternately, you could begin through the vent above, but you will lose out on a multitool and have to fight spider bots.
Crouch-jump over the steam and ignore the first ladder. Grab the multitool just visible to the left.
Ignore the ladder on the right and proceed to the steam pipes ahead.
Descend the ladder and you'll find a medkit and an energy cell on a box behind these barrels.
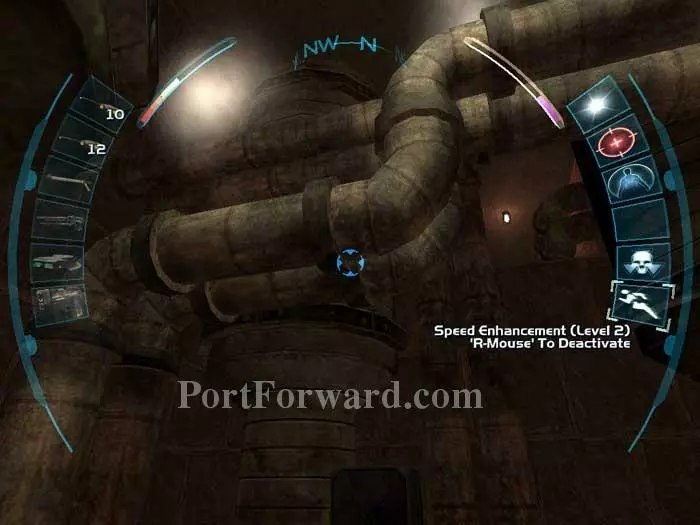
If you'd rather fight the spider bots than do a jumping puzzle, backtrack up the ladders to the ventilation shafts. Otherwise, activate your speed enhancement and jump onto the pipes to advance through the opening seen above. Avoid the hot steam.
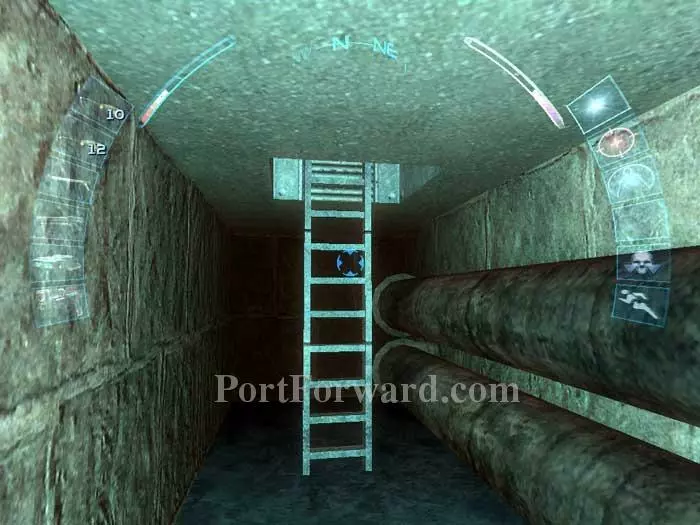
Climb this ladder into the ventilation shafts.
You'll find Archer's secret office just beyond this grate. Be careful of the spiders in the vents behind you. Send in your spy drone to disable that camera ahead.
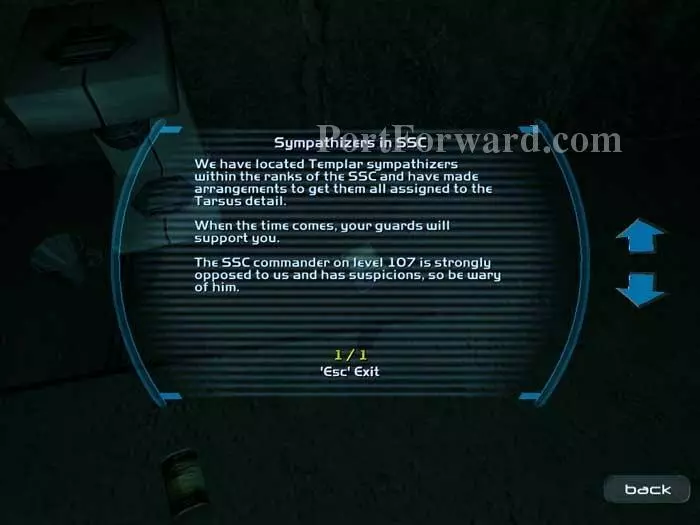
Search the area for ammo clips, the soft key to this room and a datacube with this message indicating that the SSC regulars are Templar supporters, but their commander is not.
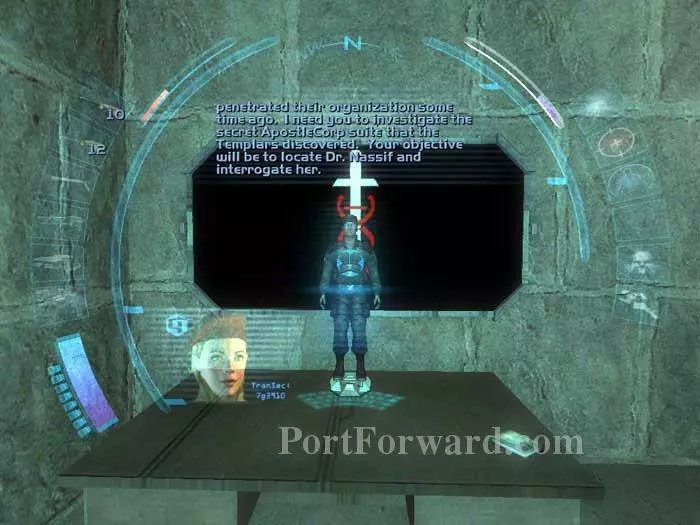
View this holocomm to obtain the ApostleCorp facility keycode and complete the goal of investigating Tarsus. You receive a new goal: interrogate Dr. Nassif. The datacube on the right reveals that Archer was planning to kill the students.
Use multitools (or hack the computer seen on the right) to access this safe. Inside are two ammo clips and a fragmentary round.
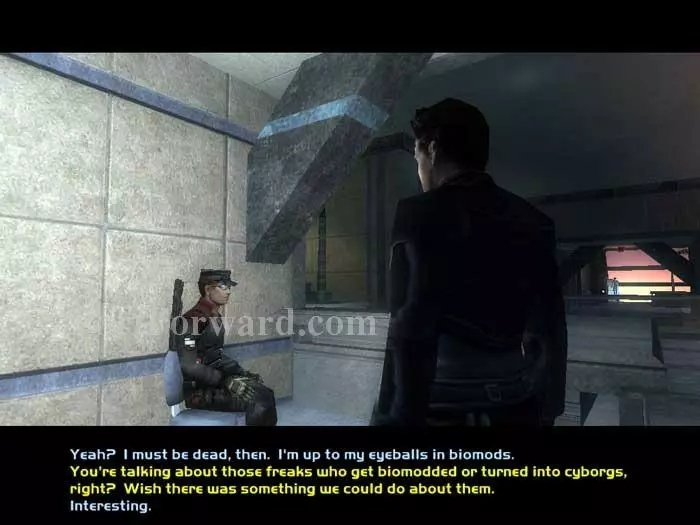
Continue to the neighboring room where you can recharge at this repair bot. A spiderbomb is by the door ahead. img(220261); Pass through the door and quietly make your way down this ladder. img(220262); Three Templars patrol below. Your spy drone brings them down non-lethally. img(220263); Search the area for supplies, including two multitools, two EMP prox mines, gas grenades, an EMP grenade, and this chest with two ammo clips and an SMG. img(220264); Backtrack up the ladder then continue up these stairs. img(220265); Activate the switch at the top to exit through this secret doorway. img(220266); Speak with Silas Archer and you have these two dialogue options. Option (1) results in a fight with the guards. Option (2) allows you to continue peacefully -- and get Silas lawfully. img(220267); You could hack the computer ahead to open the safe to the right, or use multitools. The only thing inside is a single medkit. img(220268); Exit through this doorway and follow the corridor north to the receptionist's area. img(220269); The receptionist's back is to you -- don't talk to her and keep it that way. If you can hack, this computer will allow you to approve the application for Mrs. Ameer's daughter. (She rewards you with a whopping 5 credits.) Ammo is on the nearby shelf. img(220270); Exit Tarsus and return to NG. She instructs you to report your findings to the SSC office on level 108. img(220271); Proceed up this ramp. img(220272); Continue up the next ramp to level 108, bypassing the Order church and Arcology Air to arrive at this SSC guard station. img(220273); Choose dialogue option (1) to receive your reward of 300 credits. img(220274); The locker behind the guard holds a Mag Rail and a spider bomb. The room beyond the gold lasers holds a black market biomod canister. The easiest thing to do is to back off and send in your spy drone, disabling the security camera, the gold lasers, and knocking the guard unconscious all in one EMP blast. img(220275); You'll find the biomod canister here. img(220276); Exit the guard station and proceed to Arcology Air. img(220277); Step off the elevator and NG's manager is straight ahead. Time to choose sides in the coffee wars. img(220278); The Pequod's manager has promised you a biomod canister -- a very good deal. img(220279); The Queequeg's manager will reward you with a choice of an ammo scavenger, a frag rounds mod or a glass destabilizer. img(220280); My vote goes to Pequod's. I use the biomod canister to upgrade Speed Enhancement to level 3. img(220281); Back at Arcology Air you'll find this mother-daughter pair discussing terrorism and the government's lax response. Binoculars are on the table to the right. img(220282); There's a medkit on this cart. img(220283); Head down this ramp to level 110, hopping behind that desk ahead for a multitool and a stun prod. img(220284); Speak with this WTO tax auditor to pick up a new goal: search hangar 24. img(220285); Approach the reception agent and tell her you have a friend in common. She'll give you the flight bay 24 door code. The ATM in the background can be hacked for 150 credits -- just don't get caught. img(220286); Proceed to the hallways behind the reception desk and head toward bay 24. img(220287); Before you make it to the hangar you'll find this vent on the right. Slip through. img(220288); Continue up this ladder. img(220289); You'll find an energy cell here. img(220290); There's 50 credits on this desk. img(220291); Below is flight bay 23, where Sid Black would drop you off. img(220292); The locked locker on the right holds a refire rate mode. The unlocked locker on the left holds the bay 24 safe code. img(220293); Head back down the ladder and you'll find this multitool directly across the hall. img(220294); Activate your cloak and use the keycode the receptionist gave you to enter the hangar. img(220295); The Omar asks you to locate the power-assault armor schematic. You've just completed his goal to enter flight bay 24. img(220296); Send in your spy drone to bring down the military bot and the two Templar Paladin's patrolling the area. img(220297); A third Paladin is in that overlook. Still cloaked, climb the ladder in the right corner. img(220298); Your biotox attack drone allows you to bring down the Paladin non-lethally while still cloaked. The area holds binoculars, an EMP grenade, a sniper rifle and ammo clips. img(220299); View this holocomm to receive the storage room code and update your goals. Note the baton behind the holocomm. img(220300); Return down the ladder and you'll find this sniper rifle and ammo clip atop these crates. Approach that chest upper-right. img(220301); Inside the chest is a scrambler prox mine, an EMP prox mine, and the schematic that the Omar wants. Grab the multitool behind the machine to the right. img(220302); Use your storage room code to proceed through here. Fill up on health first, or activate your hazard drone if you have one installed. img(220303); The area is contaminated so move fast. Use your safe code on this safe, dead ahead. Inside are two medkits, an energy cell, and a datacube with the molecular spec for the counter-nanites and the login and keycode for the arcology nanoformer bay. img(220304); Return to the flight bay 23 overlook to confront the chairman. Options (1) and (3) get you an explanation that the counter nanites have not been fully tested, but option (1) also gets you 750 credits. Option (2) gets you nothing. img(220305); Head back down the ladder and follow the corridor to bay 23. img(220306); Recharge at the repairbot. img(220307); Another multitool is behind this machine. img(220308); Continue through these doors in the northwest corner. img(220309); Inside this locked chest you'll find scrambler and EMP prox mines. img(220310); Back at the reception desk, the tax auditor will reward you with 200 credits if you respond with dialogue option (1) seen here. img(220311); Next stop: ApostleCorp. Enter through the corporate suites entrance with your ApostleCorp keycode. An ATM to the left can be hacked for 150 credits. img(220312); Klara Sparks is waiting for you inside. She'll give you a biomod canister as reward for securing the mag rail plans at Mako Ballistics. img(220313); Klara opens the door beyond and starts shooting. Send in your biotox attack drone to help her. Keep an eye on her health as it is possible for the Templars to kill her at this point. img(220314); Here I install the biomod canister and upgrade biotox attack drone to level 2. Search the area for ammunition. img(220315); Hack the computer on the left to lower the red beams ahead, or wait quietly for the Paladin to approach and send in your spy drone to take out both the lasers and the Paladin in one EMP blast. img(220316); Sneak through this grate or enter the same room through this door (inset). Inside are two Paladins. img(220317); Drop the Paladins with your method of choice and search the room for a concussion grenade and ammo clips. img(220318); One more Paladin awaits inside this conference room. He'll drop a flamethrower and there's a spiderbomb on the table. img(220319); Hop over this couch to the adjoining room. img(220320); Talk to the security chief inside. Use option (1) and he'll offer you the keycode to the nanoformer bot bay -- but you already have that. Use option (2) and he'll brag about his biomods. img(220321); If you kill the security chief, return to Harvester to collect 300 credits. Note that you will have to kill the chief to collect -- knocking him unconscious will complete the goal but you will not be paid. img(220322); Return to the hallway. Ignore the beams. Instead, proceed down the ramp to the right. img(220323); More Templars are through this door. Fill up on health and energy, then cloak and activate your biotox attack drone before entering. img(220324); It is extremely cool to walk around invisible while your attack drone knocks everyone unconscious -- just remember to keep an eye on your energy level. img(220325); View this holocomm next to a concussion prox mine for some background. img(220326); Search the area for supplies, including an EMP grenade, a boltcaster, a silencer, and this multitool. img(220327); Climb onto these boxes and mantle over the railing above. img(220328); Search the area for supplies, including ammo clips, a spider bomb, a sniper rifle, a shotgun, and this energy blade. Through the doorway ahead are the lasers we bypassed earlier. img(220329); Drop below and continue through the doors to the laboratory suite. img(220330); Continue down these stairs as Lin May Chen urges you to kill Dr. Nassif. img(220331); Send in your spy drone to take out two security bots and one camera. img(220332); Alternately, hack this security computer. img(220333); Grab the standard biomod canister from this locked cabinet. img(220334); Here I install the canister and upgrade biotox attack drone to level 3. You should be feeling very powerful by now. img(220335); Around the corner is this locked cabinet with another mag rail. img(220336); Search the area downstairs for an EMP grenade and a medkit. Don't waste your multitools on this cabinet -- all that is inside is a lone spider bomb. img(220337); Approach Dr. Nassif and she reveals that you are a clone of JC Denton and that you must hire a pilot to take you to ApostleCorp's last remaining facility in Trier, Germany. img(220338); You have a choice to make: support The Order by killing Dr. Nassif, or support the WTO by interrogating her. If you want to kill her, you'll have to fight Klara Sparks. If you interrogate her, you'll learn of a teleportation gate that can lead you to JC Denton. Talk to Dr. Nassif repeatedly to learn of the Dentons' plans to provide biomodification to the masses. img(220339); Return to level 107. Ava Johnson tells you that she is waiting for you at the landing pad outside the arcology. Tell NG Resonance what you've learned about the arcology chairman and collect a reward of 300 credits. Talk to NG again and tell her that her manager takes bribes and earn another 200 credits. img(220340); Return down this ramp to the maintenance tunnels below. img(220341); Proceed down the tunnel to nanoformer programming that we bypassed earlier. If you chose dialogue option (1) with the security chief, he'll offer you the code to enter. Otherwise, you can use the code you obtained from the hangar safe. img(220342); Login to this computer to enable the counter nanite distribution and clean Cairo's air of the nanite infestation. Watch the bots leave through the window ahead. Very cool. Grab the energy cell visible above the computer. A locked locker behind you holds another energy cell and a refire rate weapon mod. img(220343); Next stop: the apartments in the north medina. Return to Leo Jankowski. If you support the Omar, choose option (1) and tell Leo the truth of what you learned when you spied on the Templars. img(220344); Talk to the Omar Trader. The schematic analysis reveals a weak spot in the power-assault armor. img(220345); Exit the zone to simulate the passage of time. (A quick trip to the south medina will do.) Return to Leo Jankowski. If you told him the truth, he has defeated the Templars and rewards you with 400 credits. If you lied, the Omar trader is killed and you receive nothing. img(220346); Time to choose a pilot again. Ava is free and waiting for you at the south medina landing pad. img(220347); Alternately, you can hire Sid Black at the Pequod's in the arcology. img(220348); Activate this beacon in flight bay 23 to have Sid fly you to Trier.
More Deus Ex: Invisible War Walkthroughs
This Deus Ex: Invisible War walkthrough is divided into 11 total pages.


