Hitman: Contracts Walkthrough 4 - Beldingford Manor

September 12, 2016 (Last Updated: ) | Reading Time: 3 minutes

This Hitman: Contracts walkthrough is divided into 13 total pages.

You can jump to nearby pages of the game using the links above.

4 - Beldingford Manor

Hitman: Contracts Walkthrough - Hitman Contracts 58

Your first location that you should go. But first, ...

Hitman: Contracts Walkthrough - Hitman Contracts 59

Wait for them. They will start patrolling this area after a few seconds.

Hitman: Contracts Walkthrough - Hitman Contracts 60

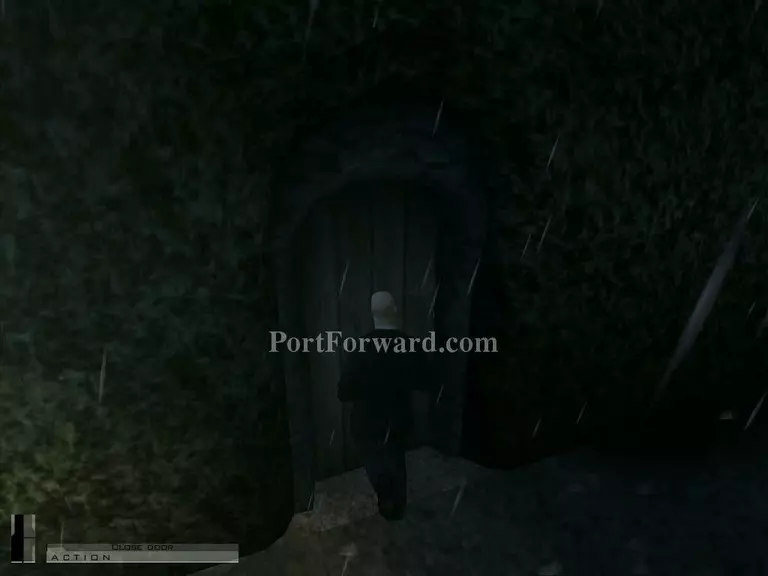
Open the door to the garden maze and make your way to the "!" location.

Hitman: Contracts Walkthrough - Hitman Contracts 61

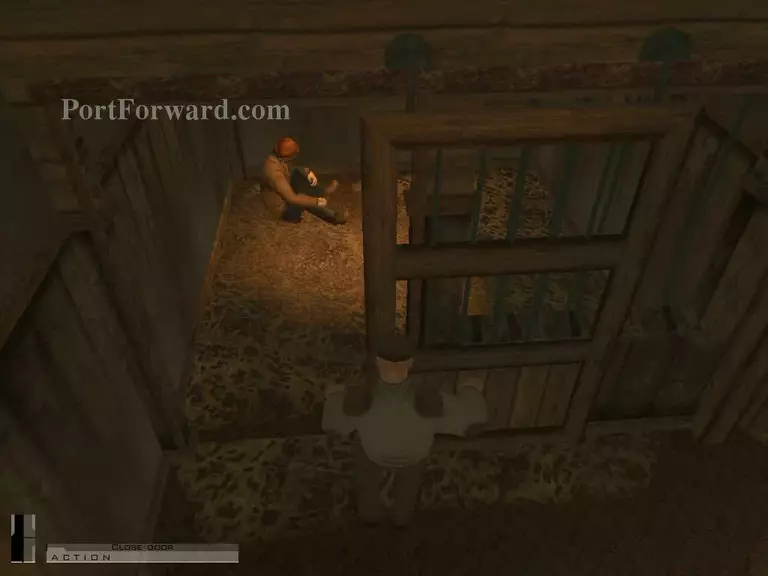
Again, wait for a guard that will come down here.

Hitman: Contracts Walkthrough - Hitman Contracts 62

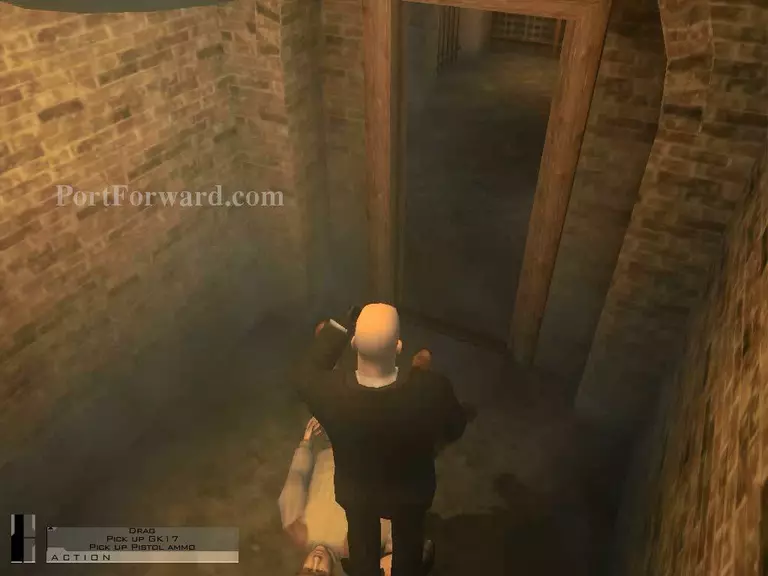
Kill him, take his clothes and hide his body.

Hitman: Contracts Walkthrough - Hitman Contracts 63

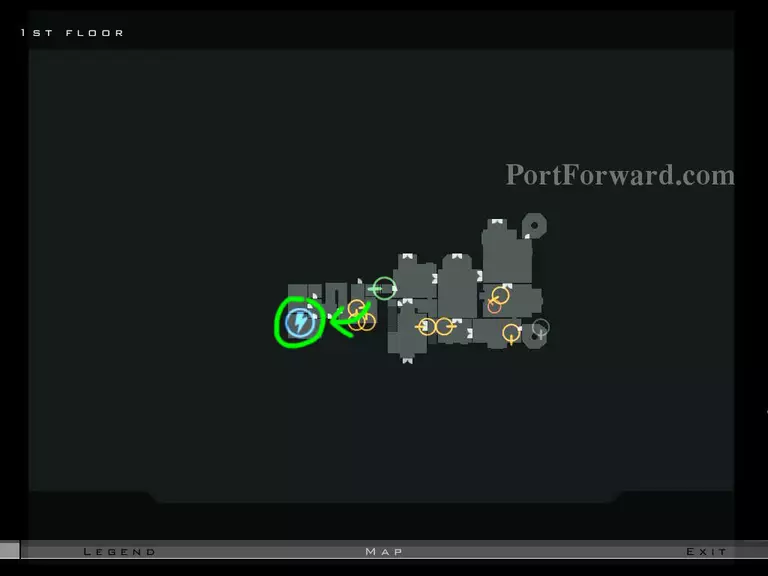
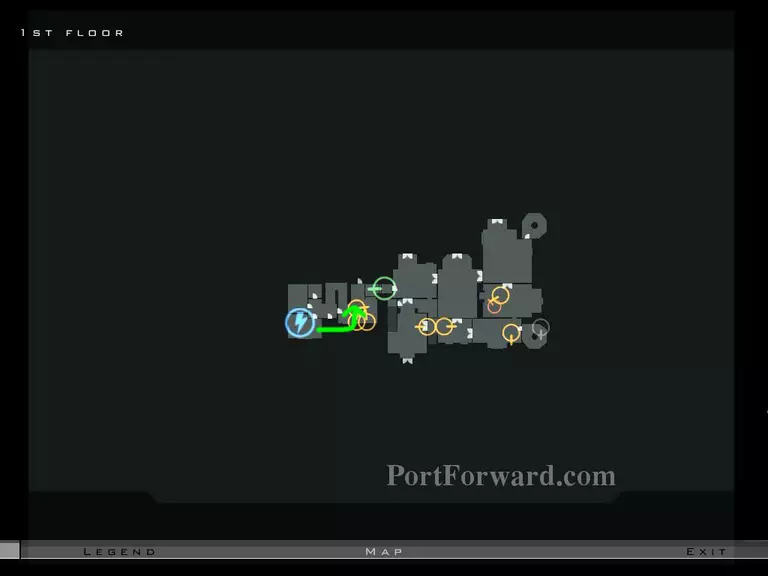
Go to the power generator room.

Hitman: Contracts Walkthrough - Hitman Contracts 64

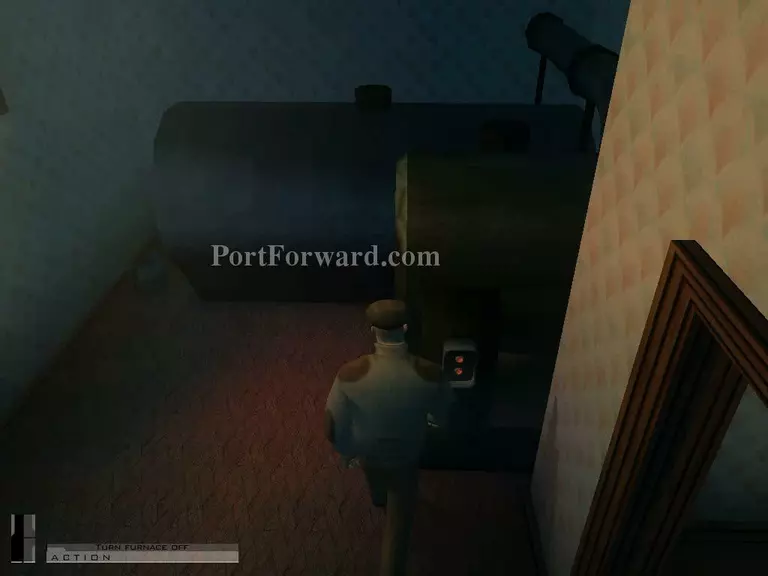
Turn off the furnace off.

Hitman: Contracts Walkthrough - Hitman Contracts 65

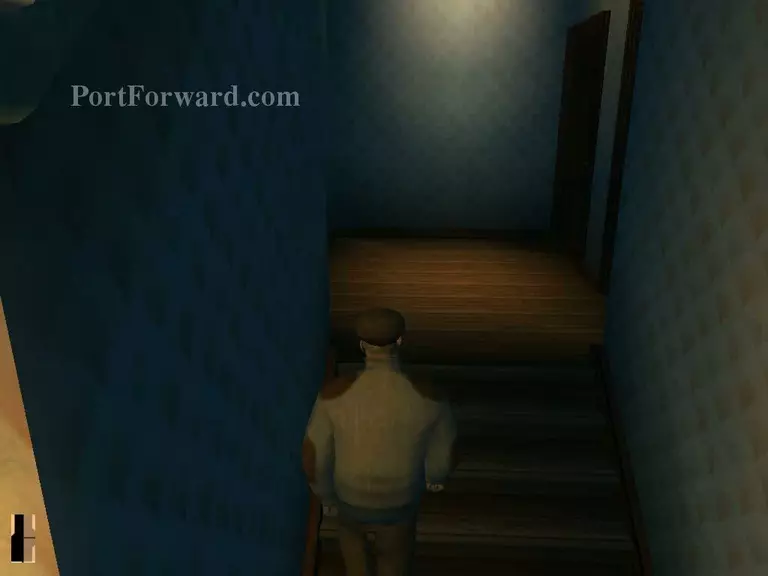
Go to the second floor through the nearest stairs.

Hitman: Contracts Walkthrough - Hitman Contracts 66

Enter the room second from right to take a poison. Then, enter the room first from left to continue.

Hitman: Contracts Walkthrough - Hitman Contracts 67

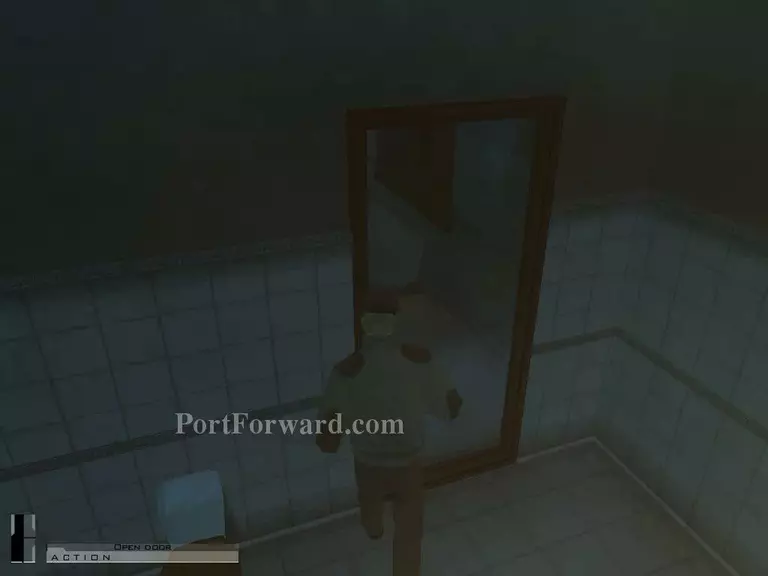
This mirror can be opened as a door.

Hitman: Contracts Walkthrough - Hitman Contracts 68

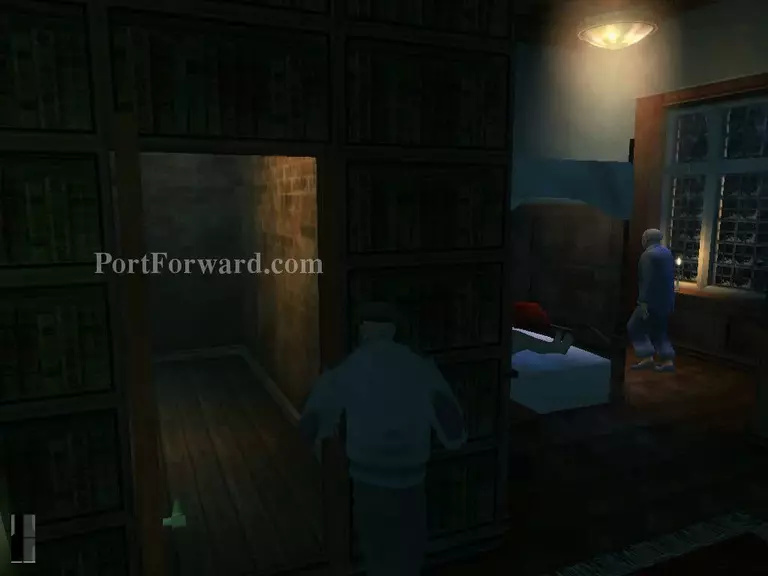
Wait until the target fall asleep. Make sure you wait for another extra seconds after he lie down on his bed.

Hitman: Contracts Walkthrough - Hitman Contracts 69

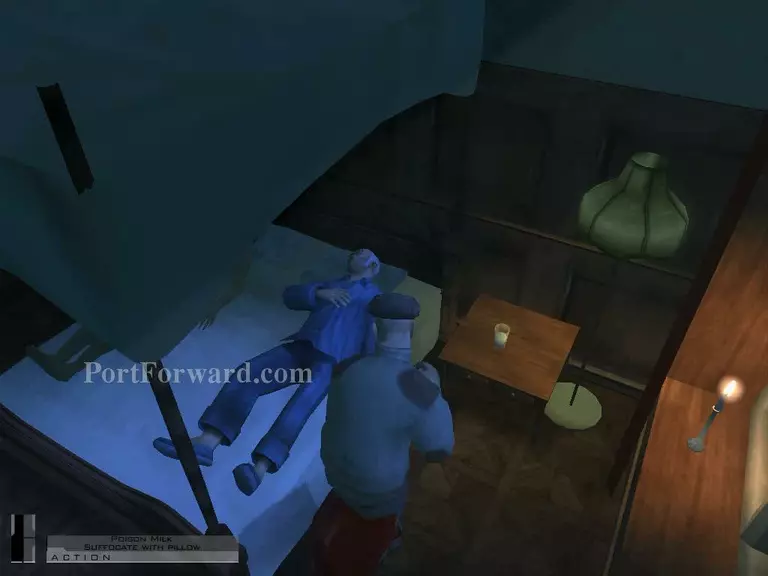
Put the poison inside the milk.

Hitman: Contracts Walkthrough - Hitman Contracts 70

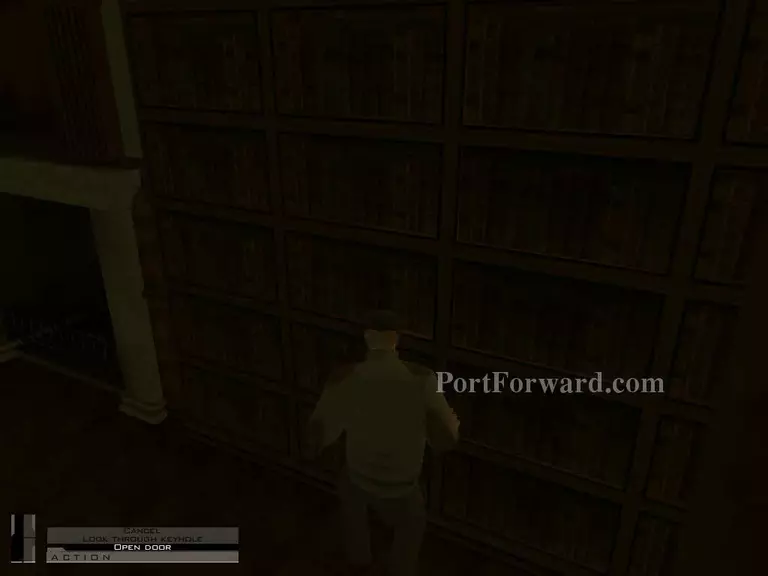
Get out from the room, and go to the bookshelf. There's a secret door.

Hitman: Contracts Walkthrough - Hitman Contracts 71

This is it. (Secret door)

Hitman: Contracts Walkthrough - Hitman Contracts 72

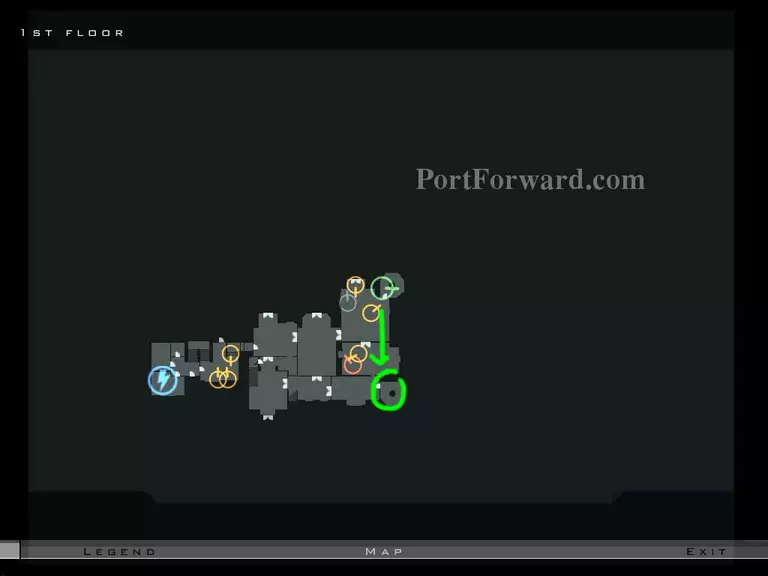
Go to another stairs.

Hitman: Contracts Walkthrough - Hitman Contracts 73

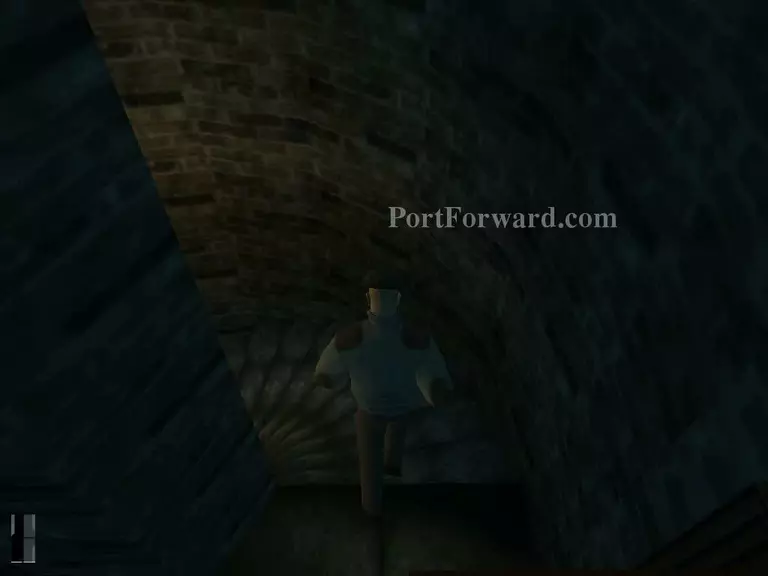
Go down to the wine section.

Hitman: Contracts Walkthrough - Hitman Contracts 74

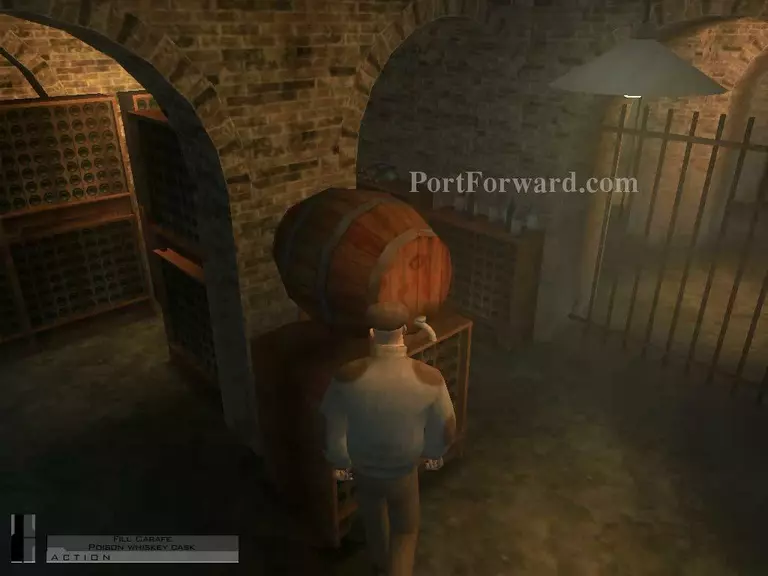
Poison the wine then get out.

Hitman: Contracts Walkthrough - Hitman Contracts 75

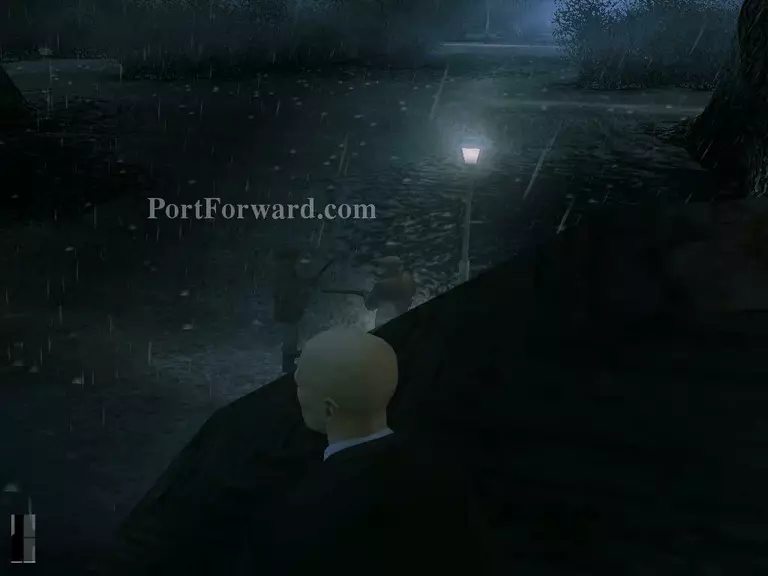
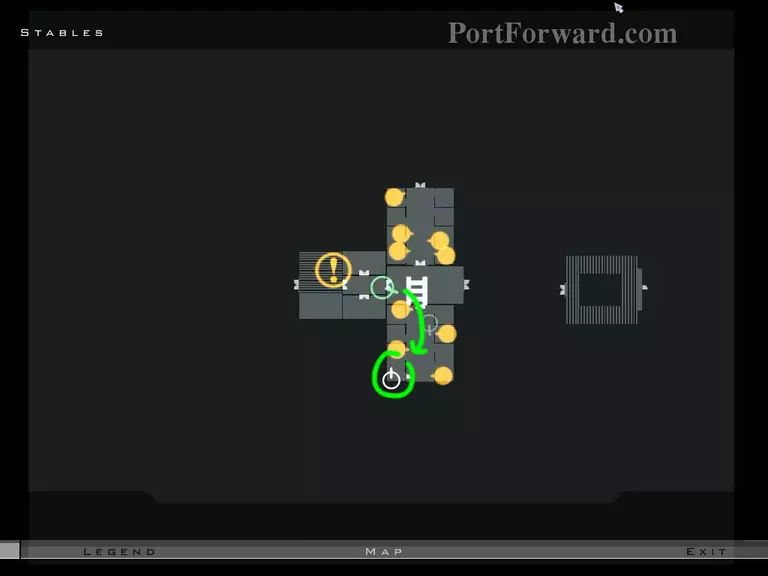
Get out from this mansion and go to behind the stable. *Don't let sniper see you because sometimes he shoot you without any reason.

Hitman: Contracts Walkthrough - Hitman Contracts 76

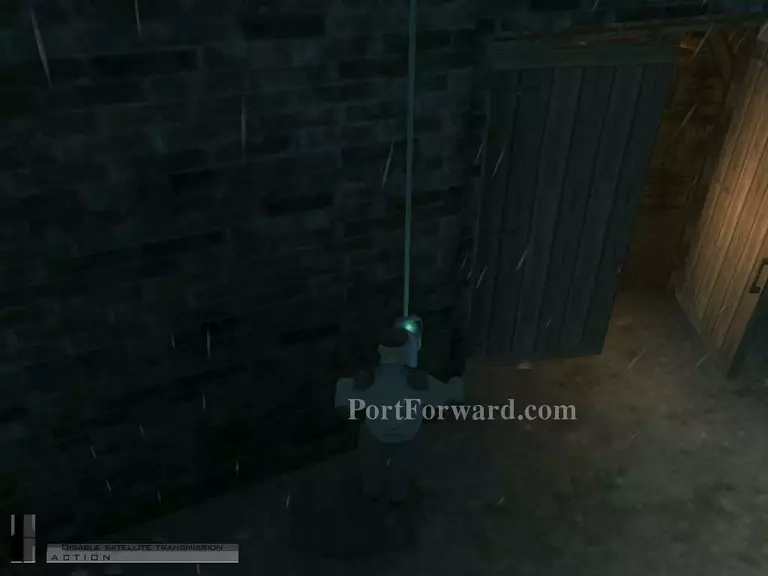
Disable the satellite transmission.

Hitman: Contracts Walkthrough - Hitman Contracts 77

When the guards get out take the key inside that room.

Hitman: Contracts Walkthrough - Hitman Contracts 78

Wait for all of them to get out.

Hitman: Contracts Walkthrough - Hitman Contracts 79

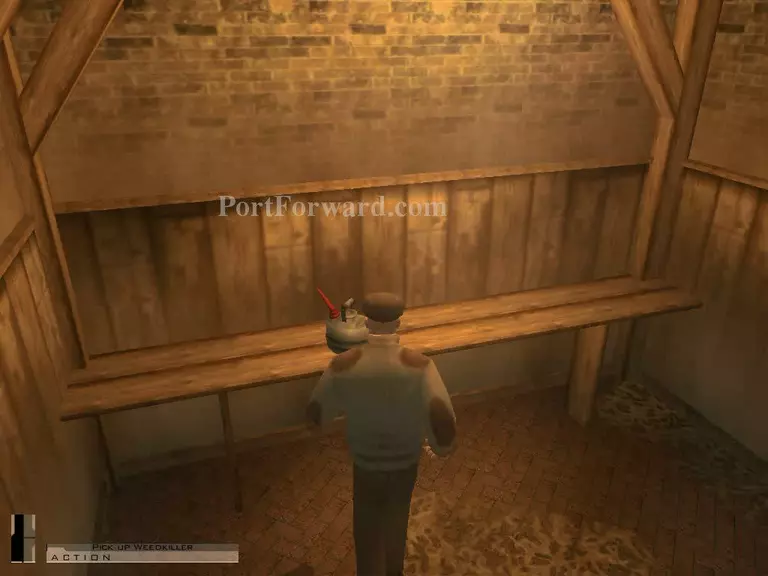
Grab a weedkiller from the opposite room of the guard's room.

Hitman: Contracts Walkthrough - Hitman Contracts 80

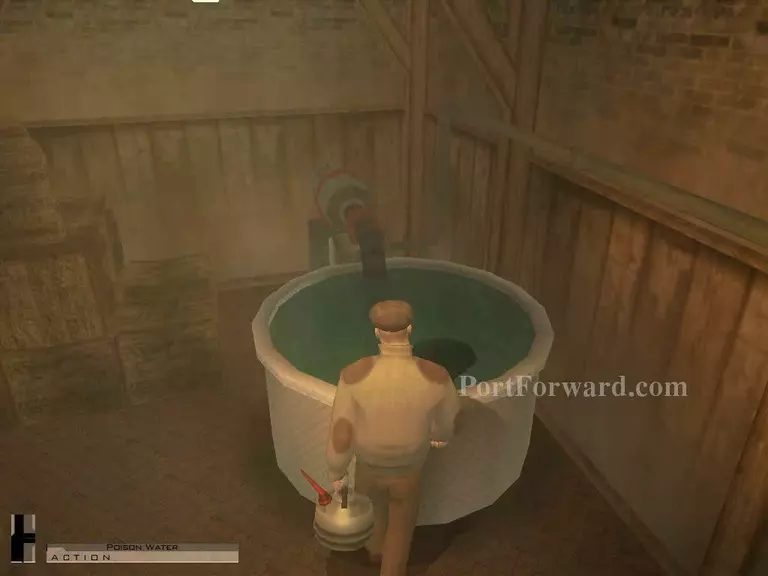
Go back here and poison the water. Watch out for the civilian here. You may need to use syringe to him. If he knows about the dead horses, he will be scared.

Hitman: Contracts Walkthrough - Hitman Contracts 81

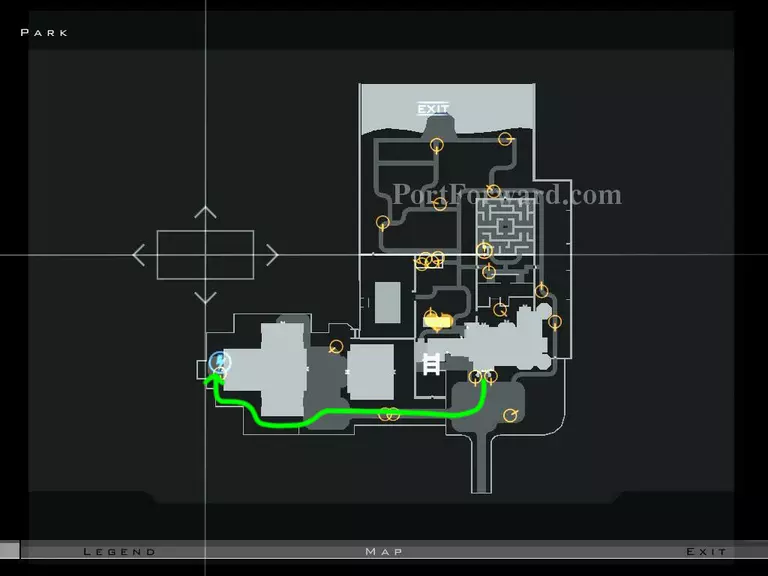
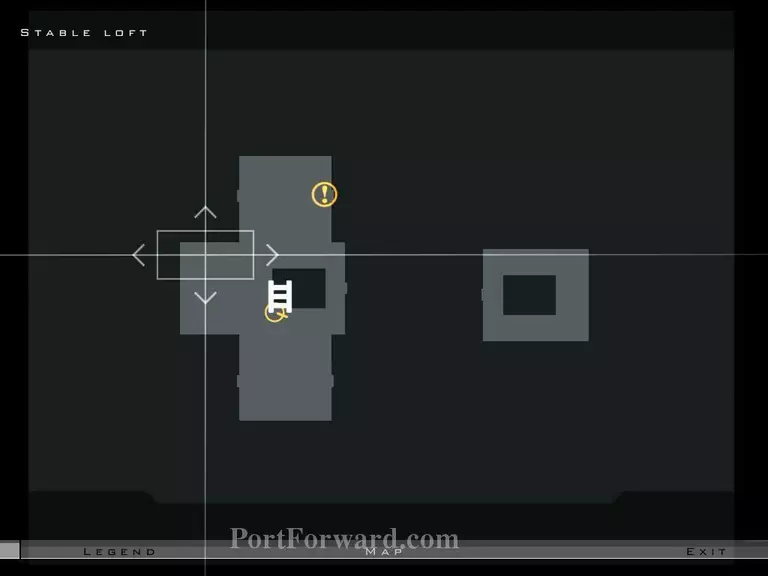
Your next location is here.

Hitman: Contracts Walkthrough - Hitman Contracts 82

Watch out for sniper at the 2nd floor. When he's not looking, keep

Hitman: Contracts Walkthrough - Hitman Contracts 83

Track his movement from the map.

Hitman: Contracts Walkthrough - Hitman Contracts 84

If anything else cool, now save him as a final task.

Hitman: Contracts Walkthrough - Hitman Contracts 85

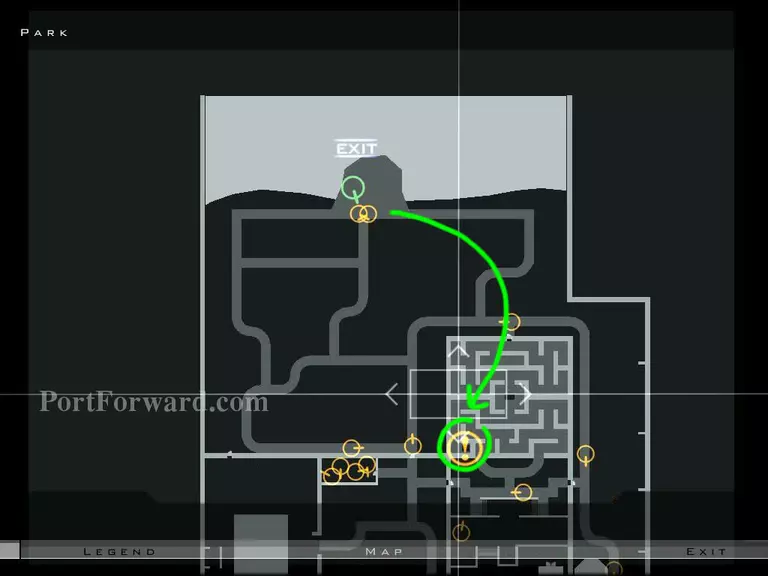
You may need to sneak to get out from here because they may suspect you do something weird. Open the map and it should gives you an idea how to escape.

Hitman: Contracts Walkthrough - Hitman Contracts 86

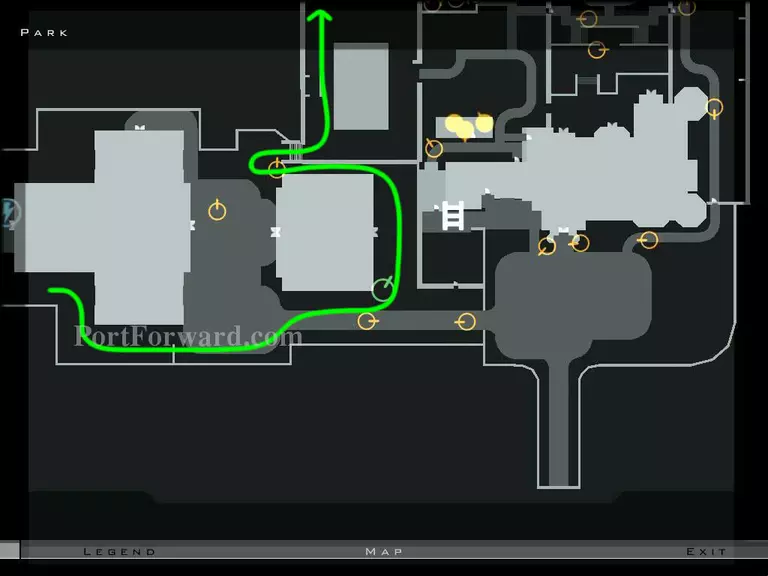
No idea? Then follow this path is should be ok. -end-

More Hitman: Contracts Walkthroughs

This Hitman: Contracts walkthrough is divided into 13 total pages.

More From Portforward