
This BioShock walkthrough is divided into 15 total pages.
You can jump to nearby pages of the game using the links above.
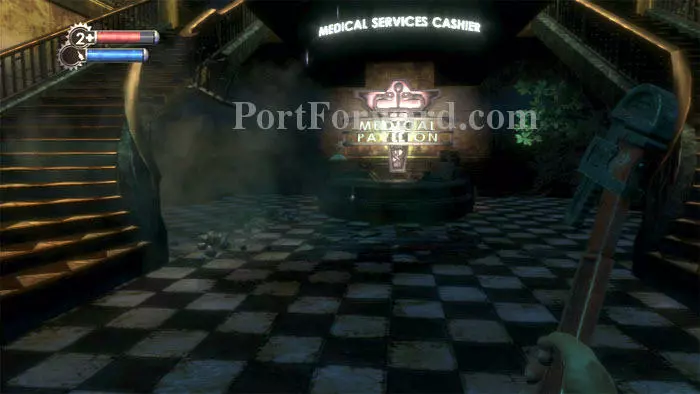
Medical Pavilion
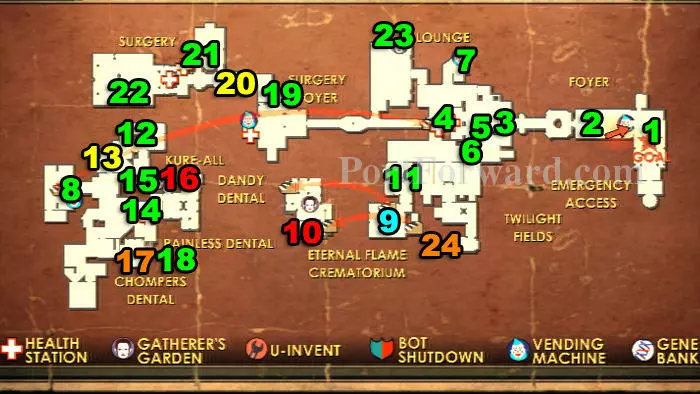
Here's a map of the level. Map - Medical Pavilion
- ADAM's Changes - Audio Diary
- Released Today - Audio Diary
- Higher Standards - Audio Diary
- Love For Science - Audio Diary
- Parasite Expectations - Audio Diary
- Limits of Imagination - Audio Diary
- Vandalism - Audio Diary
- Freezing Pipes - Audio Diary
- Hacker's Delight - Physical Tonic
- Incinerate - Plasmid
- Surgery's Picasso - Audio Diary
- Enrage Trial - Audio Diary
- Wrench Jocky - Combat Tonic
- Useless Experiments - Audio Diary
- Testing Telekinesis - Audio Diary
- Telekinesis - Plasmid
- Speedy Hacker - Engineering Tonic
- Plasmids Are The Paint - Audio Diary
- Symmetry - Audio Diary
- Static Discharge - Combat Tonic
- Aphrodite Walking - Audio Diary
- Not What She Wanted - Audio Diary
- Gatherer Vulnerability - Audio Diary
- Security Expert - Engineering Tonic
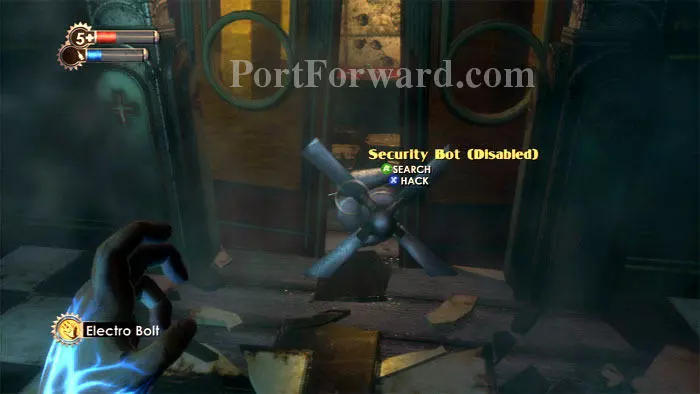
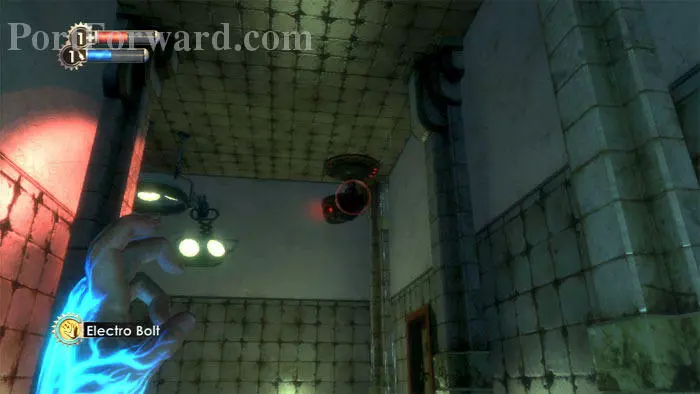
Turn right, then keep left around the first corner to find this Security Bot. Approach and press "X" to initiate your first hacking attempt.
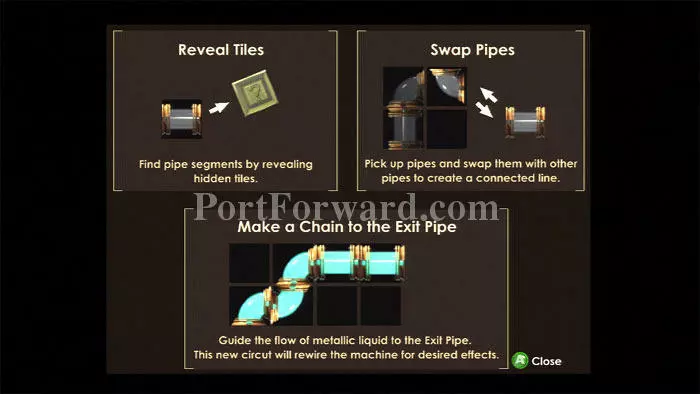
Here are the instructions for the hacking mini-game. It's pretty straightforward and not as difficult as it looks, once you get some practice. It's essentially another version of the Pipe Dream game.
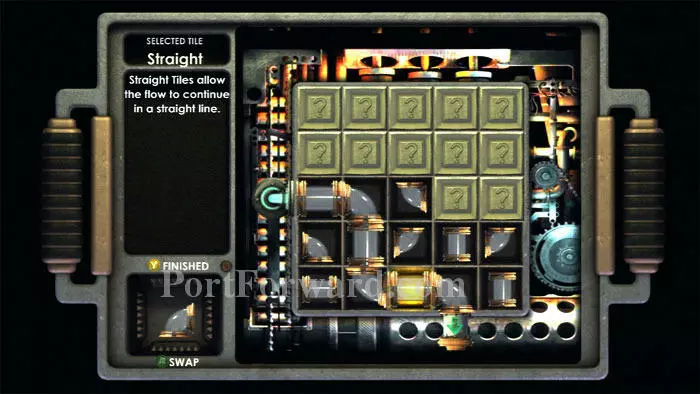
The water moves very slowly during this training hack. Here is one possible solution.
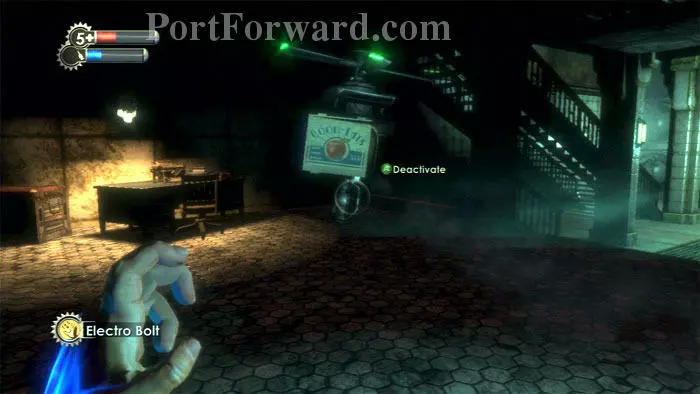
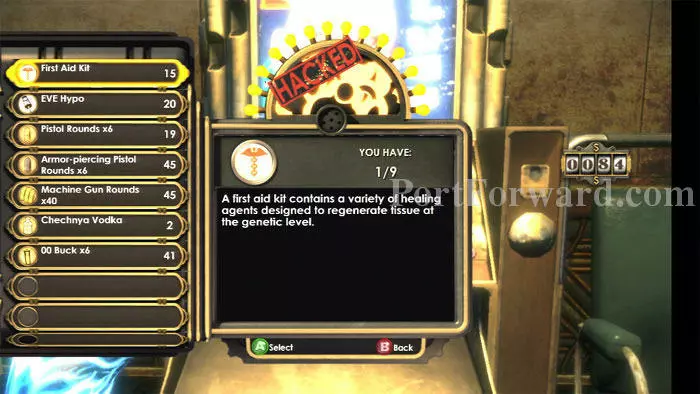
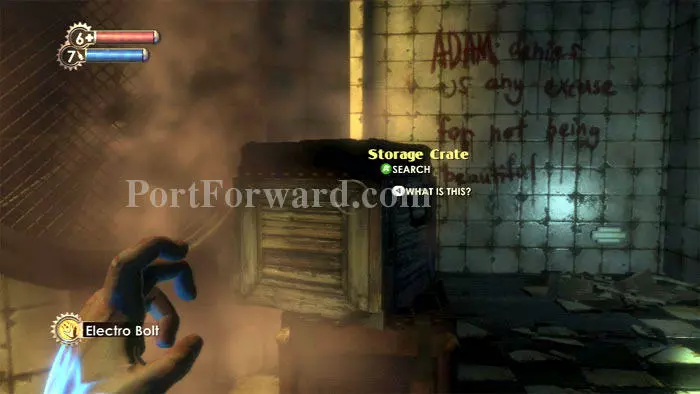
Once hacked, the doors will open and the bot will stay by your side and defend you. While two Splicers fight it out to the right, approach the desk on the left to find the ADAM's Changes audio diary, machine gun ammo and a First Aid Kit. There is also a storage crate to the left of the desk.

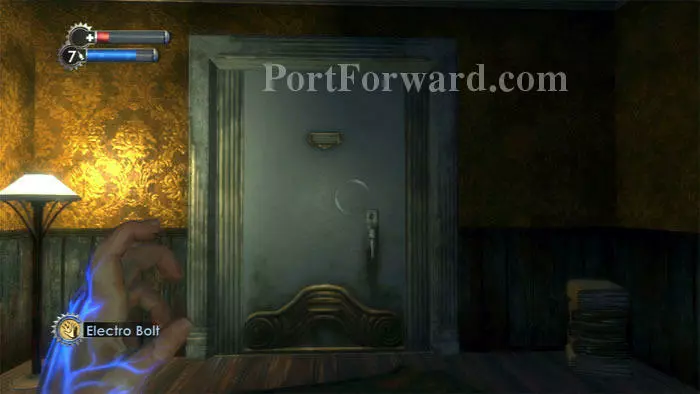
You can backtrack a bit to hack the Circus of Values vending machine, but it is much more difficult to hack. Ahead is the Emergency Access you've been looking for, but you'll find it locked. Pistol ammo is behind a column on the right.
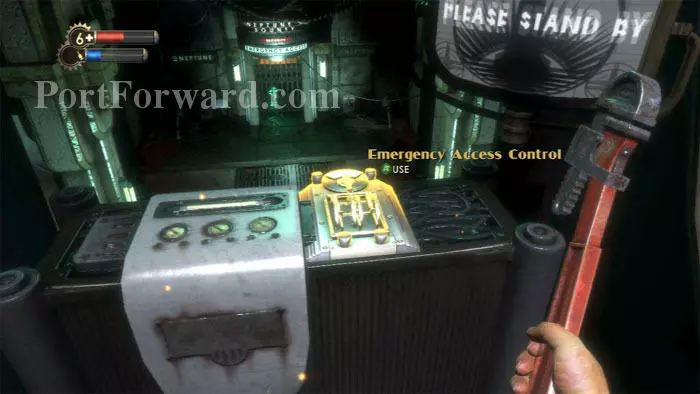
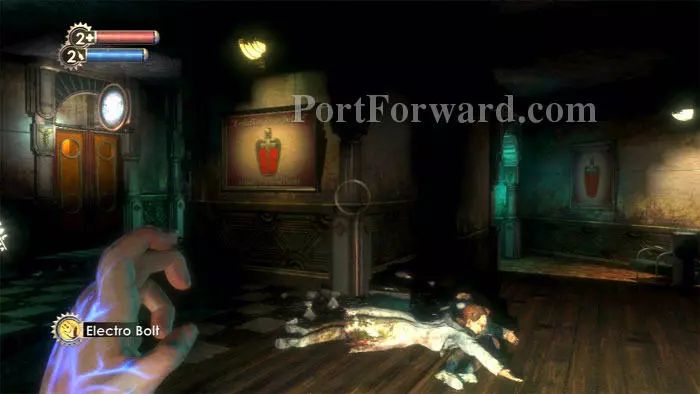
Defeat the victor of the dueling Splicers, then find a storage crate under the stairs before ascending them to this Emergency Access Control. Using it triggers a new goal from Atlas: get the key from Dr. Steinman.
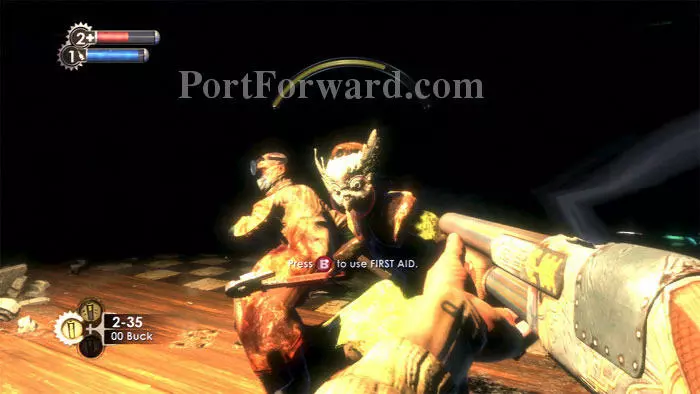
Pass through the now-unlocked door behind yourself and defeat this Thuggish Splicer. Grab the machine gun and search the storage crate on the right before activating the Electrical Override Switch ahead.
Activating the switch triggers a Splicer attack. Press the right stick to zoom your revolver and tag the Splicers as they rush through. Your hacked security bot will engage them. Survivors will attack through the door behind you.
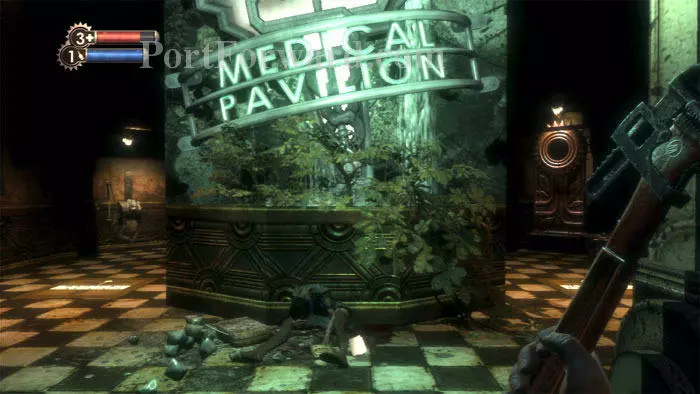
Jump below, and approach the reception desk to find the Released Today audio diary, along with a handful of supplies. Ascend the curved staircase.
More supplies are found here, including cash and pistol rounds.
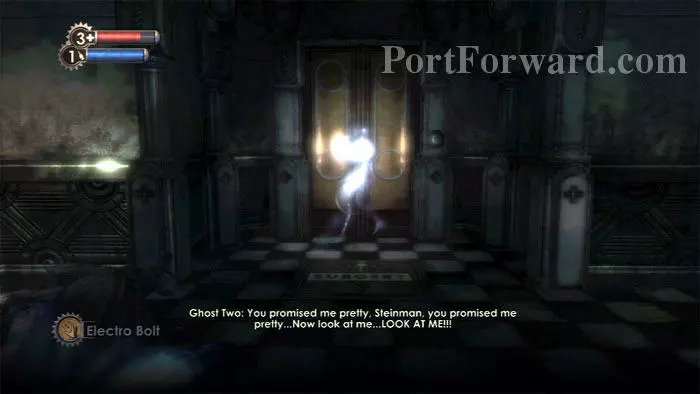
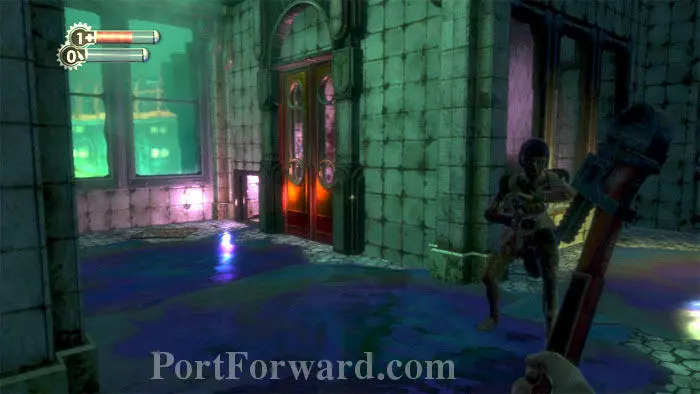
Witness the apparition before the power is restored. Use the door control to the right of the doors and continue ahead.
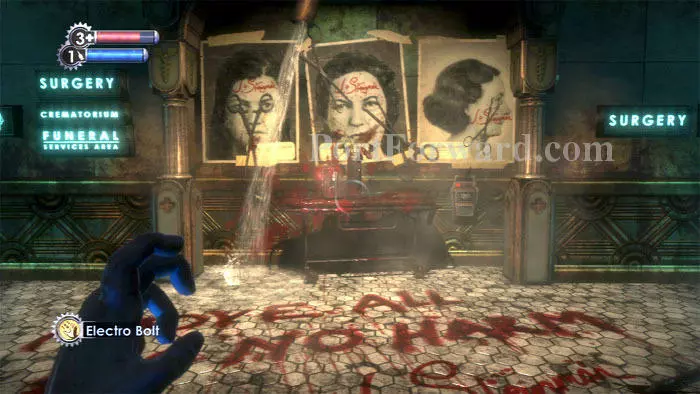
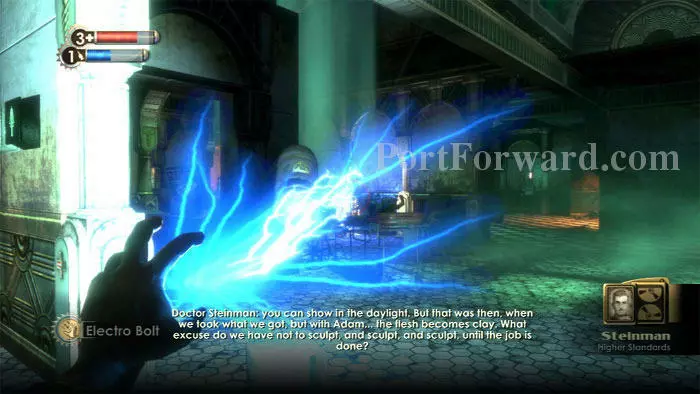
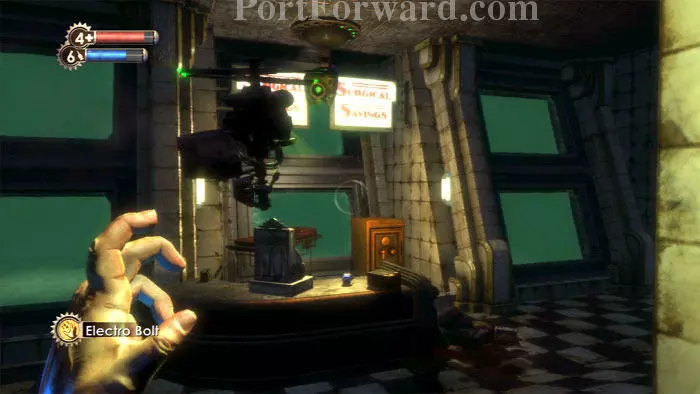
You'll emerge in a large rectangular hallway. Funeral services and the crematorium (plus an EVE hypo) are to the left, surgery (plus a searchable trash can) is to the right. Find Steinman's audio diary Higher Standards under the rightmost poster.
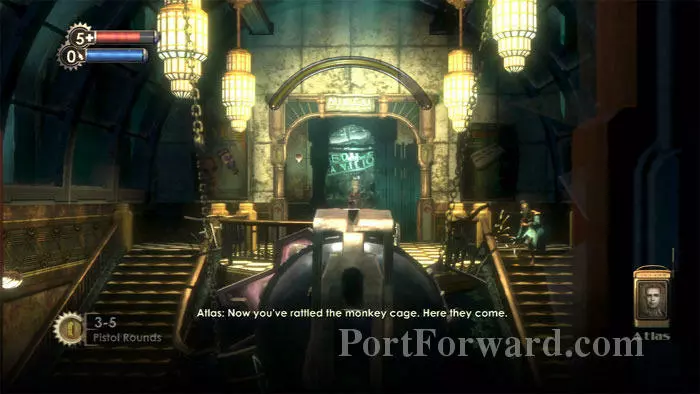
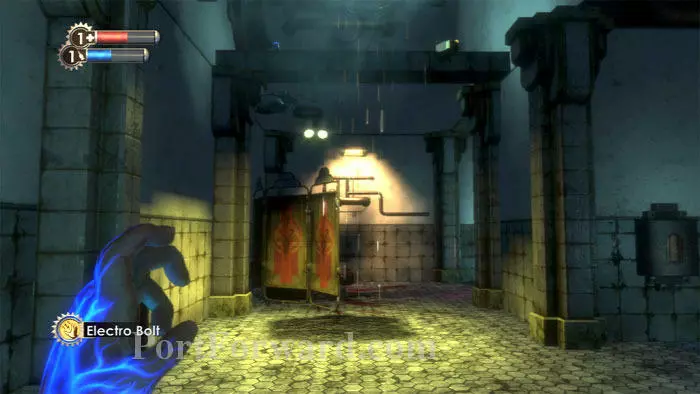
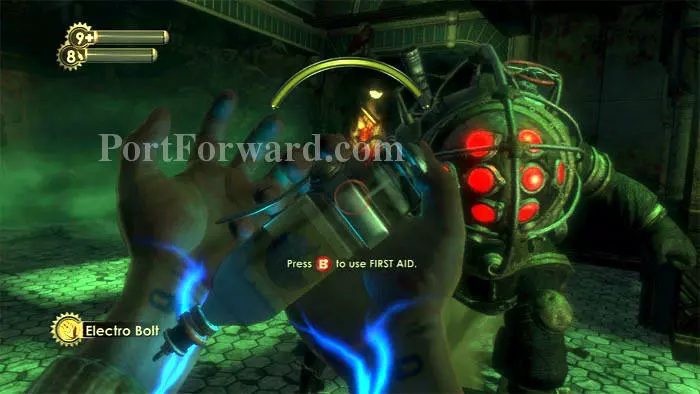
Proceed cautiously around the corner. This turret, plus another in a storage room on the right, must be hacked to make the unfolding battle winnable. Zap the turret with your Electro Bolt to temporarily disable it, then quickly approach and press "X" to hack it.
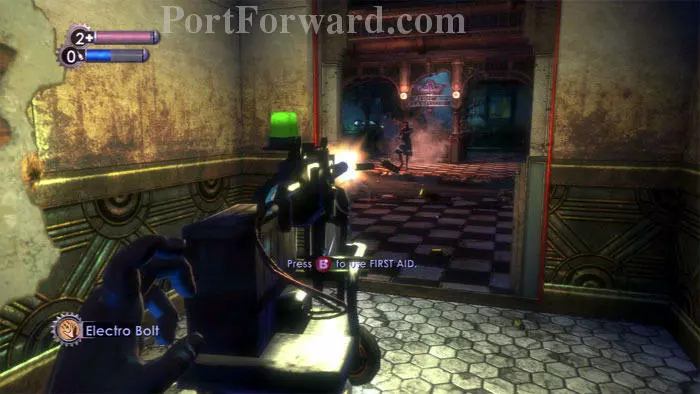
This storage room makes for a decent, albeit temporary, refuge against the onslaught of Leadhead Splicers. Inside you'll find a First Aid Kit, Armor-Piercing Bullets, storage crates and a cabinet to search.
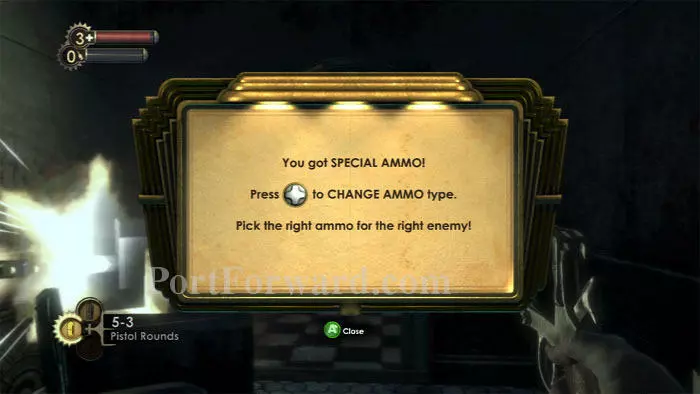
The Armor-Piercing Bullets are special ammo for your revolver, effective against turrets and other armored targets. Use the D-Pad to change ammo type, seen in the lower-left of your screen.
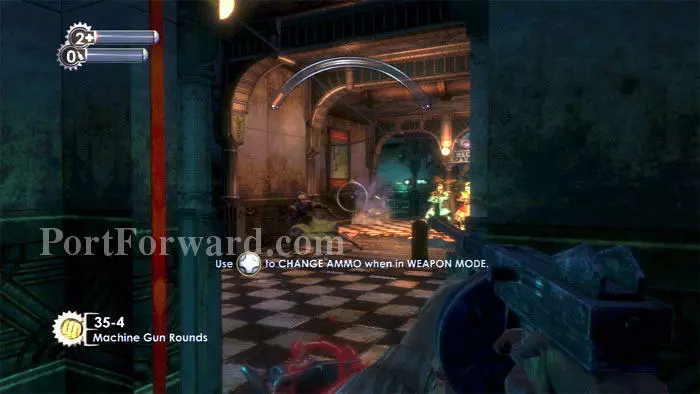
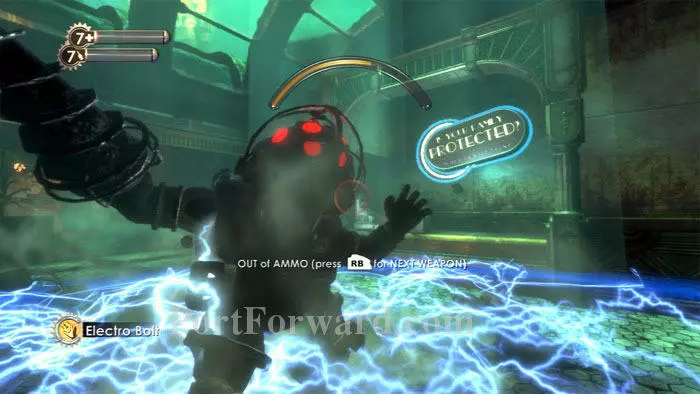
Lots of Leadheads Splicers join the battle. Your Machine Gun is useful when there are this many foes, but its kickback makes aiming very difficult, at least for now. In fact, this is one of the more difficult battles of the game. You are not yet Spliced for battle and your weapons are not yet modified, yet there are plenty of enemies about.
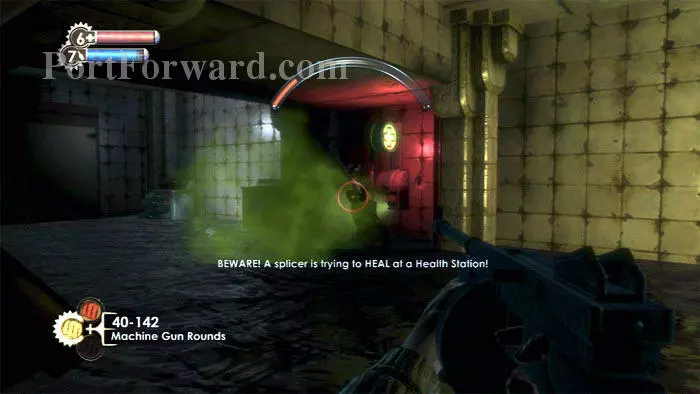
Two Health Stations are in the area, and they will be at the service of the Splicers. Hacking them will inflict damage on any Splicers who attempt to heal. Muahaha! Now the battle is turning!
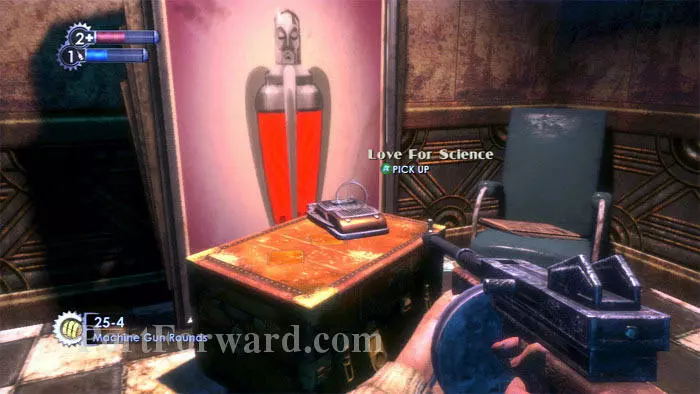
Once the battle calms, search the immediate area for goodies, such as this Love For Science audio diary. (Avoid the Eternal Flame crematorium -- you don't want to open that can of worms just yet.)
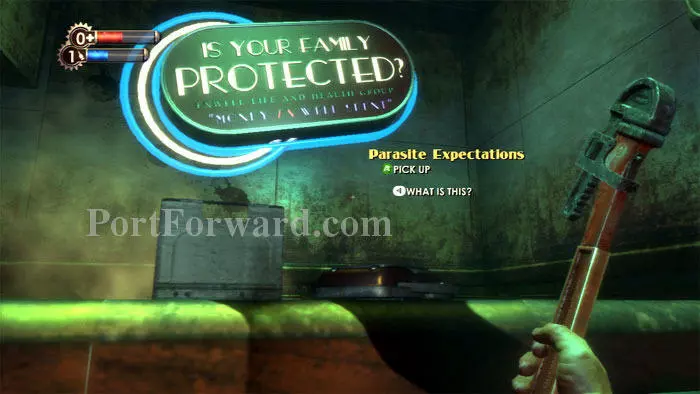
The Parasite Expectations audio diary can be found here. Search the nearby cash registers for money.
Steinman's Limits of Imagination audio diary is found on this wall.
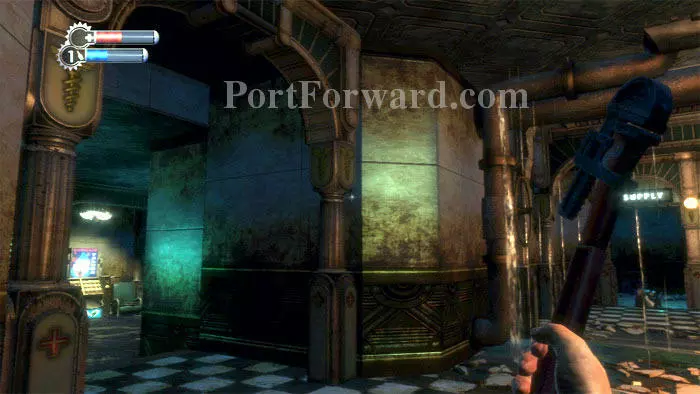
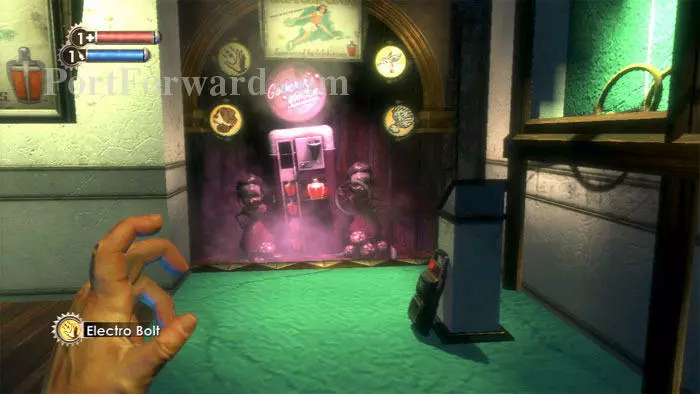
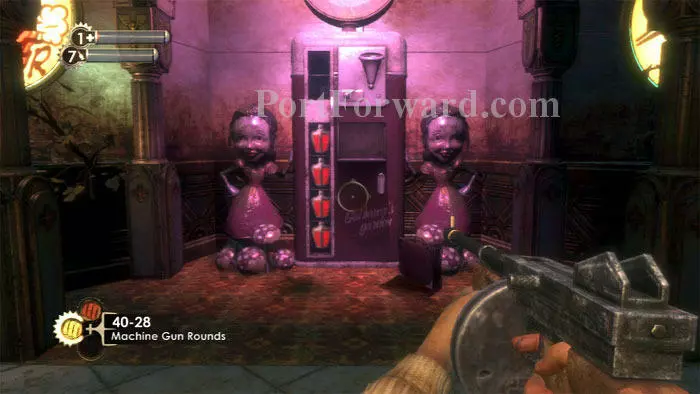
Enter this side hallway on the left to find Circus of Values and El Ammo Bandito vending machines, plus Andrew Ryan's Vandalism audio diary. Note the supply-room sign on the right to get your bearings.
It is more difficult to hack the vending machines, but you are rewarded with more items to buy, and everything will be less expensive.
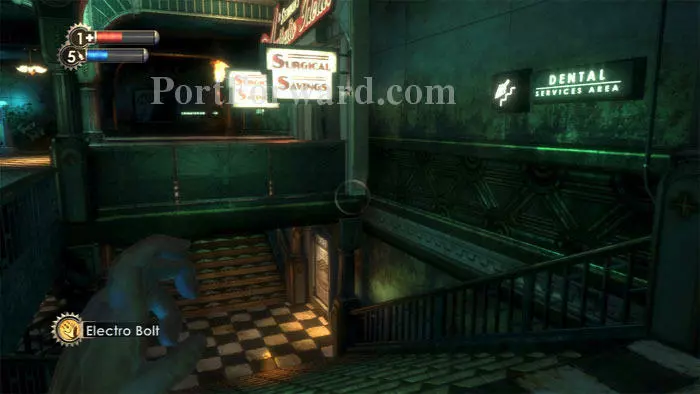
Descend these stairs to the Dental Services area.
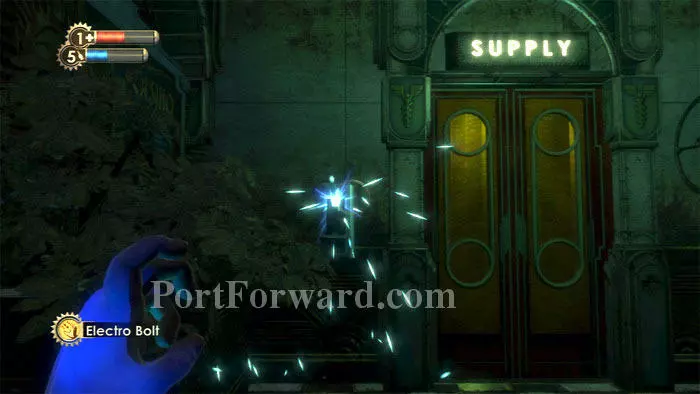
Storage crates, trash cans, and this supply room with an Automatic Hack tool are found. Use your Electro Bolt to open the supply room door.

The path to Dental Services is blocked by ice. Pull McDonagh's Freezing Pipes audio diary out of the ice for some background. If only there were some way to melt the ice and unblock the path...
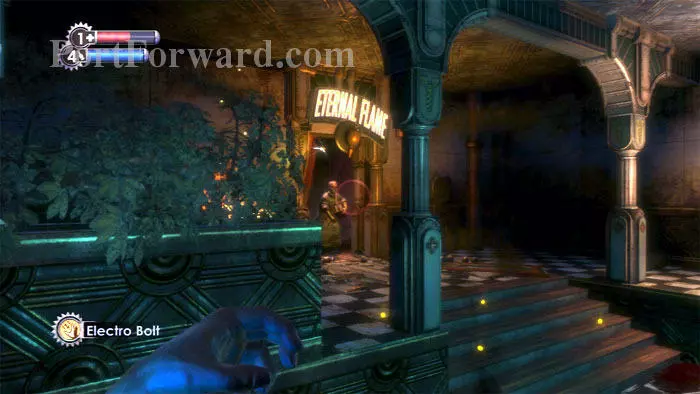
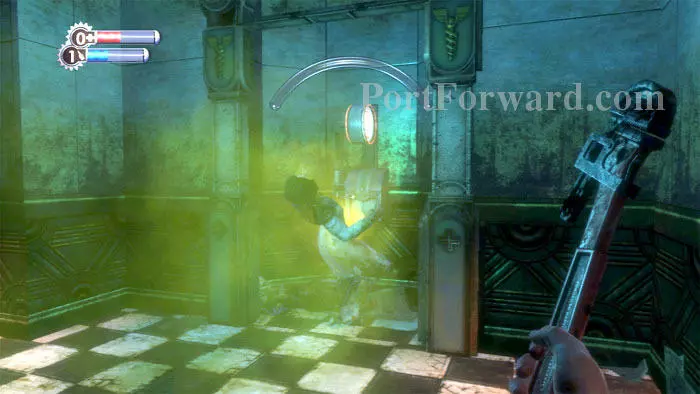
Now would be a good time to visit the Eternal Flame crematorium. Keep left up the stairs and find it here on the right. A Thuggish Splicer is blown to bits by this guy, your first Nitro Splicer. Electric Buck ammo is on the ledge to the left.
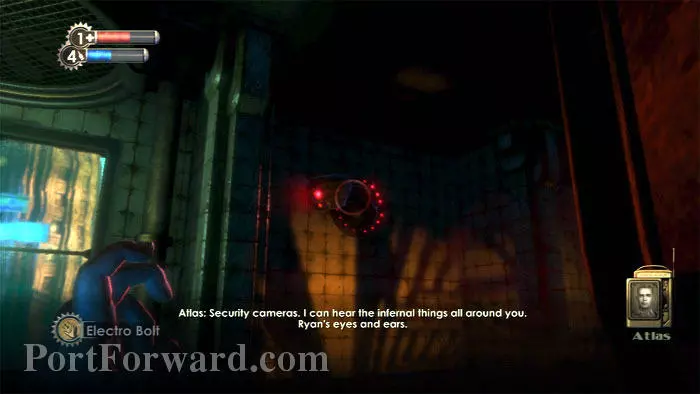
The Nitro Splicer tosses bombs your way and is the deadliest foe you've seen yet. Zap him with your Electro Bolt then rush to this back room inside Eternal Flame. Zap the security camera then hack it quickly.
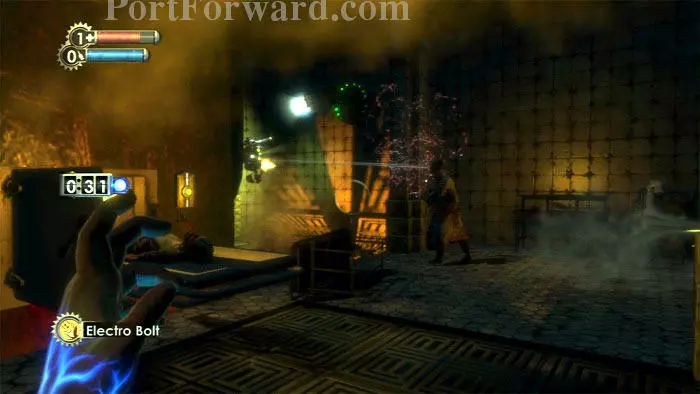
Lure the Nitro Splicer to the camera and its security bots will assist you in taking him down. Note the body at the incinerator on the left.
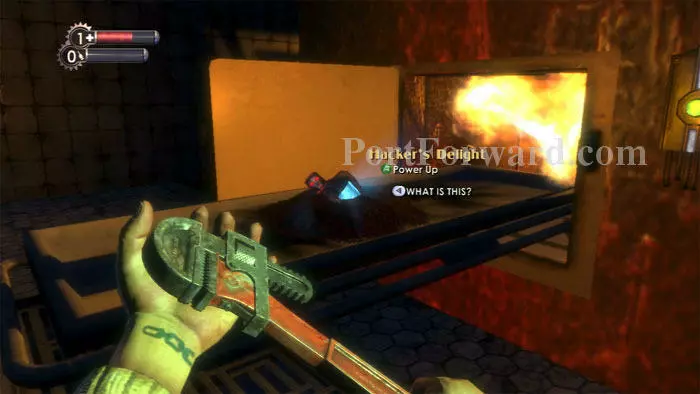
Press the furnace control button on the right to incinerate the body and receive this Hacker's Delight. This Physical Tonic awards you a small amount of health and EVE after a successful hack.
Ascend the nearby stairs then rush past this Splicer to the crawlspace left of the door ahead. Notice the oil slick on the floor.
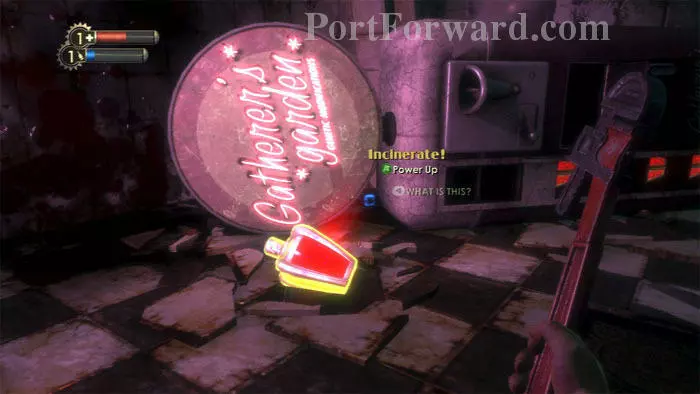
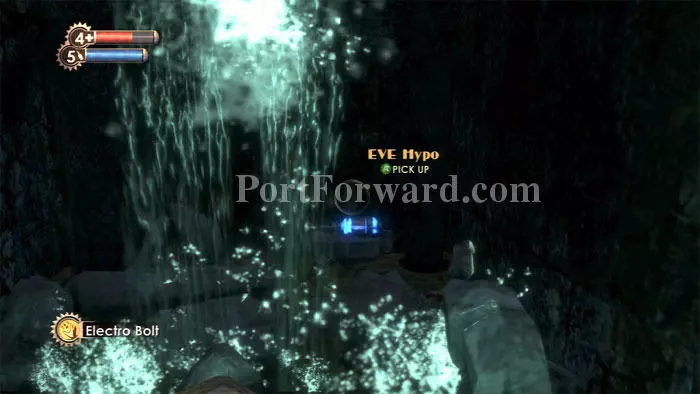
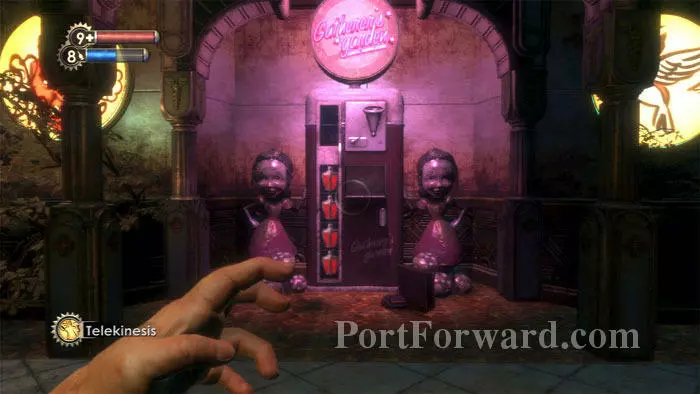
The Incinerate Plasmid is found inside. Spot the EVE hypo behind the Gatherer's Garden. Another EVE hypo is found on the desk to the right.
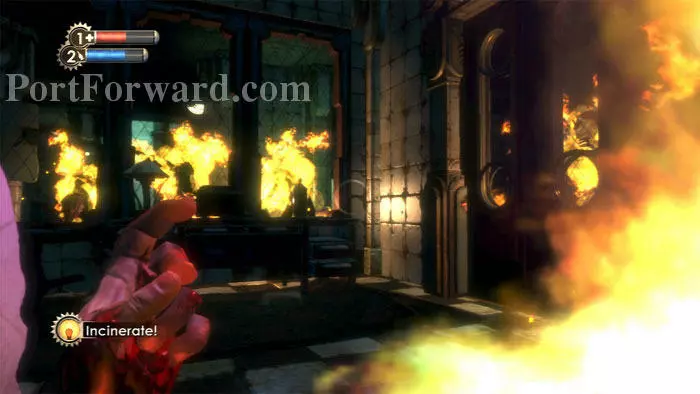
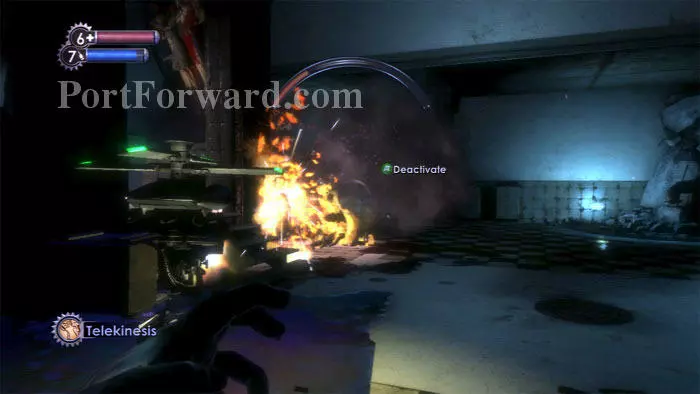
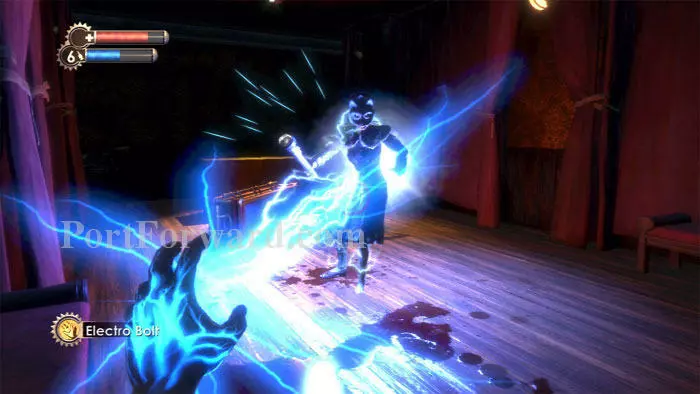
Splicers attack, surrounding the room. The oil slick you noticed a moment ago trails a bit through the crawlspace. Hit it with your new Incinerate Plasmid to set all the Splicers ablaze!
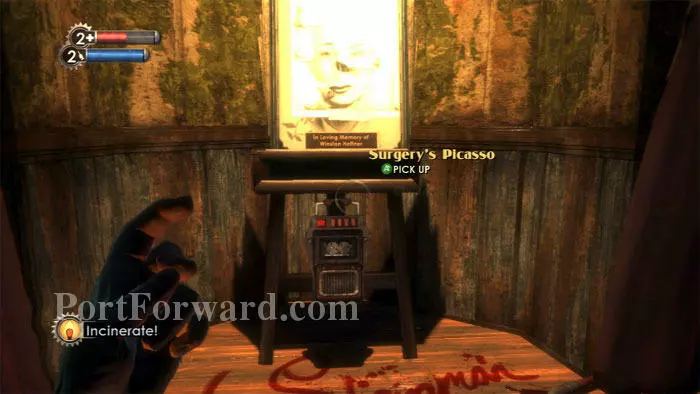
Find a First Aid Kit in the hall before returning downstairs and searching for more goodies, including this troubling audio diary from Steinman, Surgery's Picasso.
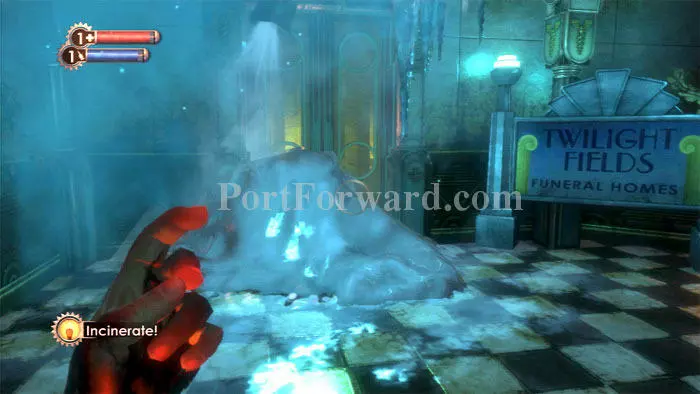
Return to Dental Services and melt the ice blocking your path with the Incinerate Plasmid. You'll also want to melt the ice blocking this door upstairs at the Twilight Fields funeral home. Don't head inside just yet -- we'll be back.
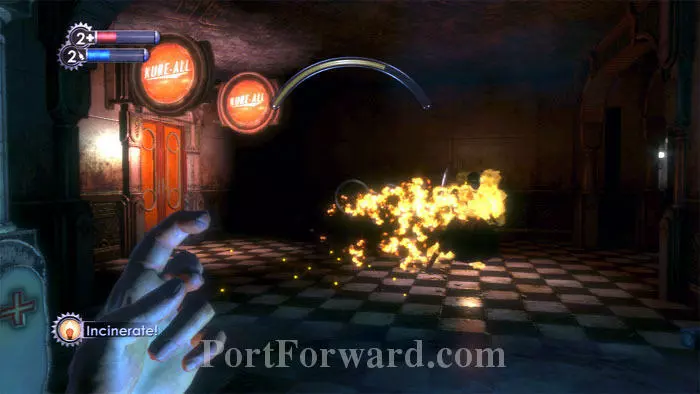
Incinerate also makes short work of this Thuggish Splicer. Find bandages on the floor to the right before proceeding to Kure-All on the left.
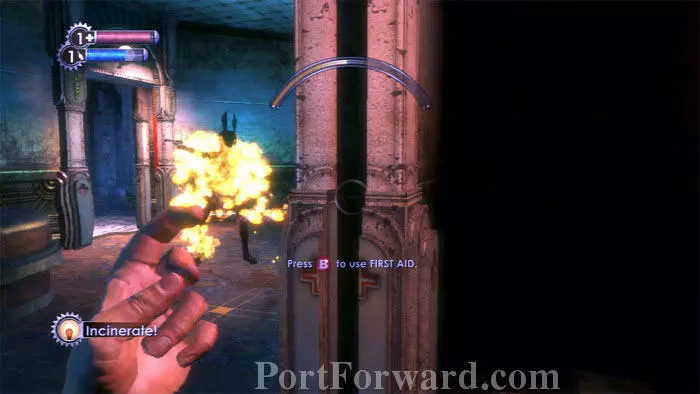
A Leadhead Splicer is in here and there's a nasty rocket turret on the right. I'm still using Incinerate in this shot, but I recommend switching to Electro Bolt to disable these foes before quickly hacking the turret. You can then take cover behind it while it attacks the Splicer. You'll find a First Aid Kit, a Cash Register, Bandages and Armor-Piercing Pistol Rounds near the turret. Continue through the door seen on the left.
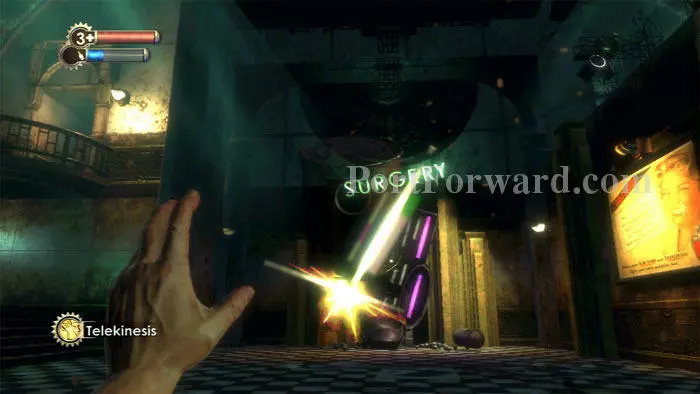
Directly ahead is SuChong's audio diary, Enrage Trial. Don't approach it just yet, however, as a security camera is covering the area. Notice the EVE hypo and Electric Buck ammo on the beam above -- if you can't reach them by jumping, you'll be able to retrieve them once you have Telekinesis, coming up soon.
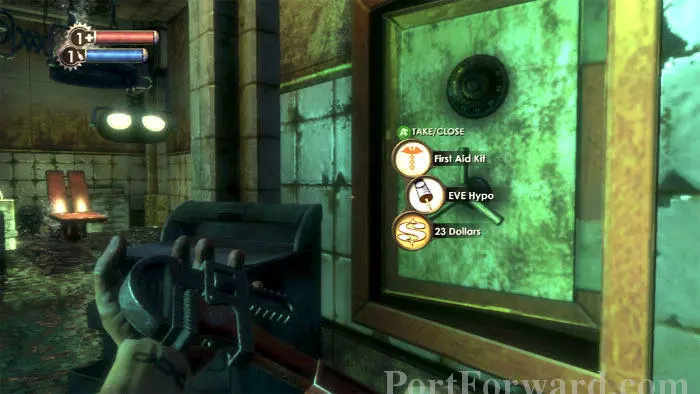
Turn right, then find the security camera on the left. I prefer to zap it with Electro Bolt before approaching. Once underneath, look up and maneuver yourself until you see the "X" to hack the camera. An EVE hypo is on the nearby bed. Note the safe under the camera which can be hacked for supplies.
With the camera hacked, you can listen to SuChong's audio diary in peace. Find this grate on the right as you head for the door. Smash it with your wrench then climb into the vent.
Emerge in this room to find health, ammo, and the Wrench Jockey Combat Tonic, seen ahead. A Thuggish Splicer is now available outside the air vent for you to test your newly-found wrench strength.
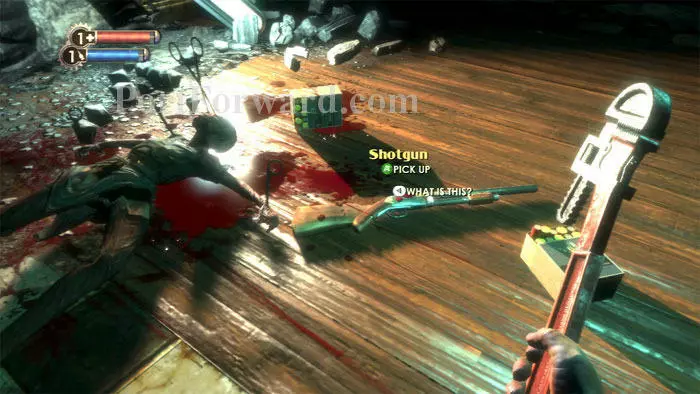
Exit the Kure-All and find this Shotgun in the room across the hall. Grab the Shotgun and trigger an ambush.
The room is sealed and Splicers attack all around. This is a great time to learn the Shotgun. Reload as soon as you pick it up and you shouldn't have any trouble. Just keep circling backwards and fire as they approach.

Loot the room after the battle ends then find Tenenbaum's audio diary, Useless Experiments outside the Dandy Dental door on the left. Enter and find plenty of supplies and no enemies. The supply-room door on the right is locked.
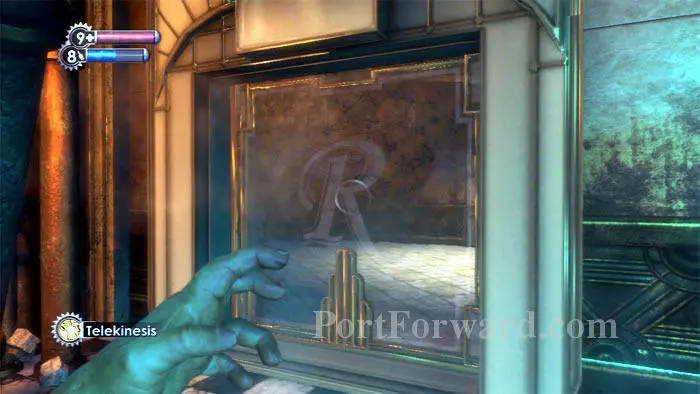
Most importantly, make an immediate left after entering to pass through a glass door and find the Telekinesis Plasmid at this defunct Gatherer's Garden. SuChong's Audio Diary Testing Telekinesis is propped against the console on the right. You now have three Plasmids but only two Plasmid slots. I choose to replace Incinerate with Telekinesis and keep Electro Bolt, which I find very useful for temporarily disabling turrets and cameras before I hack them. (Warning: without Incinerate, you won't be able to melt the ice blocking the funeral home. If you want to keep Electro Bolt, don't take the Telekinesis Plasmid unless you've melted the ice outside Twilight Fields.)
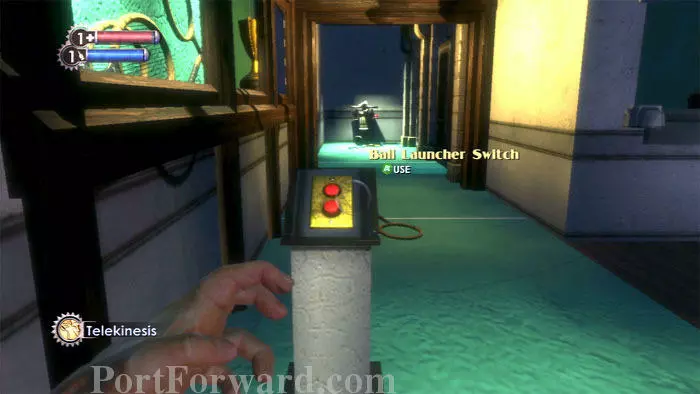
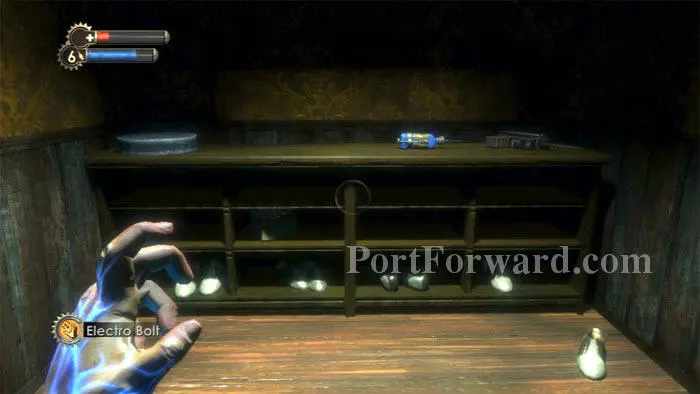
You can practice your Telekinesis skills by activating this switch. Catch the balls as they are thrown by holding the left trigger. Release the left trigger to throw the ball.
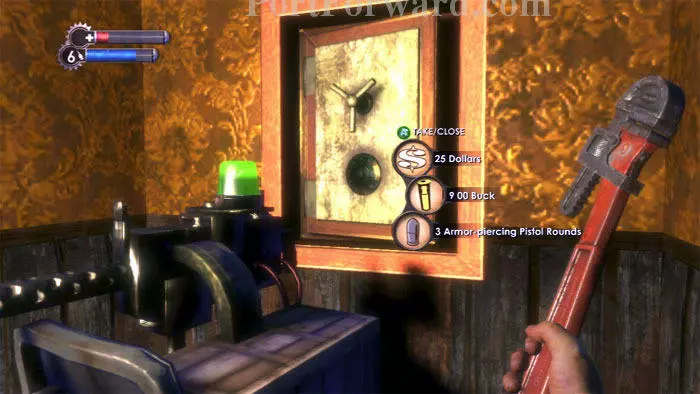
Crack this safe for decent loot, and check the front counter for cash.
Exit to the hallway and continue past the locked Painless Dental door on the left. (The dead-end on the right has a Vita Chamber and some Pep Bars.)
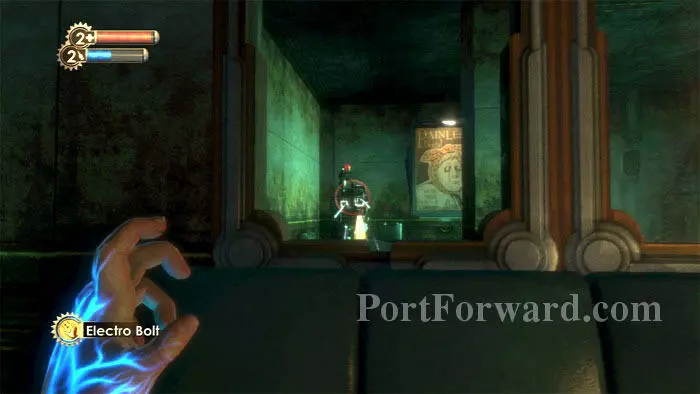
Beware of this turret as you round the left corner. An Electro Bolt disables the turret long enough to crawl through the window and hack it.
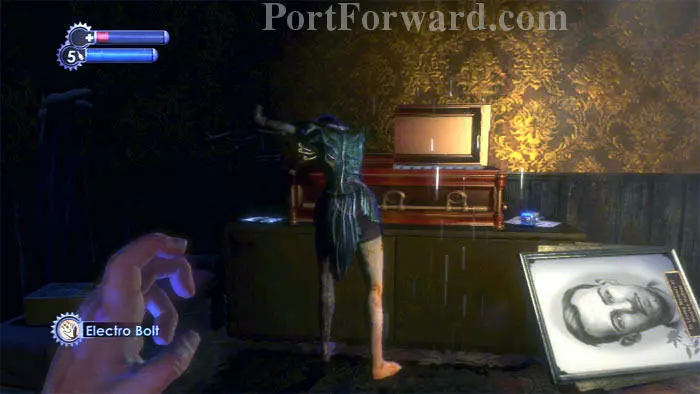
You're now inside Painless Dental. Cash and Electric Buck is behind the counter. A trail of bandages leads to the next room. Note the empty examination bed directly ahead.
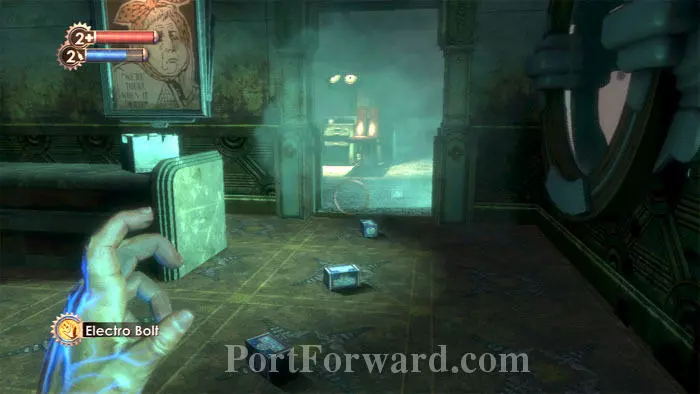
You become disoriented by mist as you enter the room. You hear footsteps, and then this corpse appears on the bed that was previously empty! Creepy! SuChong's Plasmids Are The Paint audio diary and a Speedy Hacker Engineering Tonic are on the right. Crawl through the vent on the left to battle a Leadhead Splicer and find an Automatic Hack Tool, Armor-Piercing Pistol Rounds, Electric Buck and snacks. Emerge out the previously-locked supply-room door.
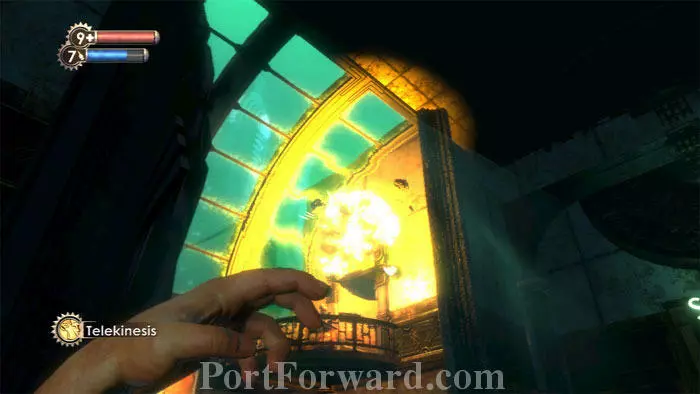
At the end of the hallway is this opportunity to test your Telekinesis skills. The door on the right is locked, but the key is found dangling just through this window. Pull the key to yourself using Telekinesis, then unlock the door on the right. Inside are two security cameras that you'll want to hack so you can loot the area in peace. Included in the take are some Antipersonnel Auto Rounds for your Machine Gun, plus there is a safe in the back room. Return past the melted ice block to begin your pursuit of Steinman.
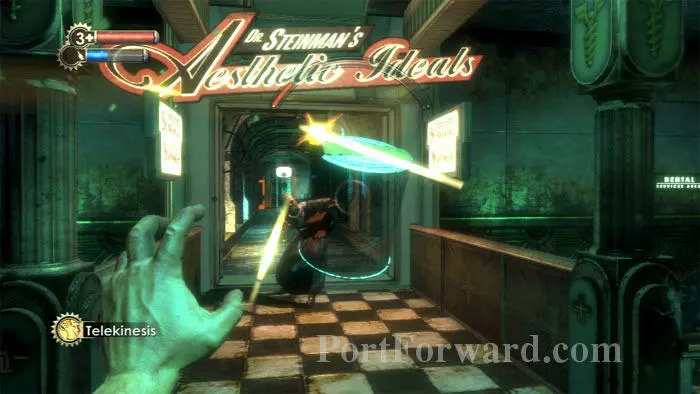
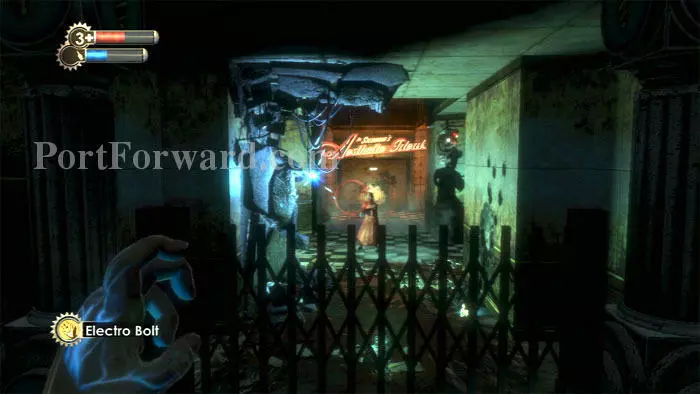
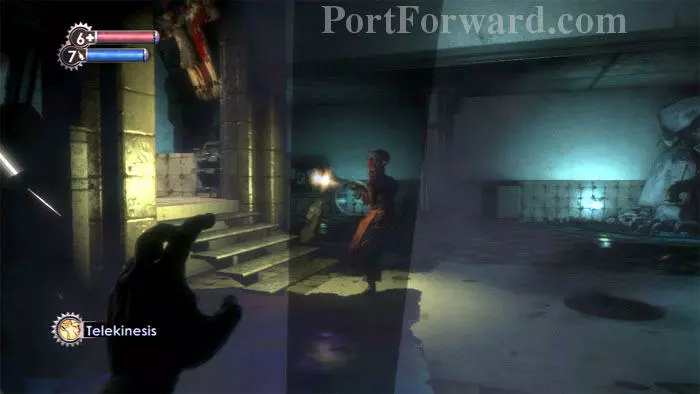
Ready your Telekinesis as you return upstairs. Nitro Splicers are between you and Dr. Steinman's Aesthetic Ideals. Grab their bombs and toss them back.
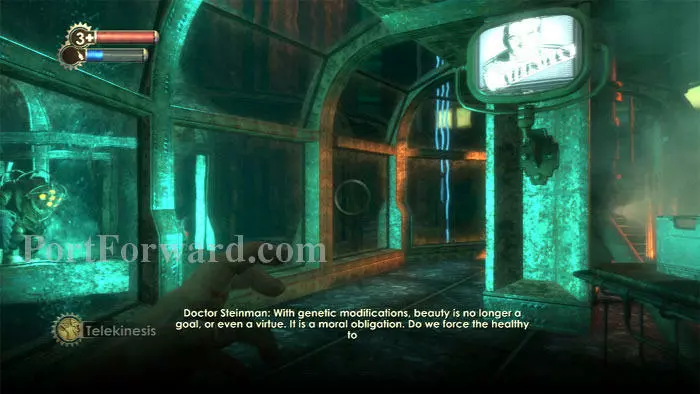
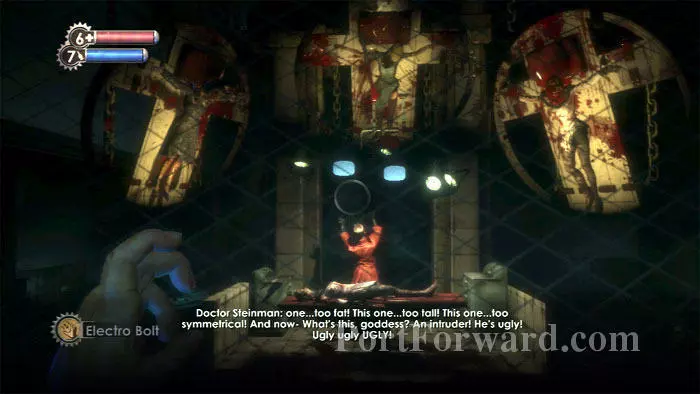
A Big Daddy and a Little Sister are in the neighboring tunnel, and Steinman is spouting his insanity on the TV. I love this tunnel. It's sort of like living in a snow-globe while watching someone else in another.
Steinman is in the room at the end of the tunnel. Don't waste your ammo on him, he's invulnerable for now. He tosses a bomb and blocks the exit with debris.
What you need to do is use your Telekinesis to grab one of the bombs being thrown by the Nitro Splicer on the balcony. You can then throw the bomb at the debris and clear the exit.
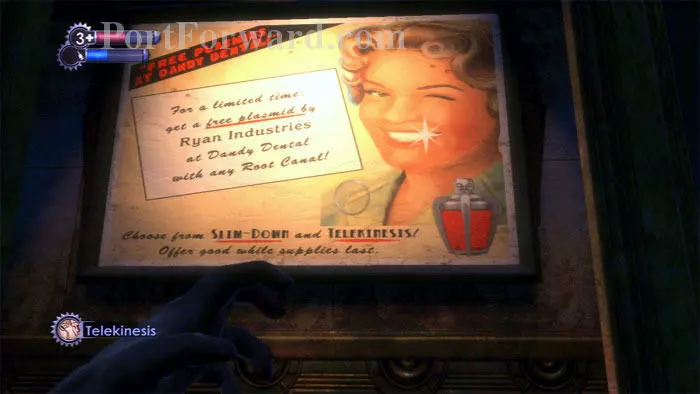
If you didn't already have Telekinesis, Atlas would set a new goal for you to find it. These billboards advertising free Telekinesis Plasmids at Dandy Dental would be your clue to go to Dental Services.

Find money in front of this wheel chair, and Steinman's audio diary Symmetry on the wall.
Steinman activates a turret and sends a security bot after you. Hacking them both will give you additional allies in the upcoming boss battle.
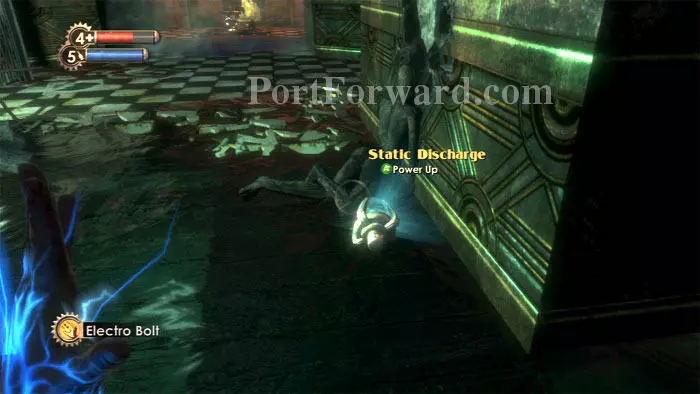
Find the Static Discharge Combat Tonic here. This Tonic will emit an electrical charge against everyone nearby when you are struck.
Turn around to find this EVE Hypo.
Enter the room on the right. Hack the security camera and you've got a secure place to hide or lure Steinman once the battle begins. An EVE Hypo, cash, ammo, bandages and a safe are found here as well.
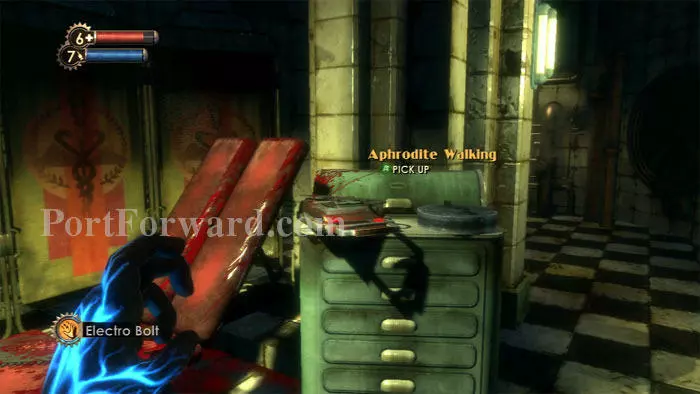
Steinman's audio diary Aphrodite Walking is found here, alongside Machine Gun ammo.
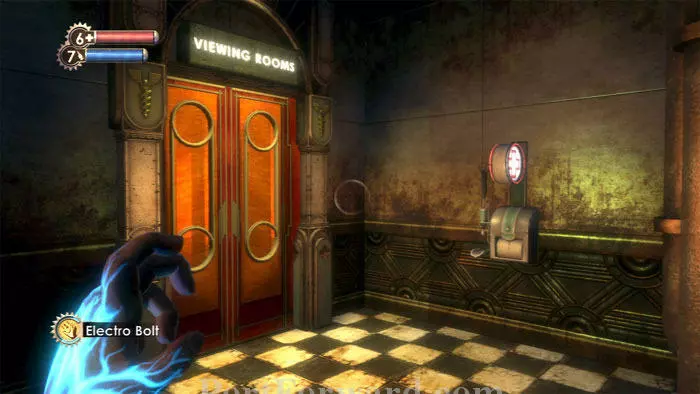
Hack the health station before entering the viewing rooms -- Steinman will use it once injured.
Search these storage crates near the door before approaching Steinman.
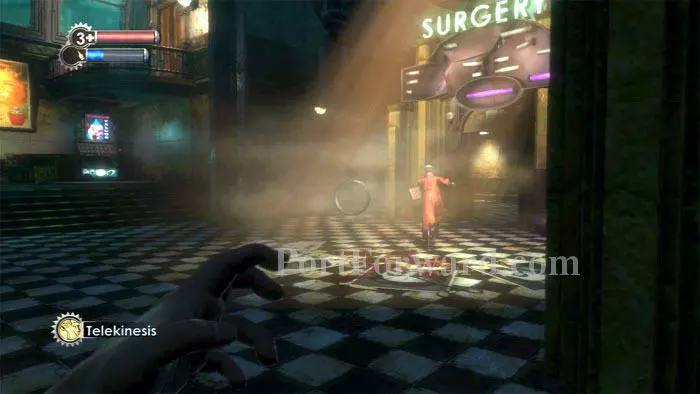
Another crate is to the left of this window, but once you approach, Steinman's insane rambling begins. Once he notices you, head to the door on the right and pass through after it unlocks.
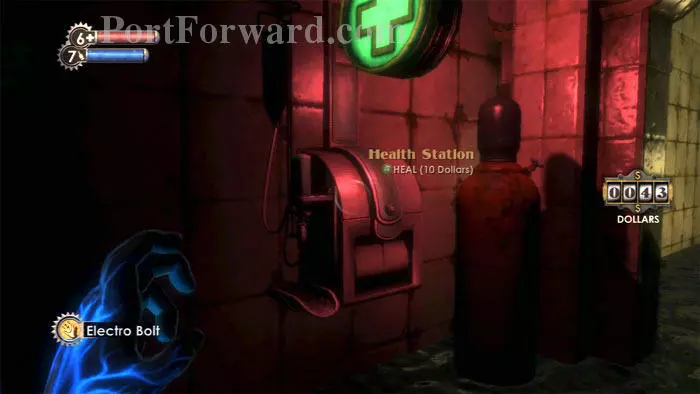
Keep right, then rush down the stairs to hack this health station. Note the flammable canister to the right.
Use your Telekinesis to pick up the canister, then throw it at Steinman.
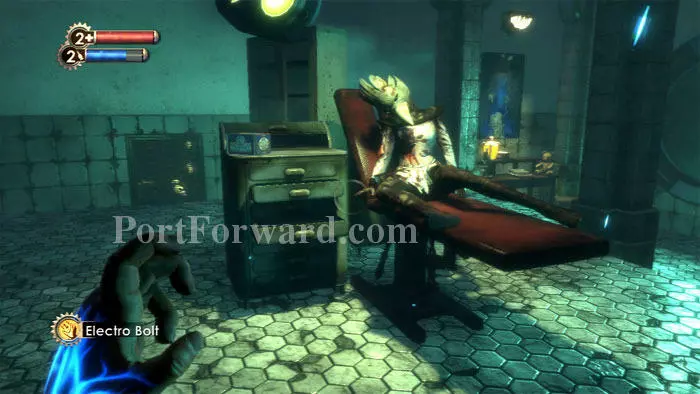
The resulting explosion, combined with the damage inflicted from your hacked bot, should leave Steinman significantly weakened.
He'll run to the hacked health station, destined to be defeated.
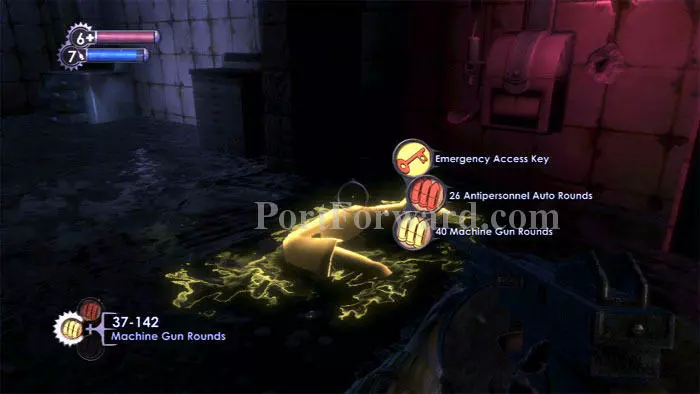
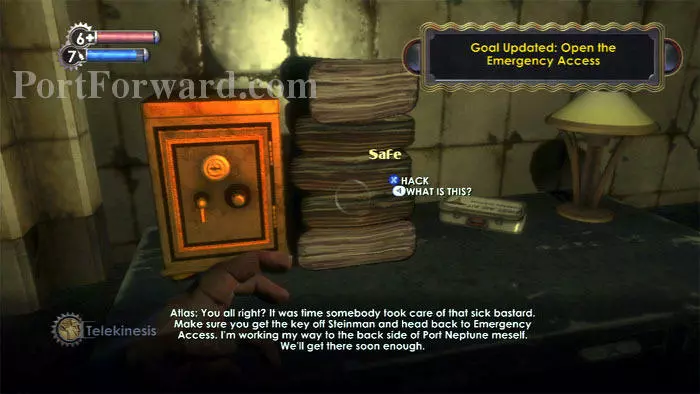
Grab the Emergency Access Key to complete the goal. Poor guy never had a chance.
First Aid Kits abound, one on this table, another on the table to the right, and three more in the safe.
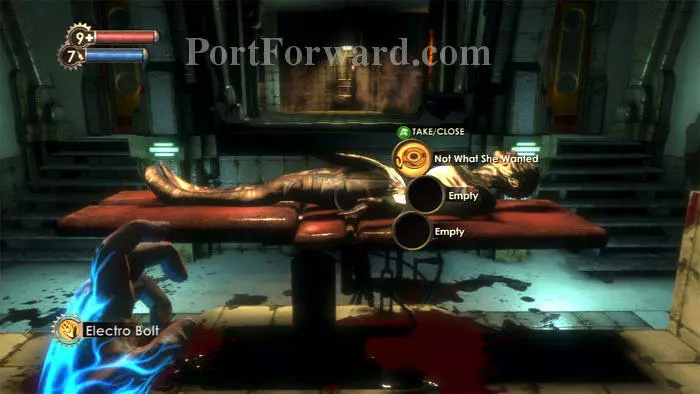
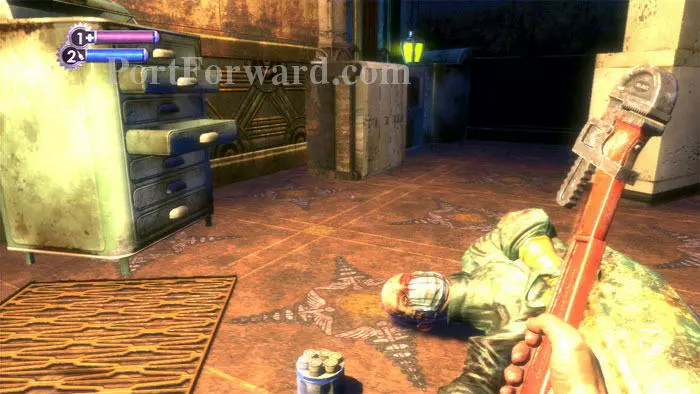
Search this corpse for the chilling audio diary Not What She Wanted. Plenty of machine gun rounds can be found around the room as well.
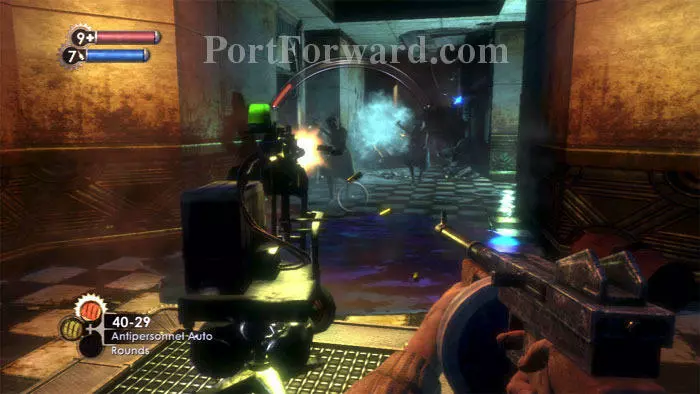
The machine gun rounds will assist your hacked turret against a small wave of Thuggish Splicers as you exit. Players who have Incinerate equipped should note the oil slick on the floor.
Farther down the corridor, you can finally finish off this Nitro Splicer on the balcony. Use Telekinesis to grab the bombs he tosses and send them back special delivery. Don't miss the First Aid Kits by the Health Station and Circus of Values to the left.
Through the Securis door there will be another tunnel collapse. The previously-available door straight ahead is now blocked, but the door on the left is now open.
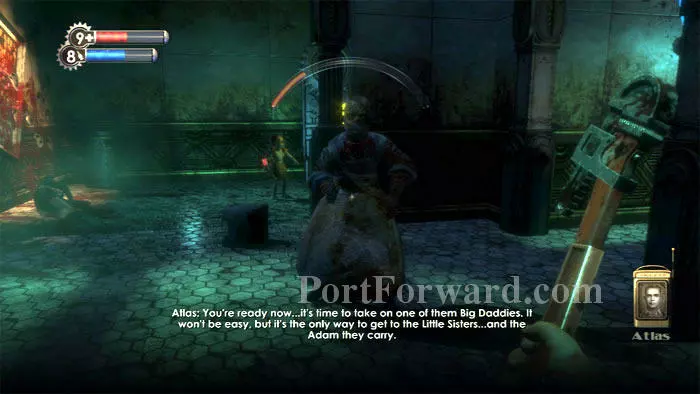
Witness a Big Daddy's defeat, then approach this door to trigger a cutscene.
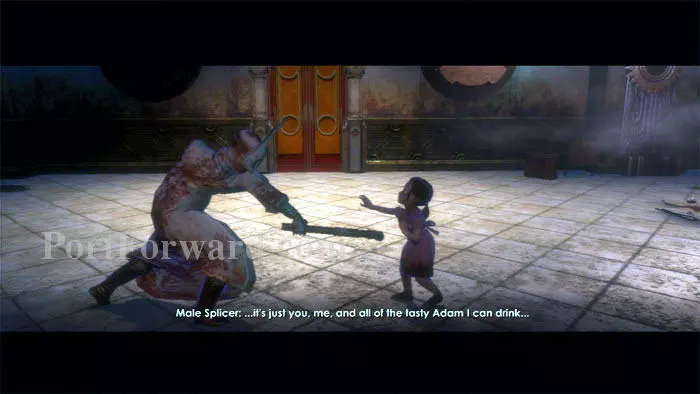
This Splicer is apparently responsible for the Big Daddy defeat you just witnessed. He's about to harvest the Little Sister when Tenenbaum intervenes.
Tenenbaum tosses you an unnamed Tonic that will enable you to harvest or rescue the Little Sisters.
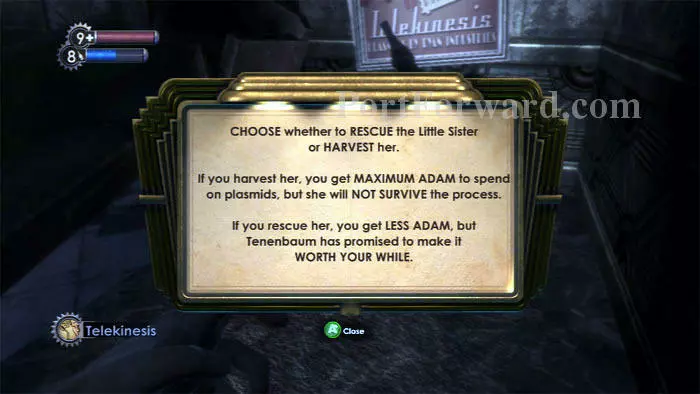
Approach the Little Sister and make your choice (bandages are to the left). Rescue her and receive 80 ADAM, plus a gift from Tenenbaum every three rescues. Harvest the Little Sister and receive 160 ADAM, but no gifts. The moral choice? I prefer to live in a world, virtual or otherwise, where little girls aren't slaughtered like cattle, so from a role-playing perspective my preference is to save the Little Sisters. That said, from a game play point-of-view, I prefer to have the extra Adam to spend. Having played the game both ways, I prefer to harvest.

The Start Menu shows how many Little Sisters are available in your current level, and how many have been rescued or harvested. In this example from an upcoming level, there are three Little Sisters. The first icon shows a harvested Little Sister. The second icon shows a rescued Little Sister, and the third icon shows a Little Sister still under the protection of a Big Daddy.
Approach the Gatherer's Garden and find the Gatherer Vulnerability audio log. Supply Crates are on the right.
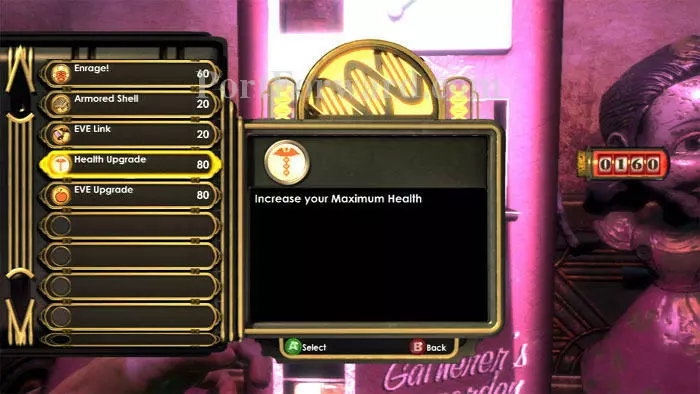
Use the Gatherer's Garden to purchase gene upgrades. My preference is to first buy Plasmid and Tonic slots (not available at this station) followed by Health and EVE Upgrades. Only then purchase new Plasmids and Tonics. Here, I purchase the Health and EVE Upgrades with the 160 ADAM I received for harvesting the Little Sister. (My first play through I rescued all the Little Sisters. This play though I'll be harvesting them all.)
Exit out this door, where you'll find another Supply Crate.
Splicers are about and you'll want to save your ammo for the upcoming Big Daddy, so switch to your wrench or try to avoid them altogether. Note the Little Sister behind this Splicer. Her Big Daddy is just behind the wall to the right.
I'm about to die in this shot. No doubt about it, you are not well-equipped to deal with this fight. I used all nine of my Health Kits and died multiple times.
When you die, keep left after exiting the Vita-Chamber to ascend the stairs near Dental. You'll find Big Daddy back in the area near the sign seen on the right. The combination of Electro Bolt followed by your Shotgun (Electric Buckshot is best) or the Machine Gun (don't use Anti-Personnel rounds) whittle's Big Daddy's health down over time, but if you aren't quick, the Little Sister will return through her Hidey Hole and you'll need to wait for another to come back out to play.
Once Big Daddy is defeated, you can return to the Gatherer's Garden to spend the ADAM you've received from the Little Sister. I, however, save my ADAM for the moment.

If you've been following the walkthrough, the ice at Twilight Fields should be melted. Return and enter for an optional, but profitable, diversion.
This room on the left has a solitary Thuggish Splicer. Armor-Piercing Pistol Rounds and cash are found behind the cabinet ahead. Beware the turret behind you.
Hack the turret and the safe to obtain some decent loot.
Defeat this Thuggish Splicer in the room opposite, then find cash and Buckshot to the left, plus an EVE Hypo to the right. Under the EVE Hypo is a note with the number, "0451."
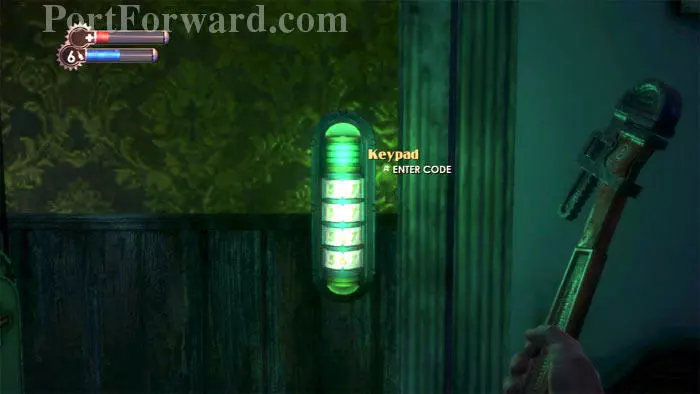
Unsurprisingly, 0451 unlocks the door at this Keypad behind you.
Inside you'll find an Automatic Hack Tool, an EVE Hypo, Buckshot and Machine Gun Rounds.
Continue through this door in the central room.
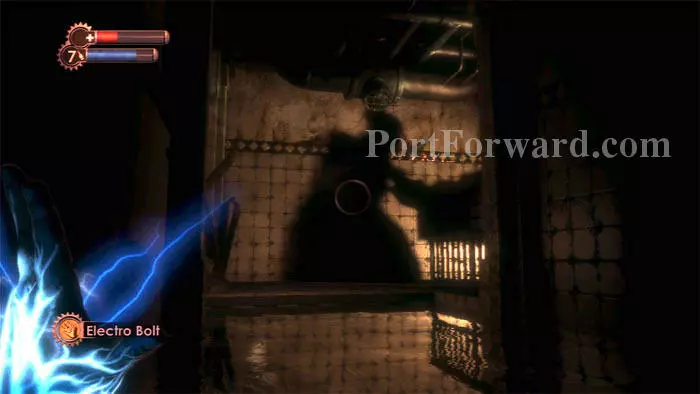
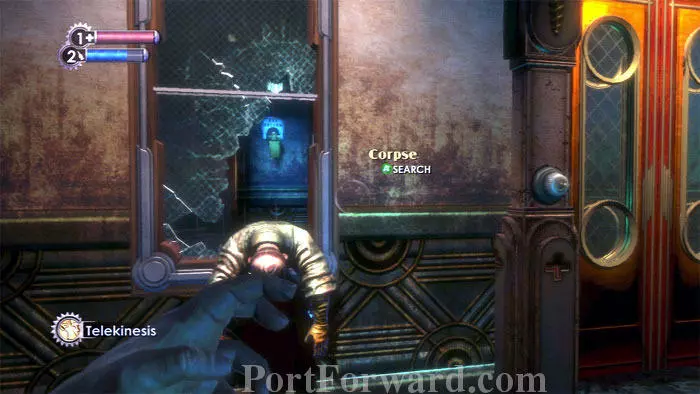
Find some Bandages to the left then spy this shadowy figure before the lights cut out. Some scary music plays...and nothing happens.
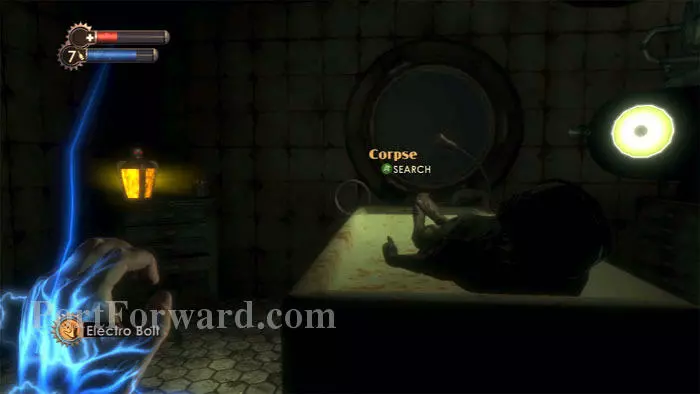
Search the corpse on the right then grab the Security Expert Engineering Tonic on the left. You'll now find it easier to hack security turrets, bots, and cameras. Pistol rounds are also here.
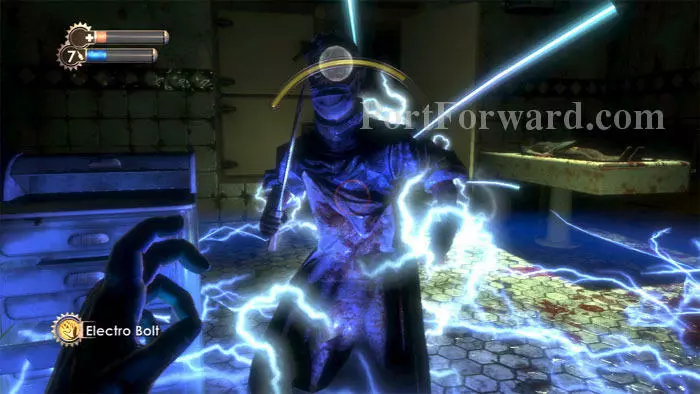
The shadowy figure - this Splicer - reveals himself on your way out.
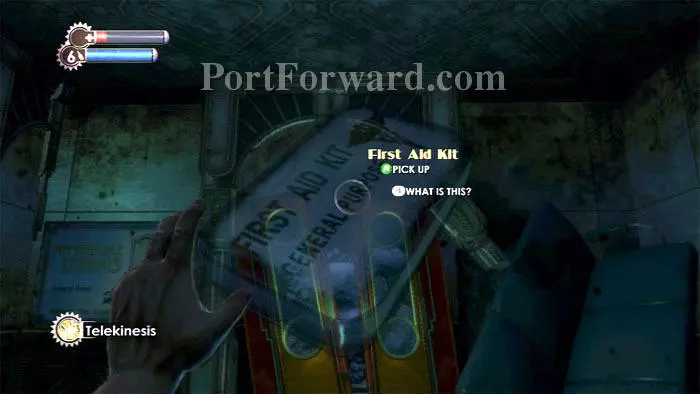
Defeat the Splicer and now it's time to leave. Grab any supplies you can find, including this First Aid Kit which can be grabbed through the broken door by using Telekinesis.
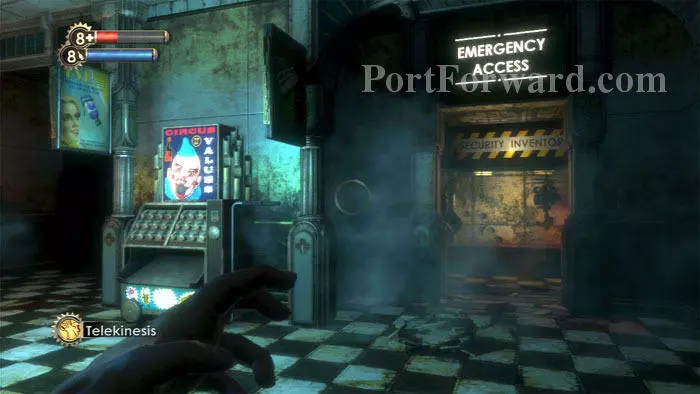
Before entering Emergency Access, you might want to fill up on supplies at the neighboring Circus of Values. I like to purchase EVE Hypos and First Aid Kits, eight each. That way if I find a ninth I can still pick it up. img(206771); Ascend the stairs and defeat this Nitro Splicer - supposedly Andrew Ryan himself - by using Telekinesis to throw his bombs back at him. img(206772); Use the Emergency Access Control switch to disable the security lockdown and unlock the door to the Bathysphere. img(206773); Enter the Bathysphere and pull the lever to travel to Port Neptune.
More BioShock Walkthroughs
This BioShock walkthrough is divided into 15 total pages.


