Splinter Cell: Double Agent Walkthrough JBA HQ (Part 1)

September 12, 2016 (Last Updated: ) | Reading Time: 9 minutes

This Splinter Cell: Double Agent walkthrough is divided into 11 total pages.

You can jump to nearby pages of the game using the links above.
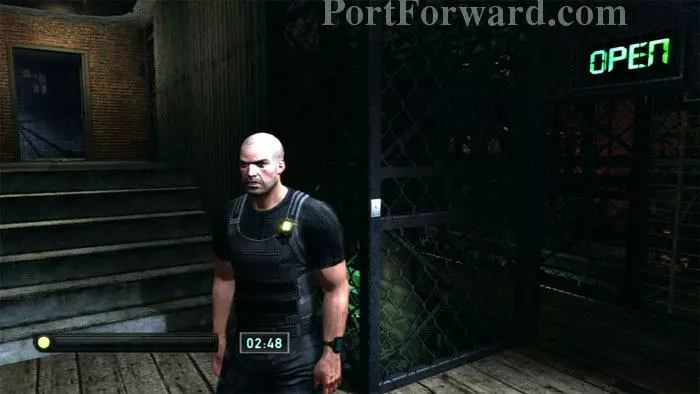
JBA HQ (Part 1)

Splinter Cell: Double Agent Walkthrough - Splinter Cell-Double-Agent 89

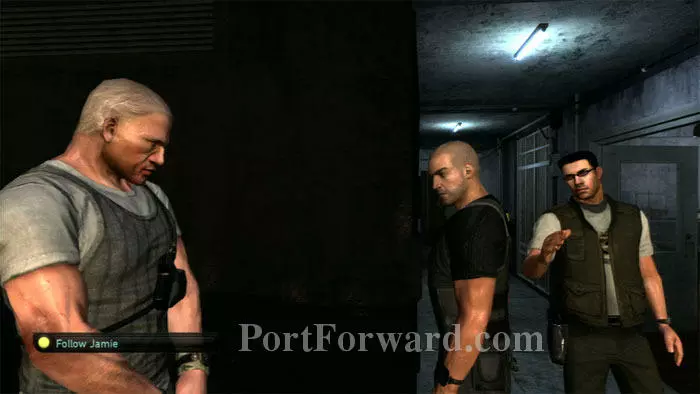
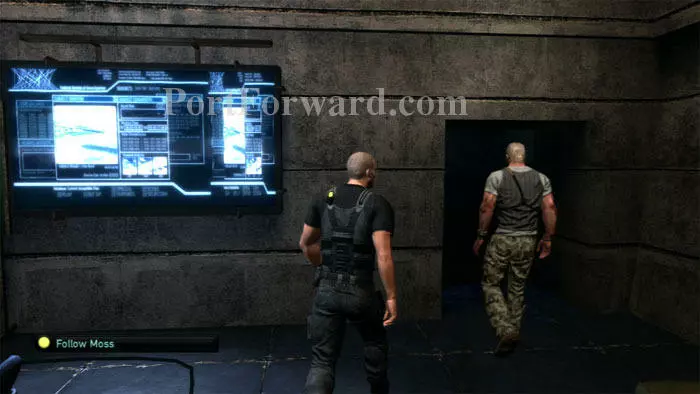
Along the way you'll meet JBA drill sergeant, Moss.

Splinter Cell: Double Agent Walkthrough - Splinter Cell-Double-Agent 90

After some introductory pleasantries, you'll follow Moss to the training course entrance and your first checkpoint.

Splinter Cell: Double Agent Walkthrough - Splinter Cell-Double-Agent 91

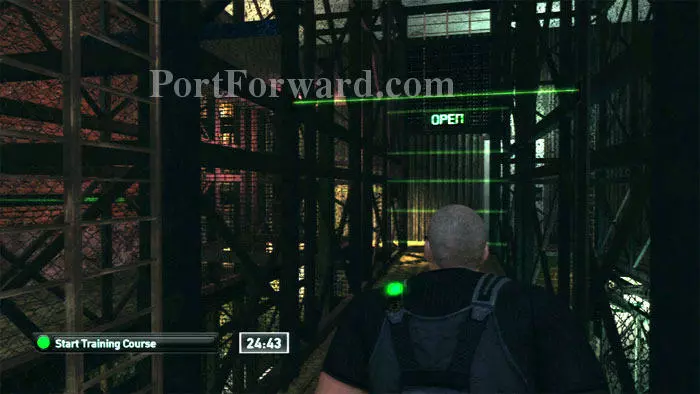
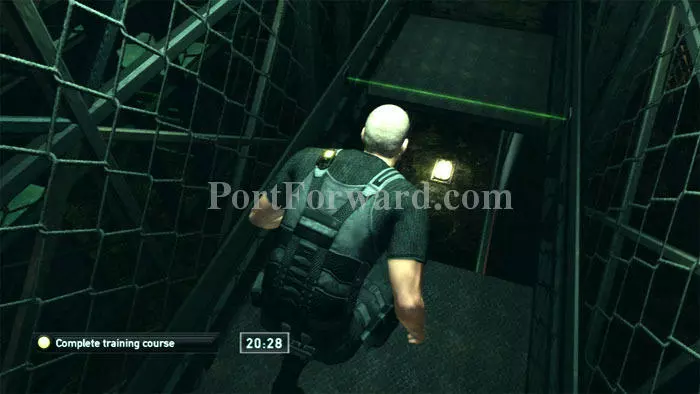
Enter the course then pause here to observe the patterns of the laser beams. Duck under the first, then scurry past when the rows of beams ahead turn off.

Splinter Cell: Double Agent Walkthrough - Splinter Cell-Double-Agent 92

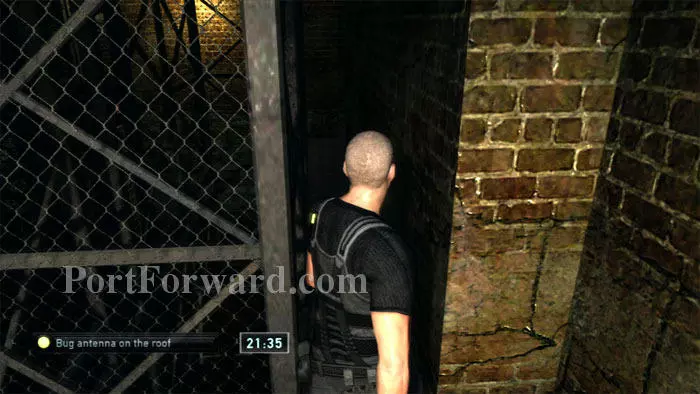
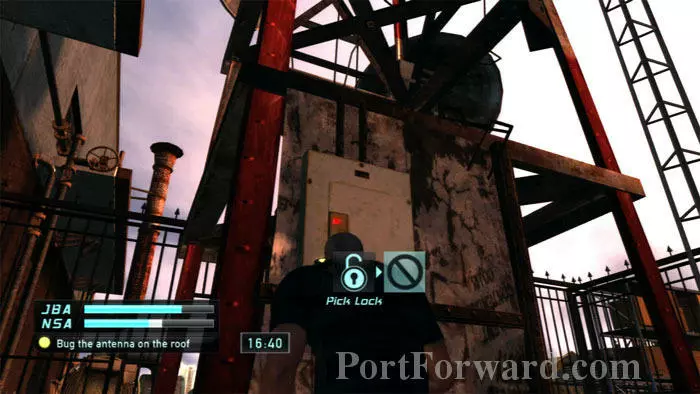
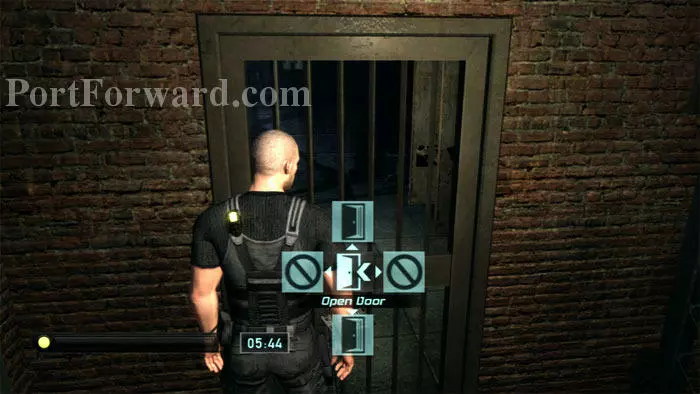
Around the next bend is this locked door. Pick the lock to proceed. (To pick the lock, move the left stick in a circle until one of the pins moves. Then, keep pressing the stick in that direction until the pin lifts away and the lock moves on to the next pin.) Alternately, look behind you for a pipe which can be climbed to carry you across the doorway and over the upcoming laser obstacle.

Splinter Cell: Double Agent Walkthrough - Splinter Cell-Double-Agent 93

More lasers. Again, advance as the beams briefly switch off.

Splinter Cell: Double Agent Walkthrough - Splinter Cell-Double-Agent 94

Around the bend you have a choice to climb up or drop below. I prefer to climb up because the light is better. If you drop below, walk to the other side of the corridor then mantle back up.

Splinter Cell: Double Agent Walkthrough - Splinter Cell-Double-Agent 95

The upper path is slightly less straightforward but it's easer to see. Carefully step across the narrow ledge seen here.

Splinter Cell: Double Agent Walkthrough - Splinter Cell-Double-Agent 96

Rappel below then enter the opening.

Splinter Cell: Double Agent Walkthrough - Splinter Cell-Double-Agent 97

Turn right and squeeze through this tight space.

Splinter Cell: Double Agent Walkthrough - Splinter Cell-Double-Agent 98

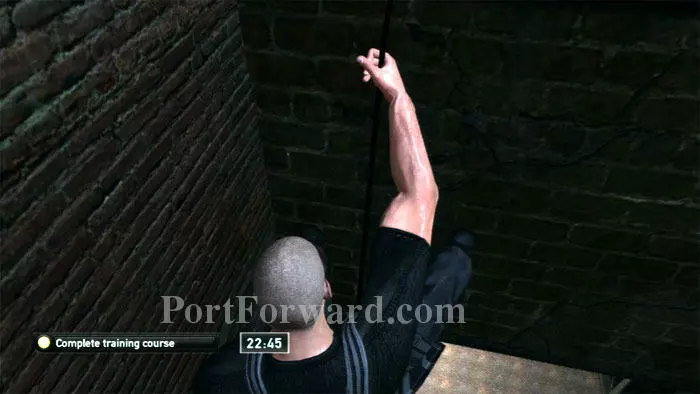
Find this rope around the corner and climb it.

Splinter Cell: Double Agent Walkthrough - Splinter Cell-Double-Agent 99

Rappel down the other side, careful to time your descent so as not to trip the sliding lasers. Don't worry if you do trip them, however; you can return past the tight squeeze to find a newly-opened gate which will put you just past this challenge.

Splinter Cell: Double Agent Walkthrough - Splinter Cell-Double-Agent 100

Your next test is this hurdle. Climb over the first section, then drop below to continue under the second section. Time your movements so that you don't trip the lasers. This is easily done by dropping below while the lower laser is behind you, not ahead.

Splinter Cell: Double Agent Walkthrough - Splinter Cell-Double-Agent 101

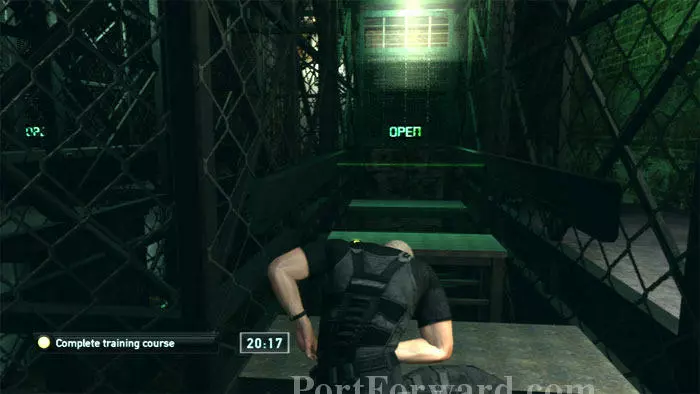
Around the next bend are these hurdles which are even easier. Just lie low while the laser moves overhead.

Splinter Cell: Double Agent Walkthrough - Splinter Cell-Double-Agent 102

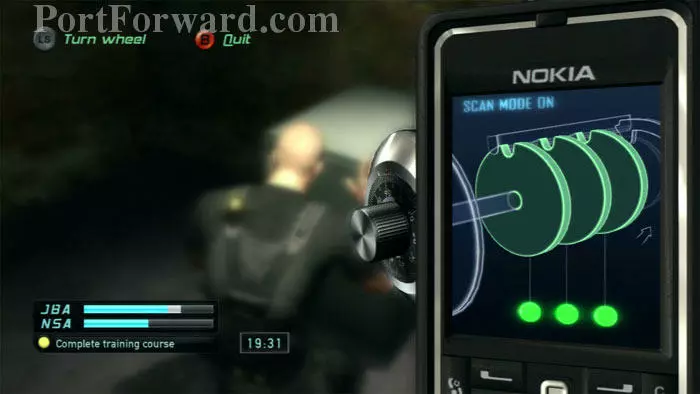
Now you're home free. The safe is around the final corner. Turn the left stick until the tumblers catch, triggering the next tumbler to turn. When the notch reaches the top position it will click into place and turn green. Turn the left stick in the opposite direction and repeat.

Splinter Cell: Double Agent Walkthrough - Splinter Cell-Double-Agent 103

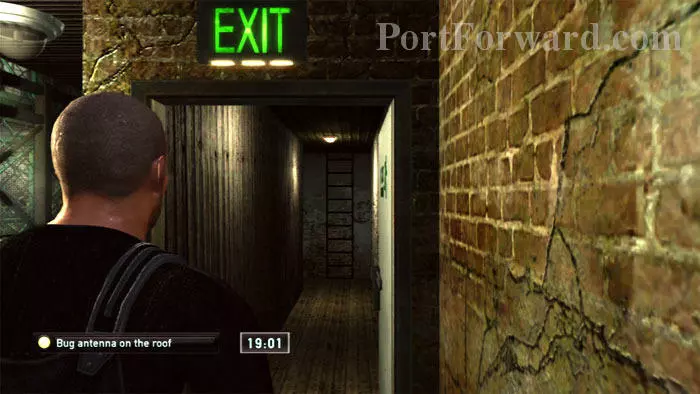
After the safe is open, exit through this door. Climb the ladder at the end of the hall and open the ceiling hatch.

Splinter Cell: Double Agent Walkthrough - Splinter Cell-Double-Agent 104

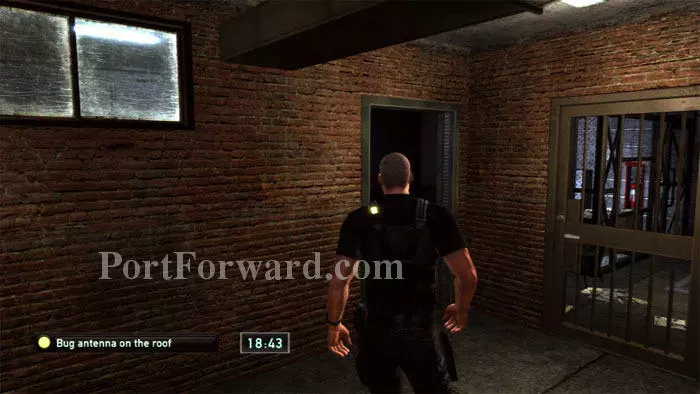
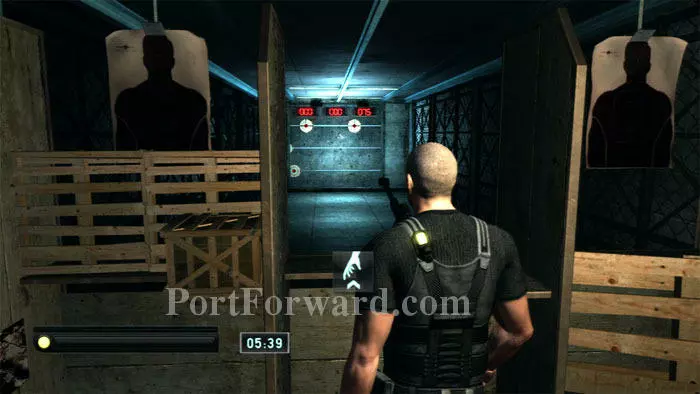
The secondary JBA objective of practicing at the firing range is accessed through the door on the right. Since we're trying to beat the clock, though, it's a safer bet to take the left door which leads to the NSA primary objective of bugging the roof antennae. We'll be back.

Splinter Cell: Double Agent Walkthrough - Splinter Cell-Double-Agent 105

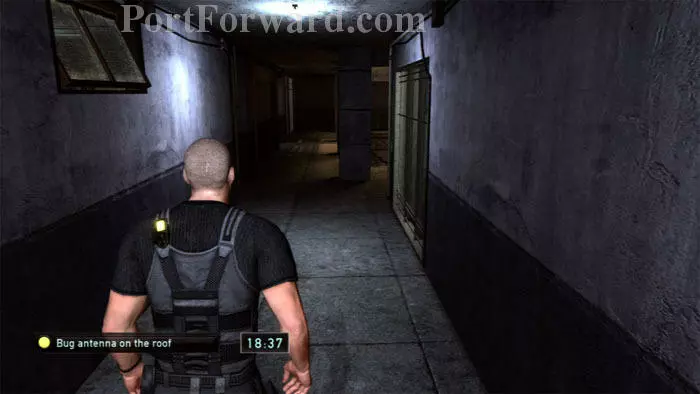
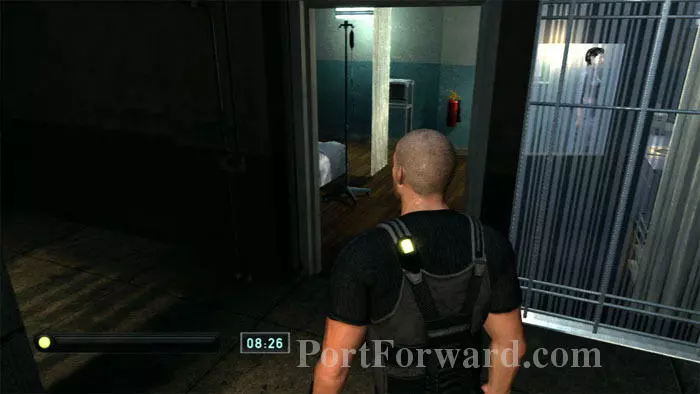
Keep left and continue down this corridor.

Splinter Cell: Double Agent Walkthrough - Splinter Cell-Double-Agent 106

Take the first right then pass the infirmary/Enrica's office. Note the screen-tearing around Sam's arm. This was a frequent visual glitch, unforgivable on a console.

Splinter Cell: Double Agent Walkthrough - Splinter Cell-Double-Agent 107

Climb this ladder.

Splinter Cell: Double Agent Walkthrough - Splinter Cell-Double-Agent 108

Wait for the workmen to finish their conversation and turn toward the fan. The immediate goal is to reach the tunnel to their right.

Splinter Cell: Double Agent Walkthrough - Splinter Cell-Double-Agent 109

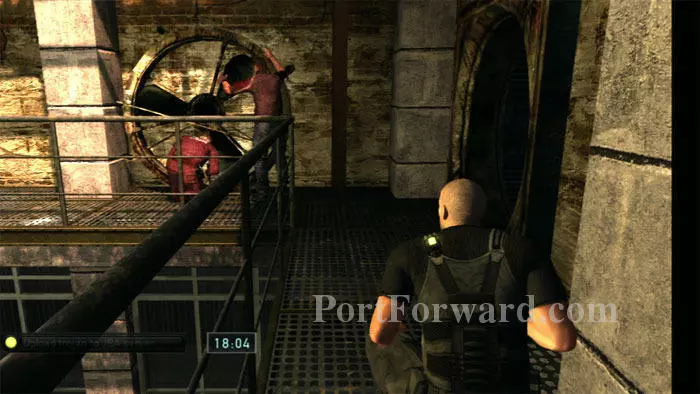
You won't be able to crouch until you reach this position. It is important to crouch or else the workmen will hear your footsteps.

Splinter Cell: Double Agent Walkthrough - Splinter Cell-Double-Agent 110

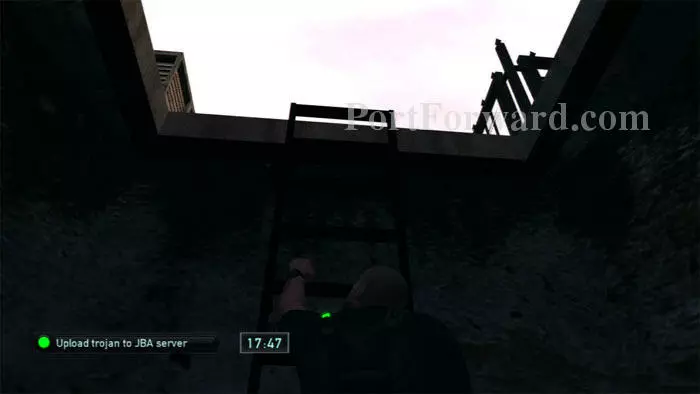
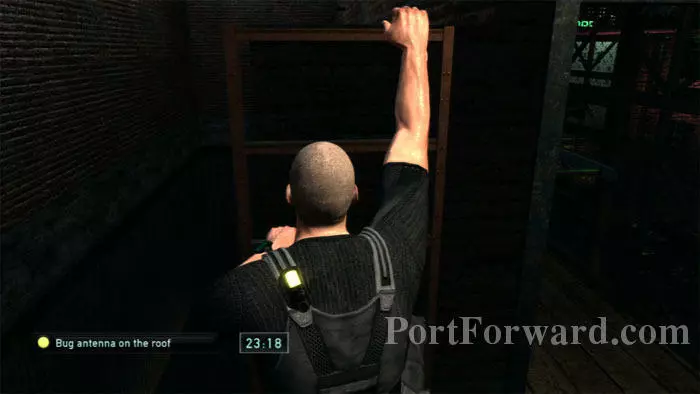
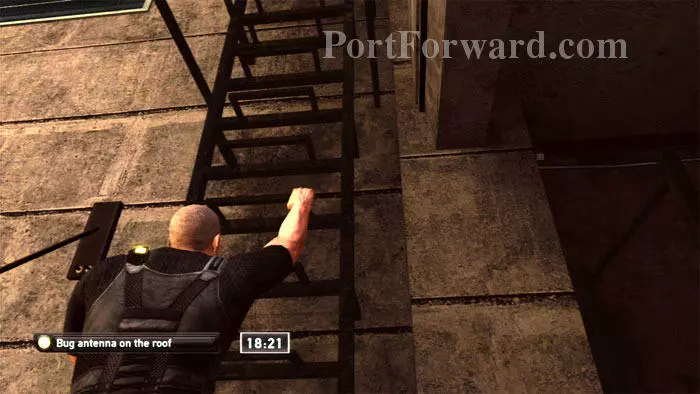
Enter the tunnel, then climb this ladder to the roof.

Splinter Cell: Double Agent Walkthrough - Splinter Cell-Double-Agent 111

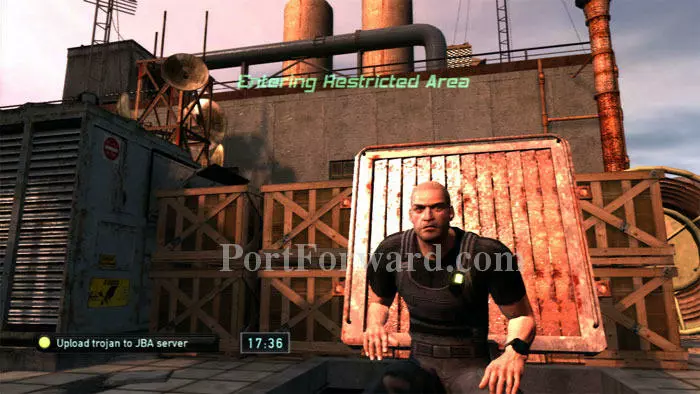
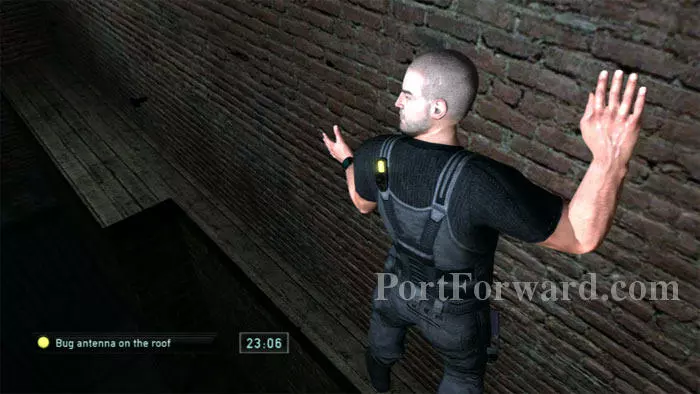
As you emerge from the hatch, a guard will be directly in front of you, turned away. The antenna can be seen behind Sam, upper-left.

Splinter Cell: Double Agent Walkthrough - Splinter Cell-Double-Agent 112

Turn right, then right again. Shadow the guard to the gate ahead/left.

Splinter Cell: Double Agent Walkthrough - Splinter Cell-Double-Agent 113

Once through the gate, keep right then find this panel on the far side of the antenna. Pick the lock and pierce the cable to complete the objective.

Splinter Cell: Double Agent Walkthrough - Splinter Cell-Double-Agent 114

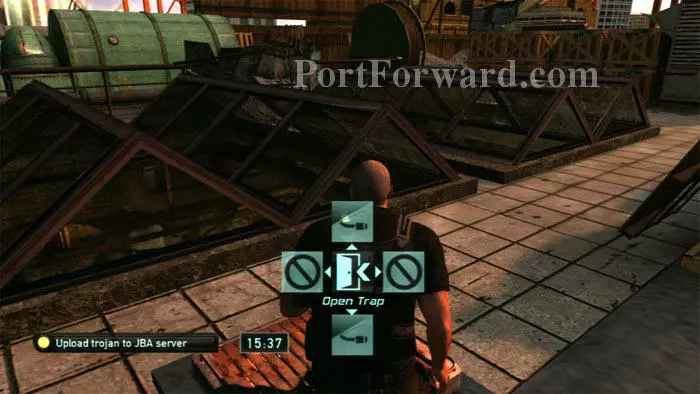
Wait for the patrol to move on, then exit back through the gate and open this trap. Timing is important here; you want the patrol to be blocked from view when you open the trap. Descend the ladder and return to the area with the workmen.

Splinter Cell: Double Agent Walkthrough - Splinter Cell-Double-Agent 115

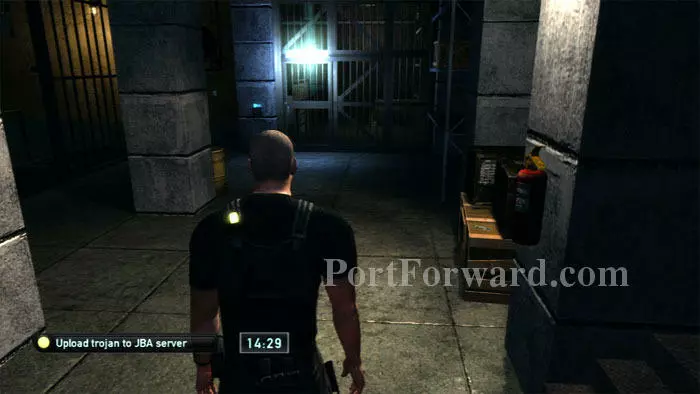
Climb down the ladder your climbed up before, then descend the stairs seen upper-left. We're heading for the server room, the destination for the next NSA primary objective.

Splinter Cell: Double Agent Walkthrough - Splinter Cell-Double-Agent 116

Once downstairs go straight, then follow the hallway right to this area. Hug the shadows on the left as you advance.

Splinter Cell: Double Agent Walkthrough - Splinter Cell-Double-Agent 117

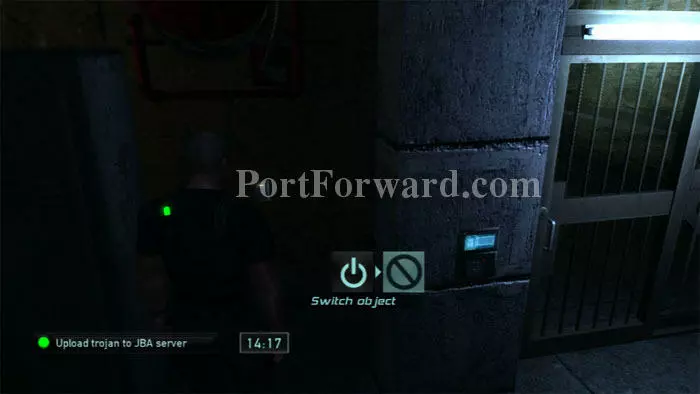
Switch off the lights to provide cover while you hack the keypad on the right. If you prefer not to hack, the code for this keypad can be found on the computer in Enrica's office, 6278.

Splinter Cell: Double Agent Walkthrough - Splinter Cell-Double-Agent 118

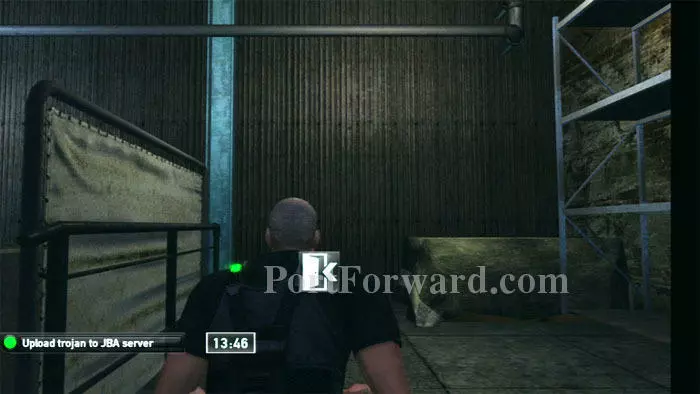
Climb onto the crate ahead/right so you can reach the pipe on the ceiling.

Splinter Cell: Double Agent Walkthrough - Splinter Cell-Double-Agent 119

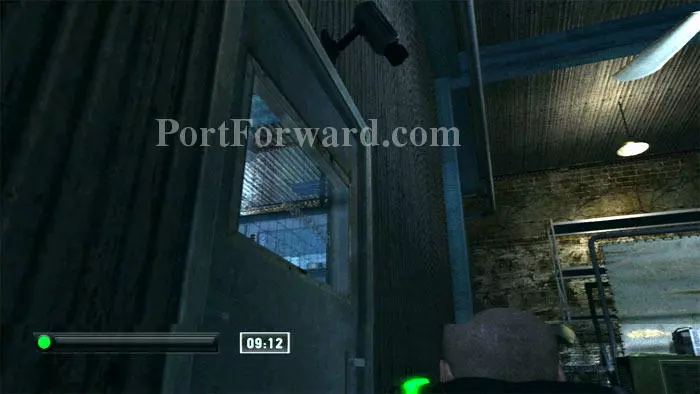
Climbing the pipe allows you to get above the camera. Wait here for Jamie to come through the doorway and complain to his subordinates. Once he's moved away, drop below and enter the doorway, careful to avoid being spotted by the camera.

Splinter Cell: Double Agent Walkthrough - Splinter Cell-Double-Agent 120

Switching off this light switch to the right of the door will assist in completing the NSA secondary objective of getting Stanley Dayton's professional background info.

Splinter Cell: Double Agent Walkthrough - Splinter Cell-Double-Agent 121

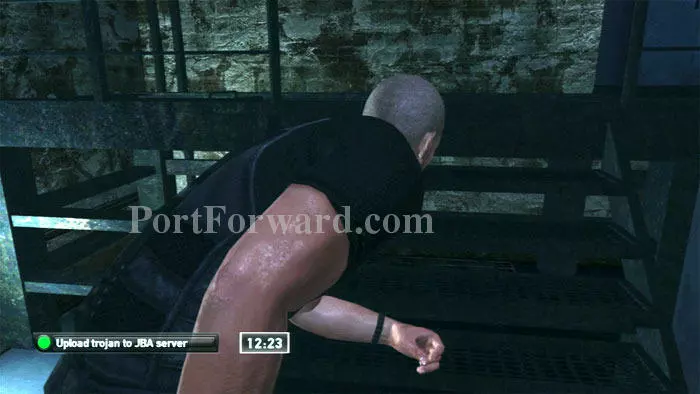
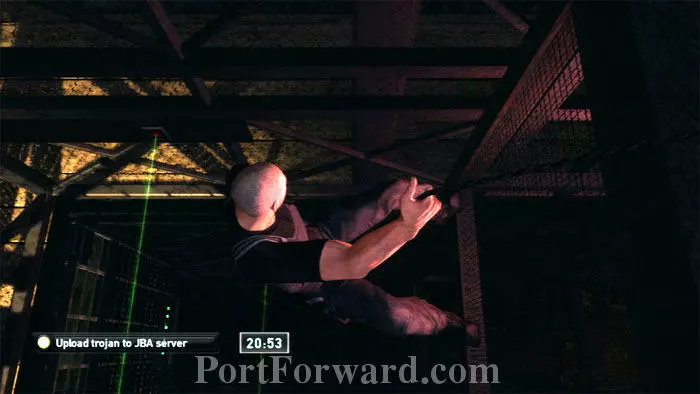
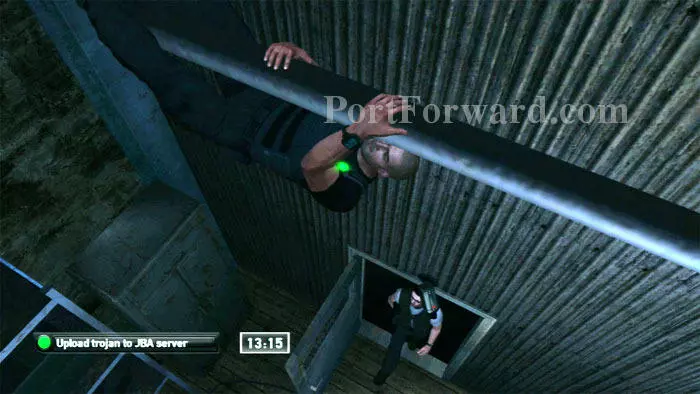
Timing is important here. It is wise to save before advancing up these stairs directly across from the door you just entered. Slip through the floor trap on the left.

Splinter Cell: Double Agent Walkthrough - Splinter Cell-Double-Agent 122

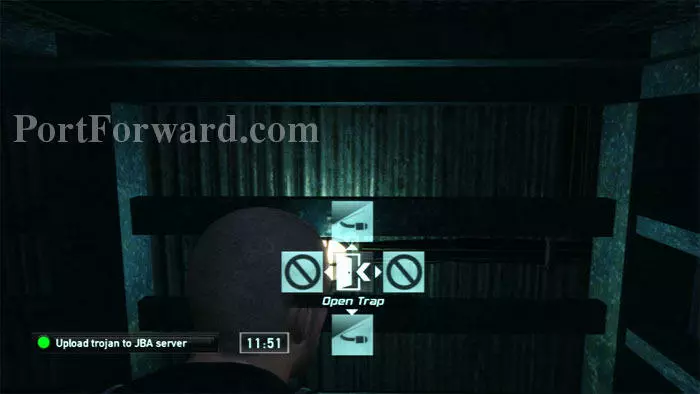
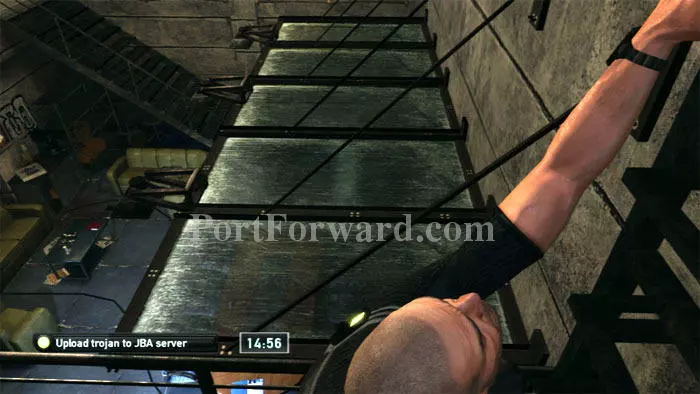
Follow the crawlspace right then find another trap door here. Climb up and out, quietly.

Splinter Cell: Double Agent Walkthrough - Splinter Cell-Double-Agent 123

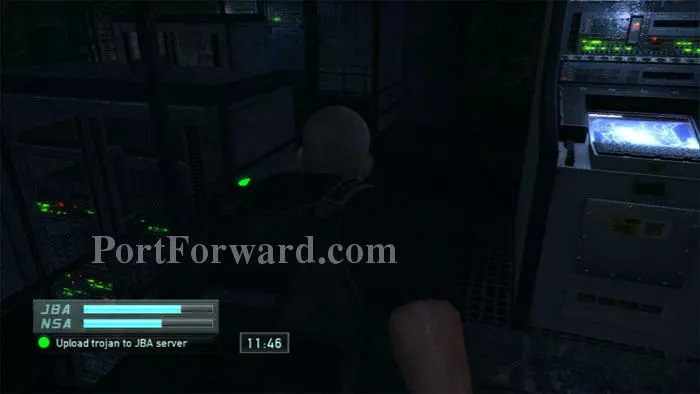
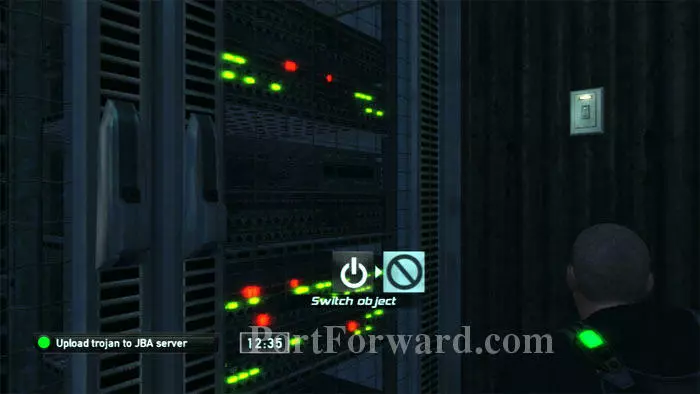
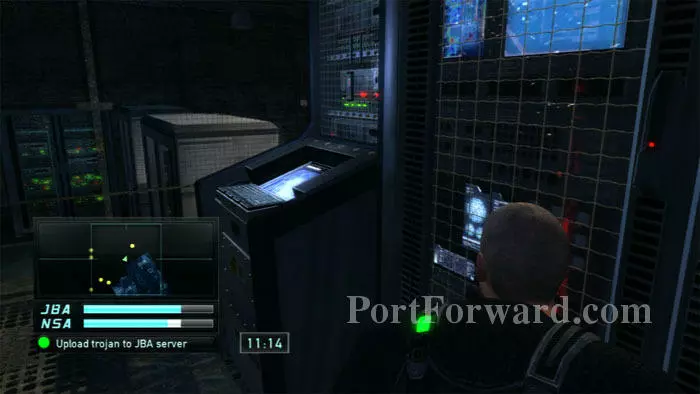
That's the server on the right; ignore it for now if you wish to complete the secondary objective.

Splinter Cell: Double Agent Walkthrough - Splinter Cell-Double-Agent 124

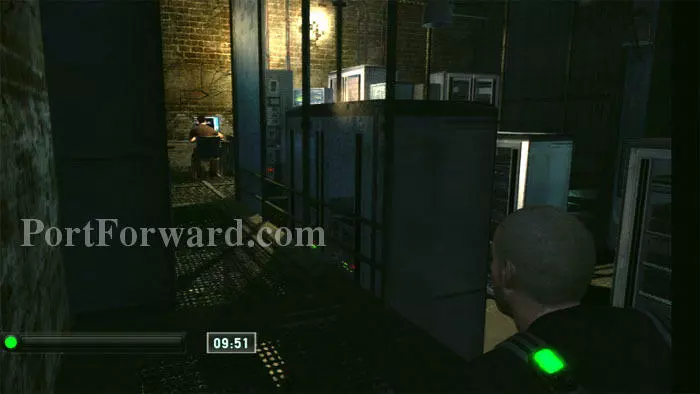
Stanley gets up from this workstation to turn the lights back on. While it's still dark, quickly search this file cabinet to complete the secondary objective of obtaining his professional info.

Splinter Cell: Double Agent Walkthrough - Splinter Cell-Double-Agent 125

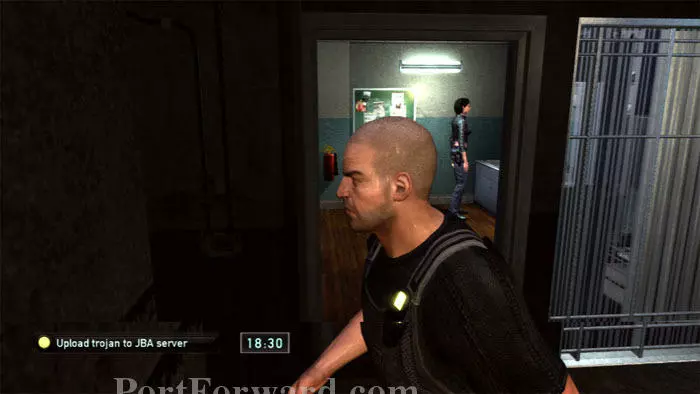
Backtrack past the server and hide in this corner while Stanley returns. Your left bumper activates a radar map that is helpful for watching his position.

Splinter Cell: Double Agent Walkthrough - Splinter Cell-Double-Agent 126

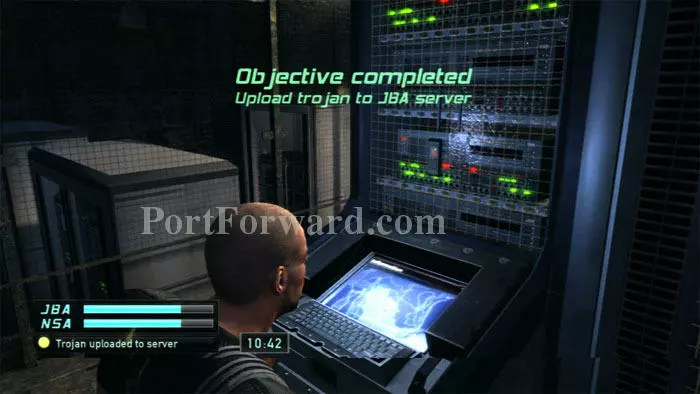
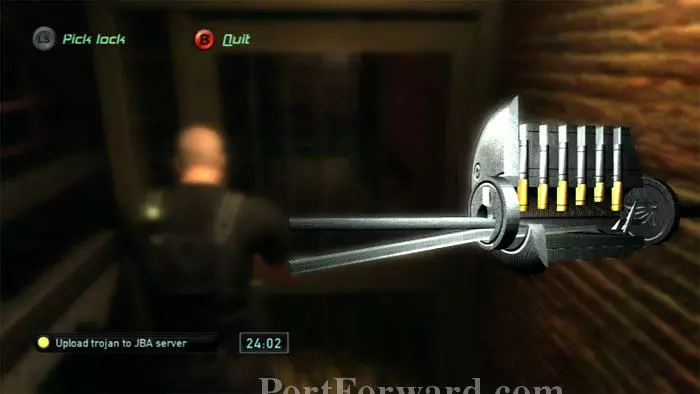
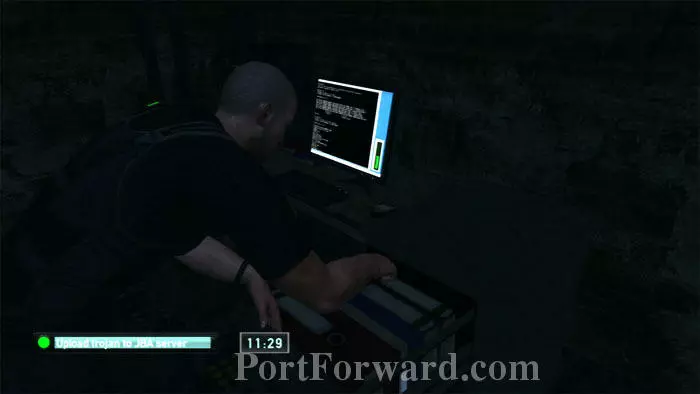
Hack the server and upload the trojan once Stanley is back at his desk.

Splinter Cell: Double Agent Walkthrough - Splinter Cell-Double-Agent 127

Exit the way you came, with Stanley none-the-wiser that anything has happened.

Splinter Cell: Double Agent Walkthrough - Splinter Cell-Double-Agent 128

As you exit the door under the camera, quickly swing right then sit tight so you can wait for the camera to point away before returning to the stairs.

Splinter Cell: Double Agent Walkthrough - Splinter Cell-Double-Agent 129

Now to complete the NSA secondary objective of obtaining the five medical files. Return upstairs to the infirmary.

Splinter Cell: Double Agent Walkthrough - Splinter Cell-Double-Agent 130

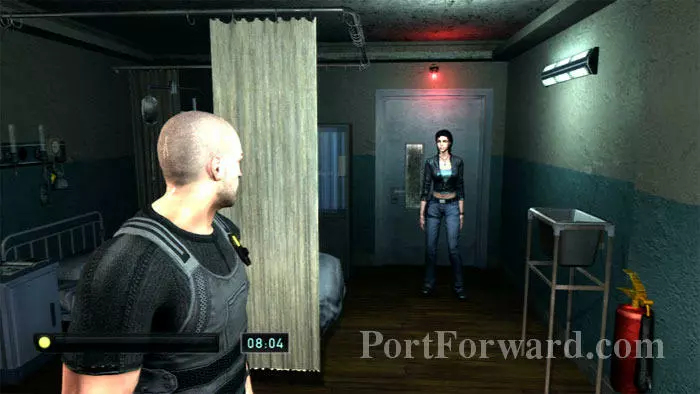
Approach Enrica and she'll talk to you briefly before entering her office.

Splinter Cell: Double Agent Walkthrough - Splinter Cell-Double-Agent 131

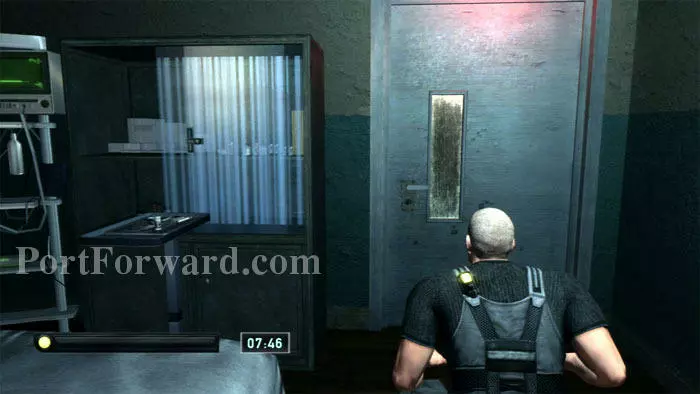
Once Enrica has locked herself in the office, approach quietly. When you are a few feet from the locked door, you'll be able to crouch. Pick the lock and enter.

Splinter Cell: Double Agent Walkthrough - Splinter Cell-Double-Agent 132

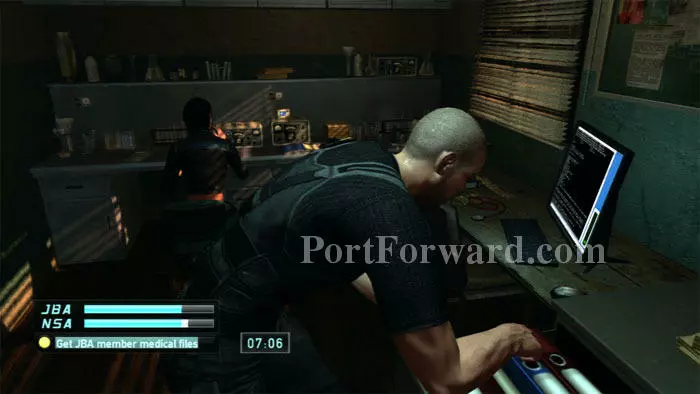
While Enrica hums at her desk, search this cabinet to obtain all five files.

Splinter Cell: Double Agent Walkthrough - Splinter Cell-Double-Agent 133

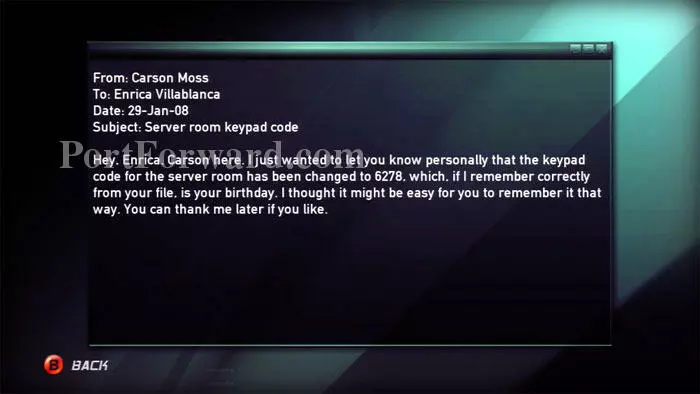
The nearby computer can be hacked to learn the server room keypad code, 6278.

Splinter Cell: Double Agent Walkthrough - Splinter Cell-Double-Agent 134

Time for the firing range secondary objective. Turn left after exiting the infirmary then turn right to return to the firing range door.

Splinter Cell: Double Agent Walkthrough - Splinter Cell-Double-Agent 135

Use the sniper rifle to begin the exercise.

Splinter Cell: Double Agent Walkthrough - Splinter Cell-Double-Agent 136

You are awarded one, three, or five points for hitting the target, with bulls eye's scoring the most points. I found it easiest to focus on the middle row and avoid chasing targets. Hold your left trigger to steady the site on the bar then fire when the target is beneath your reticule.

Splinter Cell: Double Agent Walkthrough - Splinter Cell-Double-Agent 137

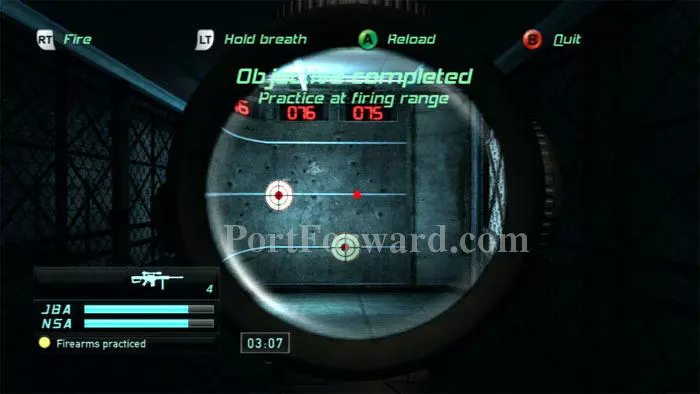
You'll need to score 75 points without reloading to earn the objective.

Splinter Cell: Double Agent Walkthrough - Splinter Cell-Double-Agent 138

Next, head down the stairs to the rendezvous point for Moss and wait for him to return. He should show when there's less than two minutes left on your timer.

Splinter Cell: Double Agent Walkthrough - Splinter Cell-Double-Agent 139

Follow Moss as he leads you to your final objective of the level.

Splinter Cell: Double Agent Walkthrough - Splinter Cell-Double-Agent 140

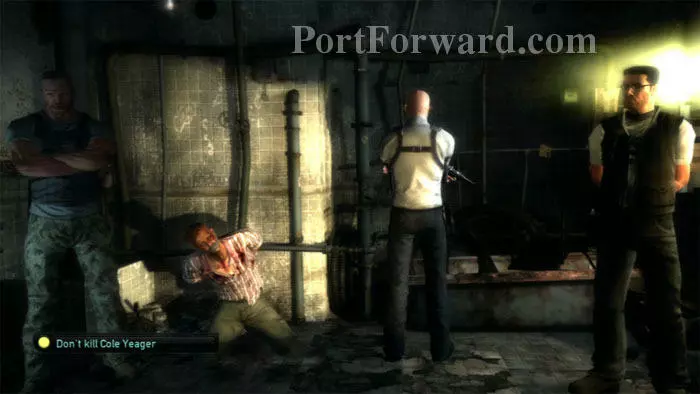
The news helicopter pilot is being held captive, and you are being asked to execute him.

Splinter Cell: Double Agent Walkthrough - Splinter Cell-Double-Agent 141

Kill him and please the JBA, or miss and please the NSA, the choice is yours. (I chose to miss.)

Splinter Cell: Double Agent Walkthrough - Splinter Cell-Double-Agent 142

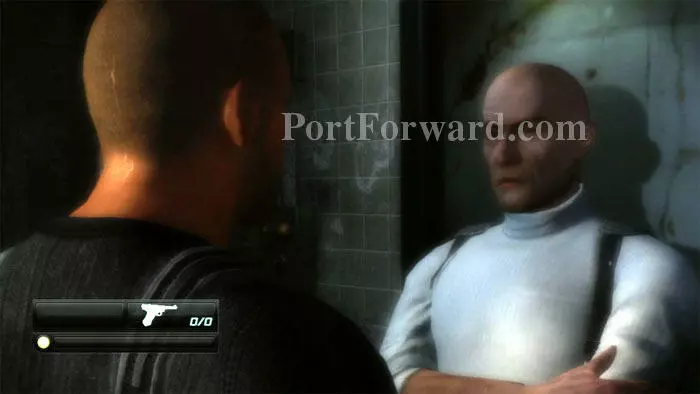
Emile explains little about the upcoming mission in the level's ending cutscene.

More Splinter Cell: Double Agent Walkthroughs

This Splinter Cell: Double Agent walkthrough is divided into 11 total pages.

More From Portforward