
This Splinter Cell: Double Agent walkthrough is divided into 11 total pages.
You can jump to nearby pages of the game using the links above.
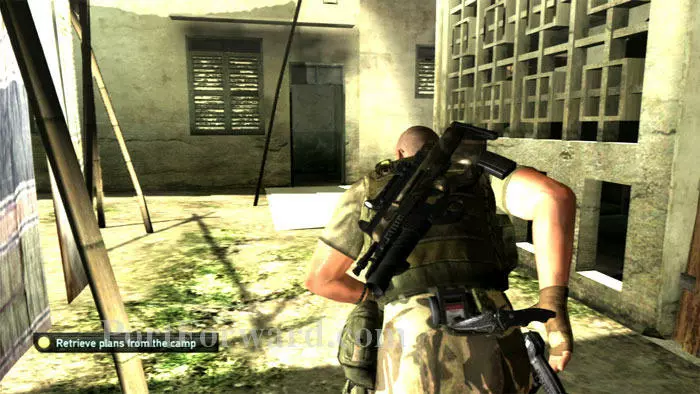
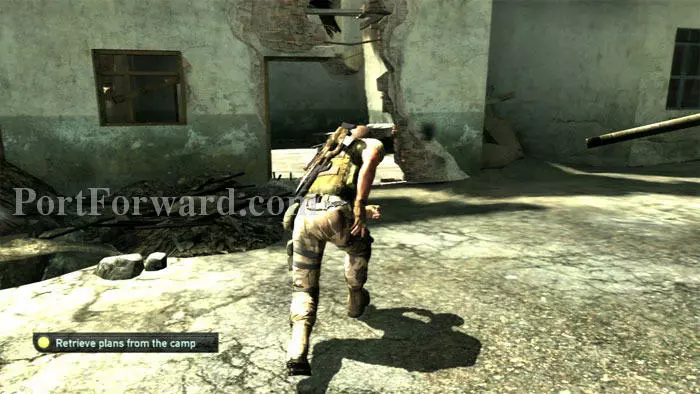
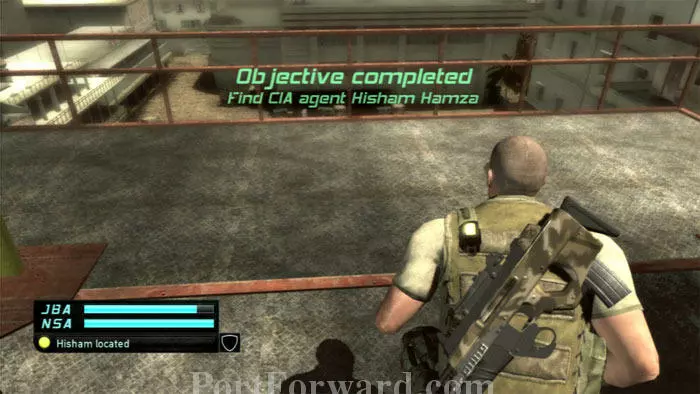
Kinshasa
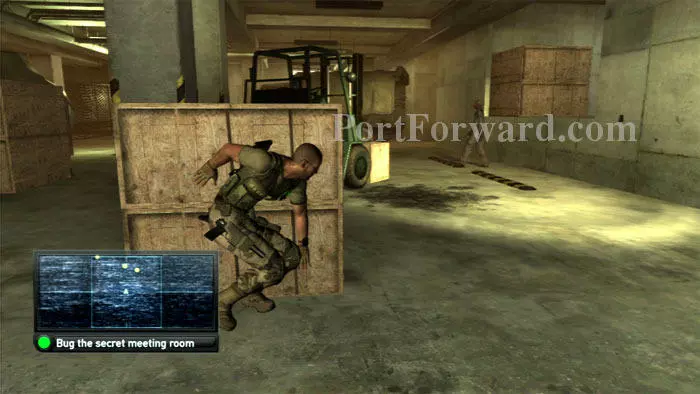
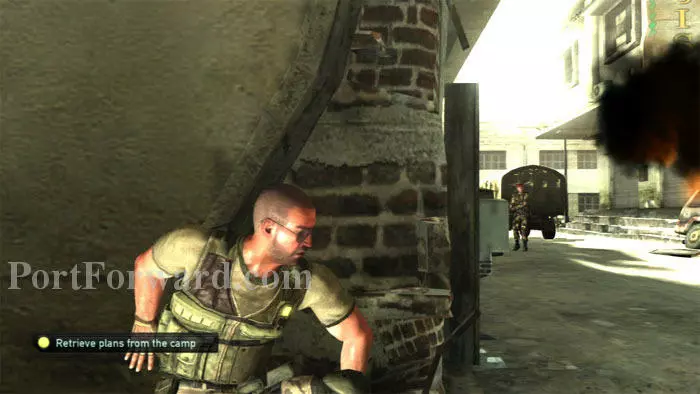
After getting in by a hole in the fence, head right and take cover behind this box. The two guards greet the truck which has just arrived.
One of the guards will hang back. Use your ultrasonic emitter to lure him away from the elevator area on the right.
Climb up then call the elevator.
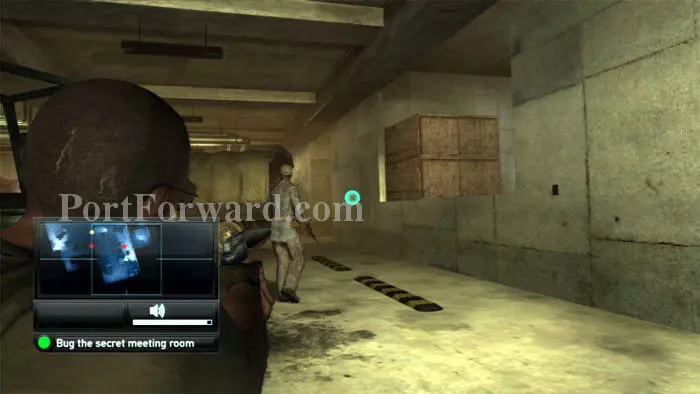
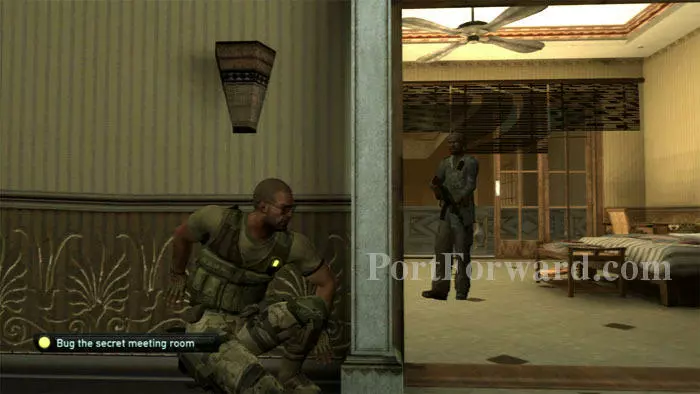
Step off the elevator, then EMP the ceiling light to give yourself enough cover to enter one of these lockers before the guard enters.
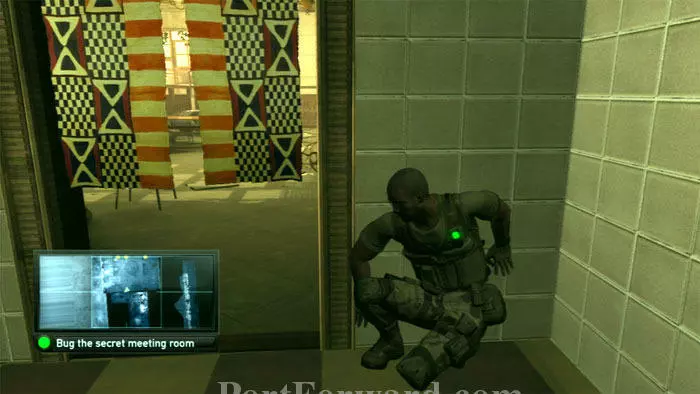
Follow the guard through the kitchen and then through this curtain.
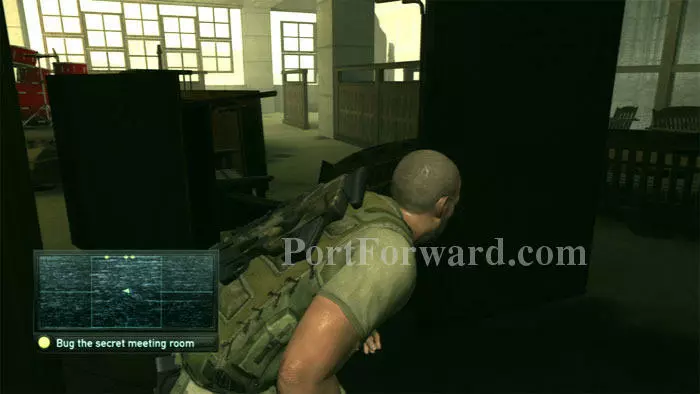
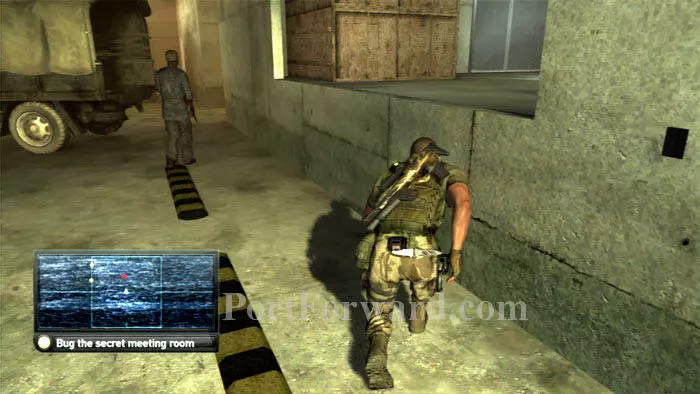
Keep right. These overturned tables provide cover.
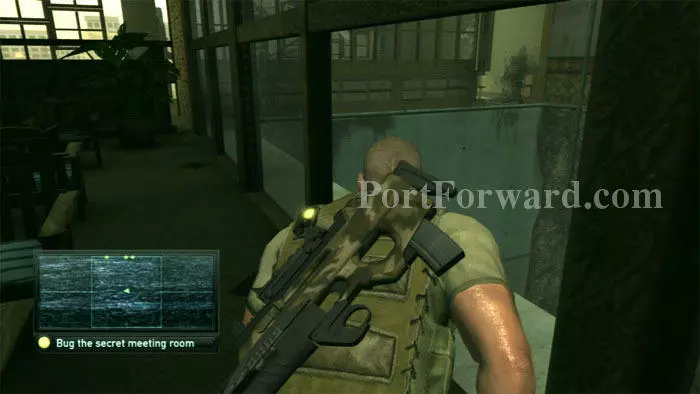
Slip through this glassless window section. Follow the ledge to the corner ahead.
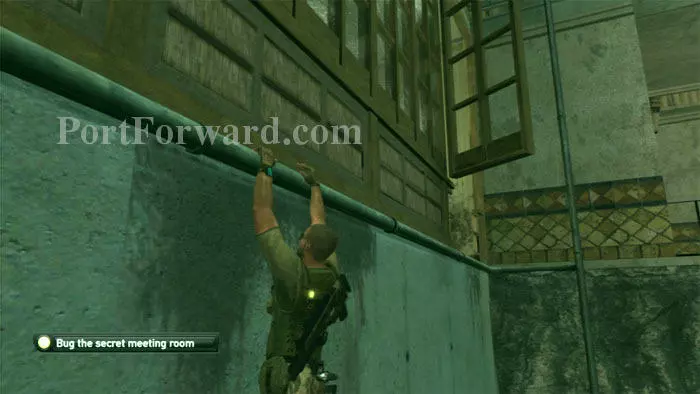
Shimmy along this pipe, then climb the adjacent pipe segment around the corner.
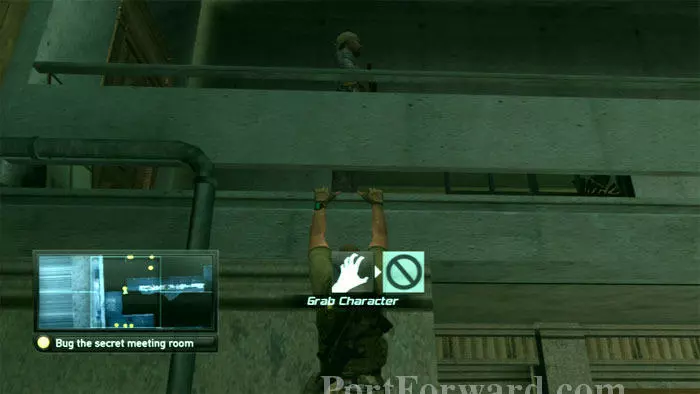
Reach out for the balcony then wait for this guard. You can either grab him or wait for him to move along.
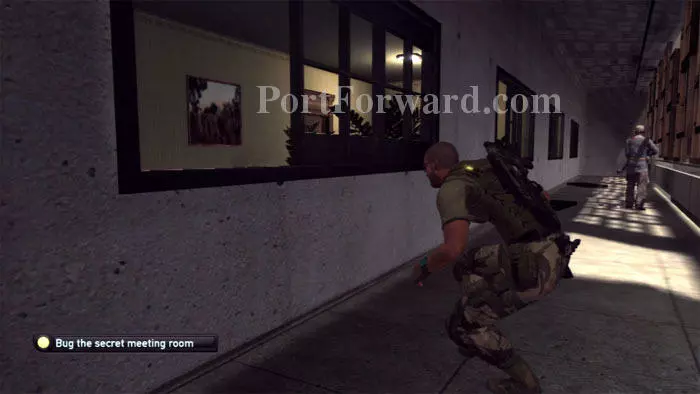
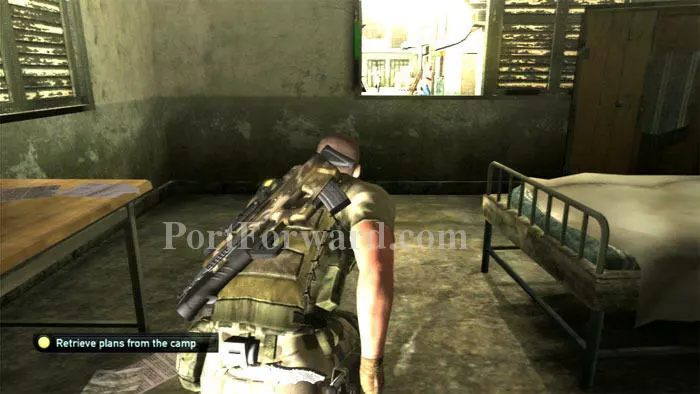
Climb through one of these windows. If you're feeling brave, the farthest room has a computer with some background emails.
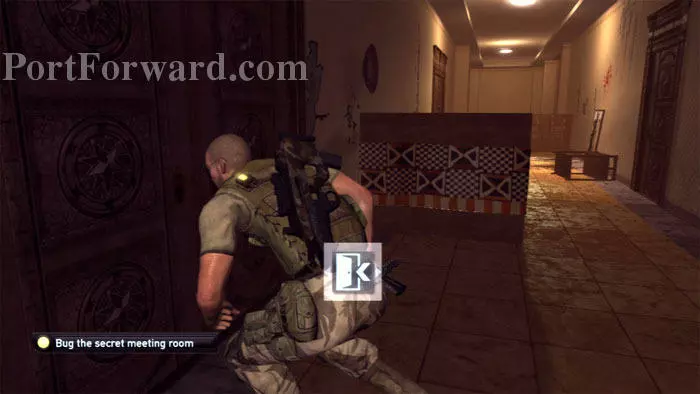
Slip into the hallway then take these double doors on the left.
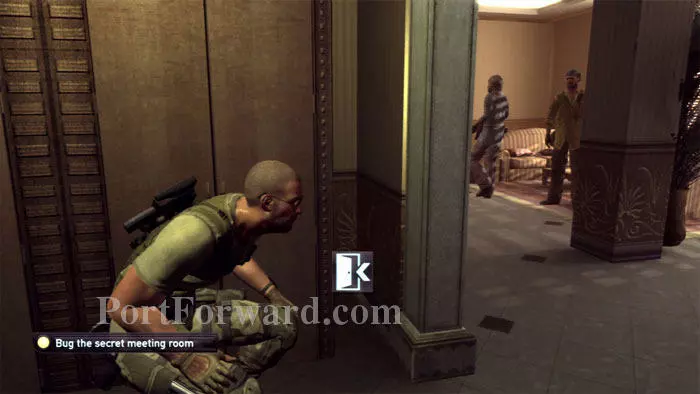
Wait for the guards to split up. One will stand nearby with his back to you, easily avoided.
The other guard will search the bedroom. Repeatedly and forever. He's really hard to avoid.
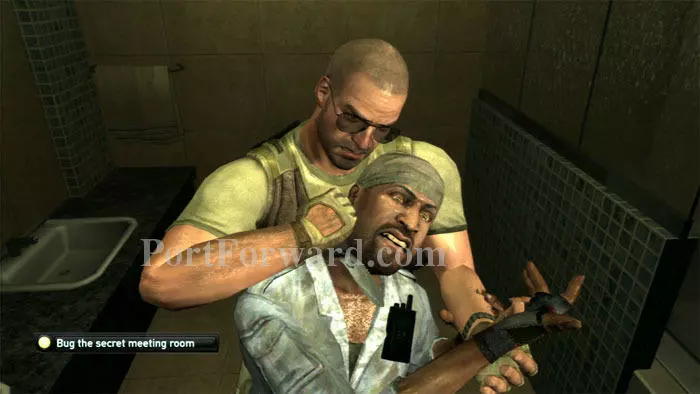
If you don't mind knocking him out, wait until he heads left. It's an easy task to sneak up on him while he's in the bathroom.
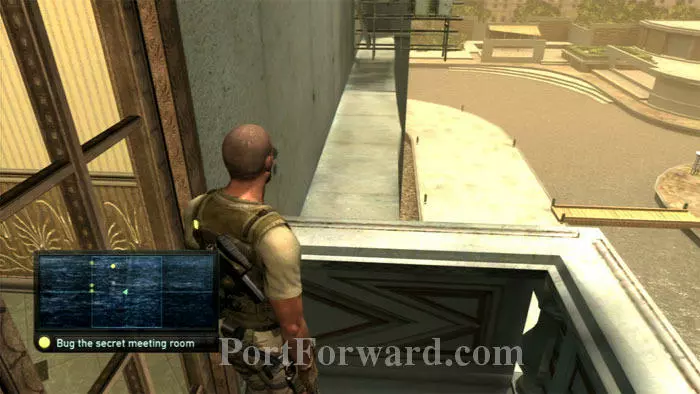
Step out on the balcony and climb over the left railing to the ledge.
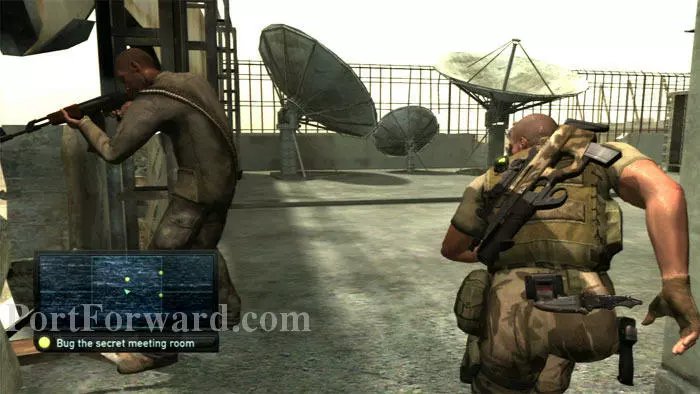
Climb this sign to reach the next checkpoint, and the roof.
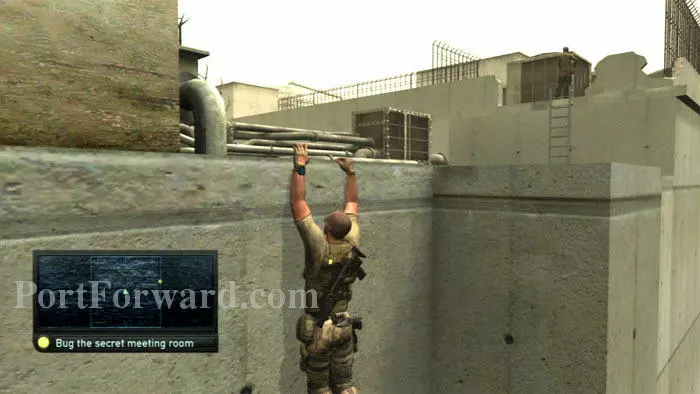
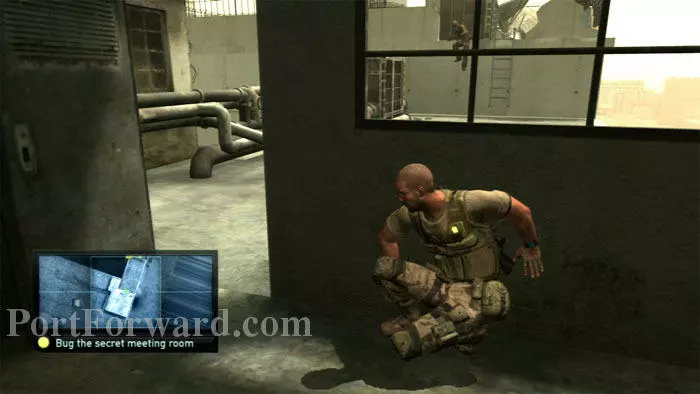
Pull yourself onto the roof. The ladder to the right is where you want to eventually go. Rushing there right now is not well-advised.
Instead, slip through this door on the left.
Frag grenades can be found here, if that's your thing.
Three guards are firing from the rooftop beyond the ladder. If you wait here by this window for a while, one will move position to this lower portion of the roof.
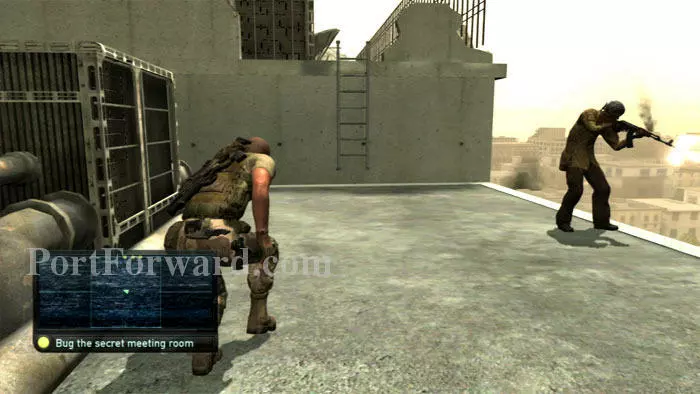
If you sneak to the ladder while he has his back to you, you'll then only have two guards to worry about once you're on the upper roof.
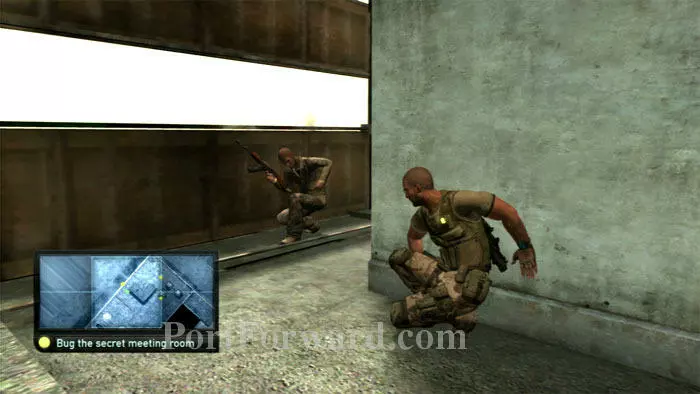
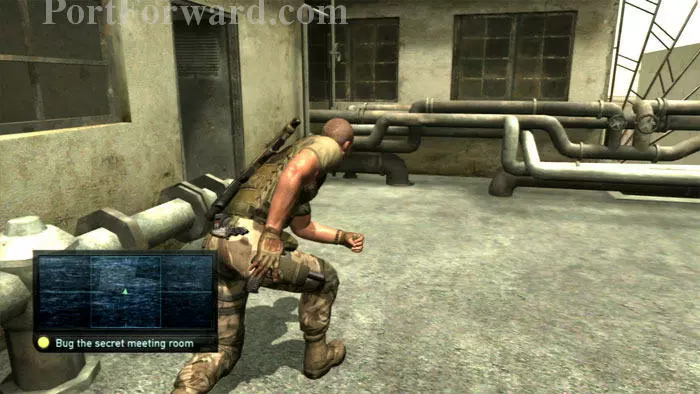
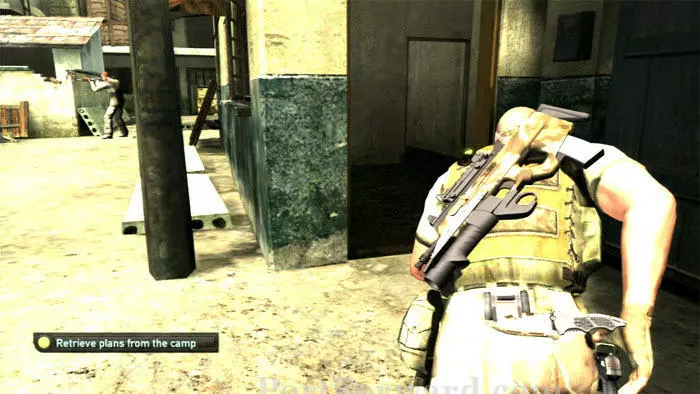
Keep left. Hug the wall and observe one of the guards reloading his gun.
Sneak behind him while he's busy firing. Keep right.
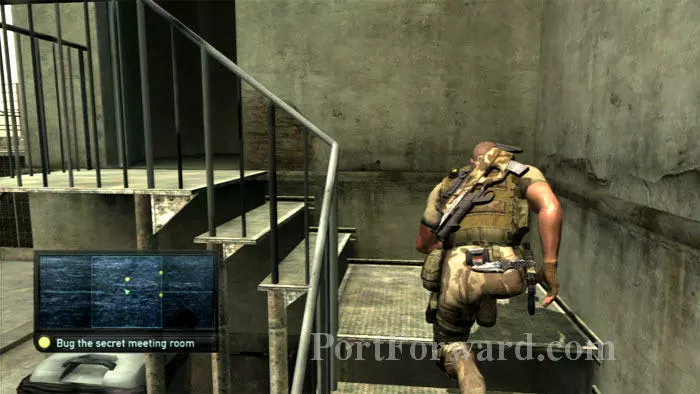
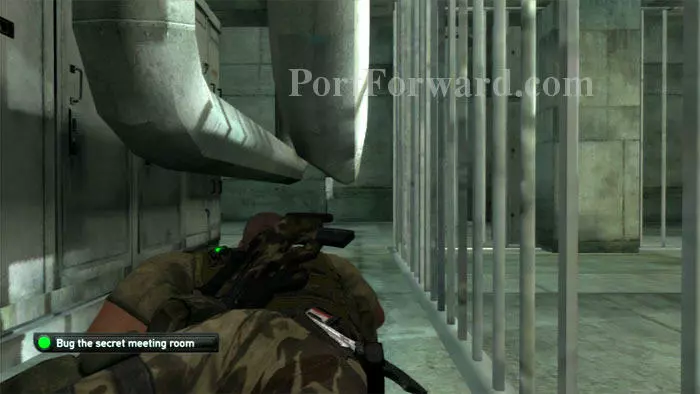
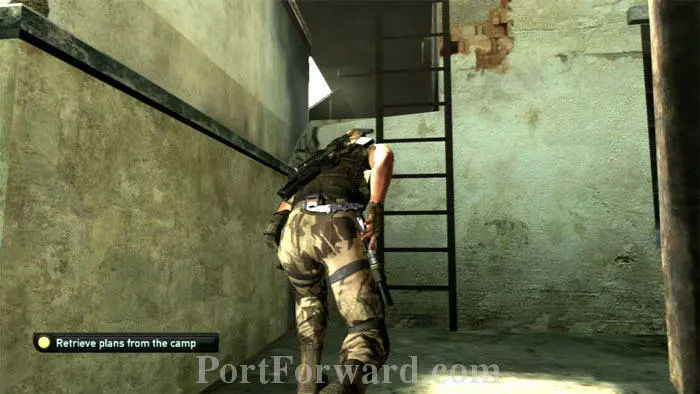
Ascend these stairs and slip through the doorway.
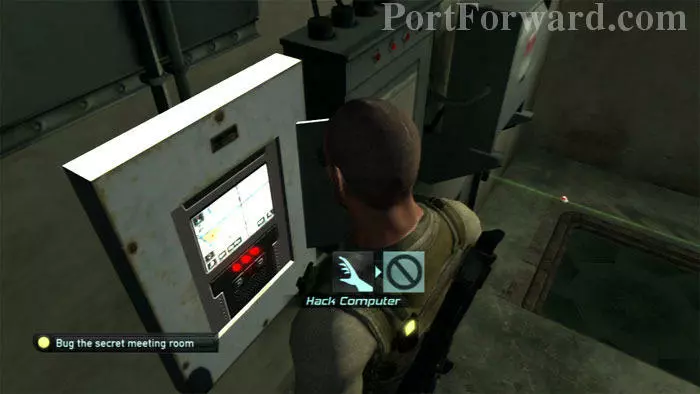
Pick the lock on this panel and hack the computer to disable the laser and open the hatch on the right.
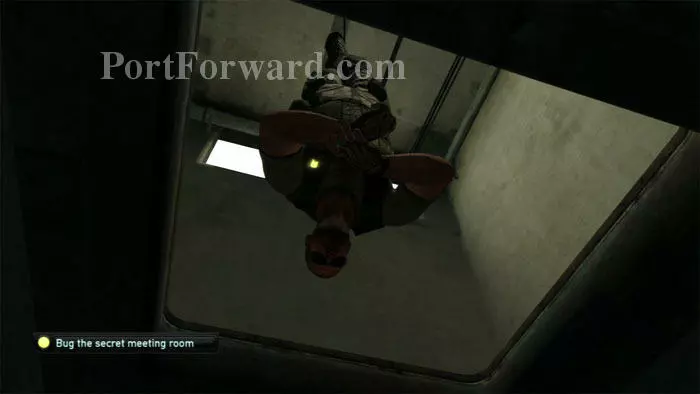
Hop up to the pipe above then use your winch to lower yourself through the hatch.
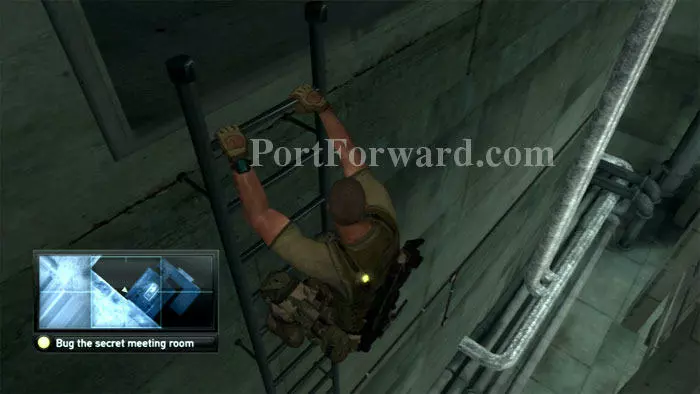
Descend this ladder.
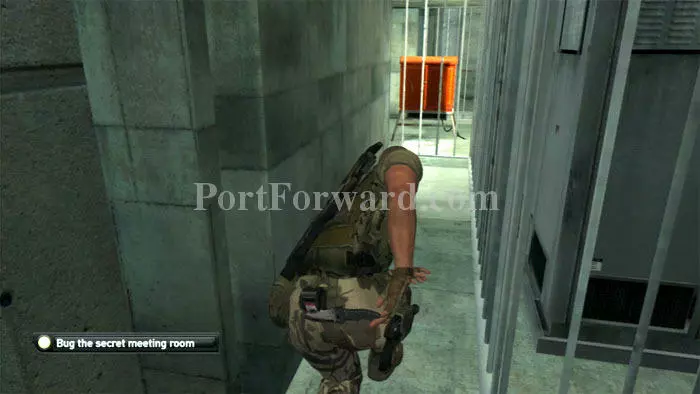
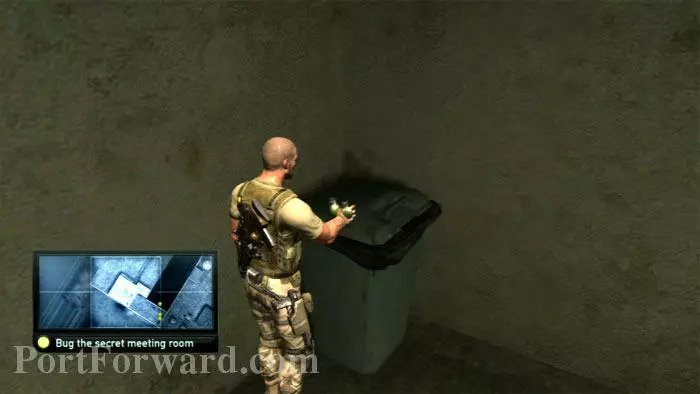
Slip into this passage.
Crawl under these pipes.
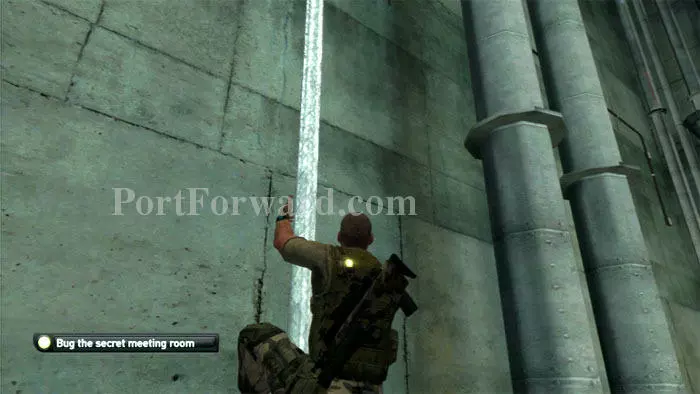
Climb this pipe.
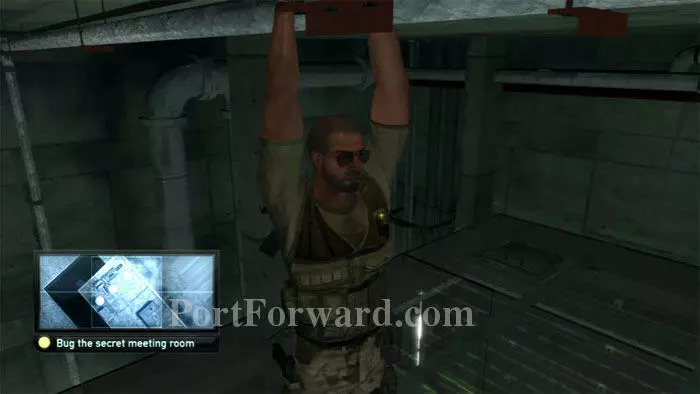
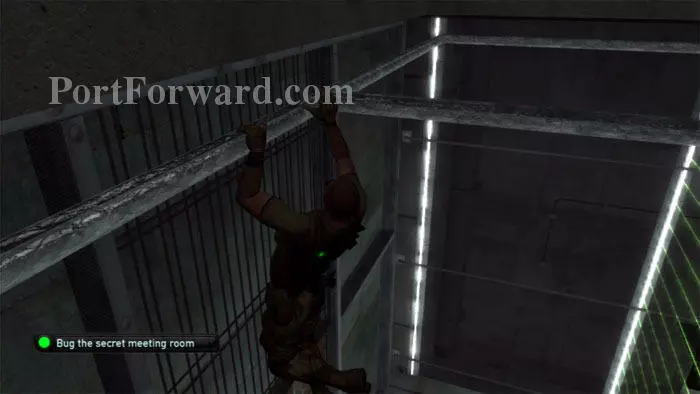
Shimmy along the ceiling pipe then drop below once here.
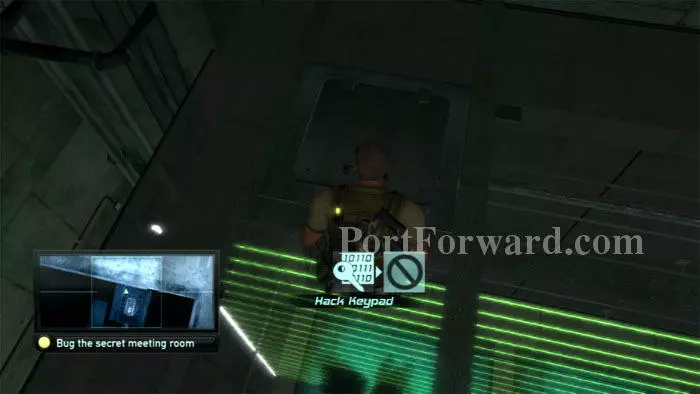
Hack the keypad on this hatch then drop through.
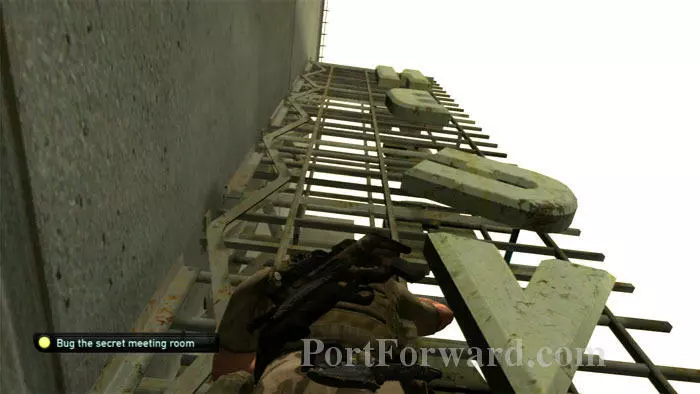
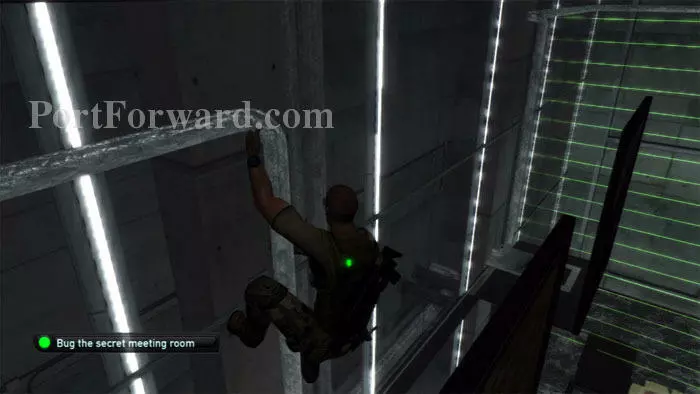
Grab hold of this pipe. You can now proceed left or right, it doesn't really matter.
Just be sure to pause while the lasers are firing.
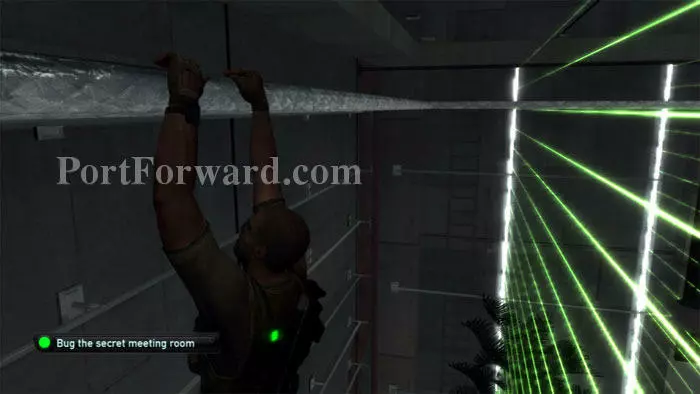
The pipe will end, running into the floor. Continue up the adjacent pipe a few yards away.
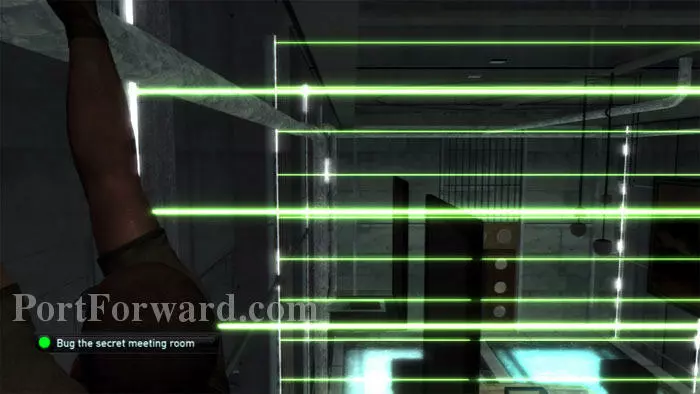
This is the important part. Follow the pipe along to this cross-pipe, running down the center of the room.
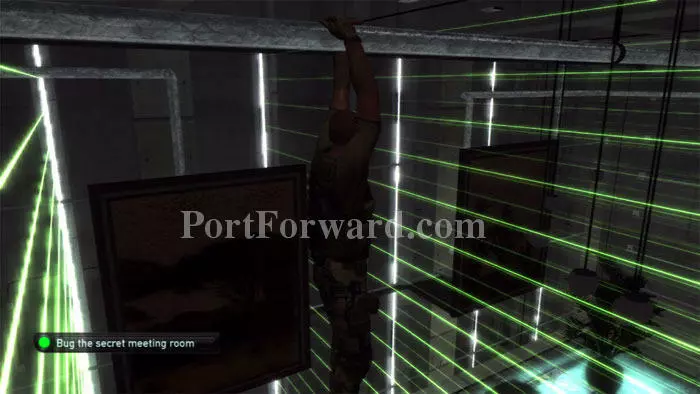
Shimmy along this new pipe toward the chandelier, again pausing while the lasers are firing.
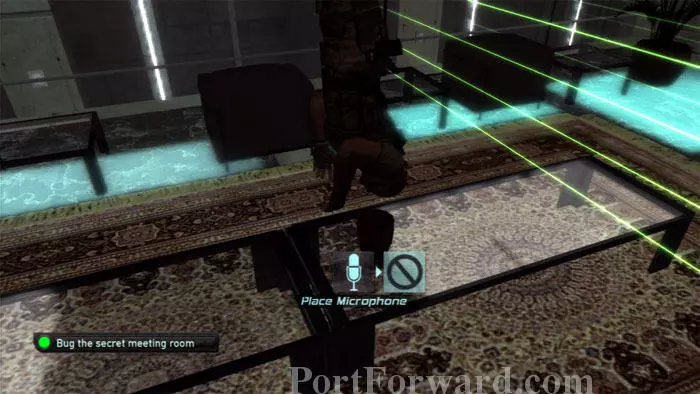
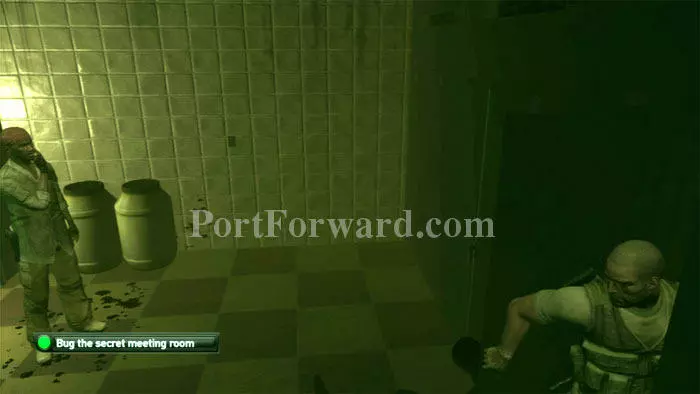
Upon reaching the chandelier, you'll be able to winch your way down to this table and place the microphone. Hisham warns that Emile and the others are on their way -- quickly winch back up.
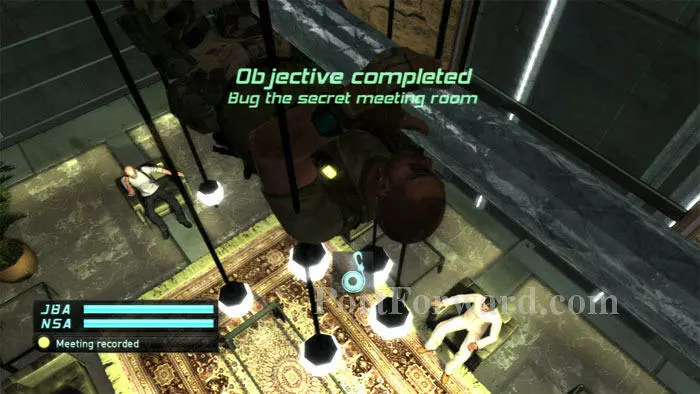
Hang out while the meeting takes place.
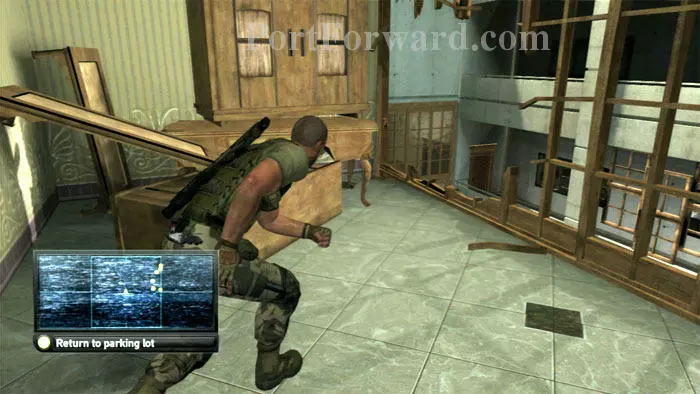
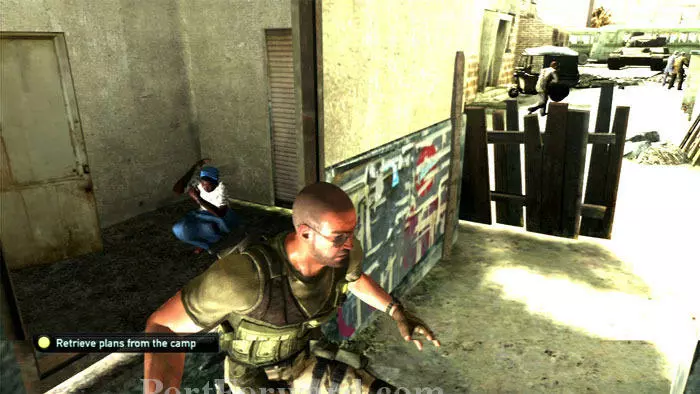
Quietly follow everyone out once the meeting concludes. Head left to this broken wall.
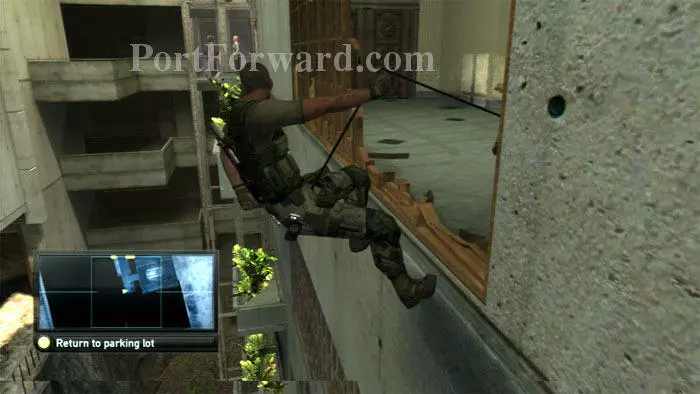
Rappel down the building. You can spy Emile and company on the elevator.
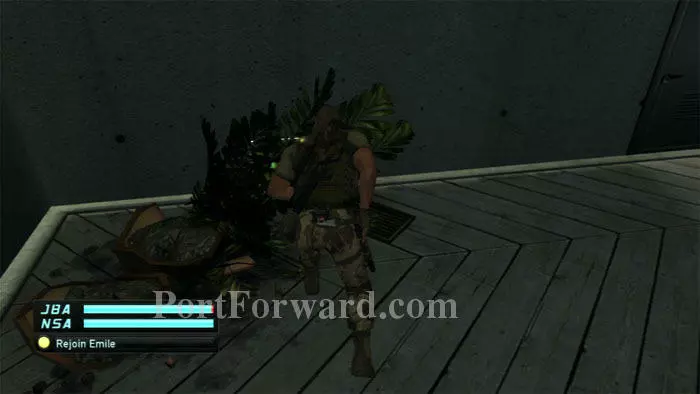
Push your way into the air vent behind this plant. Move quickly, as JBA trust is lost the longer you take returning to the parking garage.
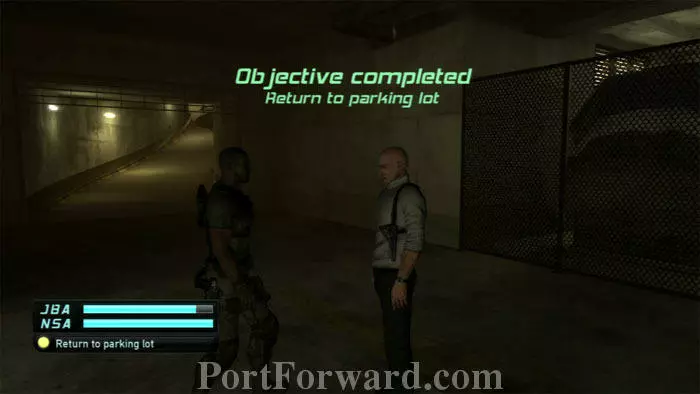
Drop into the bathroom then exit to the parking garage. Talk with Emile then follow the ramp to load the next area.
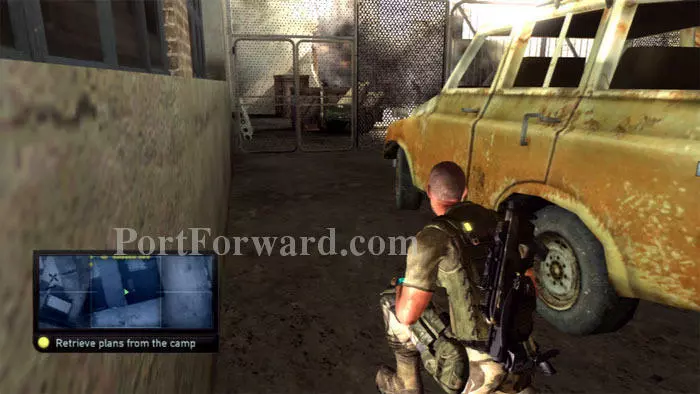
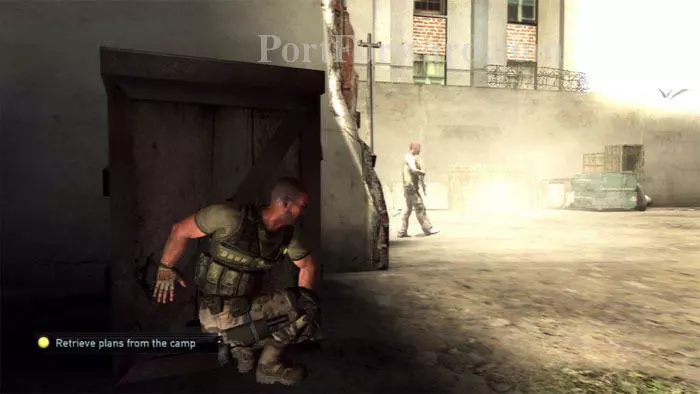
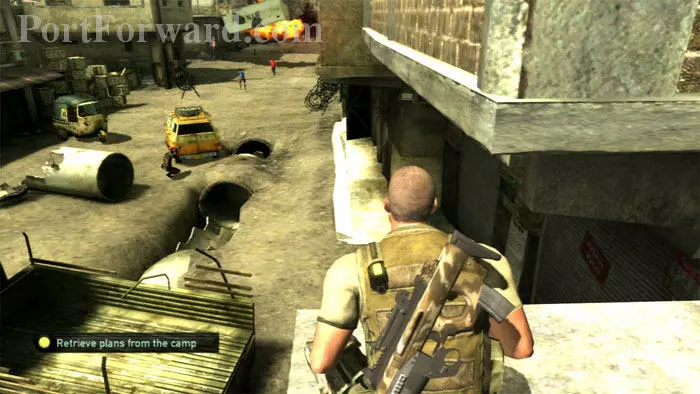
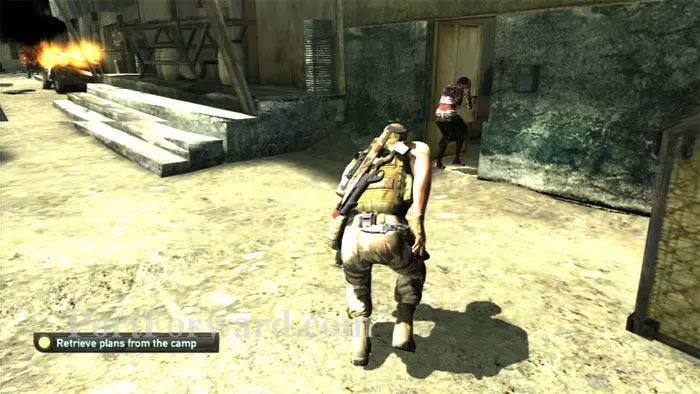
Wait here a moment. There will be an explosion, then two guards will run left. Get past the fence ahead by cutting it on the right, climbing over it, or picking the lock on the doors ahead.
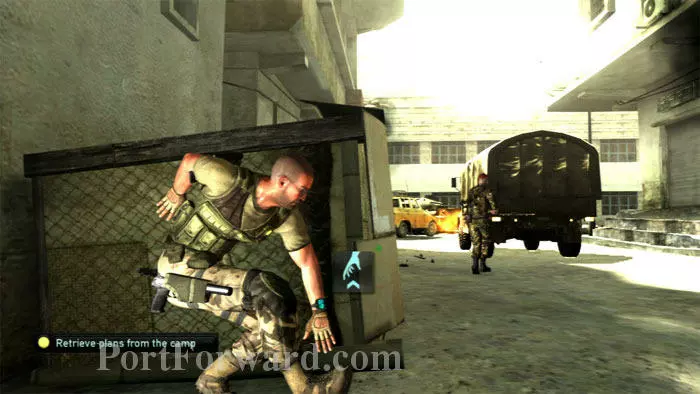
This crate provides cover while you wait for the guard to walk right.
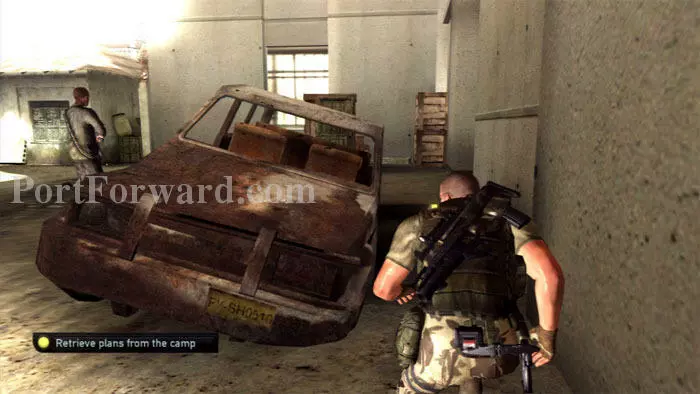
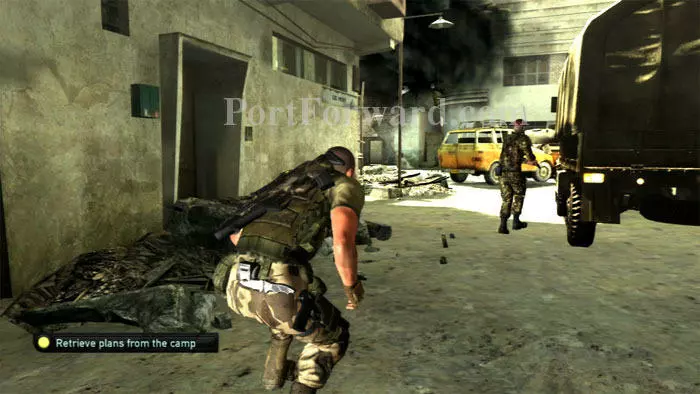
Shadow the guard, keeping right. You want to reach the crates ahead before he turns around.
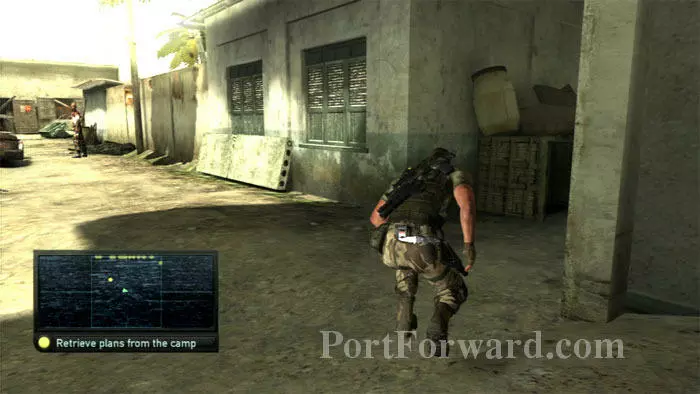
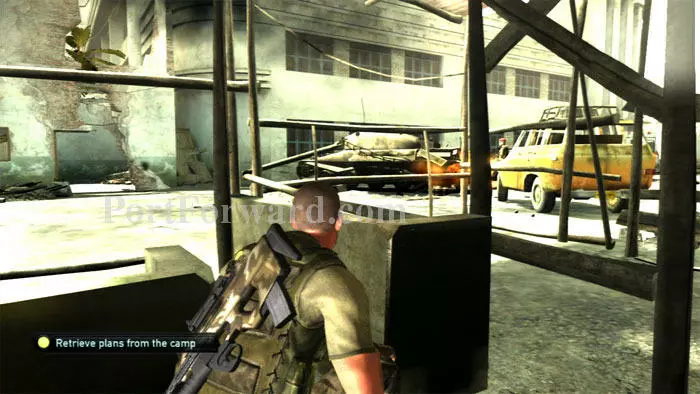
Hide behind the crates until the patrol walks away, then duck into this alley on the right.
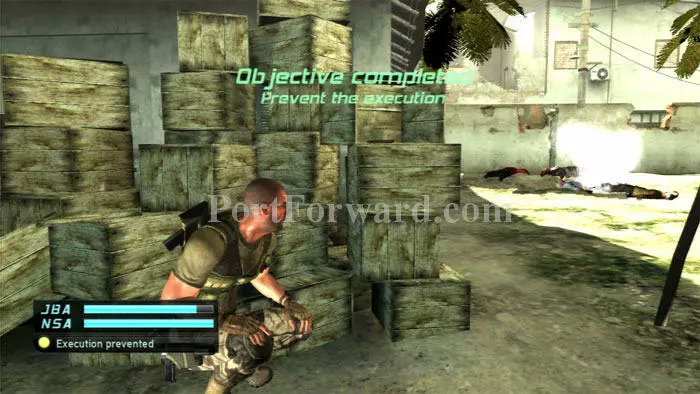
Take cover behind these boxes. Hostages are about to be executed. A well-placed gas grenade will end the crisis peacefully.
There's quite a bit of chaos in the street, but if you keep right you'll be able to avoid it fairly well. Start by entering that doorway ahead.
Exit through the bedroom window.
Duck into another doorway on the right.
Jump out this second window, apologizing to the kind lady as you go.
Hug the buildings on the right, then find this ladder to the left.

The balcony affords good protection from the fighting below. A checkpoint is just ahead.
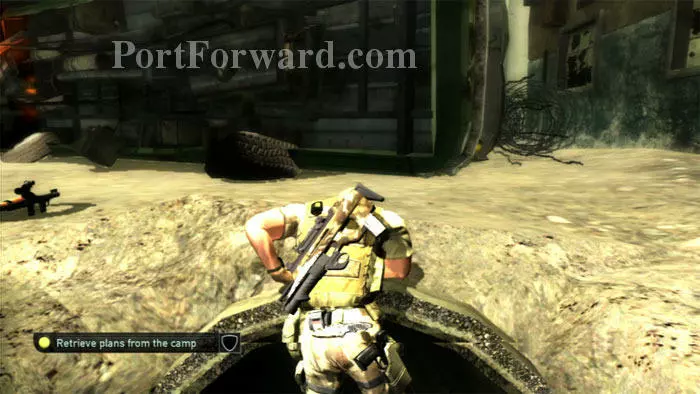
Around the right corner, you'll witness a bus explosion. Drop to the exposed pipeline below.

Scurry through the pipeline to avoid the frequent crossfire.
The pipeline ends where the flaming bus has landed. You have a new NSA secondary objective to save the woman in the bus. Enter the bus through the blown-off back window.
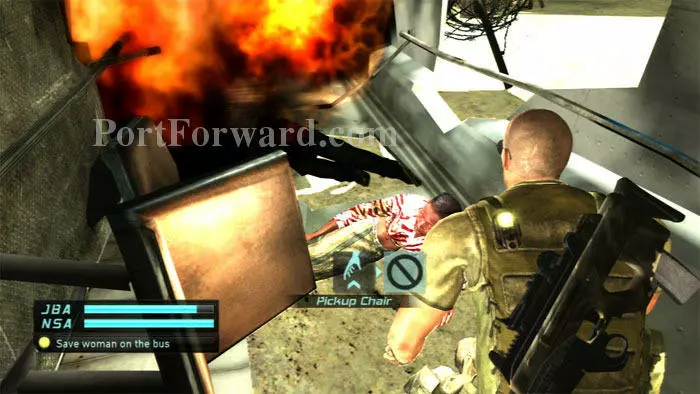
Pick up the chair to free the woman and complete the objective.
Follow the woman out of the bus and through the door ahead, where you'll find flash, frag and smoke grenades, a sticky shocker and pistol ammo.
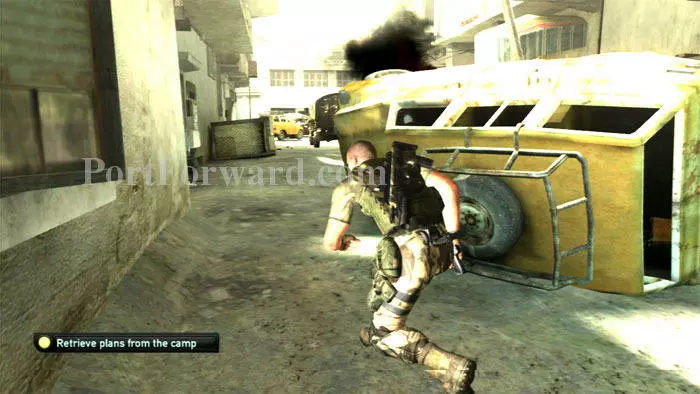
If you want even more ammo, slip into the alley left of this overturned yellow vehicle.
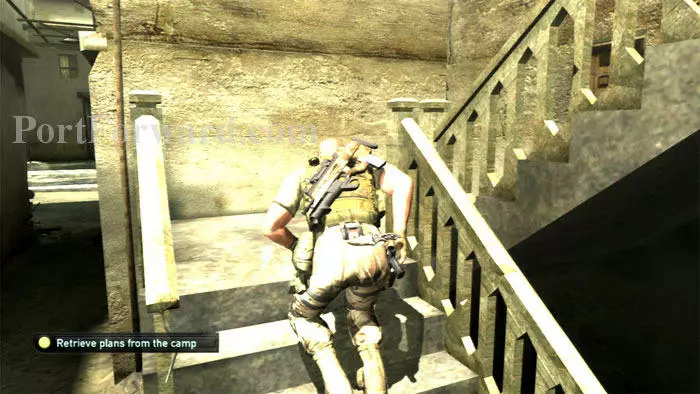
Climb these stairs and pass through a curtain to an apartment.
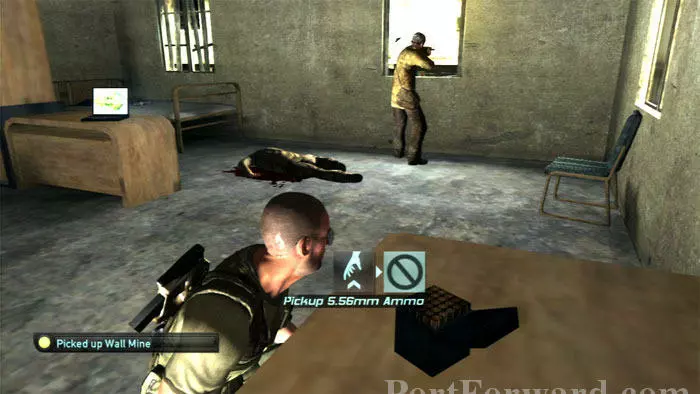
Move quietly, a sniper is inside. Wall mines, pistol and rifle ammo are on this table. The laptop has two emails about a radio tower and unexploded mines.
Peer around the corner before leaving the alley; a guard patrols ahead.
If you're playing stealthily then this street is going to be difficult. You'll find more cover here as you shadow the guard up the street. Rocks are here to distract him, but I prefer to keep his path predictable.
You'll want to turn left at the cross street.
Take cover under the scaffolding, behind this concrete block. The guard is going to patrol the intersection and will spot you otherwise. Your immediate destination is the battered doorway seen on the left.
Break for the doorway once the guard moves on. Pass through another doorway beyond.
Around the nearby bend you'll see (or at least hear) this guard being decimated by a land mine.
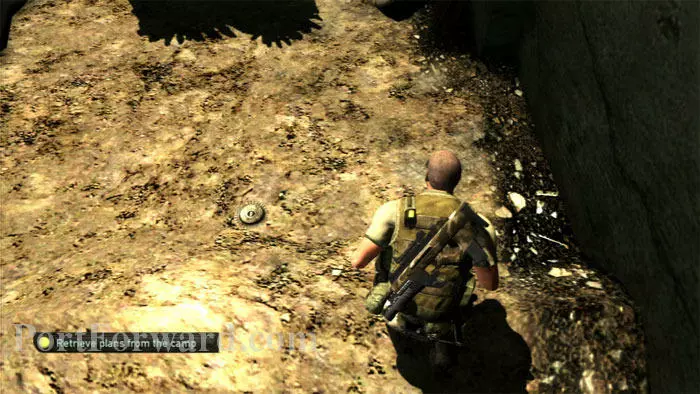
You're in a mine field, littered with the output of your efforts back at JBA HQ. You don't have your infrared goggles, but not to worry; the mines are visible so long as you take it nice and slow. There's one to my left in this shot. Keep right and you should do fine.
Reach these steps for the next checkpoint. (Note another mine to the left of the stairs.)
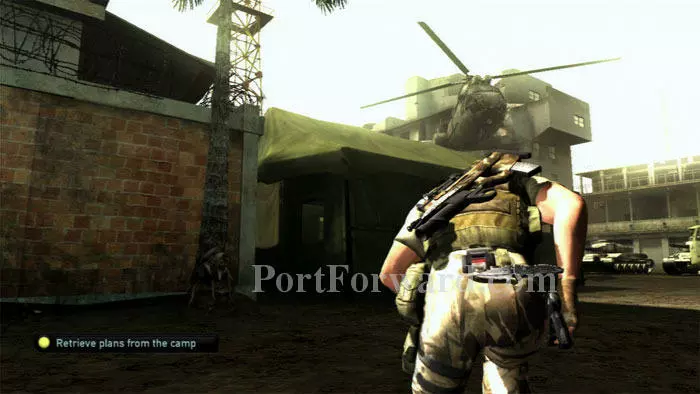
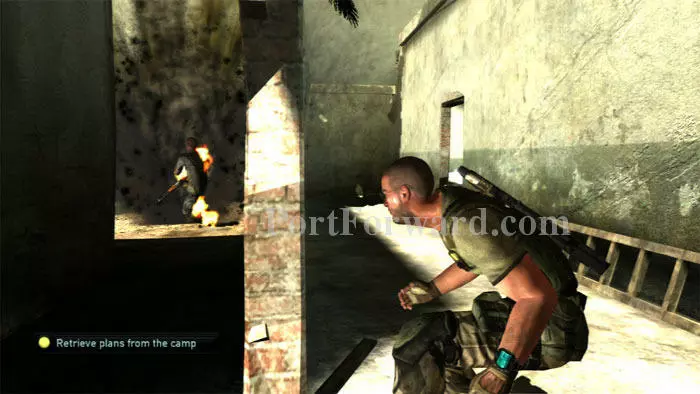
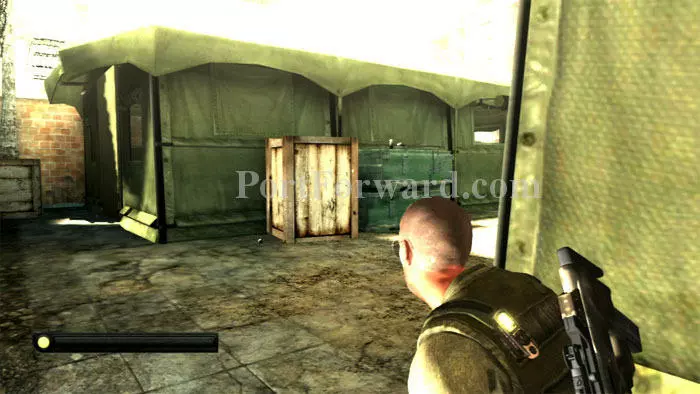
Quickly scurry behind the tent ahead. A helicopter is landing and you want to finish this next part before reinforcements arrive.
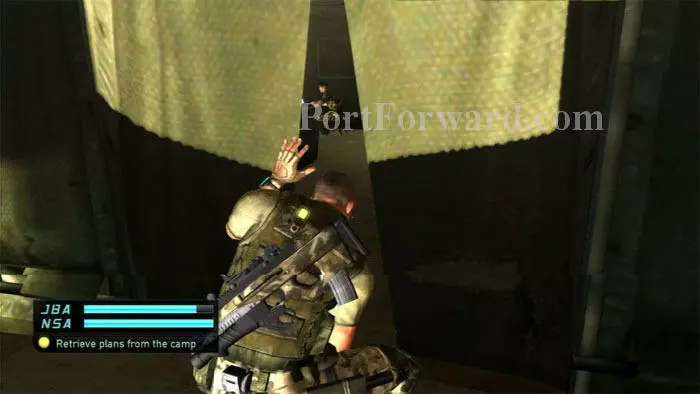
Cut through the tent. Inside is a guard sitting at a computer containing the plans for your primary NSA objective.
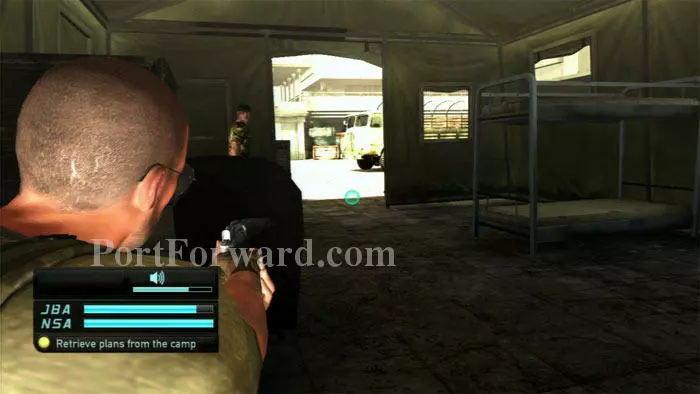
Take cover on the left then aim your ultrasonic emitter at the ground just outside the tent.
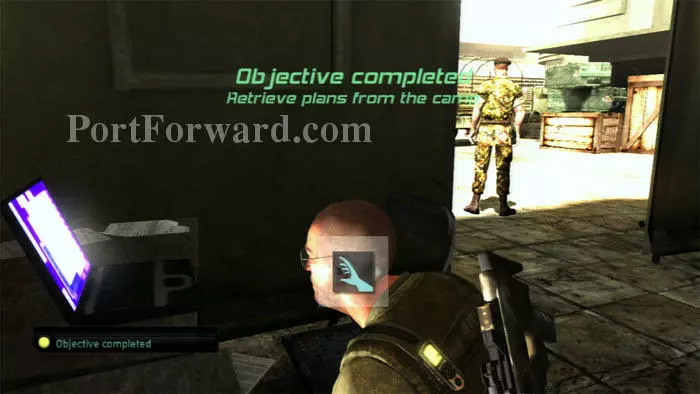
The guard is lured away, but not for long. Force hacking will complete the objective in time.
Exit the way you came, then cut the back of the neighboring tent and enter. Note the flash grenades on the green crate in this shot.
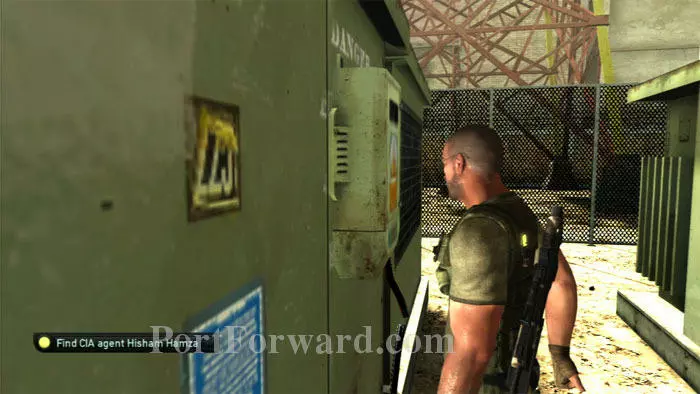
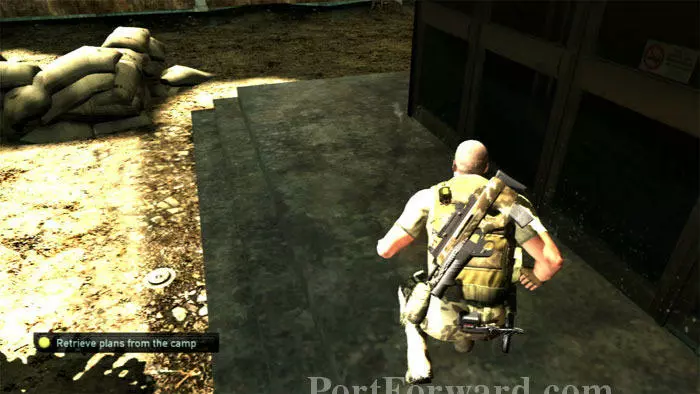
Exit the tent left, then cut the cable in the center of these generators.
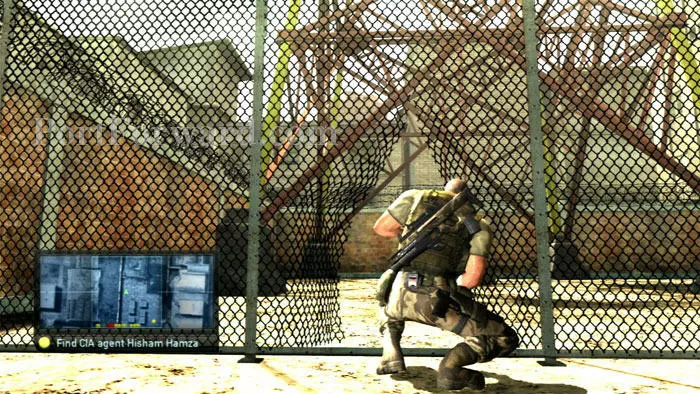
The generator powers down, allowing you to safely cut the electrified fence. You can also climb over, or use the gate on the right, but this is the stealthier approach.
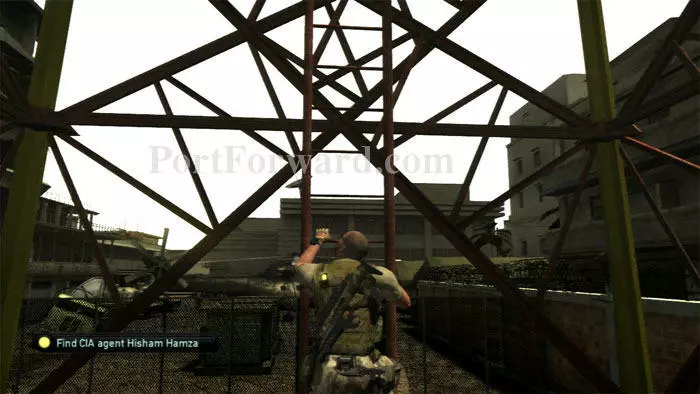
Scurry to the tower and start climbing.
You're exposed and under fire. Keep moving and reach the top to complete the objective.

Find a special sniper rifle around the other side of the platform.
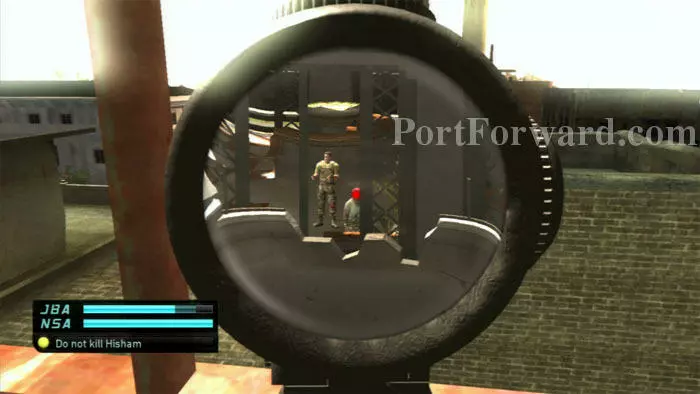
You'll spot Hisham first, followed by a guard in a red beret. Killing Hisham (or doing nothing) ends the mission immediately. Note that Hisham, like the cruise ship, is one of three targets that determines whether you'll see the bonus mission.
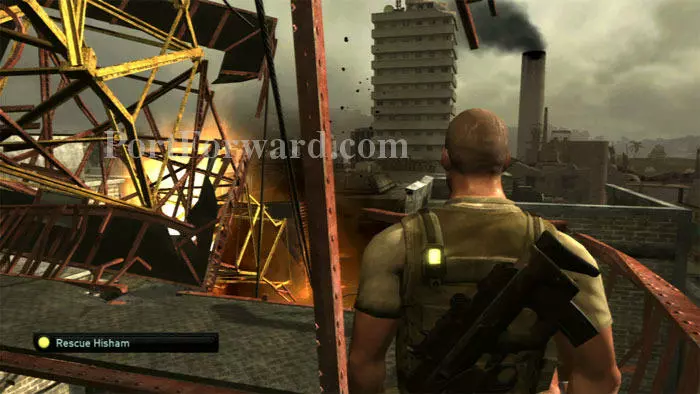
You'll only see this part of the mission if you kept Hisham alive. The radio tower is destroyed.
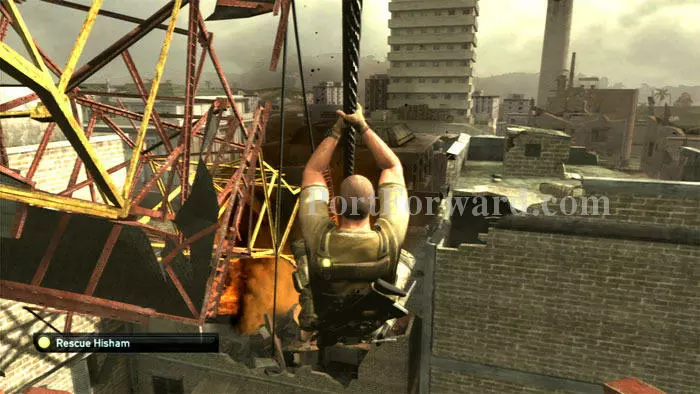
Grab the zip line and ride it to the mayhem below.
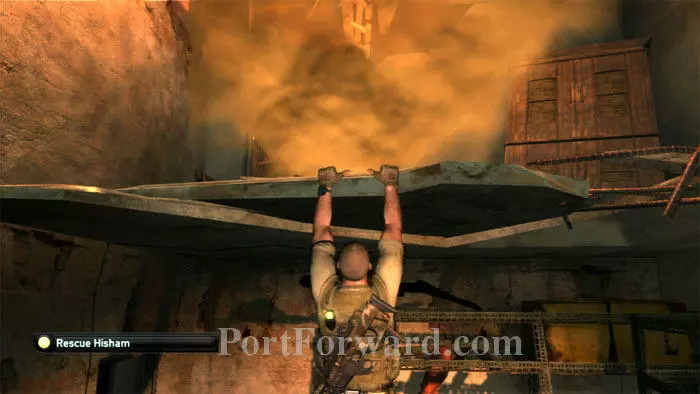
You'll grab hold of this ridge. Drop to the floor below.
Drop through the floor in the neighboring room to the street below. Dart into this bus on the left.
Immediately head to the back of the bus. This chaotic street is all-action, but there is relative safety here. Wait for a soldier to be blown up to your left. Your SC-20K can take out these two guards visible through the back window, but you can ignore them if you prefer.

There is a floor exit from the bus but I prefer to take this side exit instead.
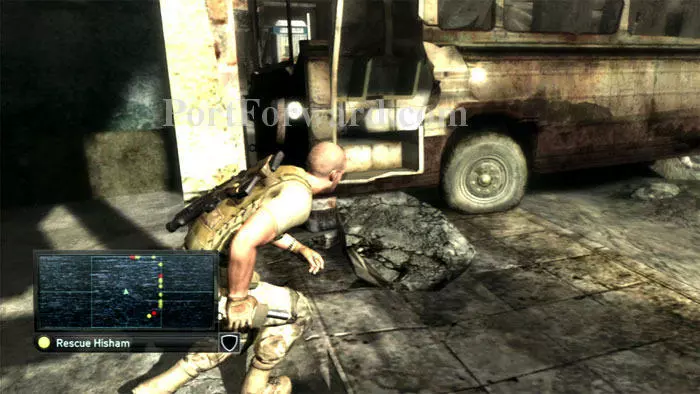
Run to the vehicle with the hole in its bottom. You can slip inside just behind the axle.
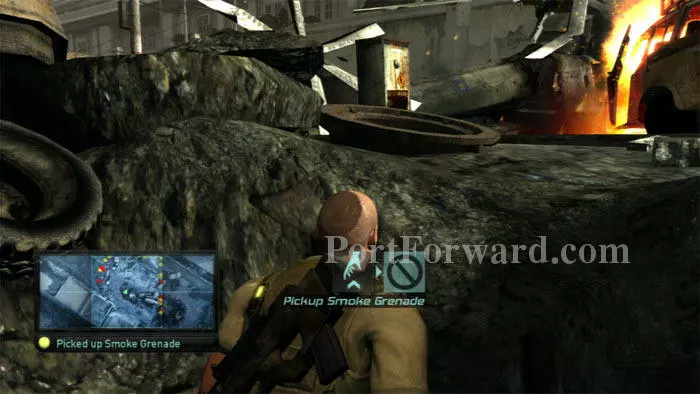
Fall out the back then push through the smoke to find three smoke grenades. The helicopter ahead is where you want to go.
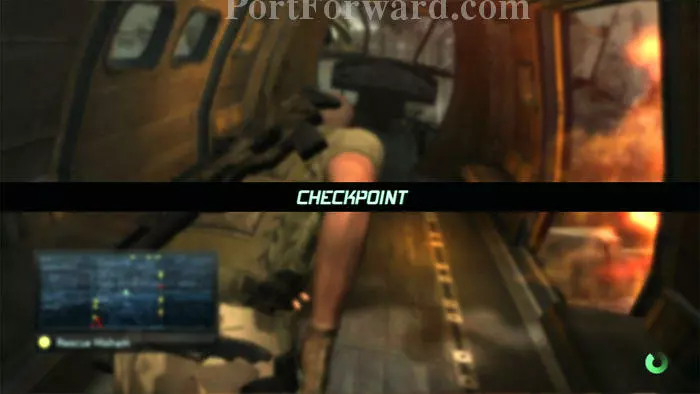
Climb inside for a checkpoint. Find 5.7mm ammo and sonic grenades.
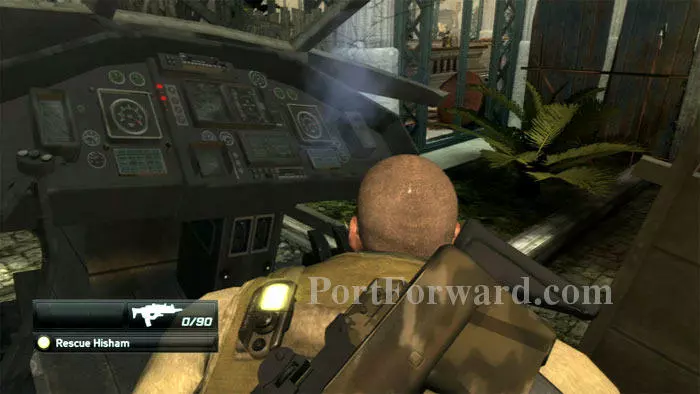
Your best path is to exit the cockpit on the right and make for the opening just ahead.
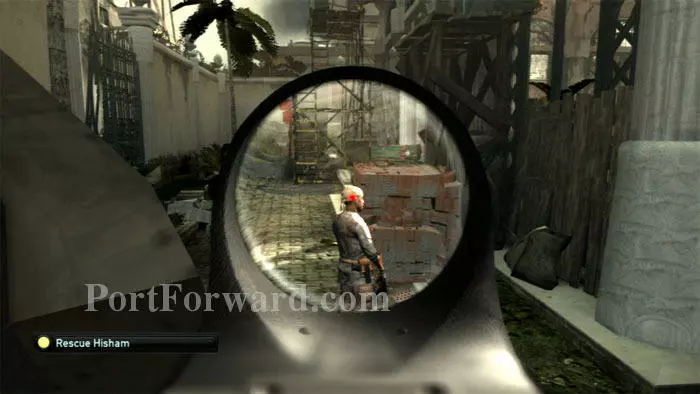
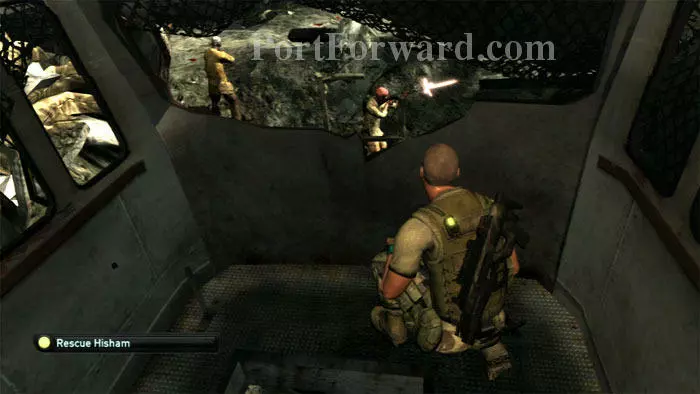
This guard may be in the way, but he is easily sniped.
The level will soon turn into an escort mission, and that means the area must be clean. Use your radar to identify nearby targets and snipe them. Using stealth is an exercise in frustration in this action-heavy level.
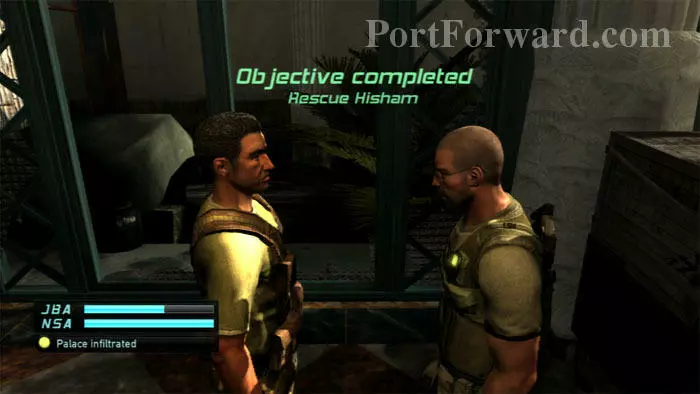
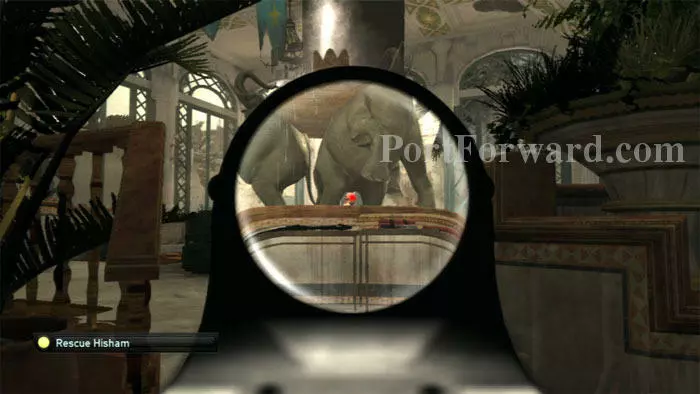
Approach Hisham from behind to untie his hands and complete the objective.
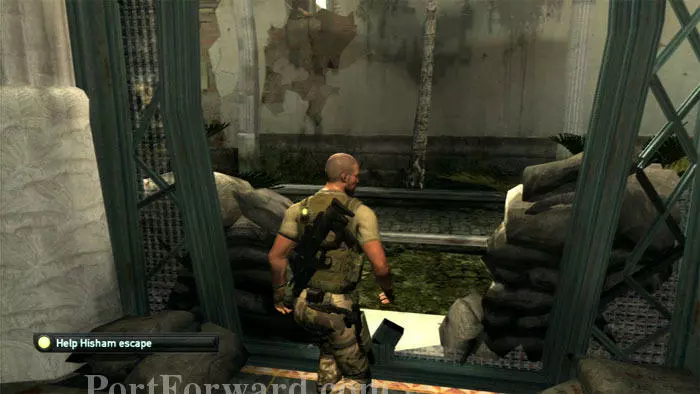
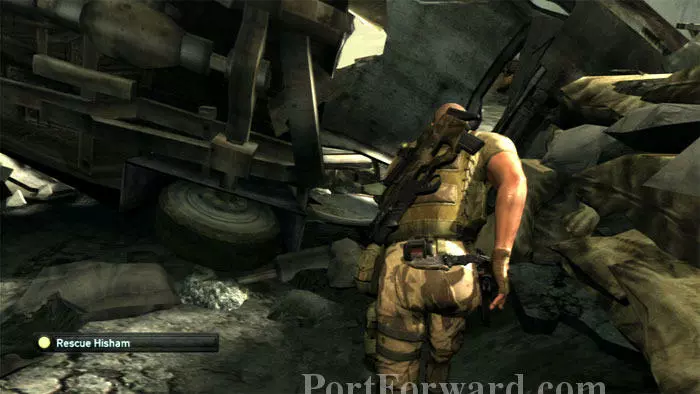
Lead Hisham through these sandbags. Head left.
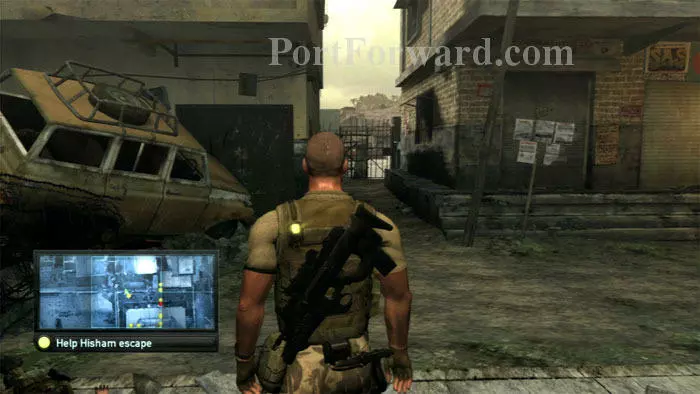
Continue to the fence ahead, then head left again.
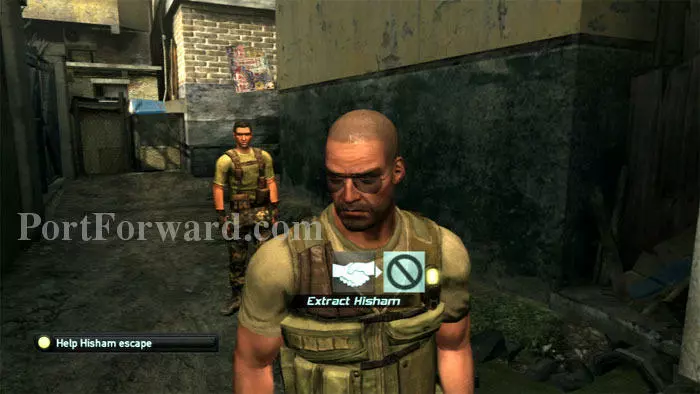
You'll come to another fence. Activate the "Extract Hisham" icon to hoist Hisham over the fence and complete the objective.

Backtrack a bit to watch the palace explode. Talk to Lambert and Emile before the mission concludes.
More Splinter Cell: Double Agent Walkthroughs
This Splinter Cell: Double Agent walkthrough is divided into 11 total pages.


