Star Trek: Elite Force II Walkthrough Derelict

September 12, 2016 (Last Updated: ) | Reading Time: 6 minutes

This Star Trek: Elite Force II walkthrough is divided into 12 total pages.

You can jump to nearby pages of the game using the links above.

Derelict

Star Trek: Elite Force II Walkthrough - Star Trek-Elite-Force-II 49

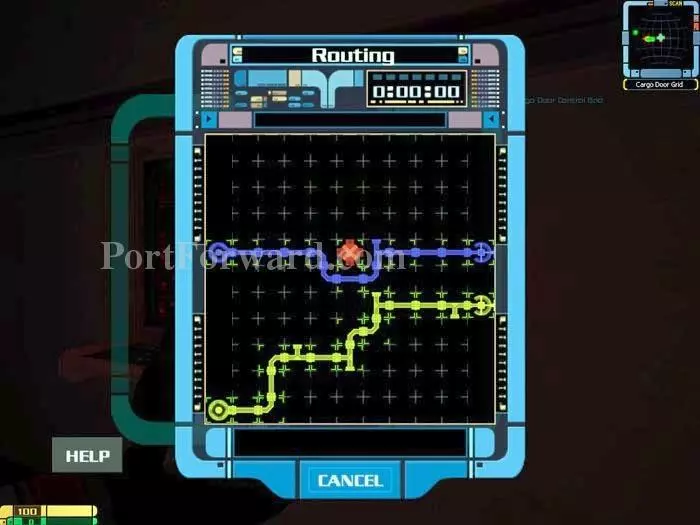
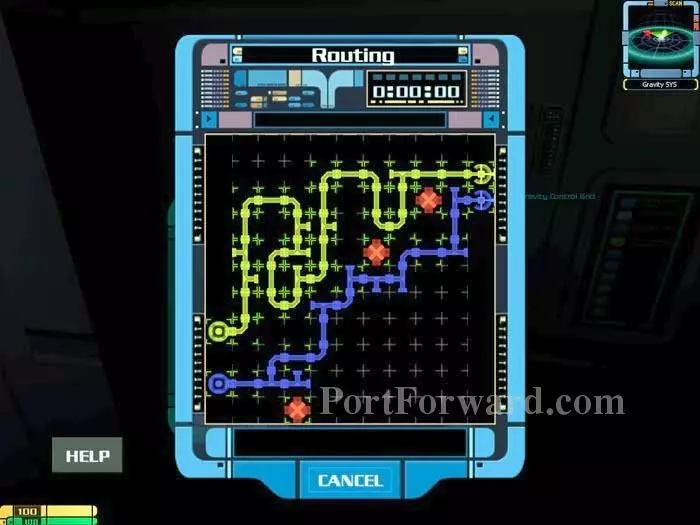
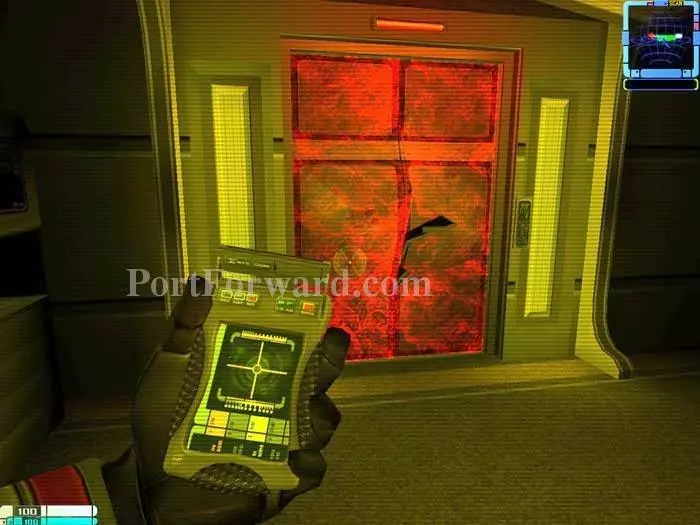
After reduxing the gravity by accessing the grid behind debris, use your tricorder to route power to the cargo door.

Star Trek: Elite Force II Walkthrough - Star Trek-Elite-Force-II 50

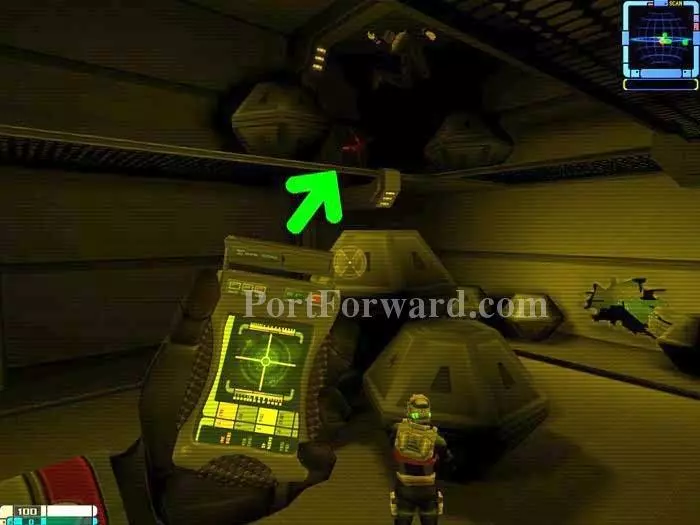
Use your tricorder's Structural Integrity View Mode to locate the fragile wall area on the second level. Blast it with your phaser.

Star Trek: Elite Force II Walkthrough - Star Trek-Elite-Force-II 51

Behind you'll find a secret area with 100 shielding and the fifth Golden Starship.

Star Trek: Elite Force II Walkthrough - Star Trek-Elite-Force-II 52

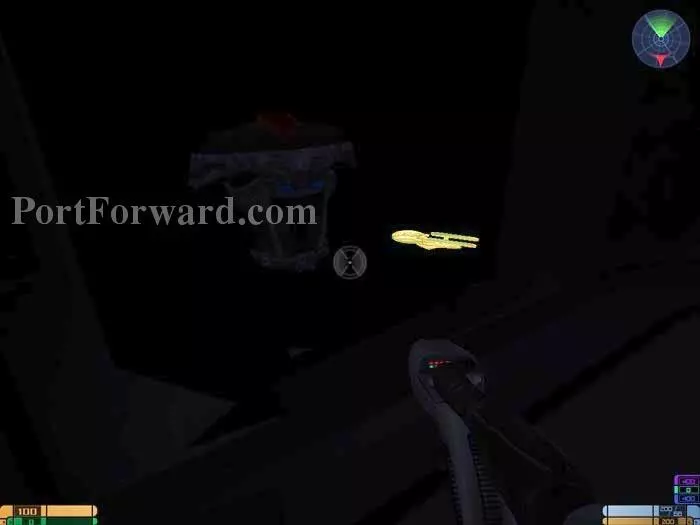
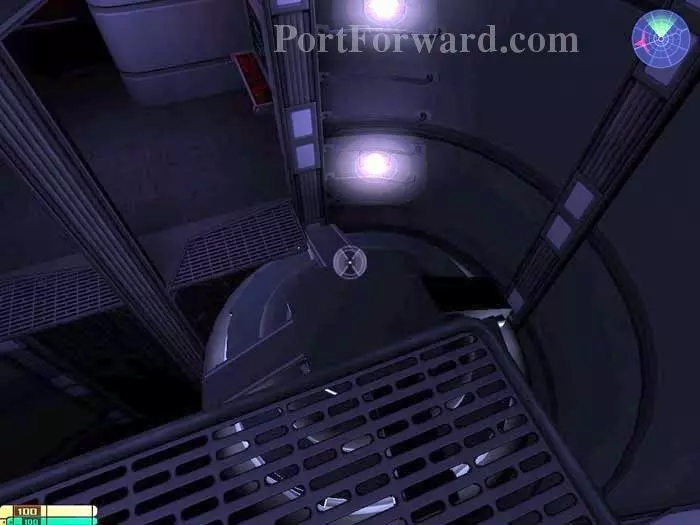
Move on to the shuttle bay and open the back of the shuttle. Inside is the sixth Golden Starship.

Star Trek: Elite Force II Walkthrough - Star Trek-Elite-Force-II 53

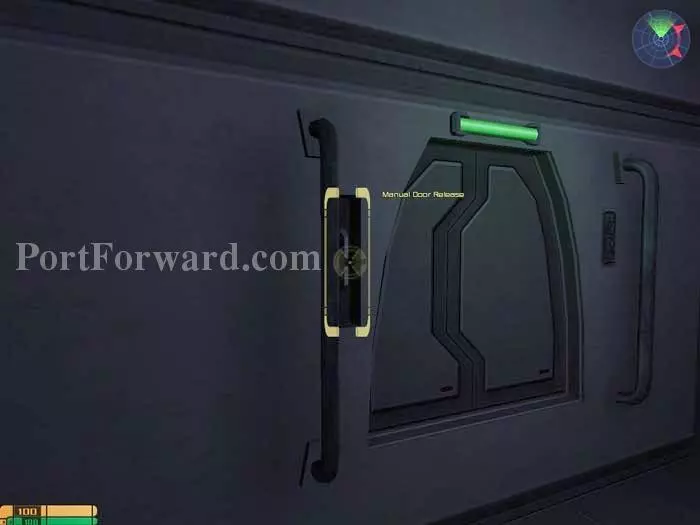
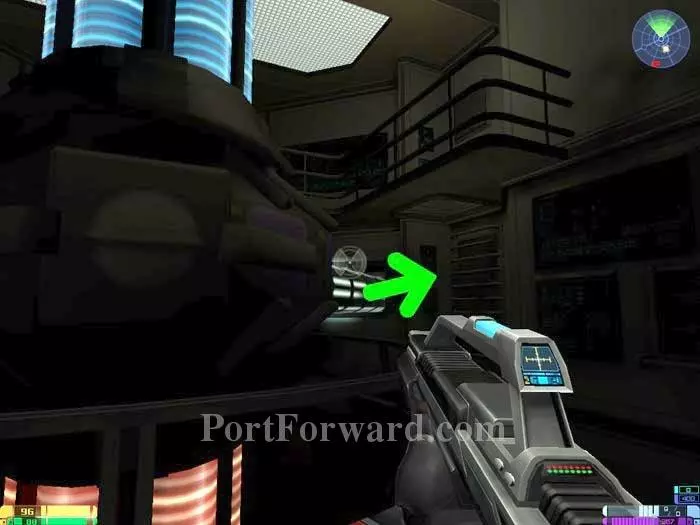
Move through the shuttle bay then access this Jeffries tube manual door release. You must "use" the lever several times.

Star Trek: Elite Force II Walkthrough - Star Trek-Elite-Force-II 54

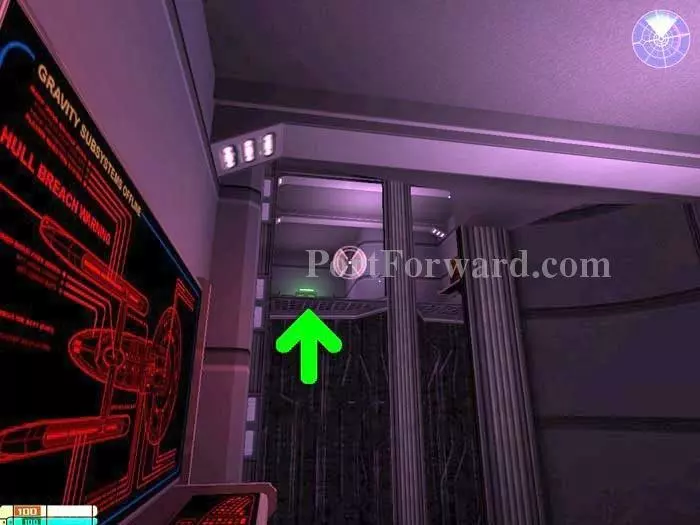
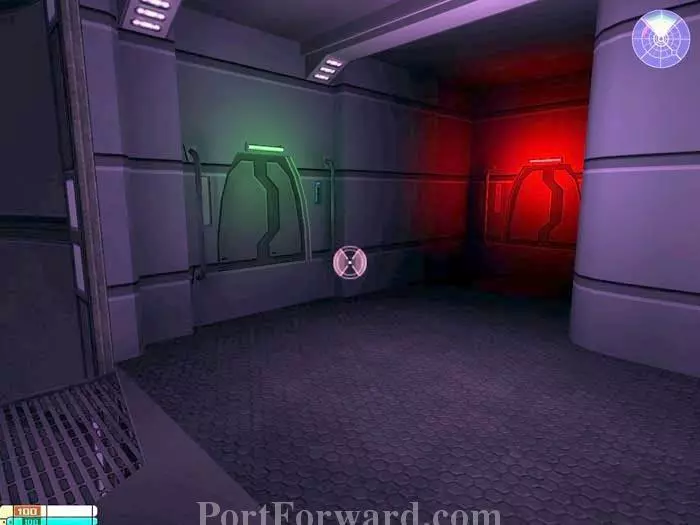
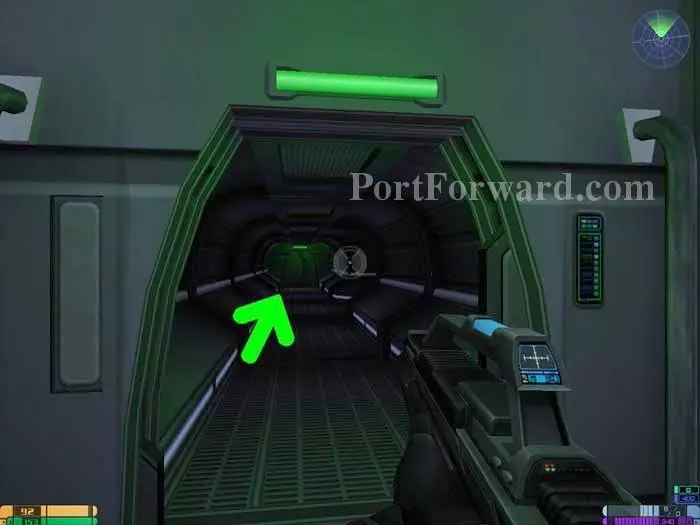
Exit through the green passage and jump up to toward the green Jeffries tube.

Star Trek: Elite Force II Walkthrough - Star Trek-Elite-Force-II 55

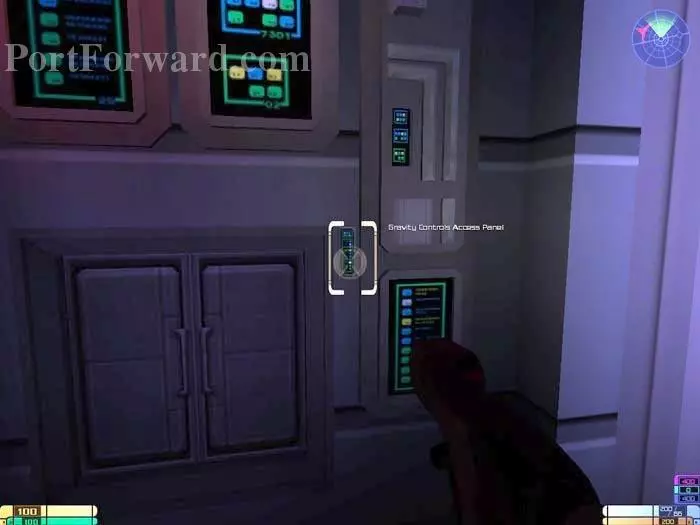
"Use" the Gravity Controls Access Panel. The controls slide out. Use your tricorder on them.

Star Trek: Elite Force II Walkthrough - Star Trek-Elite-Force-II 56

Chell reports, "That did it. The gravity is on. Can you open the shuttle doors from out there?"

Star Trek: Elite Force II Walkthrough - Star Trek-Elite-Force-II 57

Exit the Jeffries tube the way you entered, and this elevator will fall, allowing access to the other side.

Star Trek: Elite Force II Walkthrough - Star Trek-Elite-Force-II 58

Climb the ladder and access this previously unavailable Jeffries tube.

Star Trek: Elite Force II Walkthrough - Star Trek-Elite-Force-II 59

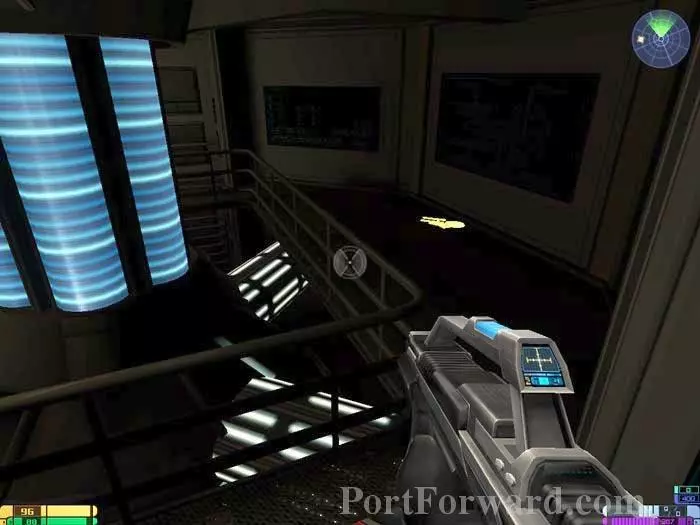
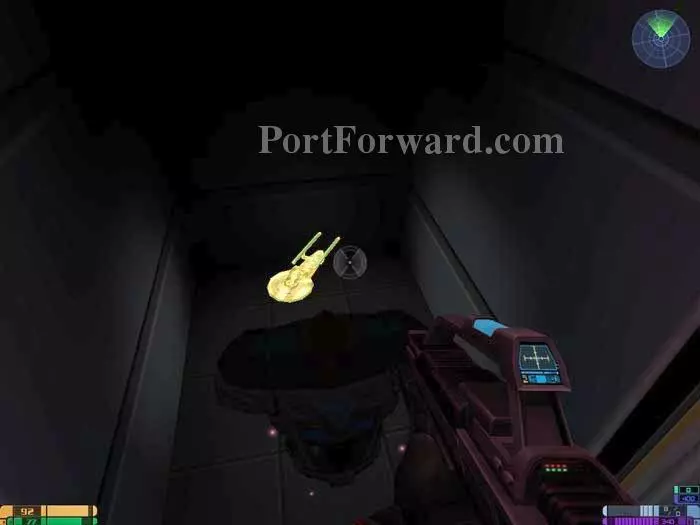
Follow the green Jeffries tube hatches. Climb down this ladder (just a few rungs) and listen for a harp. Climb back up the ladder and go back to the Jeffries tube you just exited to find the seventh Golden Starship.

Star Trek: Elite Force II Walkthrough - Star Trek-Elite-Force-II 60

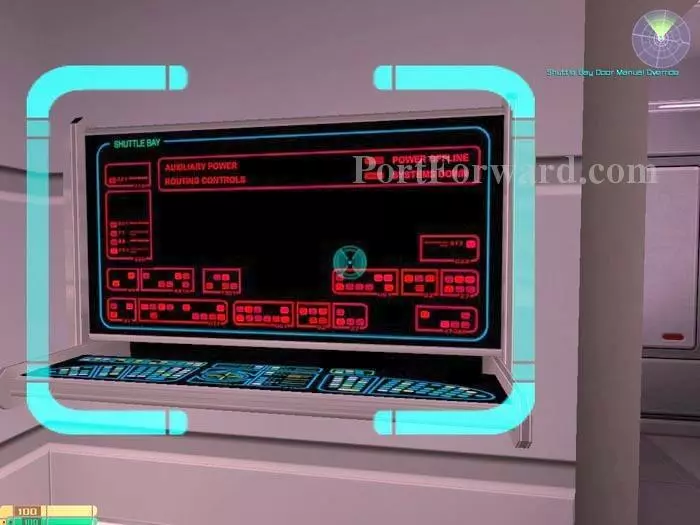
Climb all the way down the ladder this time. Use your tricorder on the Shuttle Bay Door Manual Override.

Star Trek: Elite Force II Walkthrough - Star Trek-Elite-Force-II 61

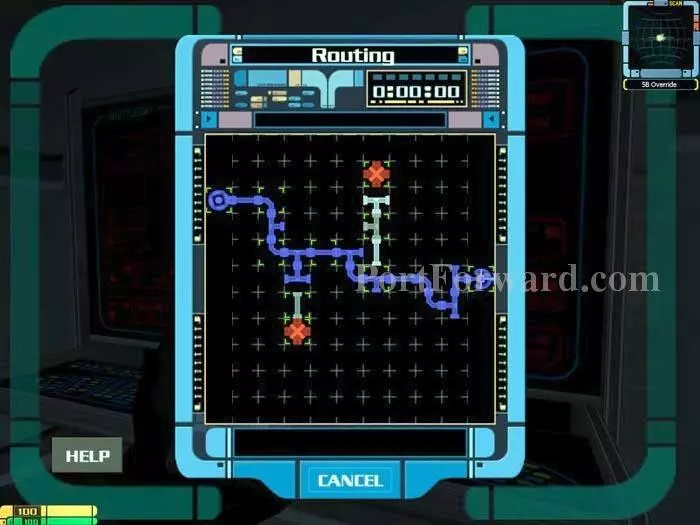
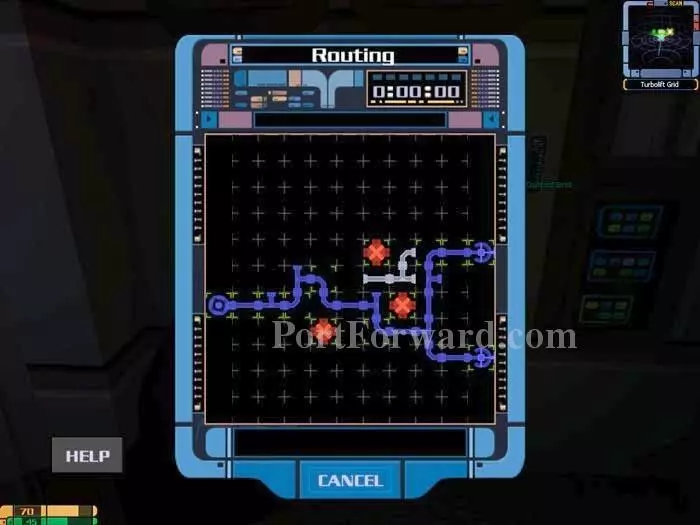
Here's a tip: begin by turning gates away from the short circuits. Once your team is inside the room you can exit.

Star Trek: Elite Force II Walkthrough - Star Trek-Elite-Force-II 62

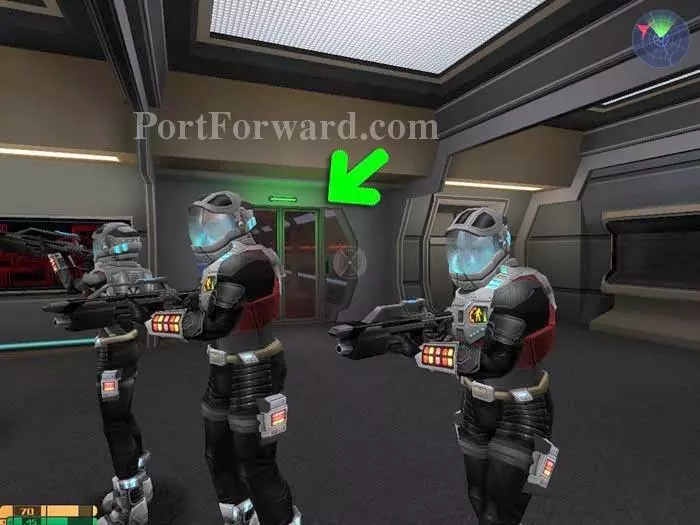
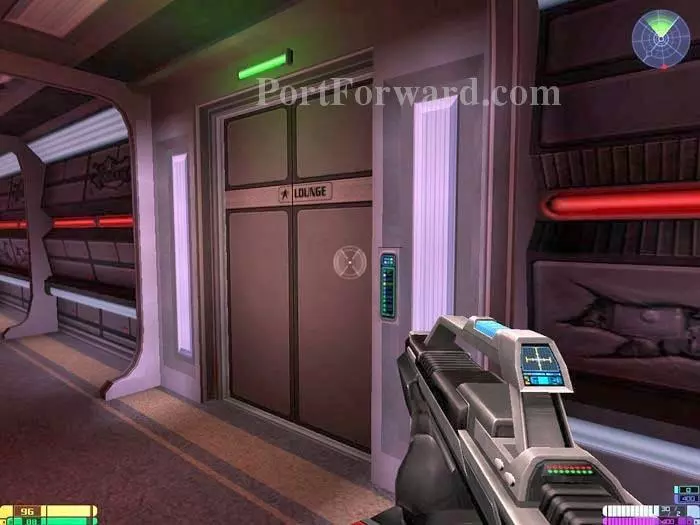
Enter the lounge then use your tricorder's Structural Integrity View Mode to spot the way out.

Star Trek: Elite Force II Walkthrough - Star Trek-Elite-Force-II 63

Enter the service room and take the ladder up to the eighth Golden Starship. Using the Jeffries hatch switch is necessary but it will make no indication that it is working. Then take the ladder down and once again follow the green access lights.

Star Trek: Elite Force II Walkthrough - Star Trek-Elite-Force-II 64

You'll come up another hatch. Use the tricorder to spot the damaged door behind you and grab the ninth Golden Starship.

Star Trek: Elite Force II Walkthrough - Star Trek-Elite-Force-II 65

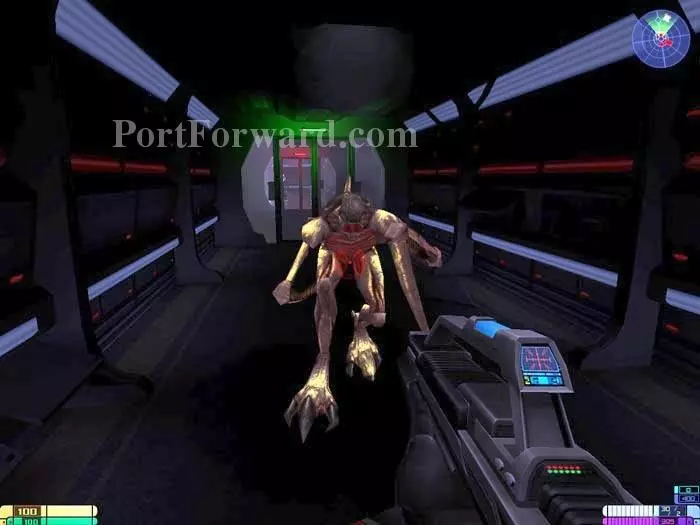
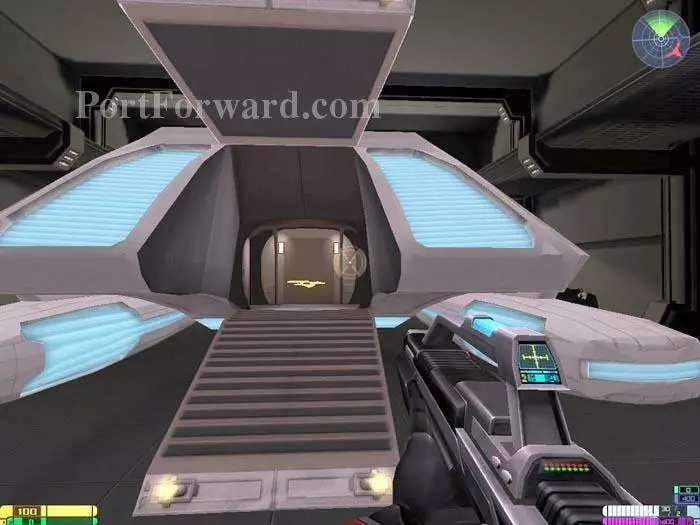
Continue through the lounge and then your first battle with the Xenomorphs ensues. Continue through the green-lit door.

Star Trek: Elite Force II Walkthrough - Star Trek-Elite-Force-II 66

Enter the warp core room and climb this ladder.

Star Trek: Elite Force II Walkthrough - Star Trek-Elite-Force-II 67

On the catwalk you'll find the tenth Golden Starship.

Star Trek: Elite Force II Walkthrough - Star Trek-Elite-Force-II 68

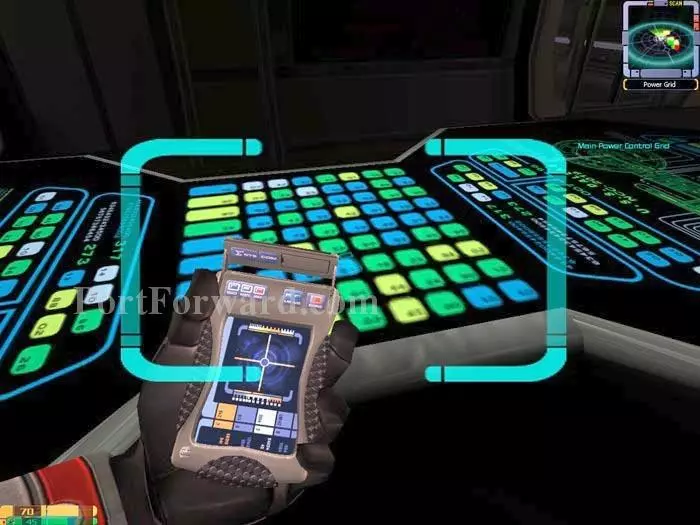
Use your tricorder on the Main Power Control Grid.

Star Trek: Elite Force II Walkthrough - Star Trek-Elite-Force-II 69

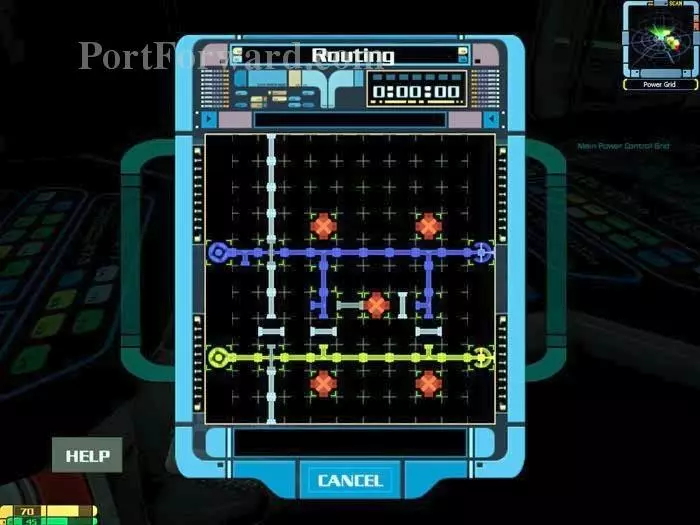
Once again, begin by turning the gates away from the short circuits. Yellow to yellow, blue to blue.

Star Trek: Elite Force II Walkthrough - Star Trek-Elite-Force-II 70

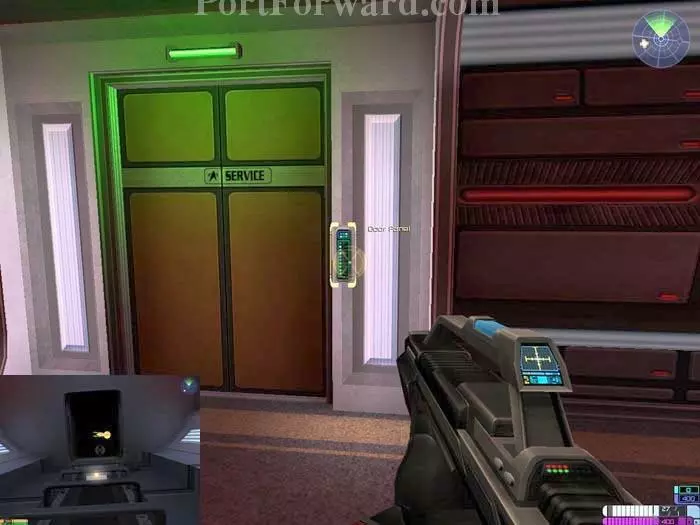
Exit through the door indicated above. Pass through the service door and enter the Jeffries tube.

Star Trek: Elite Force II Walkthrough - Star Trek-Elite-Force-II 71

Activate the Turbolift Access Panel and the Turbolift Power Relay slides out.

Star Trek: Elite Force II Walkthrough - Star Trek-Elite-Force-II 72

Use your tricorder on the Control Grid to restore Turbolift power. Climb back up and use the now-functioning turbolift.

Star Trek: Elite Force II Walkthrough - Star Trek-Elite-Force-II 73

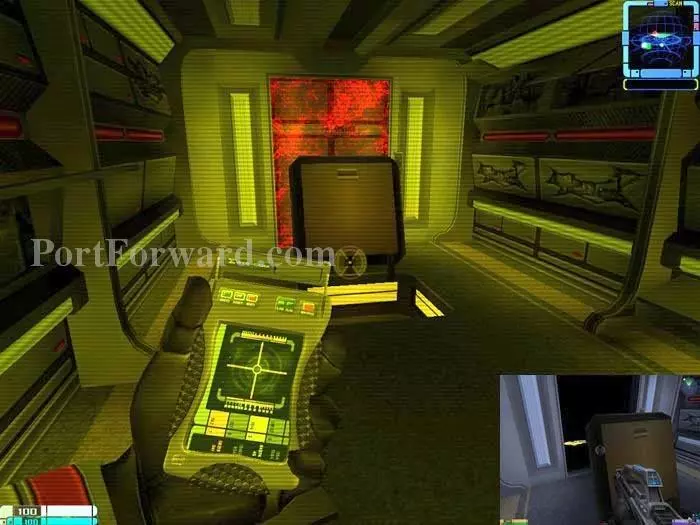
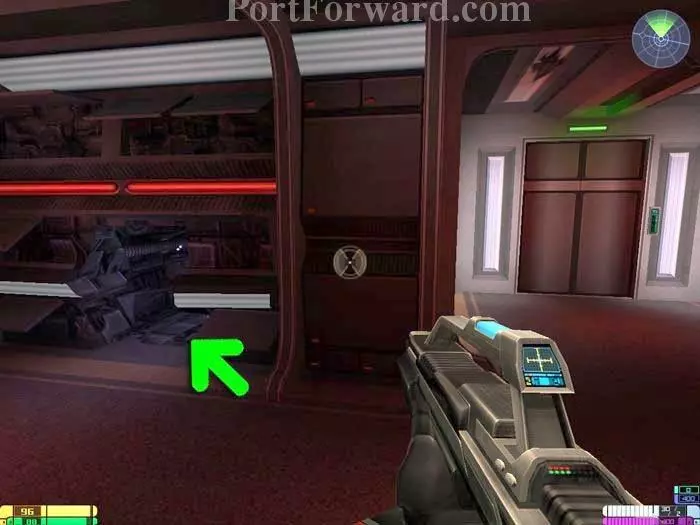
Inside this lounge you'll find an energy terminal.

Star Trek: Elite Force II Walkthrough - Star Trek-Elite-Force-II 74

Ignore the green door for now and instead crawl through this hole in the wall. Exit the room through a similar hole and you'll be past the blue force field.

Star Trek: Elite Force II Walkthrough - Star Trek-Elite-Force-II 75

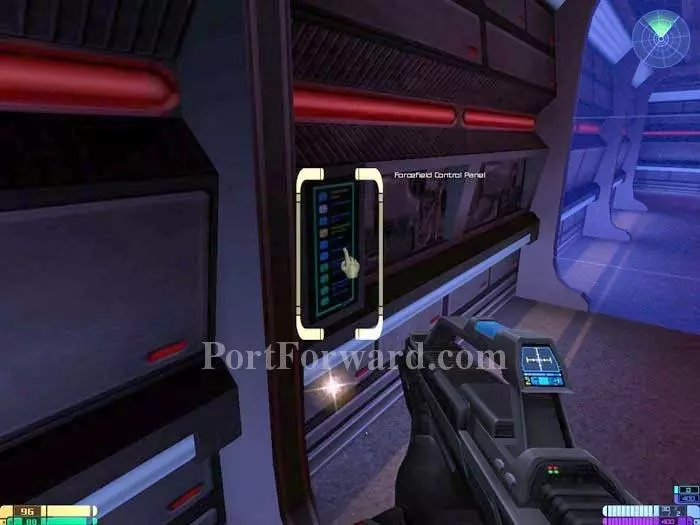
Use the Forcefield Control Panel to deactivate the blue force fields.

Star Trek: Elite Force II Walkthrough - Star Trek-Elite-Force-II 76

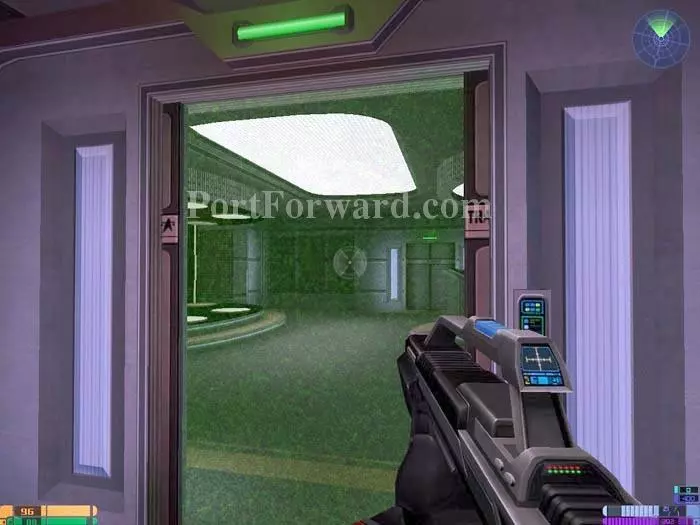
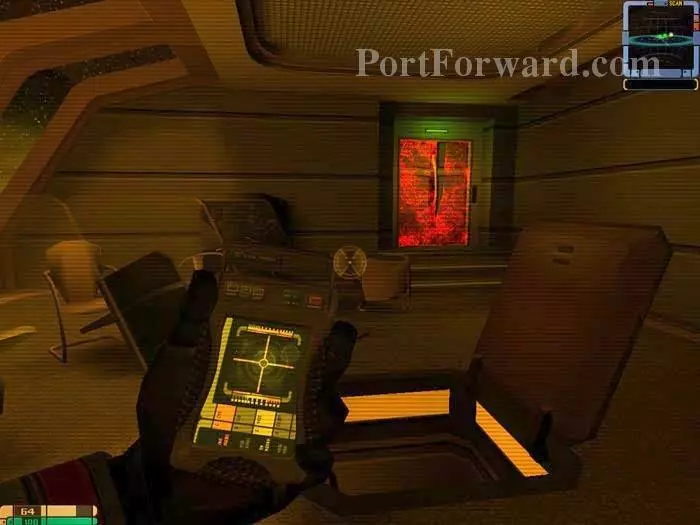
Continue to the transporter room to find it blocked by a force field.

Star Trek: Elite Force II Walkthrough - Star Trek-Elite-Force-II 77

Return to the door you bypassed before. Turn left down the corridor and battle the Xenomorphs.

Star Trek: Elite Force II Walkthrough - Star Trek-Elite-Force-II 78

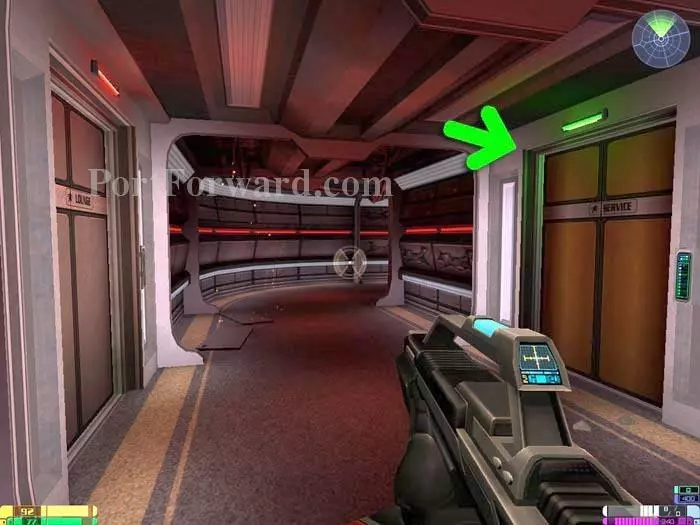
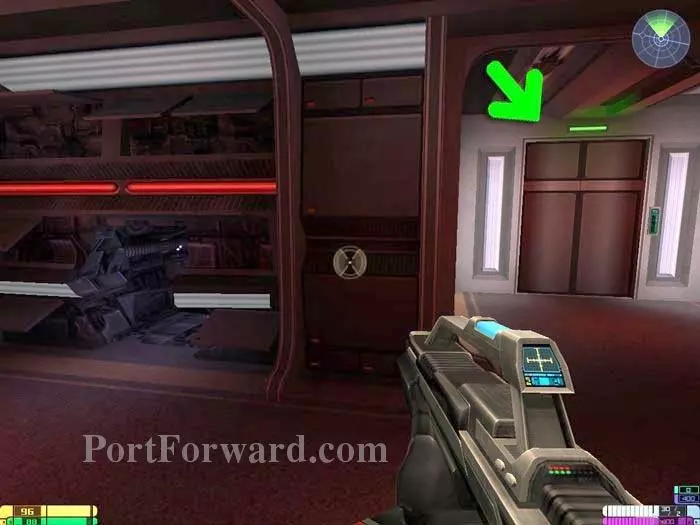
Enter the service door across from the red lounge.

Star Trek: Elite Force II Walkthrough - Star Trek-Elite-Force-II 79

Halfway down are two red Jeffries hatches and a red service door. Using the red Jeffries hatches produces a strange sound, and unlocks the service door.

Star Trek: Elite Force II Walkthrough - Star Trek-Elite-Force-II 80

Inside you'll find 100 shielding and the 11th Golden Starship.

Star Trek: Elite Force II Walkthrough - Star Trek-Elite-Force-II 81

Take the ladder to the bottom. Continue directly ahead and take the green Jeffries hatch at the end of the tube.

Star Trek: Elite Force II Walkthrough - Star Trek-Elite-Force-II 82

Take the ladder up and exit through the hatch. Activate your tricorder's Structural Integrity View Mode and spot the damaged door. Blast through to the bridge.

Star Trek: Elite Force II Walkthrough - Star Trek-Elite-Force-II 83

Blast the door directly ahead. The 12th Golden Starship is revealed. (Note: this works two ways. The Jeffries tubes lead to both rooms, and the Golden Starship is always in the other.)

Star Trek: Elite Force II Walkthrough - Star Trek-Elite-Force-II 84

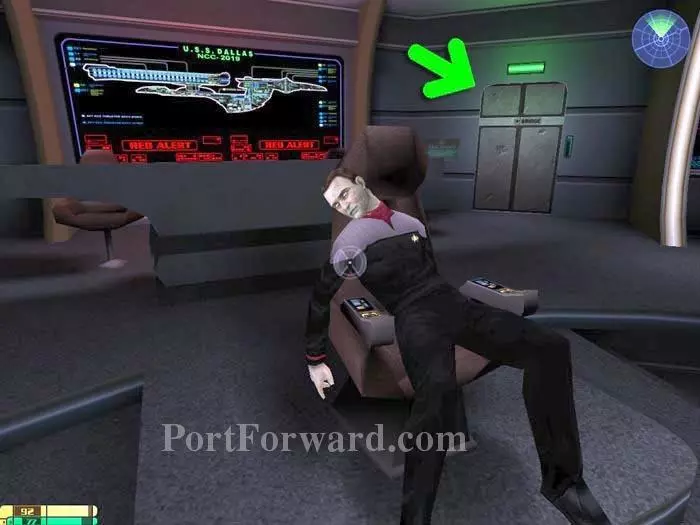
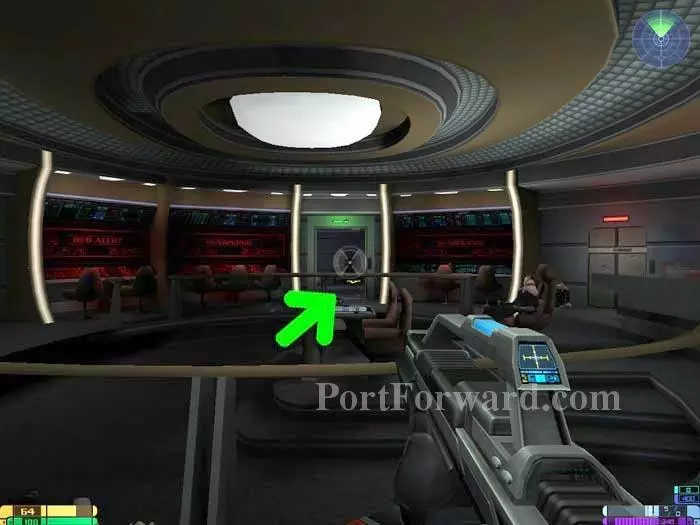
Approach the green door marked "Bridge" indicated above. Your team enters and retrieves Captain Galloway's logs. Exit through the same door and return to the transporter room, using your beacon for help.

Star Trek: Elite Force II Walkthrough - Star Trek-Elite-Force-II 85

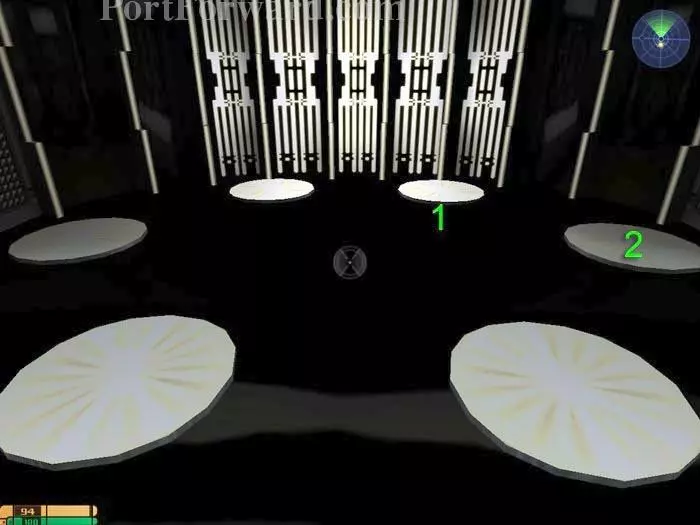
Stand on the transporter pad labeled "1" above. You will hear a harp. (This sound is often a clue that Golden Starship puzzles are near.) Stand still for about 5 seconds. Move to the transporter pad labeled "2" above and wait another 5 seconds.

Star Trek: Elite Force II Walkthrough - Star Trek-Elite-Force-II 86

The 13th Golden Starship will emerge from behind the Transporter Control Panel. (Note: standing on other pads in other patterns may work, but this always works.)

Star Trek: Elite Force II Walkthrough - Star Trek-Elite-Force-II 87

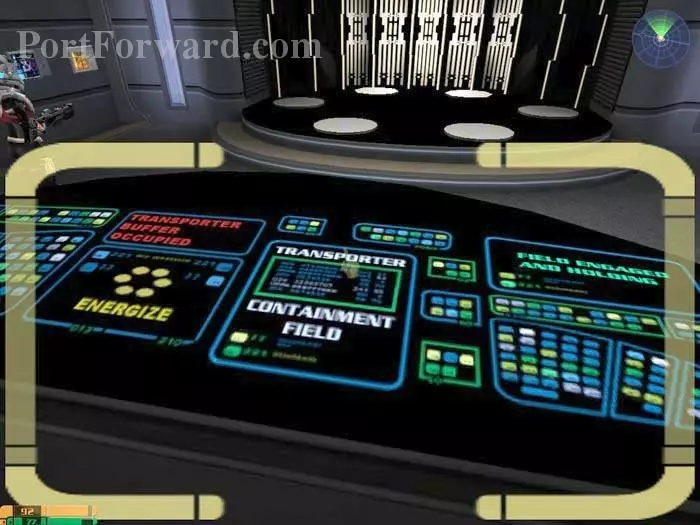
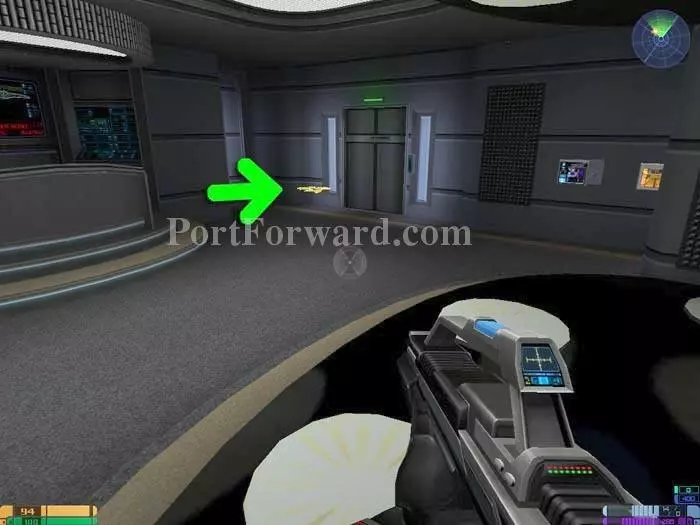
"Use" the transporter to retrieve the remaining Dallas crew - including Telsia. Energy and health terminals are visible in the upper-left.

Star Trek: Elite Force II Walkthrough - Star Trek-Elite-Force-II 88

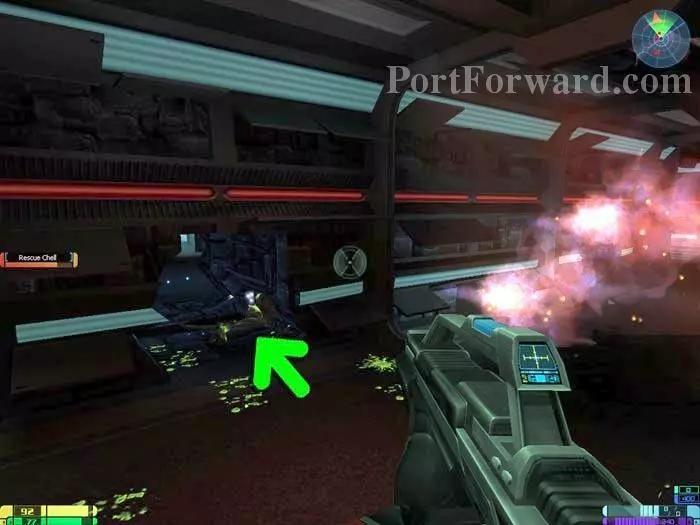
Chell is on the Bridge. Follow your beacon and use this hole after the explosion blocks your way. Return to the bridge to rescue Chell and end the mission.

More Star Trek: Elite Force II Walkthroughs

This Star Trek: Elite Force II walkthrough is divided into 12 total pages.

More From Portforward