This Star Trek: Elite Force II walkthrough is divided into 12 total pages.
You can jump to nearby pages of the game using the links above.
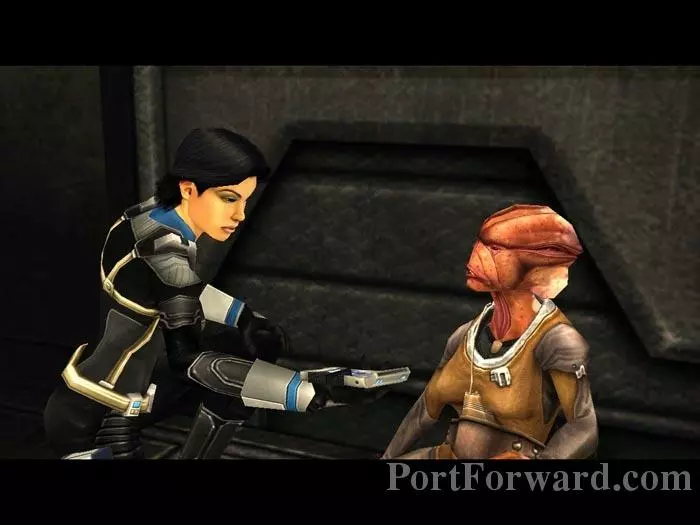
Search and Rescue
![Star Trek: Elite Force II Walkthrough - Star Trek-Elite-Force-II 247](star-trek-elite-force-ii-247-small.webp)
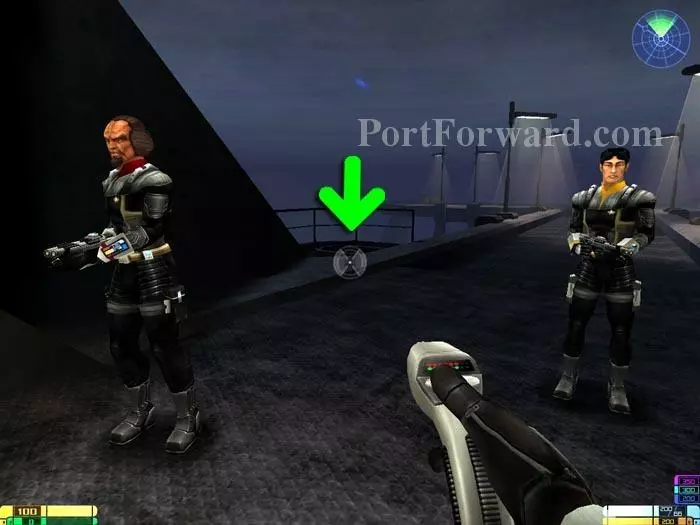
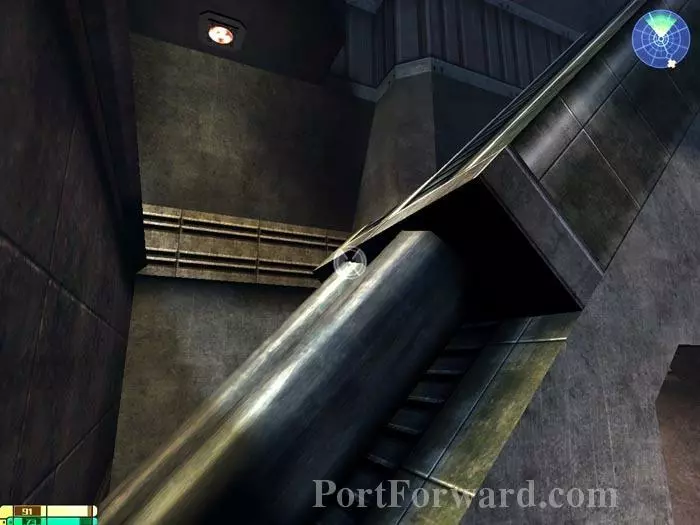
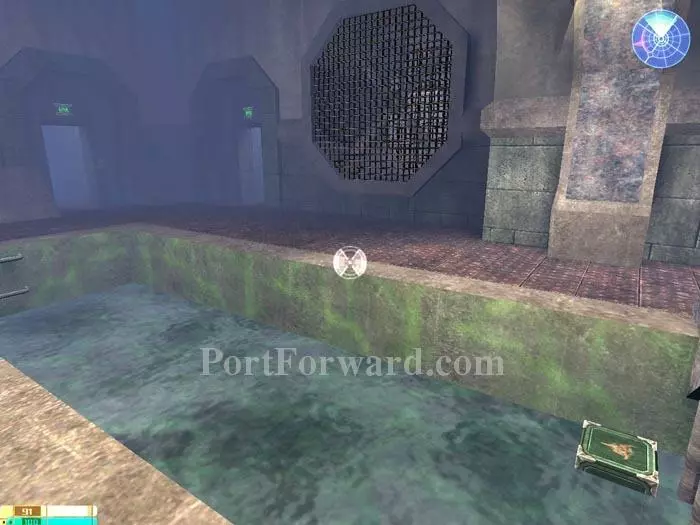
Cross the bridge. Destroy this cracked area to discover an unpowered door. Take this ladder down to the area below. Avoid the deadly water.
![Star Trek: Elite Force II Walkthrough - Star Trek-Elite-Force-II 248](star-trek-elite-force-ii-248-small.webp)
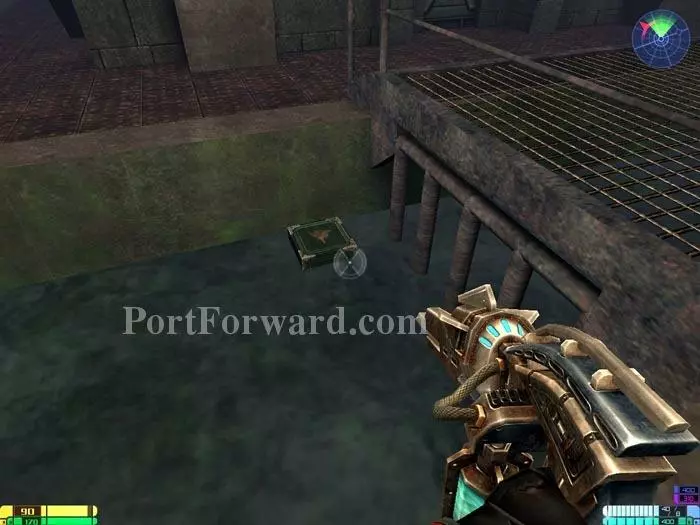
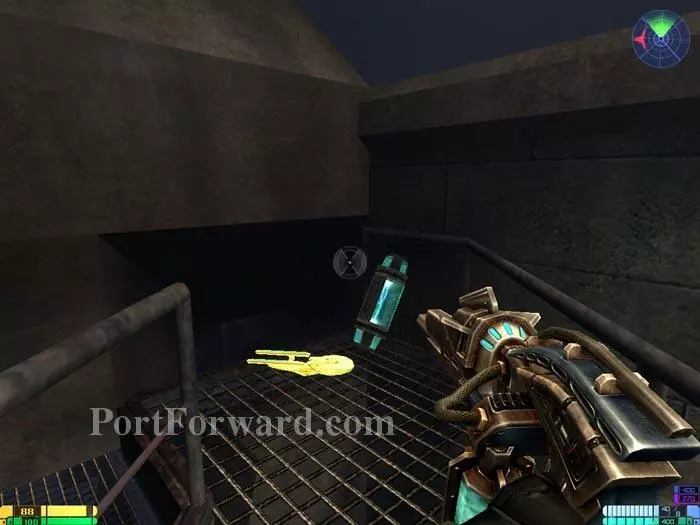
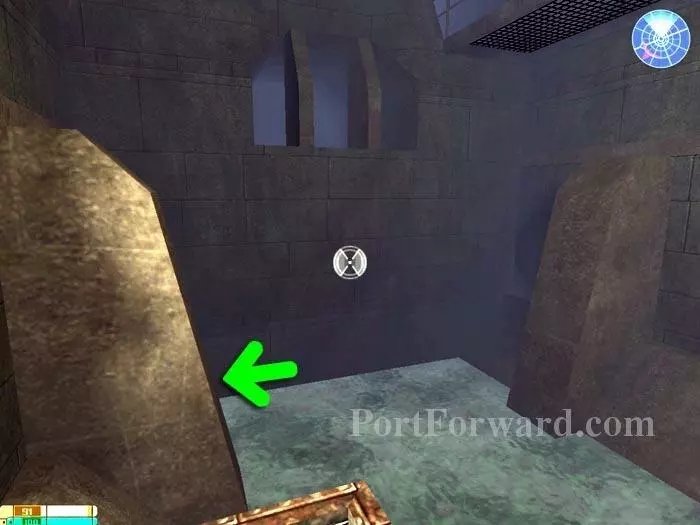
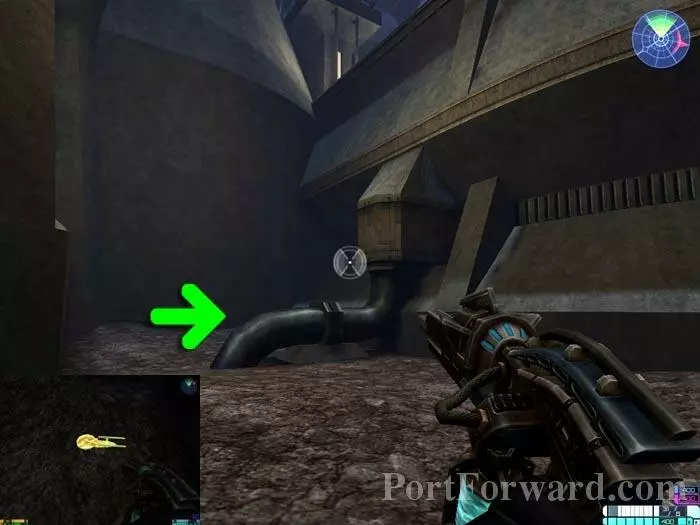
Find this secret area with 50 Idryllium.
![Star Trek: Elite Force II Walkthrough - Star Trek-Elite-Force-II 249](star-trek-elite-force-ii-249-small.webp)
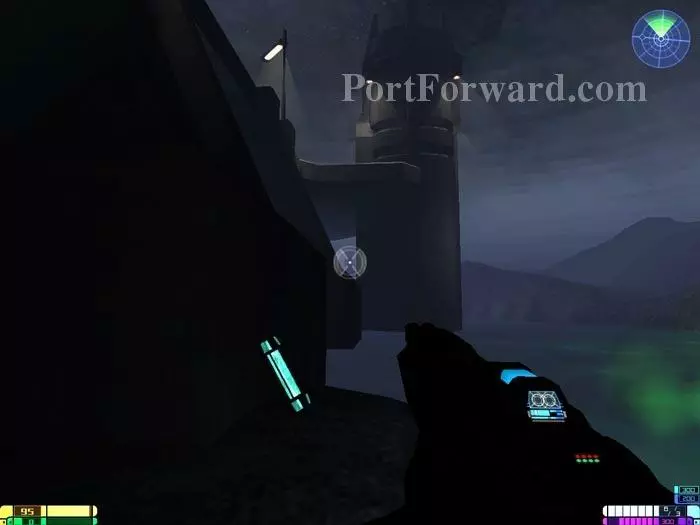
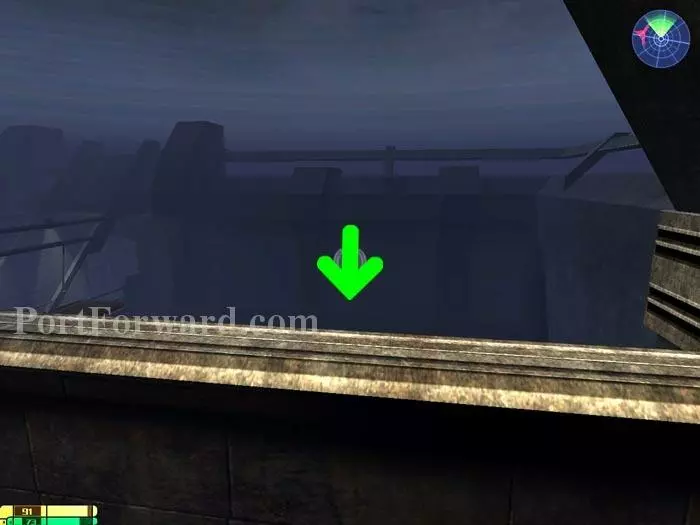
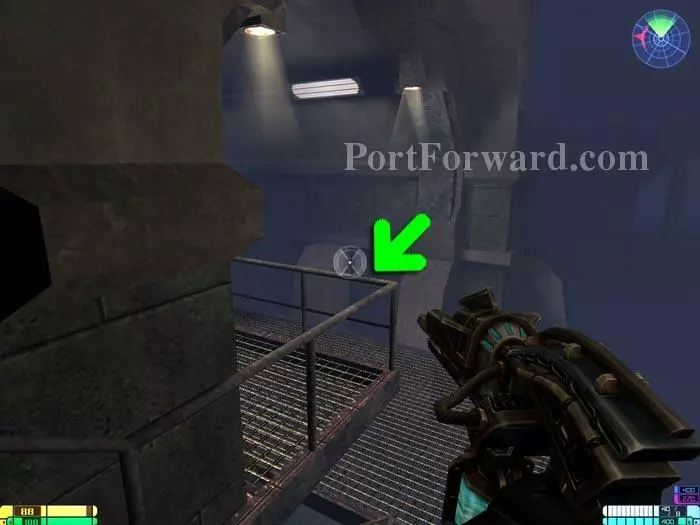
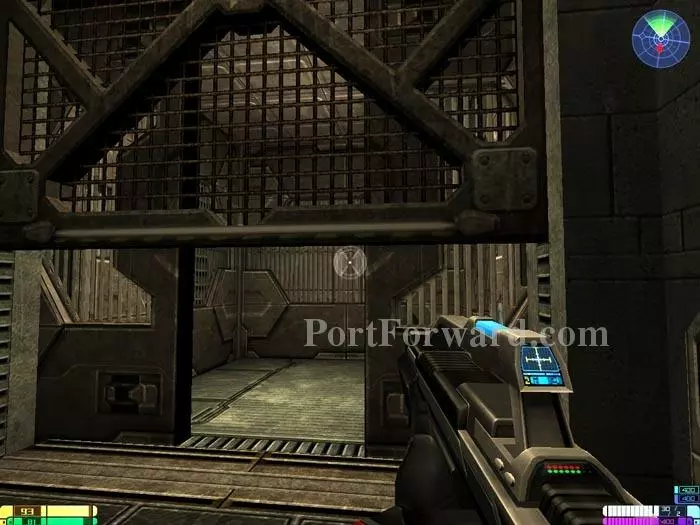
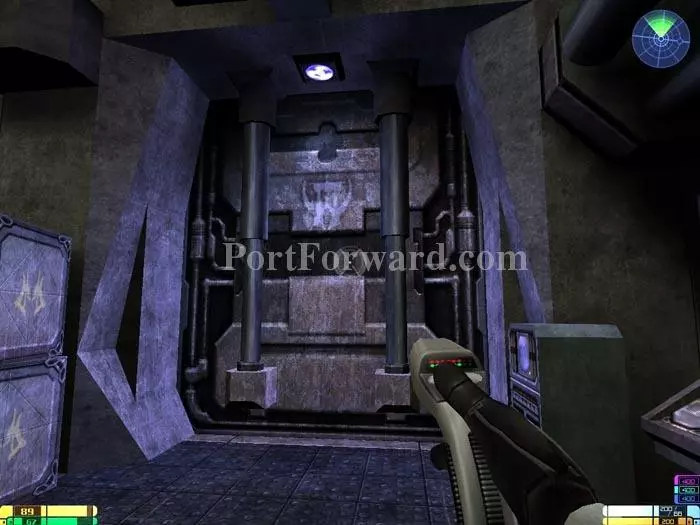
Climb back up and cross the bridge. Pass through this door.
![Star Trek: Elite Force II Walkthrough - Star Trek-Elite-Force-II 250](star-trek-elite-force-ii-250-small.webp)
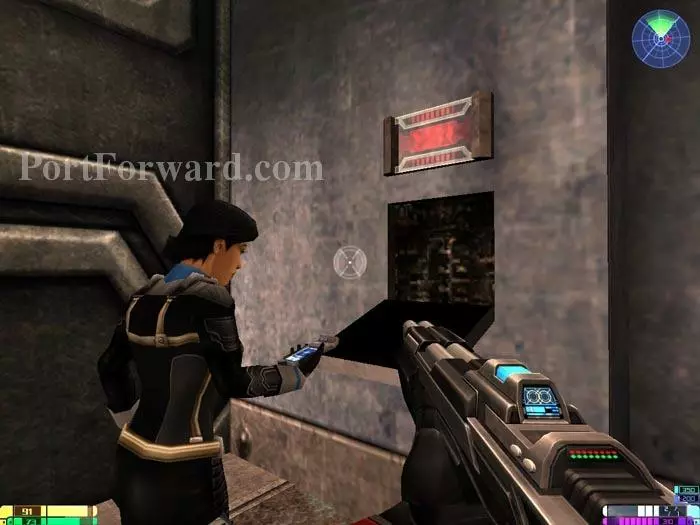
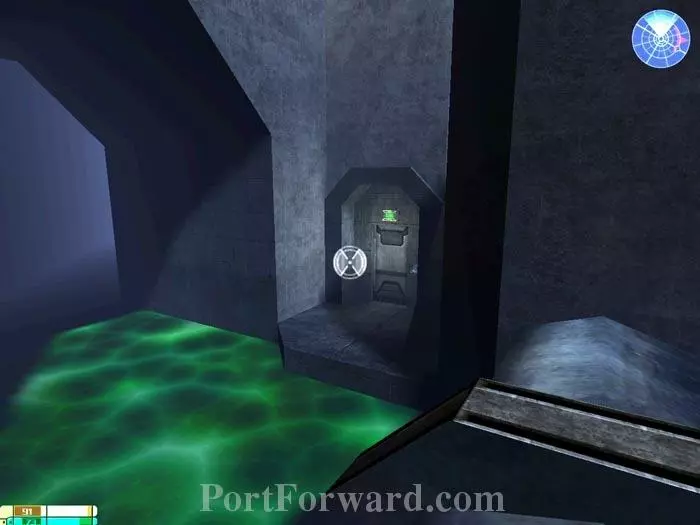
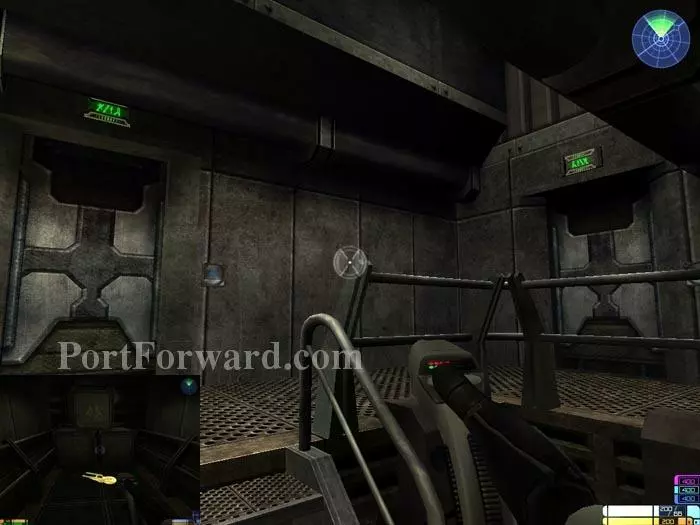
Use this security panel to disable the security system and make the door operational. Health and energy terminals are here.
![Star Trek: Elite Force II Walkthrough - Star Trek-Elite-Force-II 251](star-trek-elite-force-ii-251-small.webp)
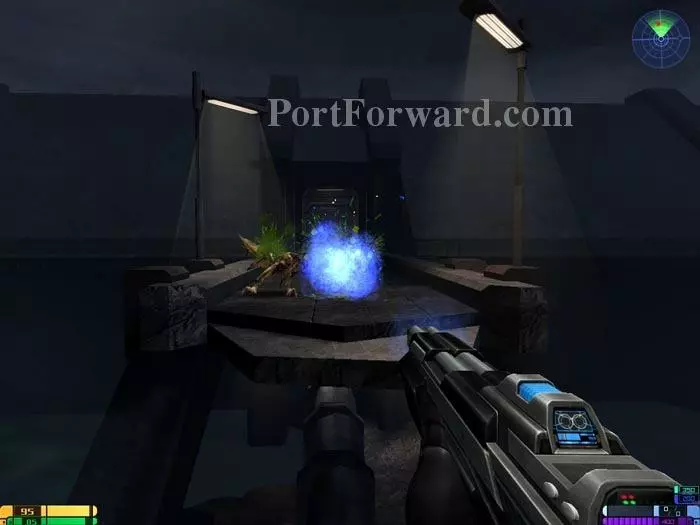
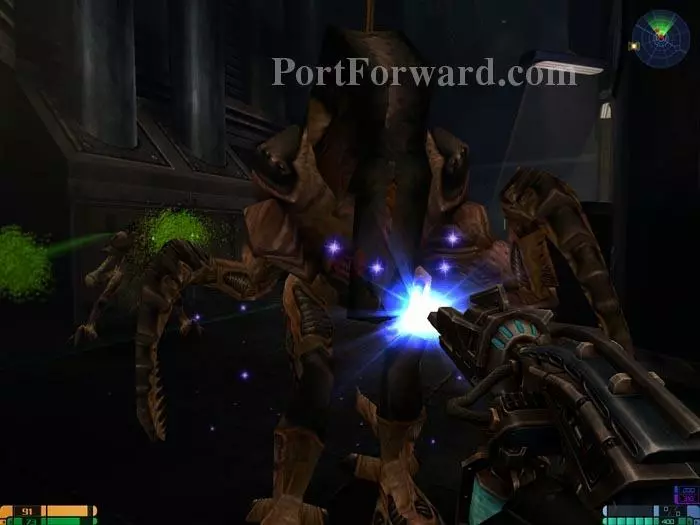
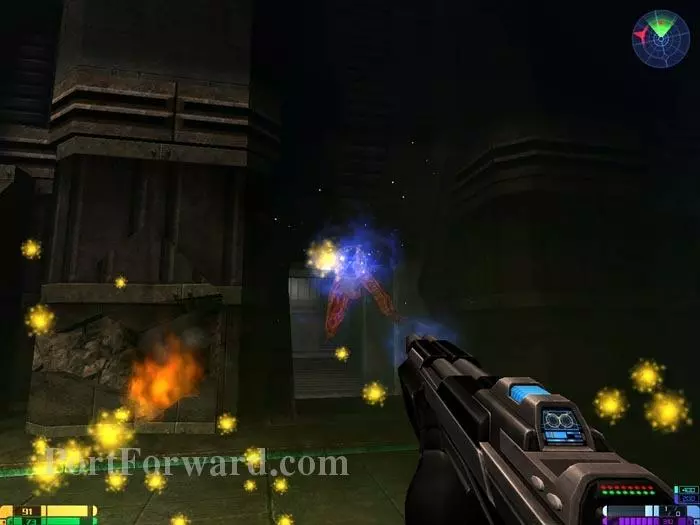
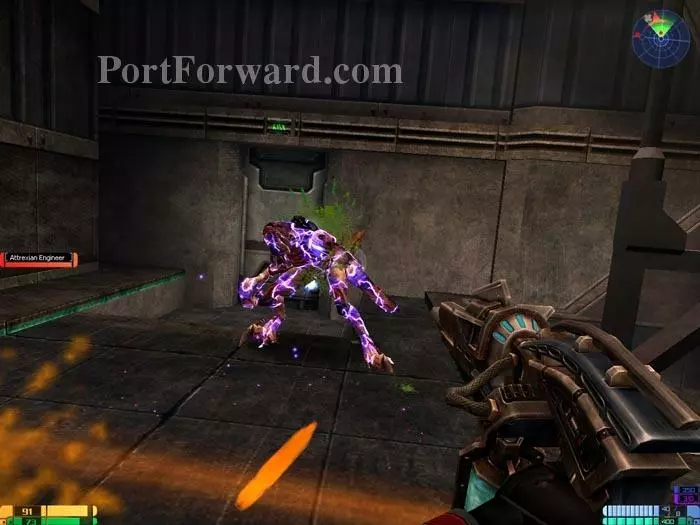
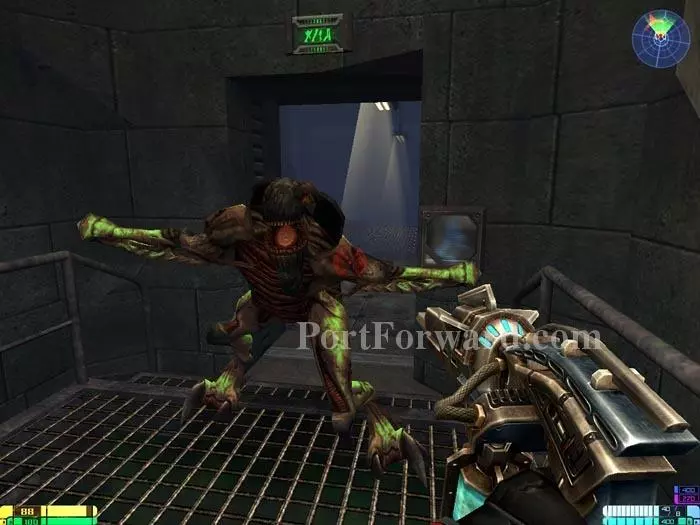
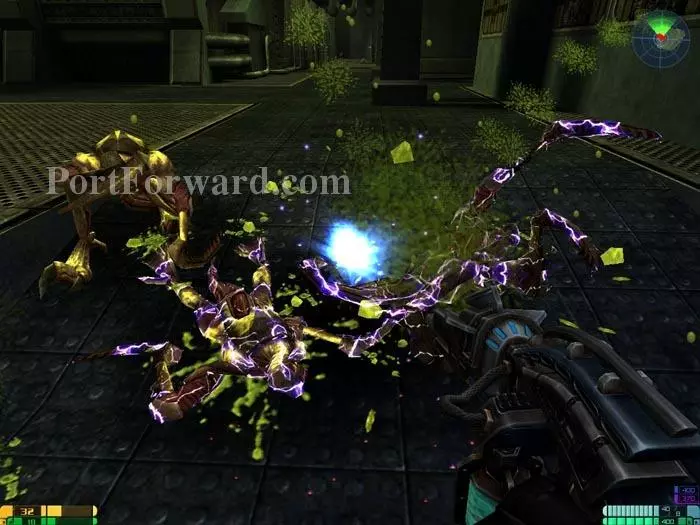
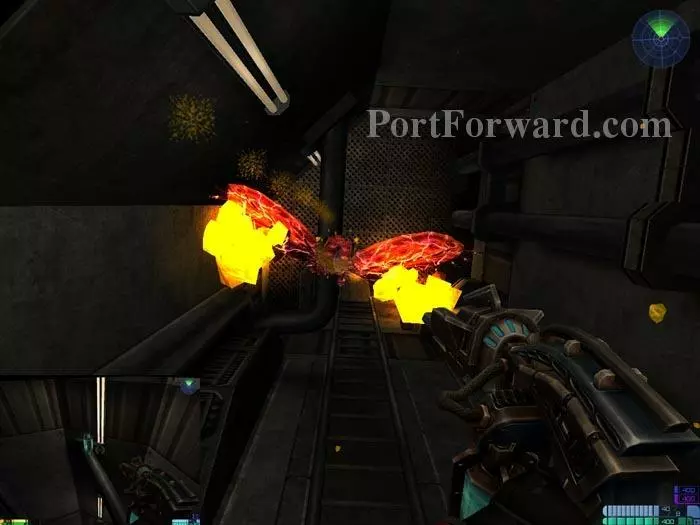
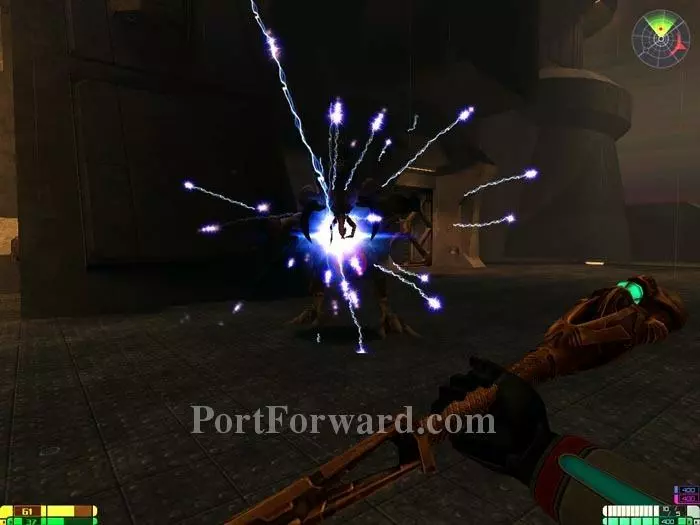
Xenomorphs beam in. Destroy them then jump over the gap in the bridge.
![Star Trek: Elite Force II Walkthrough - Star Trek-Elite-Force-II 252](star-trek-elite-force-ii-252-small.webp)
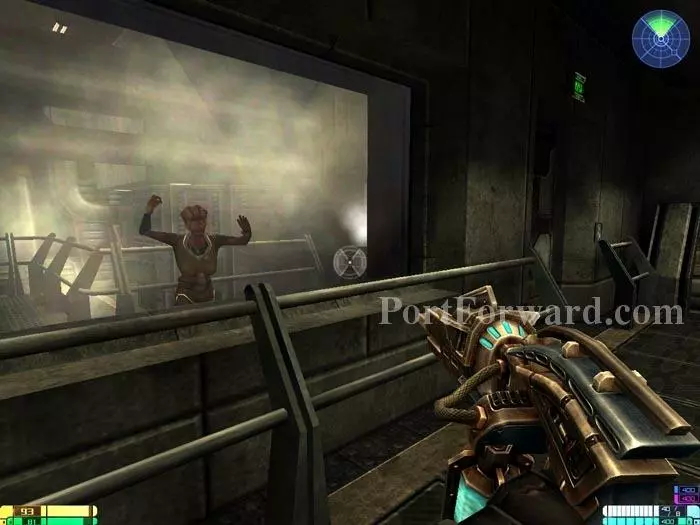
Enter the colony and battle two more Xenomorphs. Approach this panel and Jurot discovers another malfunction.
![Star Trek: Elite Force II Walkthrough - Star Trek-Elite-Force-II 253](star-trek-elite-force-ii-253-small.webp)
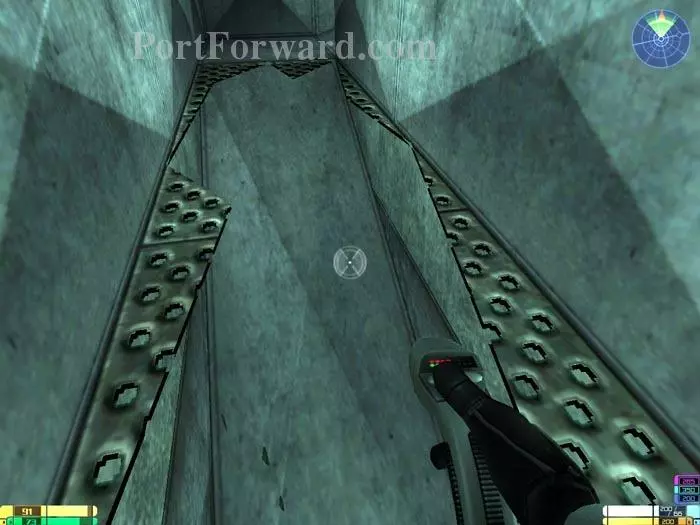
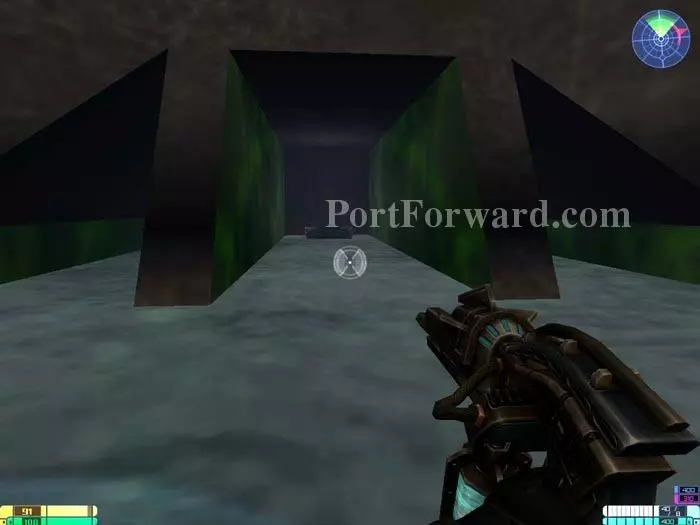
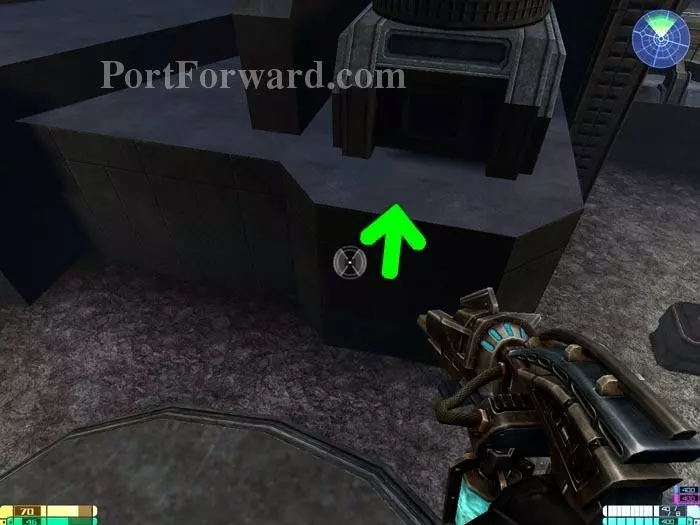
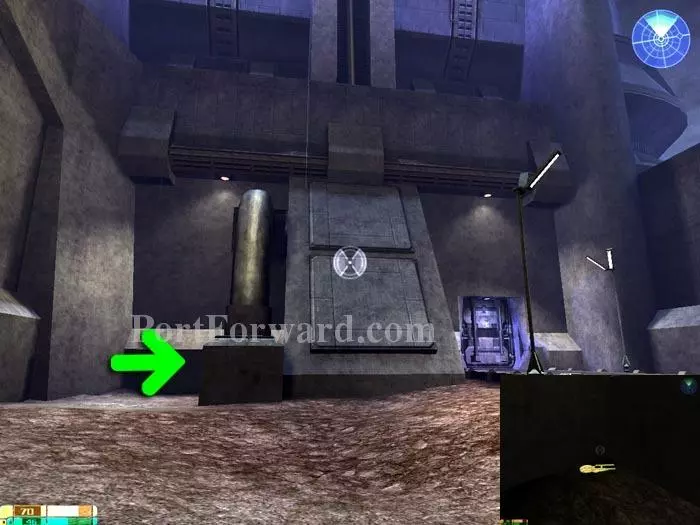
Climb these crates and destroy the grating. Pass into the ducts.
![Star Trek: Elite Force II Walkthrough - Star Trek-Elite-Force-II 254](star-trek-elite-force-ii-254-small.webp)
Shoot this floor to reveal a secret area with Idryllium.
![Star Trek: Elite Force II Walkthrough - Star Trek-Elite-Force-II 255](star-trek-elite-force-ii-255-small.webp)
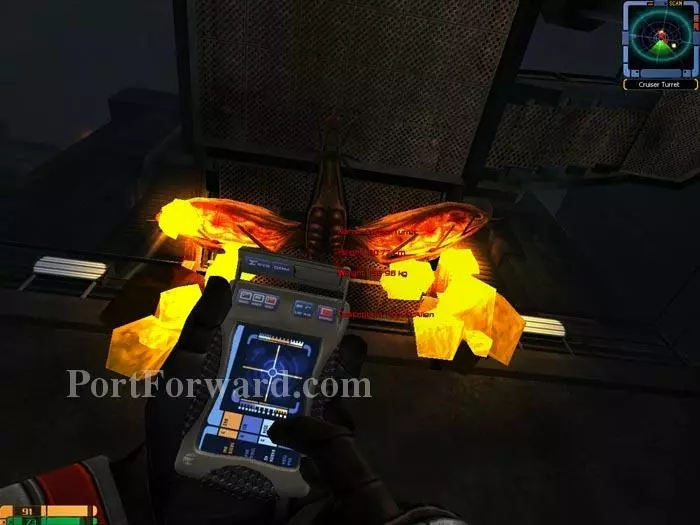
You'll emerge in an area with health and energy terminals, as well as more enemies - including this new hostile alien, the Cruiser Turret.
![Star Trek: Elite Force II Walkthrough - Star Trek-Elite-Force-II 256](star-trek-elite-force-ii-256-small.webp)
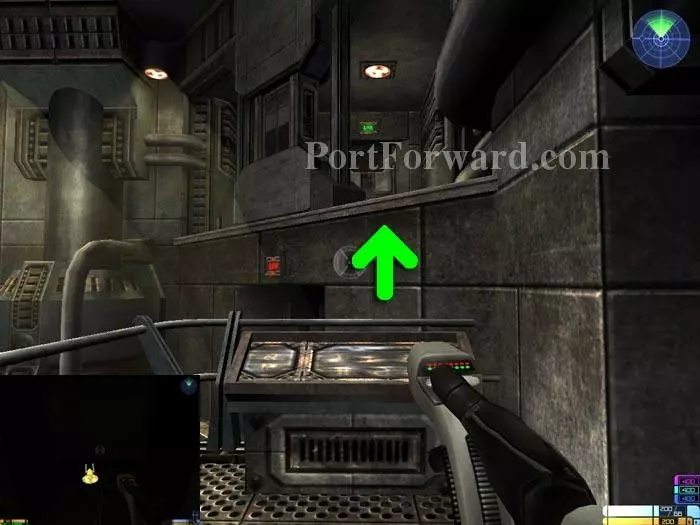
Turn left and climb up these pipes.
![Star Trek: Elite Force II Walkthrough - Star Trek-Elite-Force-II 257](star-trek-elite-force-ii-257-small.webp)
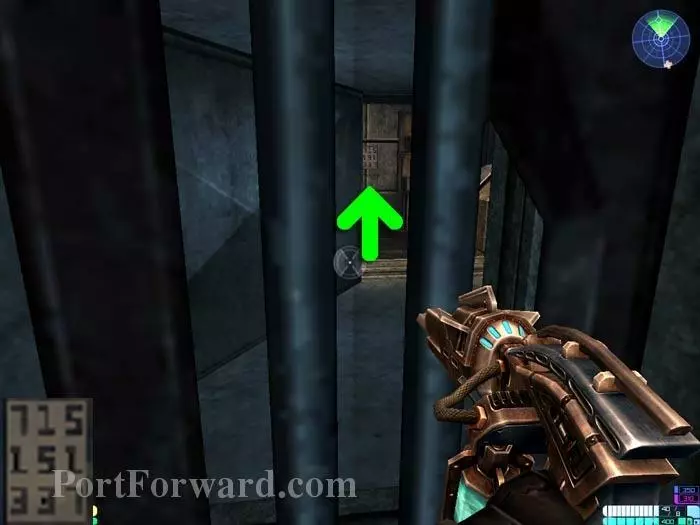
Jump onto, then over, this wall.
![Star Trek: Elite Force II Walkthrough - Star Trek-Elite-Force-II 258](star-trek-elite-force-ii-258-small.webp)
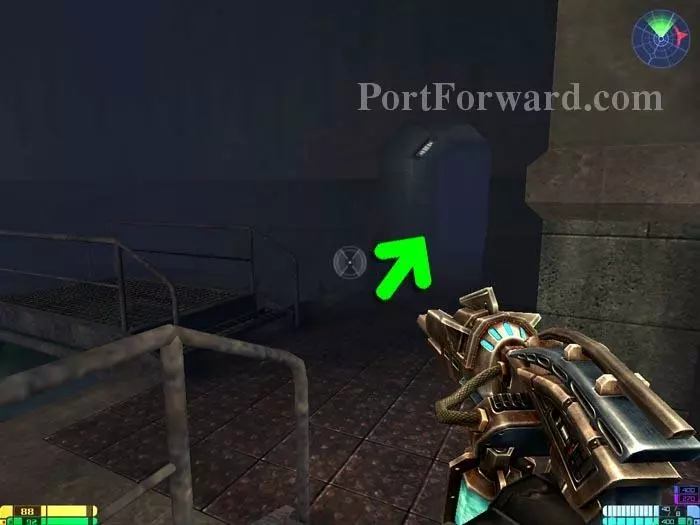
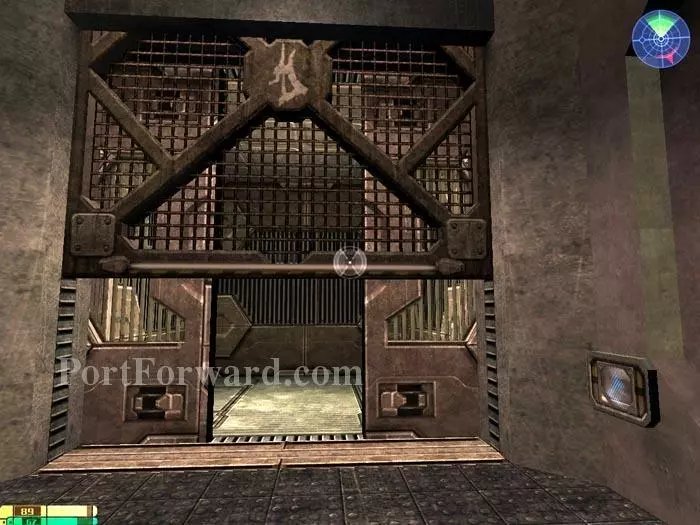
Jump onto the area in front of the green door.
![Star Trek: Elite Force II Walkthrough - Star Trek-Elite-Force-II 259](star-trek-elite-force-ii-259-small.webp)
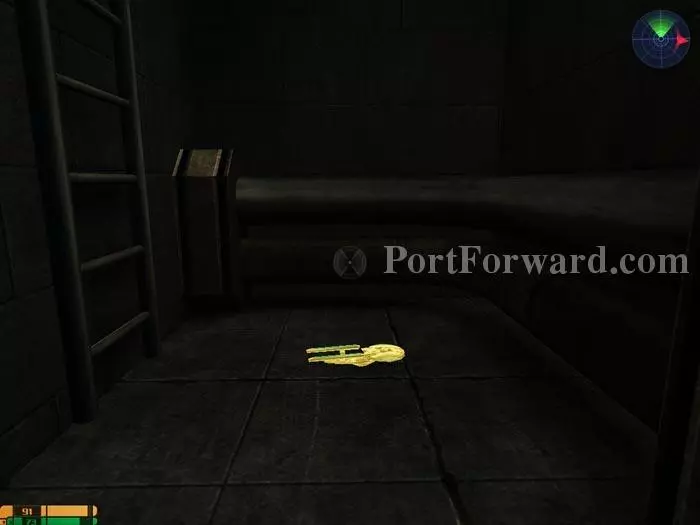
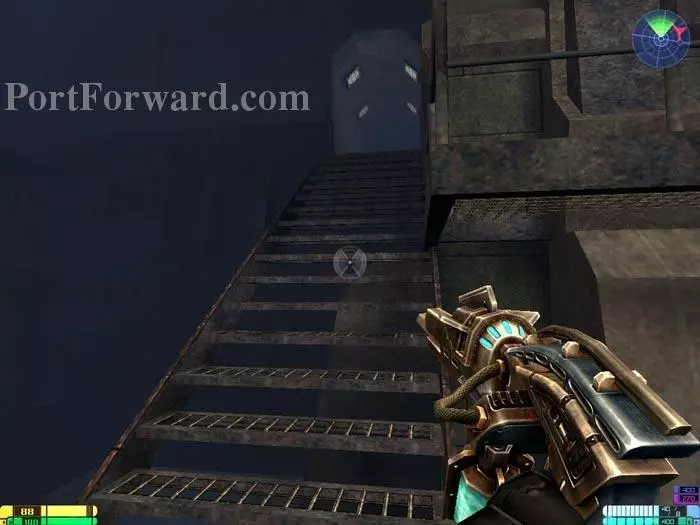
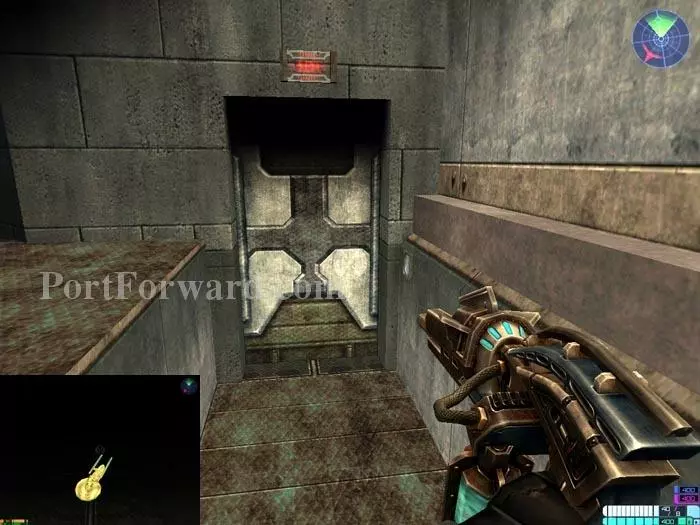
Pass through the door to find the 40th Golden Starship. Take the ladder up and pass through the door to return.
![Star Trek: Elite Force II Walkthrough - Star Trek-Elite-Force-II 260](star-trek-elite-force-ii-260-small.webp)
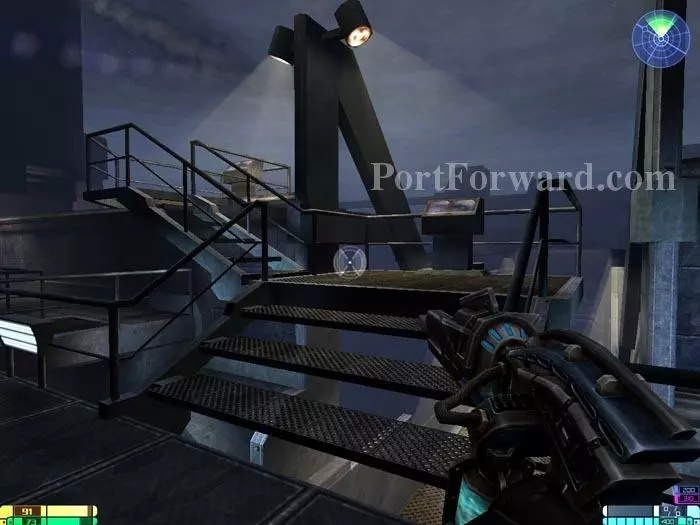
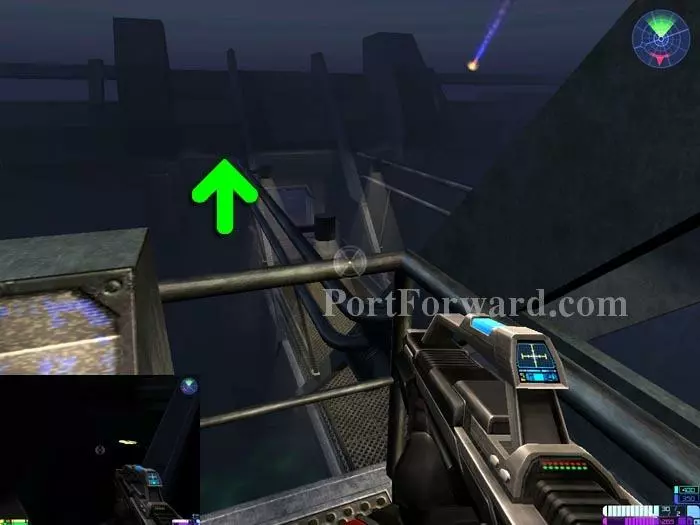
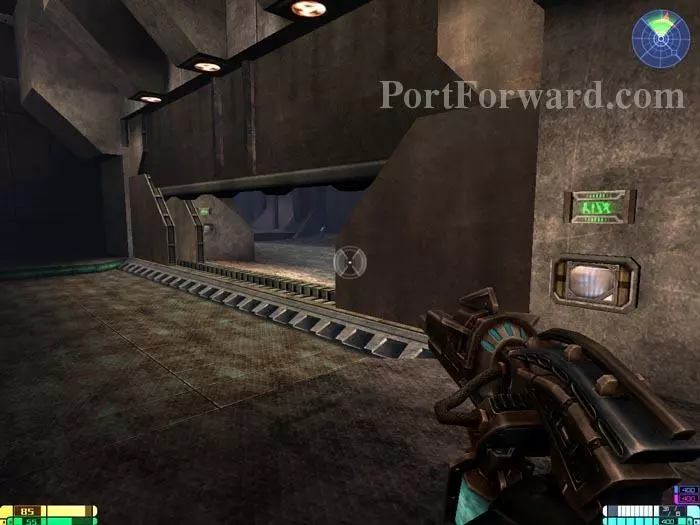
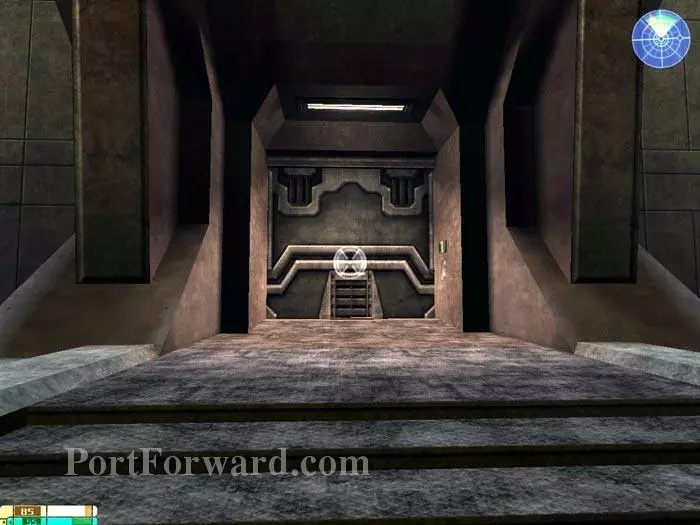
Go up the ramp and then climb these stairs.
![Star Trek: Elite Force II Walkthrough - Star Trek-Elite-Force-II 261](star-trek-elite-force-ii-261-small.webp)
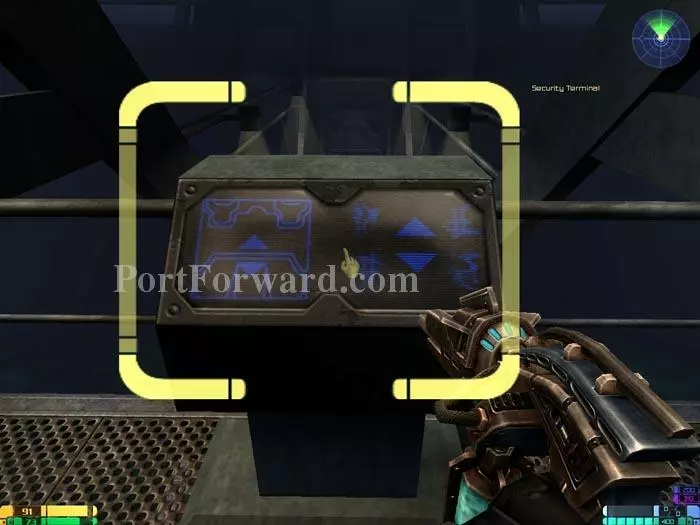
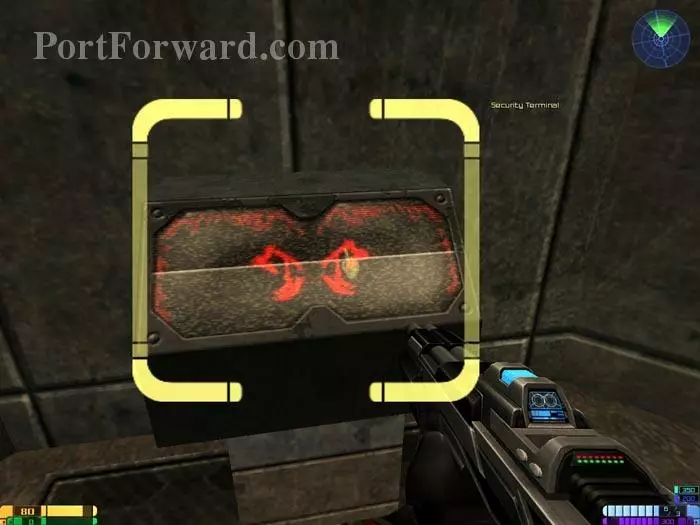
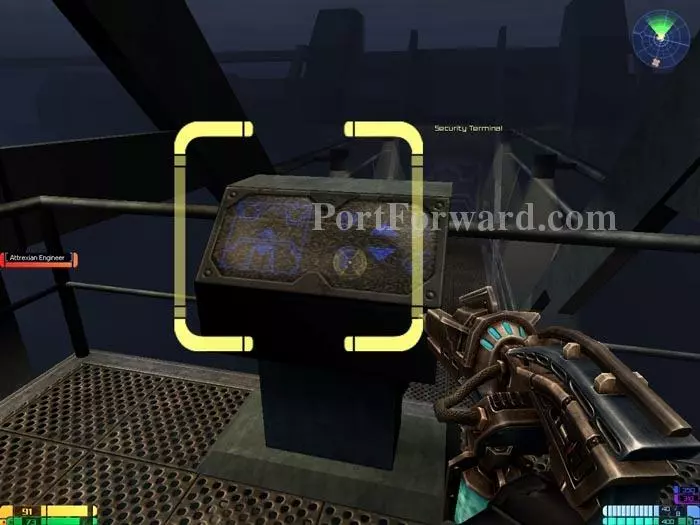
"Use" this Security Terminal and your objectives are updated. You must find the Attrexian engineer.
![Star Trek: Elite Force II Walkthrough - Star Trek-Elite-Force-II 262](star-trek-elite-force-ii-262-small.webp)
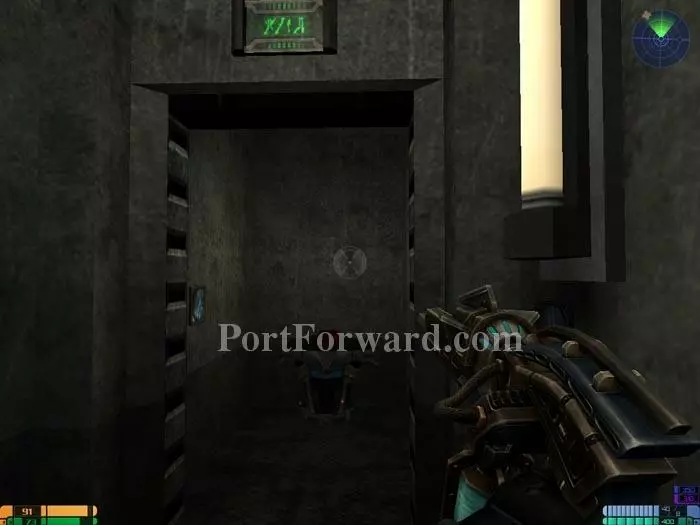
Go down the ramp on the other side and more Xenomorphs attack.
![Star Trek: Elite Force II Walkthrough - Star Trek-Elite-Force-II 263](star-trek-elite-force-ii-263-small.webp)
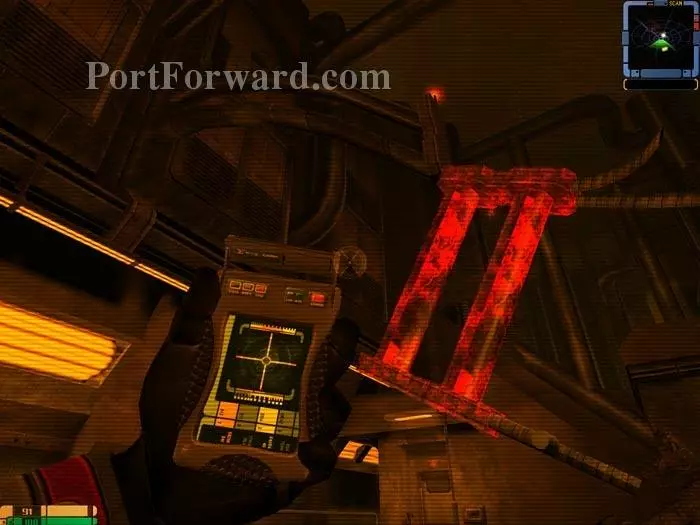
Your tricorder's Structural Integrity View Mode reveals this weakened wall. Destroy the Hytritium Storage Container to blast the area open, revealing a secret area with Idryllium.
![Star Trek: Elite Force II Walkthrough - Star Trek-Elite-Force-II 264](star-trek-elite-force-ii-264-small.webp)
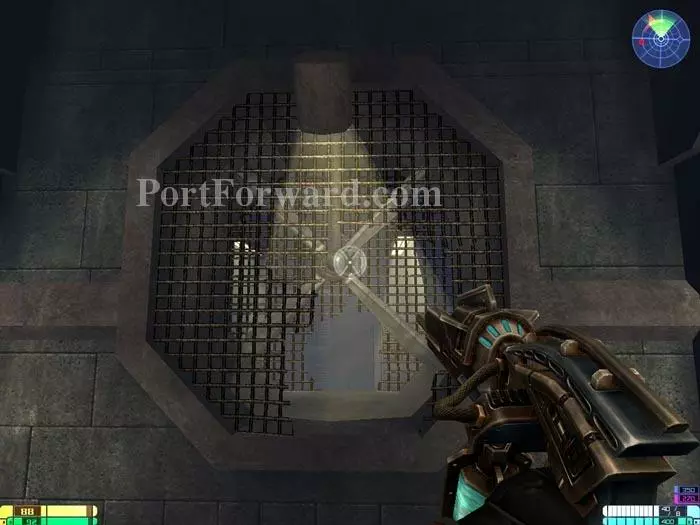
Through the grille you can see a code on the wall: 715151337. You'll need this later.
![Star Trek: Elite Force II Walkthrough - Star Trek-Elite-Force-II 265](star-trek-elite-force-ii-265-small.webp)
Inside this dumpster is a secret area with more Idryllium.
![Star Trek: Elite Force II Walkthrough - Star Trek-Elite-Force-II 266](star-trek-elite-force-ii-266-small.webp)
Defeat the Cruiser Turret and pass through the doorway.
![Star Trek: Elite Force II Walkthrough - Star Trek-Elite-Force-II 267](star-trek-elite-force-ii-267-small.webp)
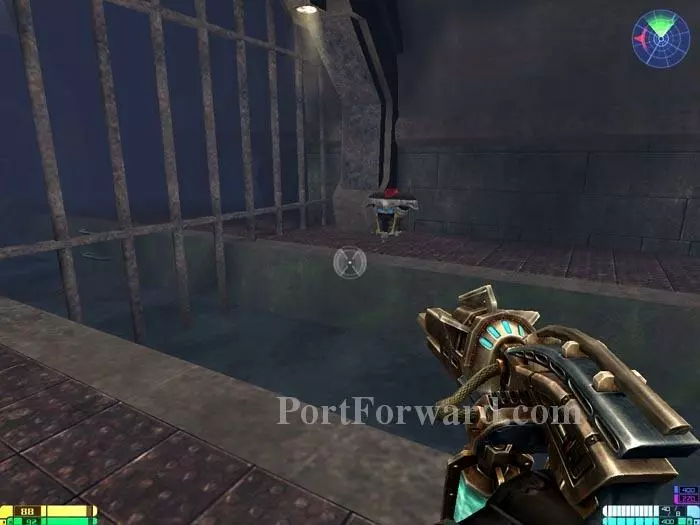
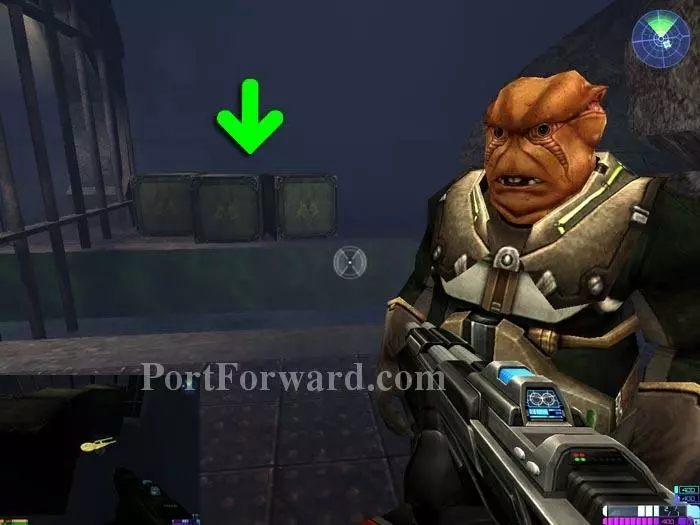
Behind this door are two trapped Attrexians and more Idryllium.
![Star Trek: Elite Force II Walkthrough - Star Trek-Elite-Force-II 268](star-trek-elite-force-ii-268-small.webp)
Go up the stairs and you'll find the Attrexian Engineer behind these crates. A case of 150 Fed is visible in the bottom left.
![Star Trek: Elite Force II Walkthrough - Star Trek-Elite-Force-II 269](star-trek-elite-force-ii-269-small.webp)
Pass through the green door and return to the Security Terminal. Protect the Engineer.
![Star Trek: Elite Force II Walkthrough - Star Trek-Elite-Force-II 270](star-trek-elite-force-ii-270-small.webp)
The Engineer continues up the stairs to the other terminal. Activate the Security Terminal on his mark. Your team can now join you.
![Star Trek: Elite Force II Walkthrough - Star Trek-Elite-Force-II 271](star-trek-elite-force-ii-271-small.webp)
Walk up to the platform with the Engineer. Step over the railing onto the bridge girders. Walk across the girders to the other side of the bridge. You'll find the 41st Golden Starship tucked away inside.
![Star Trek: Elite Force II Walkthrough - Star Trek-Elite-Force-II 272](star-trek-elite-force-ii-272-small.webp)
Hop back down to the bridge deck. Turn right through the previously-locked door and pass through this door for a secret area with 100 shielding.
![Star Trek: Elite Force II Walkthrough - Star Trek-Elite-Force-II 273](star-trek-elite-force-ii-273-small.webp)
Return to the trapped Attrexians for a cutscene.
![Star Trek: Elite Force II Walkthrough - Star Trek-Elite-Force-II 274](star-trek-elite-force-ii-274-small.webp)
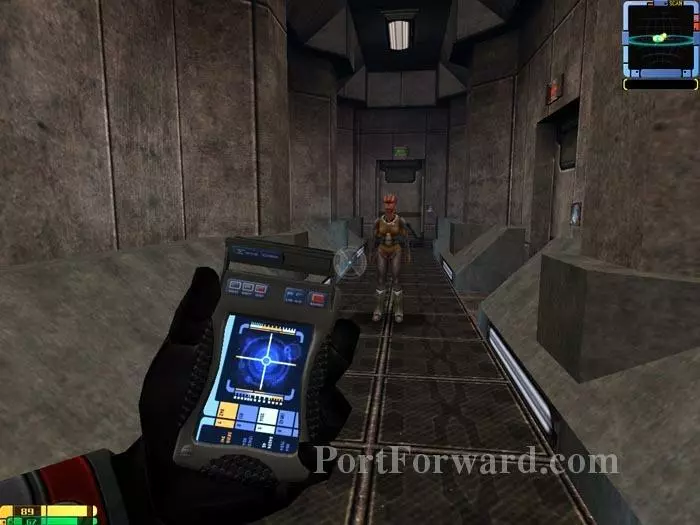
Follow the Attrexian, but not all the way. When you get here, turn around.
![Star Trek: Elite Force II Walkthrough - Star Trek-Elite-Force-II 275](star-trek-elite-force-ii-275-small.webp)
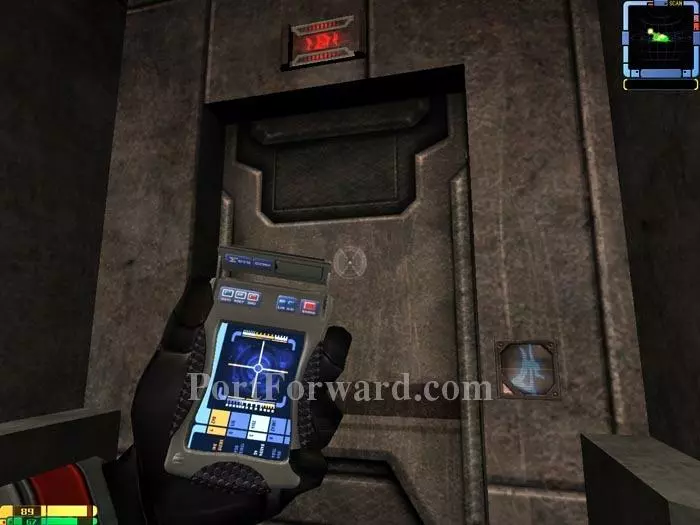
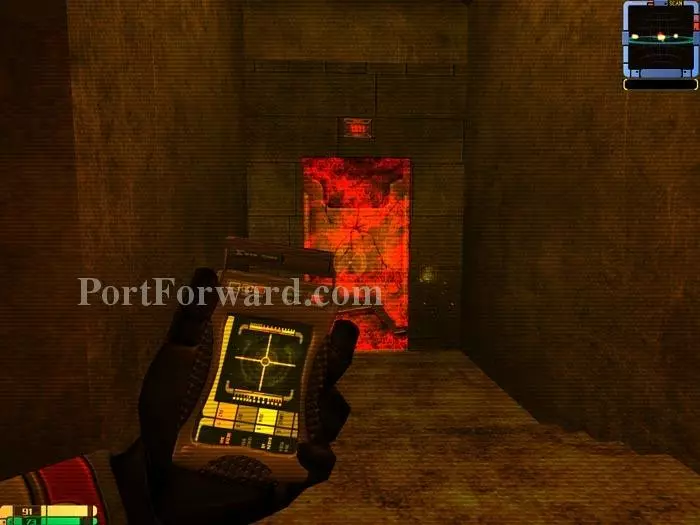
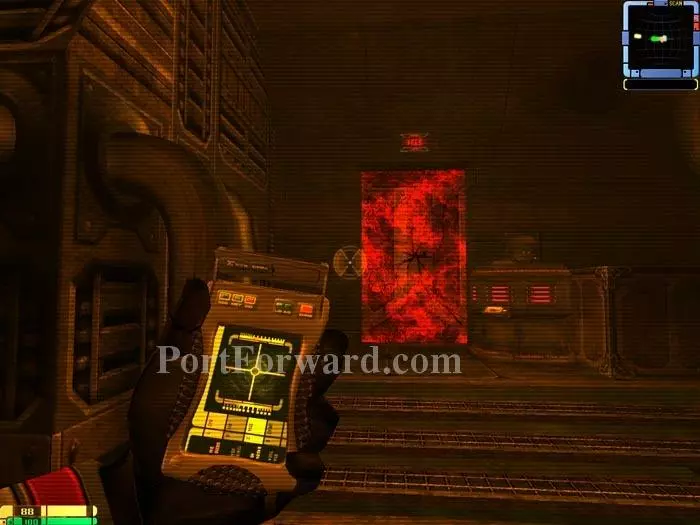
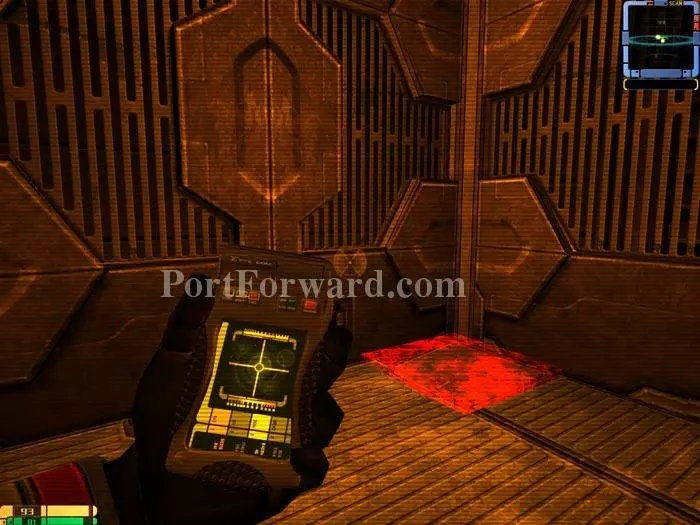
Enter the code you discovered earlier: 715151337.
![Star Trek: Elite Force II Walkthrough - Star Trek-Elite-Force-II 276](star-trek-elite-force-ii-276-small.webp)
Inside is a secret area with this cryptic message.
![Star Trek: Elite Force II Walkthrough - Star Trek-Elite-Force-II 277](star-trek-elite-force-ii-277-small.webp)
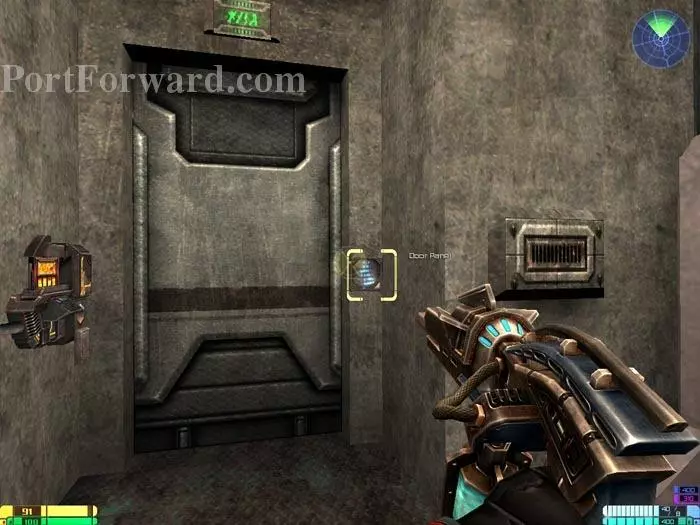
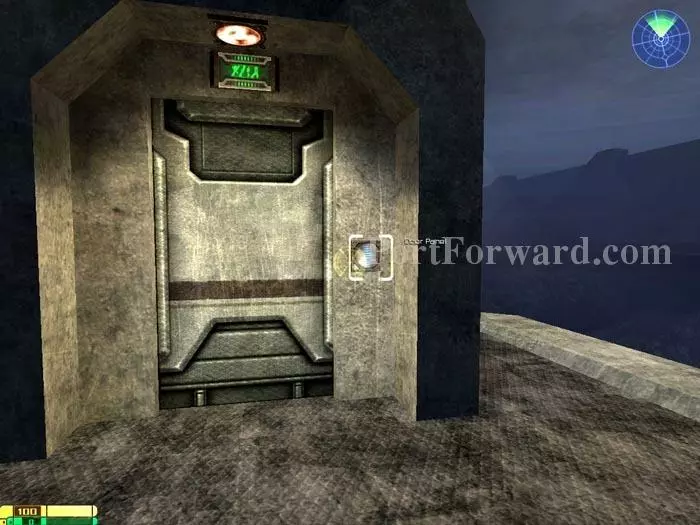
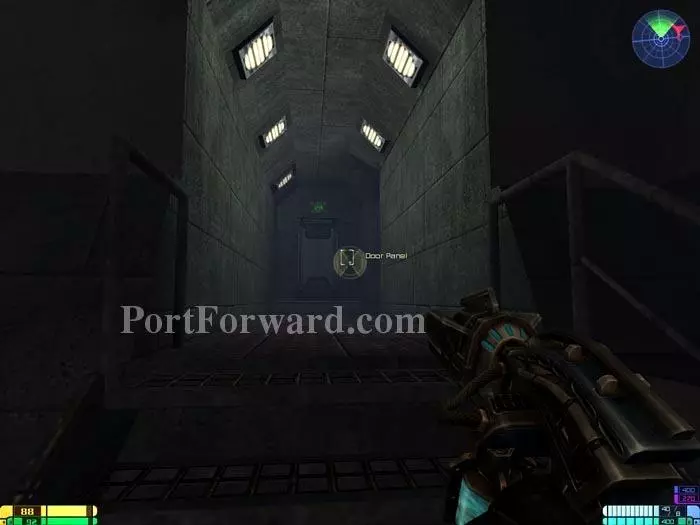
Follow the Attrexian to the sewer entrance. "Use" this door panel and a brief cutscene follows. A health terminal is on the left, and Idryllium and Fed are available here as well.
![Star Trek: Elite Force II Walkthrough - Star Trek-Elite-Force-II 278](star-trek-elite-force-ii-278-small.webp)
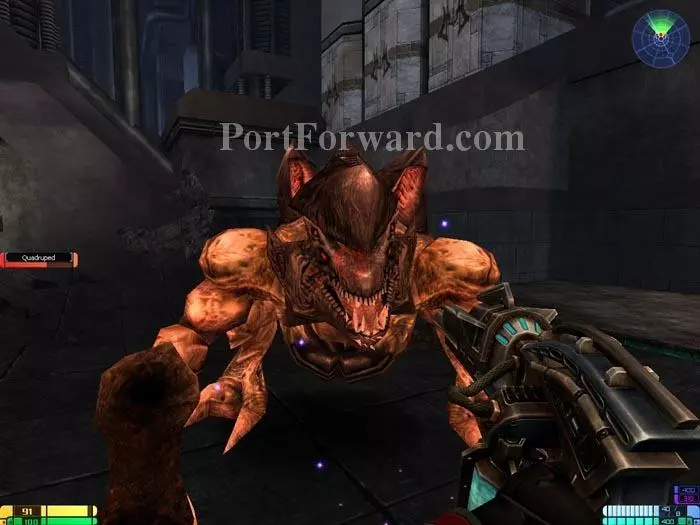
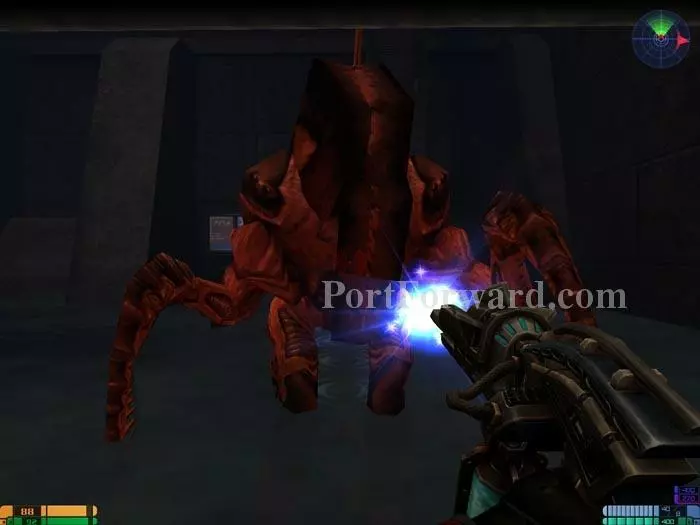
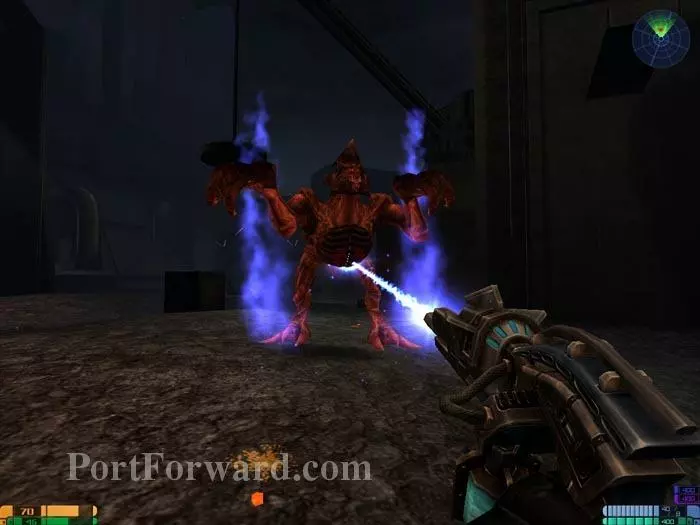
Time for another boss, Quadruped. The Arc Gun works well against him. Use the surrounding crates for cover.
![Star Trek: Elite Force II Walkthrough - Star Trek-Elite-Force-II 279](star-trek-elite-force-ii-279-small.webp)
Hear that metal rocking in the breeze? Your tricorder reveals its structural weakness. Blast it with your phaser.
![Star Trek: Elite Force II Walkthrough - Star Trek-Elite-Force-II 280](star-trek-elite-force-ii-280-small.webp)
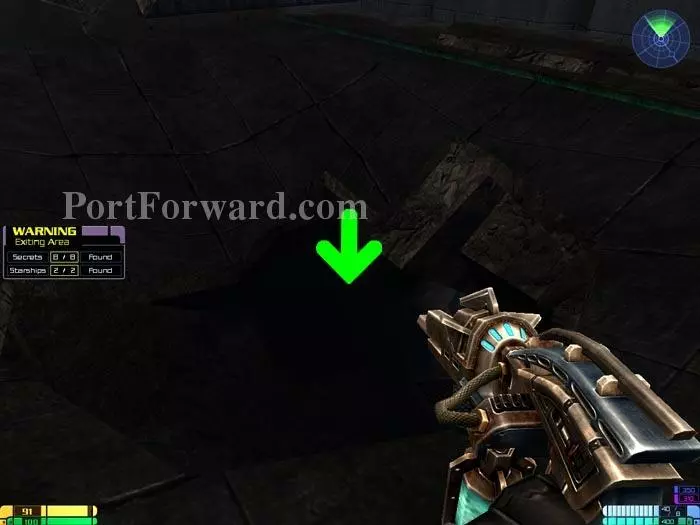
Drop through the crater it makes after crashing to the ground and exit the area.
![Star Trek: Elite Force II Walkthrough - Star Trek-Elite-Force-II 281](star-trek-elite-force-ii-281-small.webp)
Ready your Arc Gun and fight your way to this broken fan. Jump through.
![Star Trek: Elite Force II Walkthrough - Star Trek-Elite-Force-II 282](star-trek-elite-force-ii-282-small.webp)
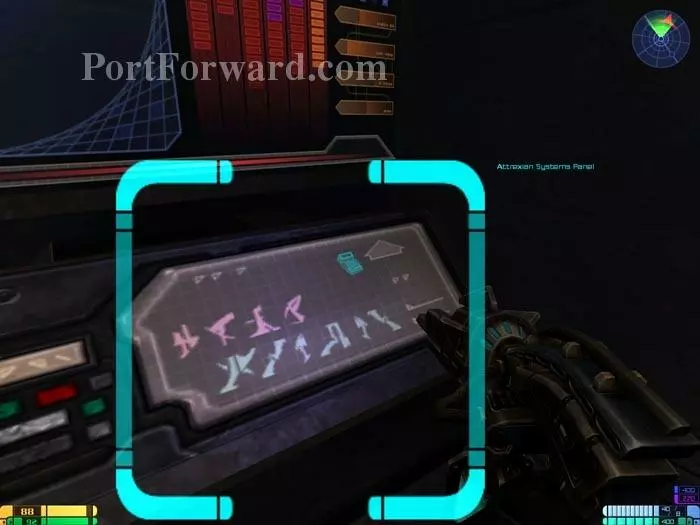
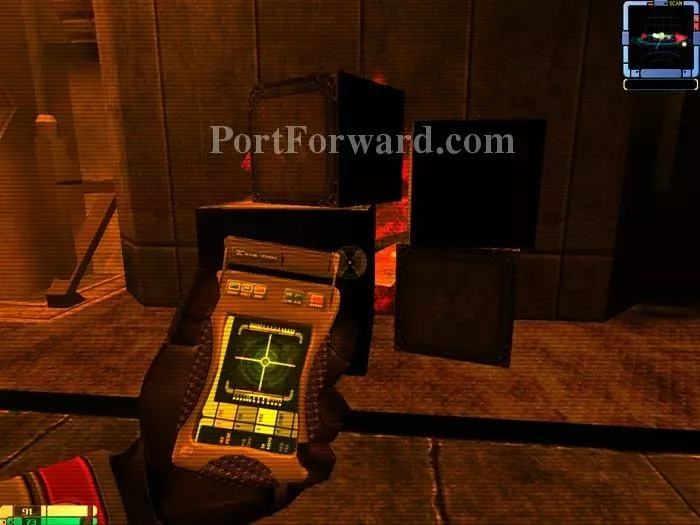
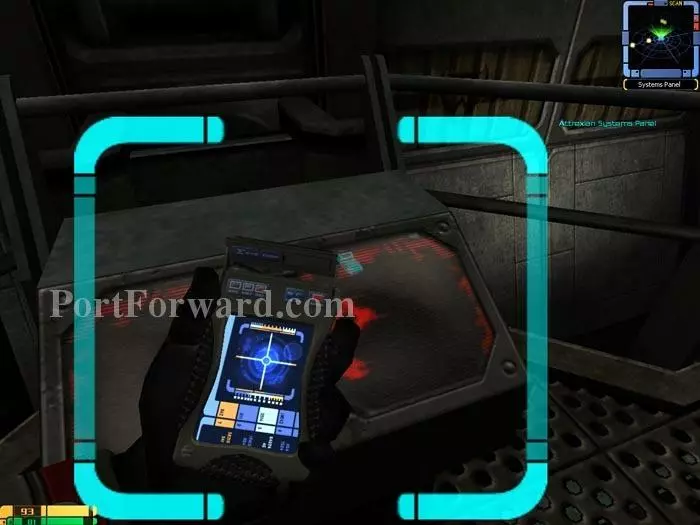
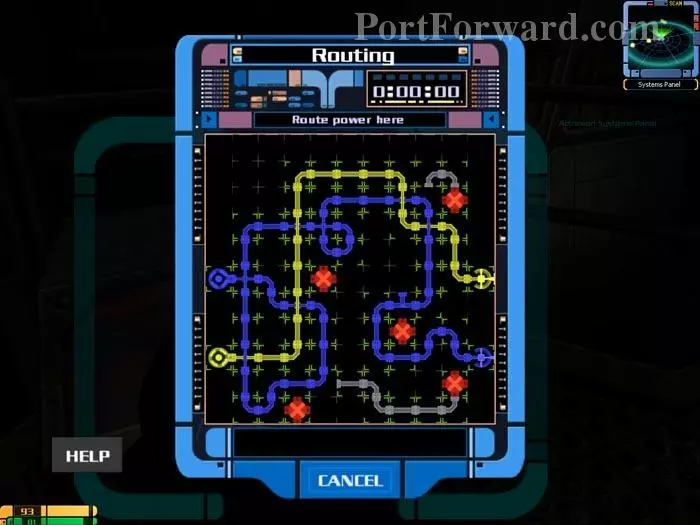
Inside you'll find some Idryllium and this Attrexian Systems Panel.
![Star Trek: Elite Force II Walkthrough - Star Trek-Elite-Force-II 283](star-trek-elite-force-ii-283-small.webp)
Use your tricorder on the Panel. Solution above. Exit through the green door.
![Star Trek: Elite Force II Walkthrough - Star Trek-Elite-Force-II 284](star-trek-elite-force-ii-284-small.webp)
Continue left past the large fan and pass through this door, being careful not to get sucked into the fan blades behind you.
![Star Trek: Elite Force II Walkthrough - Star Trek-Elite-Force-II 285](star-trek-elite-force-ii-285-small.webp)
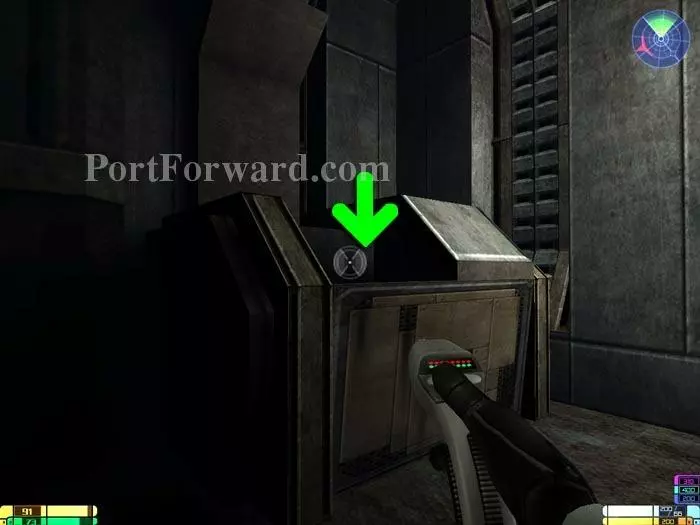
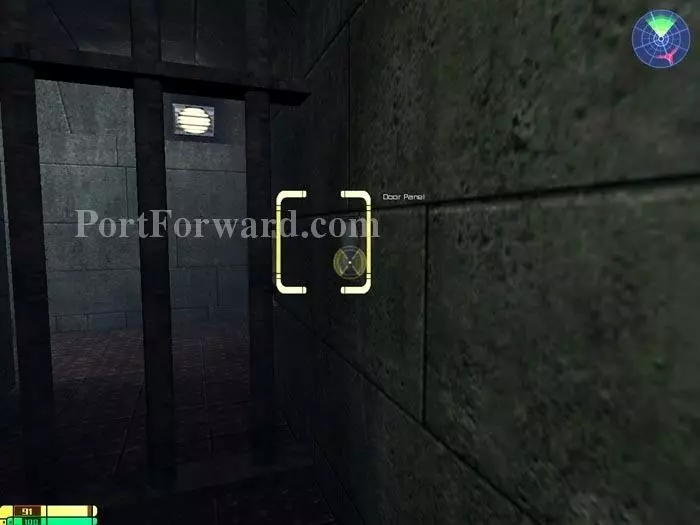
Inside you'll find health and energy terminals, as well as this Door Panel. "Use" it to raise the barriers outside.
![Star Trek: Elite Force II Walkthrough - Star Trek-Elite-Force-II 286](star-trek-elite-force-ii-286-small.webp)
Make your way past the raised barrier (the window of the room you were just in will be on the right). Straight ahead is another fan, and this secret area with supplies.
![Star Trek: Elite Force II Walkthrough - Star Trek-Elite-Force-II 287](star-trek-elite-force-ii-287-small.webp)
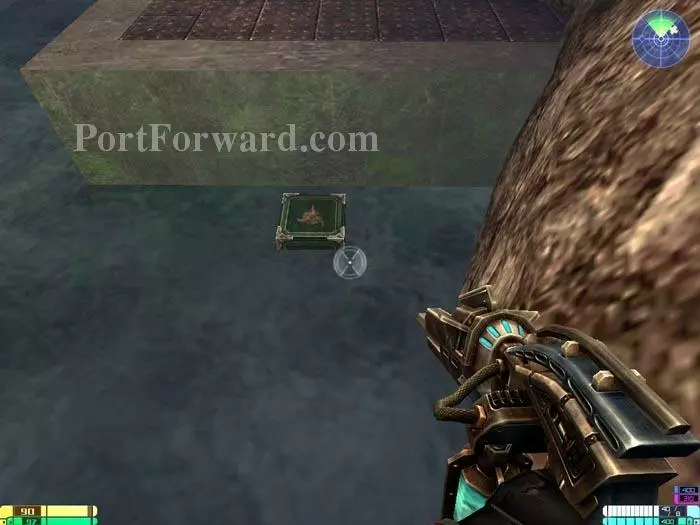
Approach this floating crate bearing the Klingon Trifoil.
![Star Trek: Elite Force II Walkthrough - Star Trek-Elite-Force-II 288](star-trek-elite-force-ii-288-small.webp)
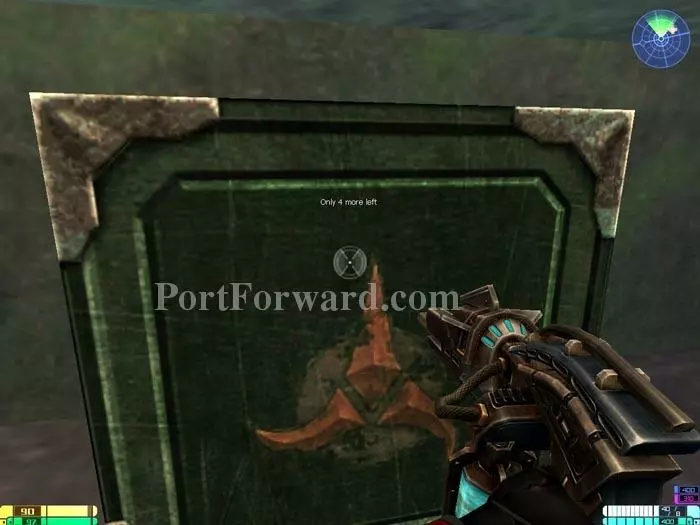
"Use" the crate and it will sink. The message "Only 4 more left" appears.
![Star Trek: Elite Force II Walkthrough - Star Trek-Elite-Force-II 289](star-trek-elite-force-ii-289-small.webp)
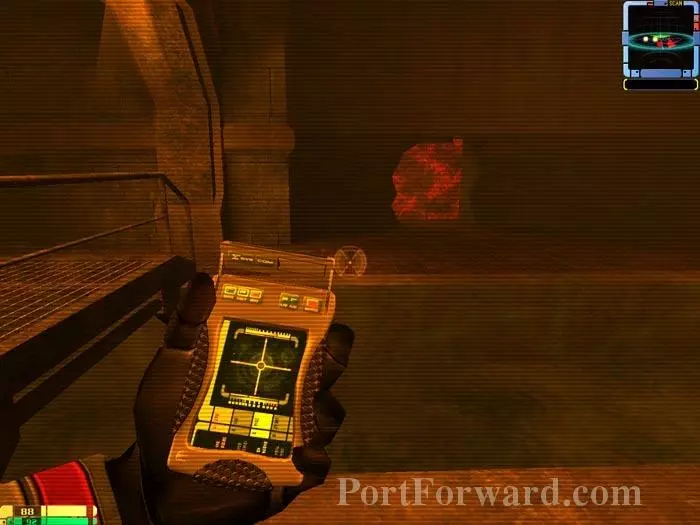
Backtrack near the first broken fan and a Xenomorph bursts through this wall. Your tricorder reveals it as a weak spot. Blast it and more Xenomorphs attack.
![Star Trek: Elite Force II Walkthrough - Star Trek-Elite-Force-II 290](star-trek-elite-force-ii-290-small.webp)
Pass through to this secret area, previously visible but inaccessible.
![Star Trek: Elite Force II Walkthrough - Star Trek-Elite-Force-II 291](star-trek-elite-force-ii-291-small.webp)
At the back of the area is another Klingon crate. "Use" it to sink. Only 3 more left.
![Star Trek: Elite Force II Walkthrough - Star Trek-Elite-Force-II 292](star-trek-elite-force-ii-292-small.webp)
Backtrack to the window area. Directly opposite is Klingon crate number 3. "Use" it to sink. Only 2 more left.
![Star Trek: Elite Force II Walkthrough - Star Trek-Elite-Force-II 293](star-trek-elite-force-ii-293-small.webp)
Pass through this archway.
![Star Trek: Elite Force II Walkthrough - Star Trek-Elite-Force-II 294](star-trek-elite-force-ii-294-small.webp)
Fight your way through the barrage of Xenomorph fire to these stairs. Climb them about 3/4 of the way.
![Star Trek: Elite Force II Walkthrough - Star Trek-Elite-Force-II 295](star-trek-elite-force-ii-295-small.webp)
Turn around and jump onto this catwalk.
![Star Trek: Elite Force II Walkthrough - Star Trek-Elite-Force-II 296](star-trek-elite-force-ii-296-small.webp)
You'll find the 42nd Golden Starship and some Idryllium at the end of the catwalk.
![Star Trek: Elite Force II Walkthrough - Star Trek-Elite-Force-II 297](star-trek-elite-force-ii-297-small.webp)
Hop over the railing and then jump into the water below. Under the catwalk where you entered this area is the fourth Klingon crate. "Use" it to sink. Only one left.
![Star Trek: Elite Force II Walkthrough - Star Trek-Elite-Force-II 298](star-trek-elite-force-ii-298-small.webp)
Backtrack to the stairs and go through the door in the back. Health and energy terminals are to the right of the door.
![Star Trek: Elite Force II Walkthrough - Star Trek-Elite-Force-II 299](star-trek-elite-force-ii-299-small.webp)
Your team is on the other side, but when you approach them an explosion sends you plummeting below.
![Star Trek: Elite Force II Walkthrough - Star Trek-Elite-Force-II 300](star-trek-elite-force-ii-300-small.webp)
Your Arc Gun works well against this guy. Use your tricorder to modulate the ladder release terminal visible in the background.
![Star Trek: Elite Force II Walkthrough - Star Trek-Elite-Force-II 301](star-trek-elite-force-ii-301-small.webp)
Climb the ladder and pass through the green door, then the green door immediately to the right. As you approach this green door, Xenomorphs burst through.
![Star Trek: Elite Force II Walkthrough - Star Trek-Elite-Force-II 302](star-trek-elite-force-ii-302-small.webp)
Destroy the Hytritium Storage Container next to this damaged door, and the door will disintegrate. Enter to find the trapped Attrexians.
![Star Trek: Elite Force II Walkthrough - Star Trek-Elite-Force-II 303](star-trek-elite-force-ii-303-small.webp)
Backtrack to this area for the fifth Klingon crate. (The doors on the left are where you just came from.) "Use" to sink. "A door has opened elsewhere" message displays.
![Star Trek: Elite Force II Walkthrough - Star Trek-Elite-Force-II 304](star-trek-elite-force-ii-304-small.webp)
Pass through the door on the left and "use" this door panel to raise the barrier.
![Star Trek: Elite Force II Walkthrough - Star Trek-Elite-Force-II 305](star-trek-elite-force-ii-305-small.webp)
Turn left then jump into the water. The secret area is indicated above.
![Star Trek: Elite Force II Walkthrough - Star Trek-Elite-Force-II 306](star-trek-elite-force-ii-306-small.webp)
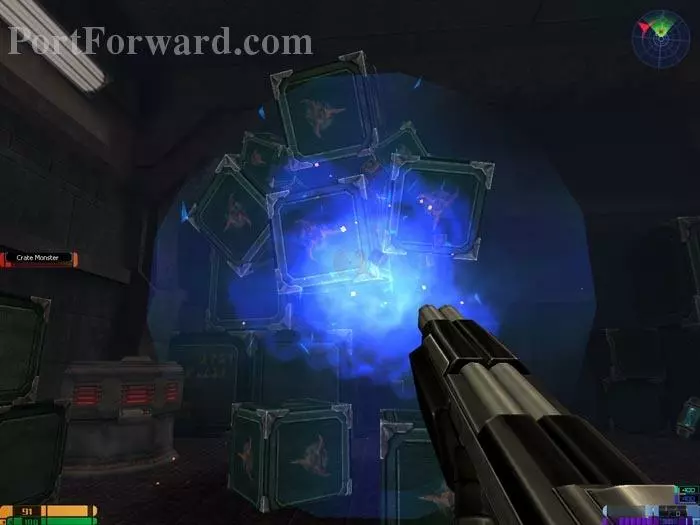
It's ...a Crate Monster! The Assault Rifle's secondary attack works rather well.
![Star Trek: Elite Force II Walkthrough - Star Trek-Elite-Force-II 307](star-trek-elite-force-ii-307-small.webp)
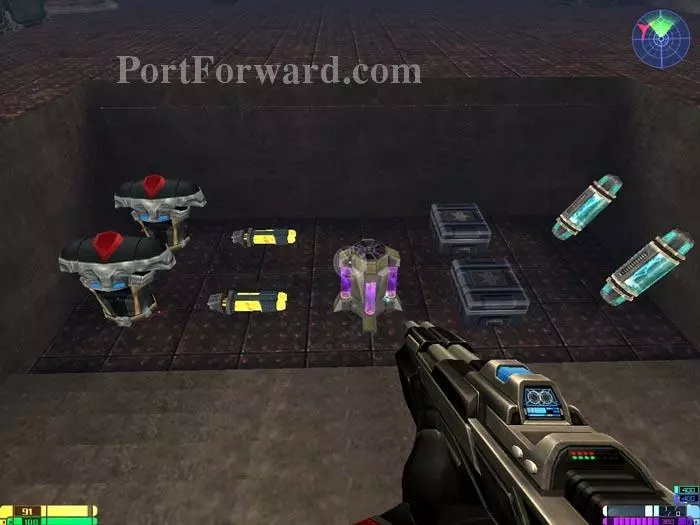
Here's your booty for defeating the Crate Monster.
![Star Trek: Elite Force II Walkthrough - Star Trek-Elite-Force-II 308](star-trek-elite-force-ii-308-small.webp)
Return to the room with the trapped Attrexians. Golden Starship 43 is hidden behind these crates.
![Star Trek: Elite Force II Walkthrough - Star Trek-Elite-Force-II 309](star-trek-elite-force-ii-309-small.webp)
Modulate this Ladder Release Terminal and a ladder lowers just ahead. Climb it and pass through the green door to exit the area.
![Star Trek: Elite Force II Walkthrough - Star Trek-Elite-Force-II 310](star-trek-elite-force-ii-310-small.webp)
Make your way to this area. Defeat the Xenomorph then hop onto the crate. Wait for the magnet to move close then jump onto the magnet.
![Star Trek: Elite Force II Walkthrough - Star Trek-Elite-Force-II 311](star-trek-elite-force-ii-311-small.webp)
Jump as indicated.
![Star Trek: Elite Force II Walkthrough - Star Trek-Elite-Force-II 312](star-trek-elite-force-ii-312-small.webp)
You'll find Golden Starship 44 here.
![Star Trek: Elite Force II Walkthrough - Star Trek-Elite-Force-II 313](star-trek-elite-force-ii-313-small.webp)
Golden Starship 45. Exit the area through the door visible on the right.
![Star Trek: Elite Force II Walkthrough - Star Trek-Elite-Force-II 314](star-trek-elite-force-ii-314-small.webp)
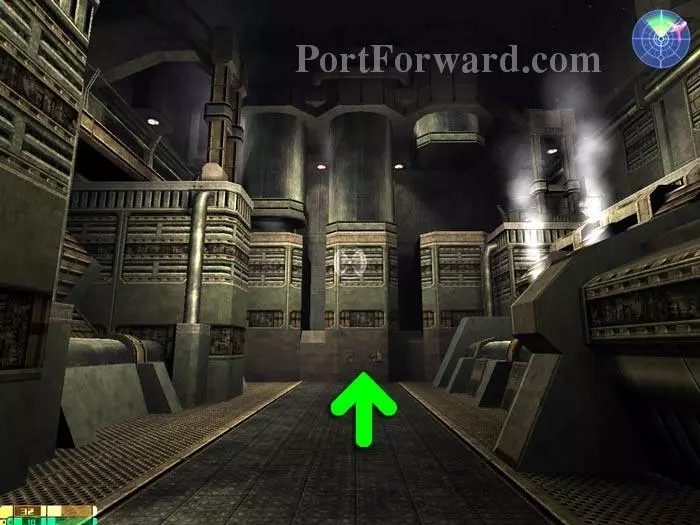
You're now in the factory. Ready your Arc Gun before opening the door, as a Xenomorph welcoming committee is on the other side.
![Star Trek: Elite Force II Walkthrough - Star Trek-Elite-Force-II 315](star-trek-elite-force-ii-315-small.webp)
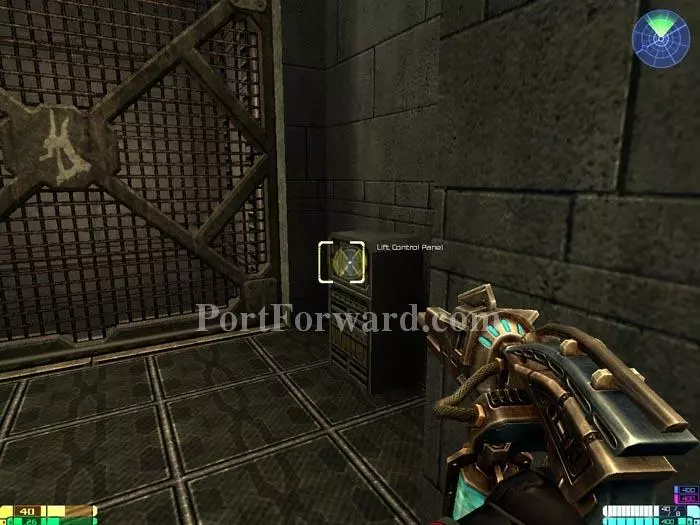
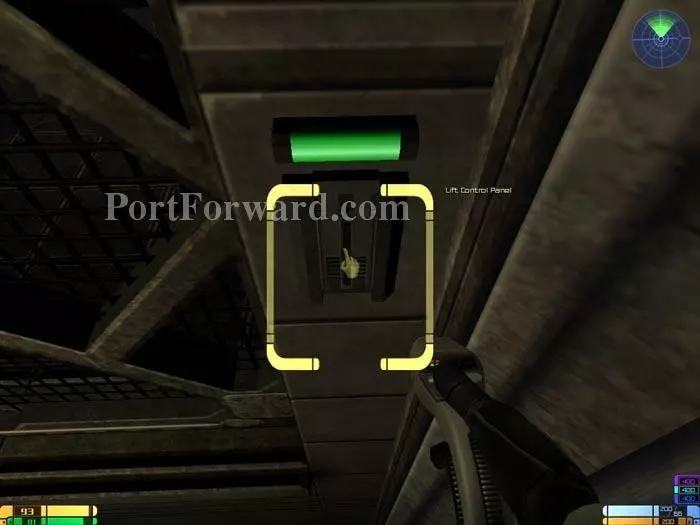
Turn right and use this Lift Control Panel to update your objectives -- restore power to this lift.
![Star Trek: Elite Force II Walkthrough - Star Trek-Elite-Force-II 316](star-trek-elite-force-ii-316-small.webp)
Health and energy terminals are found here.
![Star Trek: Elite Force II Walkthrough - Star Trek-Elite-Force-II 317](star-trek-elite-force-ii-317-small.webp)
This is easy once your realize you can control your speed on the treadmill. Walk back to hold still while you wait for the flame to subside.
![Star Trek: Elite Force II Walkthrough - Star Trek-Elite-Force-II 318](star-trek-elite-force-ii-318-small.webp)
On your right is this room with more health and energy.
![Star Trek: Elite Force II Walkthrough - Star Trek-Elite-Force-II 319](star-trek-elite-force-ii-319-small.webp)
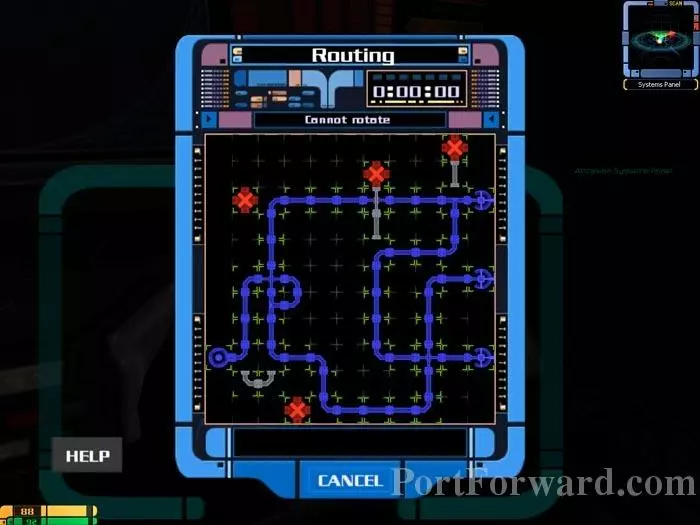
Go up the stairs and use your tricorder on this Attrexian Systems Panel.
![Star Trek: Elite Force II Walkthrough - Star Trek-Elite-Force-II 320](star-trek-elite-force-ii-320-small.webp)
Here's the solution.
![Star Trek: Elite Force II Walkthrough - Star Trek-Elite-Force-II 321](star-trek-elite-force-ii-321-small.webp)
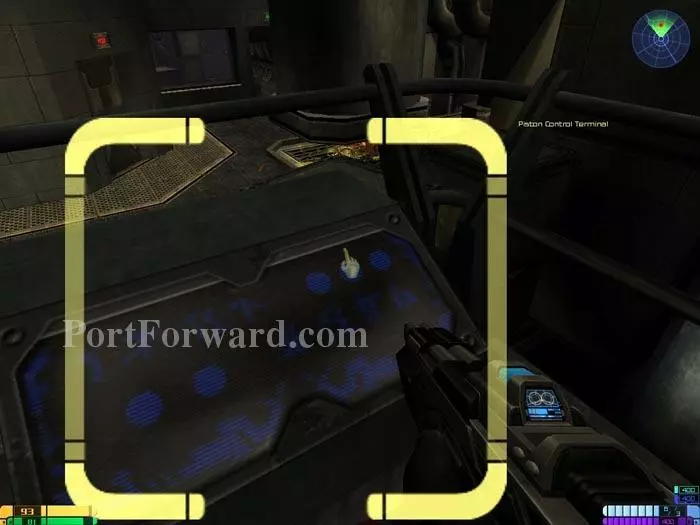
You can now use this Piston Control Terminal to squash the bugs as they spawn.
![Star Trek: Elite Force II Walkthrough - Star Trek-Elite-Force-II 322](star-trek-elite-force-ii-322-small.webp)
Pass through this new hole in the health terminal room.
![Star Trek: Elite Force II Walkthrough - Star Trek-Elite-Force-II 323](star-trek-elite-force-ii-323-small.webp)
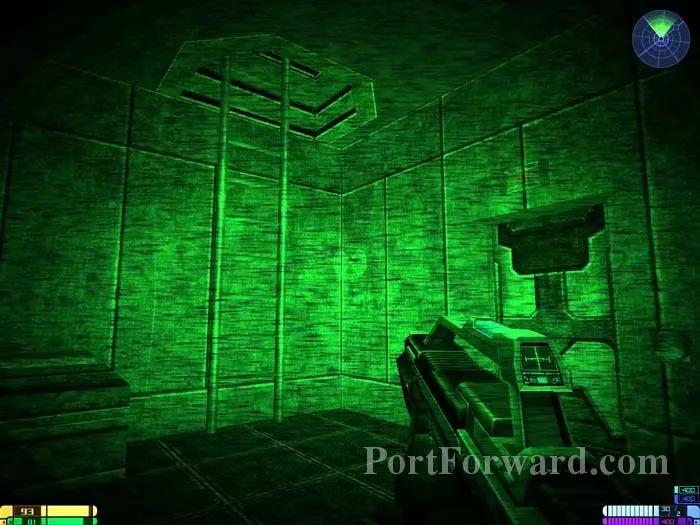
Use your night vision to fight past the Xenomorphs to this ladder.
![Star Trek: Elite Force II Walkthrough - Star Trek-Elite-Force-II 324](star-trek-elite-force-ii-324-small.webp)
Grab the Idryllium, pass through the green door and call the elevator, directly ahead. Xenomorphs spawn behind you.
![Star Trek: Elite Force II Walkthrough - Star Trek-Elite-Force-II 325](star-trek-elite-force-ii-325-small.webp)
The elevator malfunctions. Fortunately this structural weakness provides exit.
![Star Trek: Elite Force II Walkthrough - Star Trek-Elite-Force-II 326](star-trek-elite-force-ii-326-small.webp)
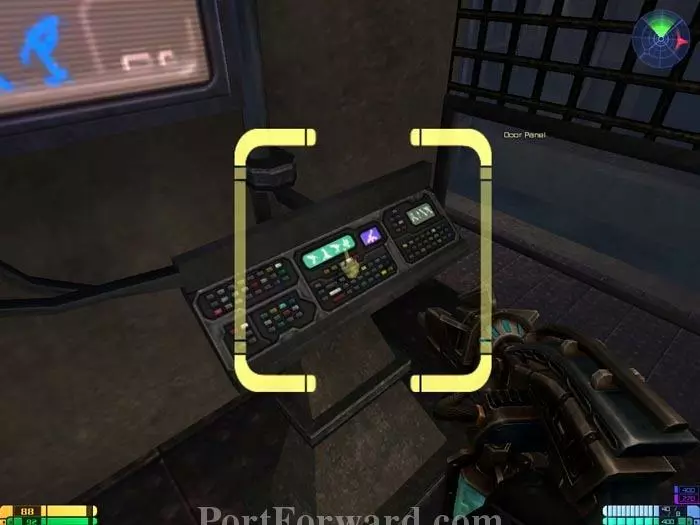
Grab onto the ladder and "use" this Lift Control Panel to open the door to the left.
![Star Trek: Elite Force II Walkthrough - Star Trek-Elite-Force-II 327](star-trek-elite-force-ii-327-small.webp)
A secret area with health and energy terminals is behind the indicated door.
![Star Trek: Elite Force II Walkthrough - Star Trek-Elite-Force-II 328](star-trek-elite-force-ii-328-small.webp)
Make a mad dash for it when you see the first two pistons rise together.
![Star Trek: Elite Force II Walkthrough - Star Trek-Elite-Force-II 329](star-trek-elite-force-ii-329-small.webp)
Make your way to this ladder. Almost at the top you'll find this secret area with Idryllium.
![Star Trek: Elite Force II Walkthrough - Star Trek-Elite-Force-II 330](star-trek-elite-force-ii-330-small.webp)
Fight past the Xenomorphs and enter this room with the flailing Attrexian.
![Star Trek: Elite Force II Walkthrough - Star Trek-Elite-Force-II 331](star-trek-elite-force-ii-331-small.webp)
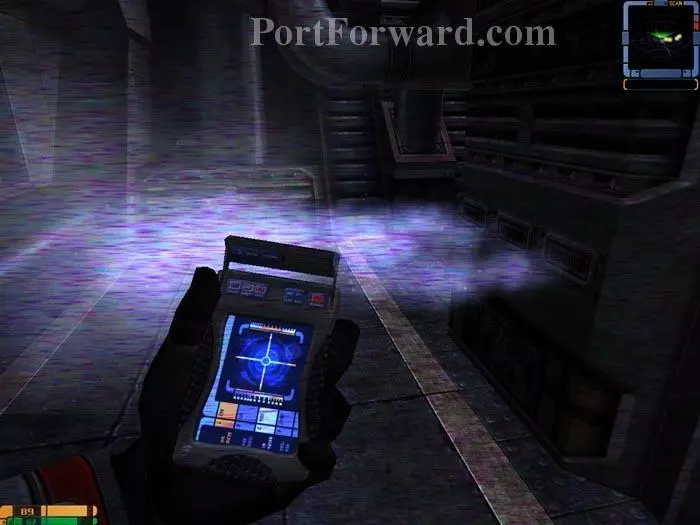
Your tricorder's Trace Gas View Mode reveals the source of the gas. Use your phaser to seal the vents.
![Star Trek: Elite Force II Walkthrough - Star Trek-Elite-Force-II 332](star-trek-elite-force-ii-332-small.webp)
Golden Starship 46 is through the door to the right. Pass through the left door to another dying Attrexian and a cutscene.
![Star Trek: Elite Force II Walkthrough - Star Trek-Elite-Force-II 333](star-trek-elite-force-ii-333-small.webp)
Jump up and go through the green door in the back to Golden Starship 47. Health and energy terminals are here as well.
![Star Trek: Elite Force II Walkthrough - Star Trek-Elite-Force-II 334](star-trek-elite-force-ii-334-small.webp)
Pass through this door to exit the area.
![Star Trek: Elite Force II Walkthrough - Star Trek-Elite-Force-II 335](star-trek-elite-force-ii-335-small.webp)
Take the lift down and battle this guy. I recommend using the Staff from Mission 5.
![Star Trek: Elite Force II Walkthrough - Star Trek-Elite-Force-II 336](star-trek-elite-force-ii-336-small.webp)
Call this elevator and ride it down.
![Star Trek: Elite Force II Walkthrough - Star Trek-Elite-Force-II 337](star-trek-elite-force-ii-337-small.webp)
Next, pass through this door.
![Star Trek: Elite Force II Walkthrough - Star Trek-Elite-Force-II 338](star-trek-elite-force-ii-338-small.webp)
You'll find the 48th Golden Starship behind this pipe.
![Star Trek: Elite Force II Walkthrough - Star Trek-Elite-Force-II 339](star-trek-elite-force-ii-339-small.webp)
Pass through this door to another Xenomorph battle.
![Star Trek: Elite Force II Walkthrough - Star Trek-Elite-Force-II 340](star-trek-elite-force-ii-340-small.webp)
Golden Starship 49 is behind this red door.
![Star Trek: Elite Force II Walkthrough - Star Trek-Elite-Force-II 341](star-trek-elite-force-ii-341-small.webp)
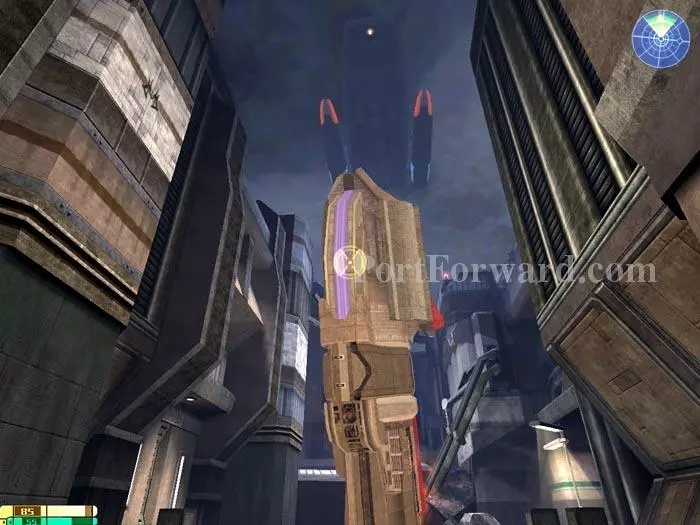
Approach the crash site to view a series of cutscenes and end the mission.
More Star Trek: Elite Force II Walkthroughs
This Star Trek: Elite Force II walkthrough is divided into 12 total pages.