Splinter Cell: Pandora Tomorrow Walkthrough Kudang, Indonesia

September 12, 2016 (Last Updated: ) | Reading Time: 9 minutes

This Splinter Cell: Pandora Tomorrow walkthrough is divided into 8 total pages.

You can jump to nearby pages of the game using the links above.

Kudang, Indonesia

Splinter Cell: Pandora Tomorrow Walkthrough - Splinter Cell-Pandora-Tomorrow 197

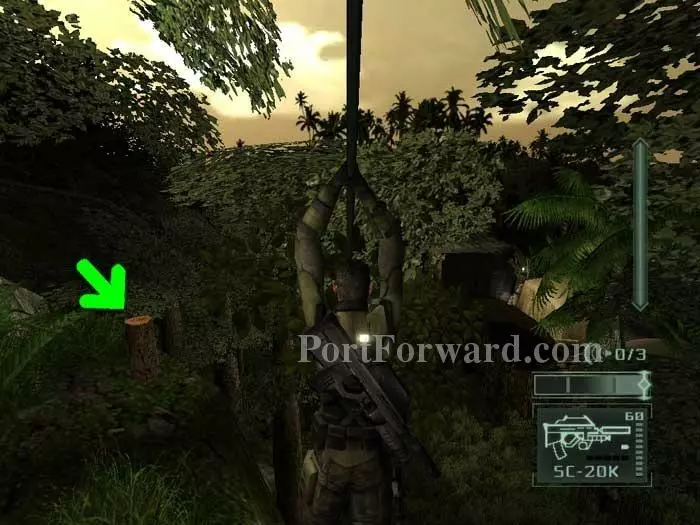
Walk a short distance through the jungle then talk to Shetland. Speak to him repeatedly and Shetland offers you a job, "No man should fight any war but his own, especially in the America we've got today." I have to say I'm disappointed that Sam doesn't lay Shetland out right then. Either use the zip line or rappel down the hill using the indicated tree stump.

Splinter Cell: Pandora Tomorrow Walkthrough - Splinter Cell-Pandora-Tomorrow 198

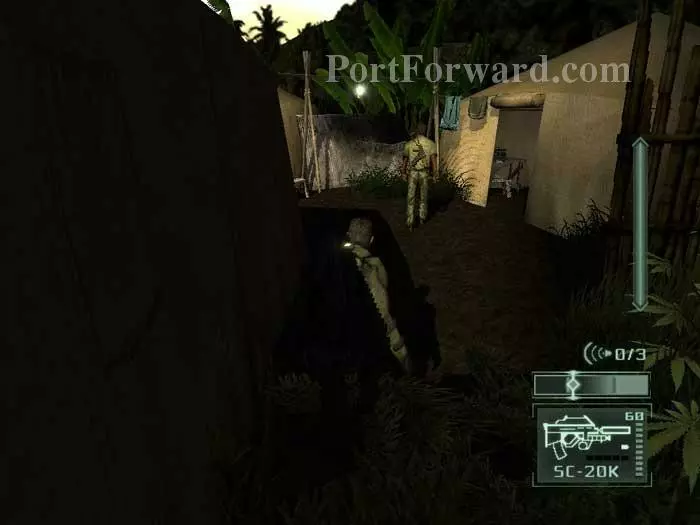
Slip through the gap in the fence then stay in the shadow on the left. There's nothing of interest in the tent on the right (other than the patrol). Taking him out isn't too hard but I chose to leave him be.

Splinter Cell: Pandora Tomorrow Walkthrough - Splinter Cell-Pandora-Tomorrow 199

A second guard patrols around the left side. When both guards have their backs to you, duck into the indicated doorway for ring airfoil rounds. Note the bottle on the left if you prefer the diversionary approach.

Splinter Cell: Pandora Tomorrow Walkthrough - Splinter Cell-Pandora-Tomorrow 200

A back-press will keep you concealed if guard #2 comes by.

Splinter Cell: Pandora Tomorrow Walkthrough - Splinter Cell-Pandora-Tomorrow 201

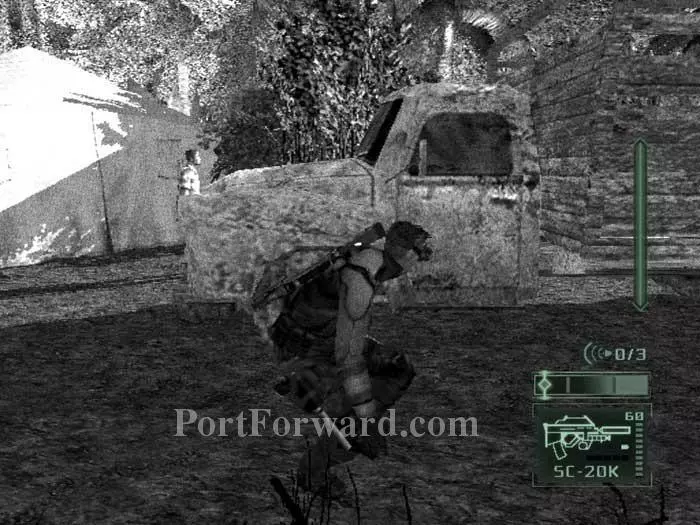
Stay in the shadows to the right of this truck. You'll disturb a flock of birds as you advance.

Splinter Cell: Pandora Tomorrow Walkthrough - Splinter Cell-Pandora-Tomorrow 202

Hide in the shadows along the right while drunk guards hunt for land mines. Oops. The explosion attracts guard #2 so be sure to be concealed before he rushes in.

Splinter Cell: Pandora Tomorrow Walkthrough - Splinter Cell-Pandora-Tomorrow 203

Patiently wait for both guards to move away then slowly proceed. Snipers should be speeding through this level.

Splinter Cell: Pandora Tomorrow Walkthrough - Splinter Cell-Pandora-Tomorrow 204

More mines are ahead. Stay low and use thermal vision to spot them. Avoid or deactivate the mines. Unfortunately, the patrols don't explode when walking through the tripwires.

Splinter Cell: Pandora Tomorrow Walkthrough - Splinter Cell-Pandora-Tomorrow 205

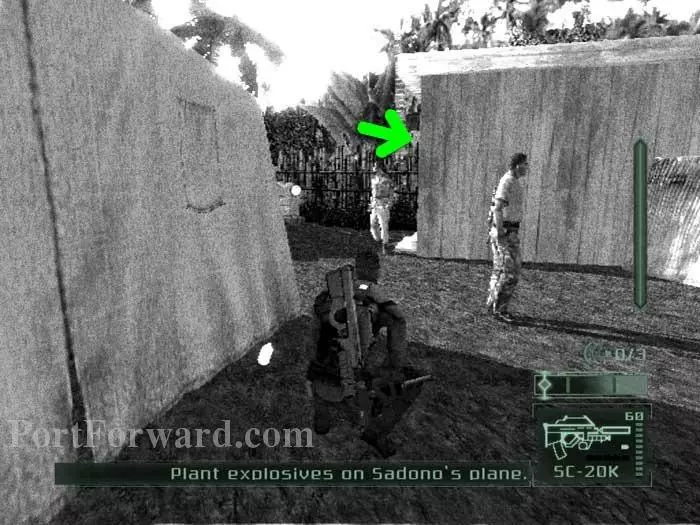
Stay left past a truck then enter this wooden airplane hangar. The two guards in here can be easily grabbed from behind, but there's an alternate approach as well.

Splinter Cell: Pandora Tomorrow Walkthrough - Splinter Cell-Pandora-Tomorrow 206

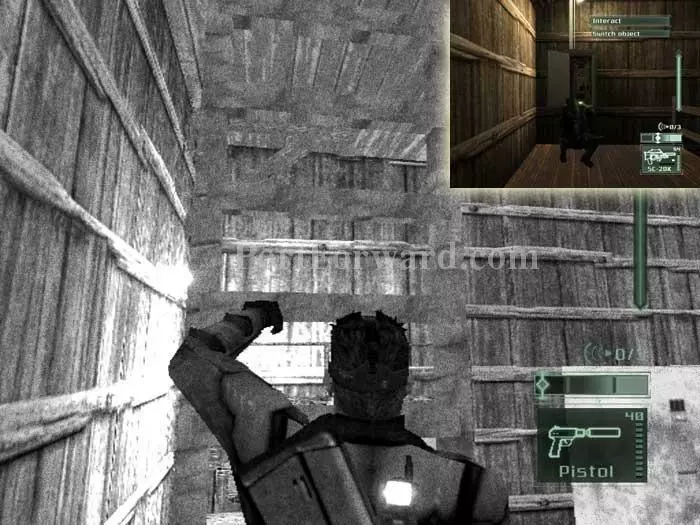
Climb this ladder to the left then switch of the lights at the fuse box (inset).

Splinter Cell: Pandora Tomorrow Walkthrough - Splinter Cell-Pandora-Tomorrow 207

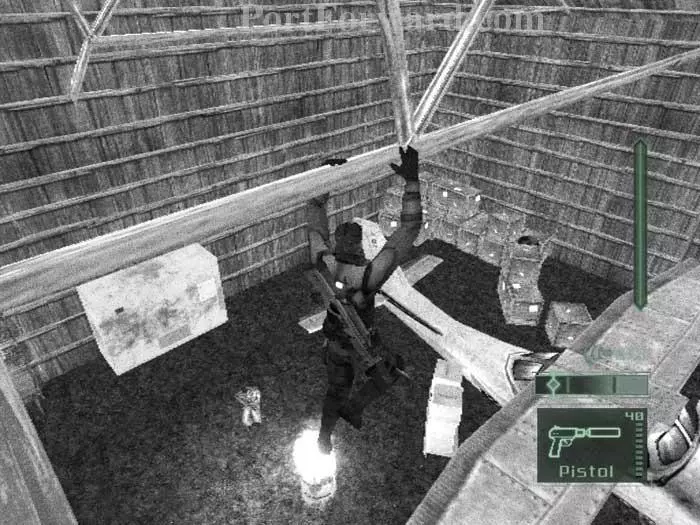
Shimmy along this beam then do a quiet landing to the plane below.

Splinter Cell: Pandora Tomorrow Walkthrough - Splinter Cell-Pandora-Tomorrow 208

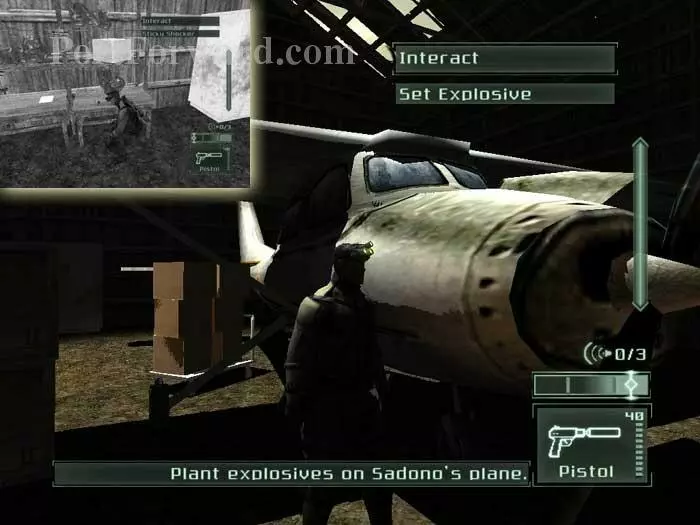
Approach the engine to set the explosives then slip out the back door after grabbing a sticky shocker from a table near the ladder (inset).

Splinter Cell: Pandora Tomorrow Walkthrough - Splinter Cell-Pandora-Tomorrow 209

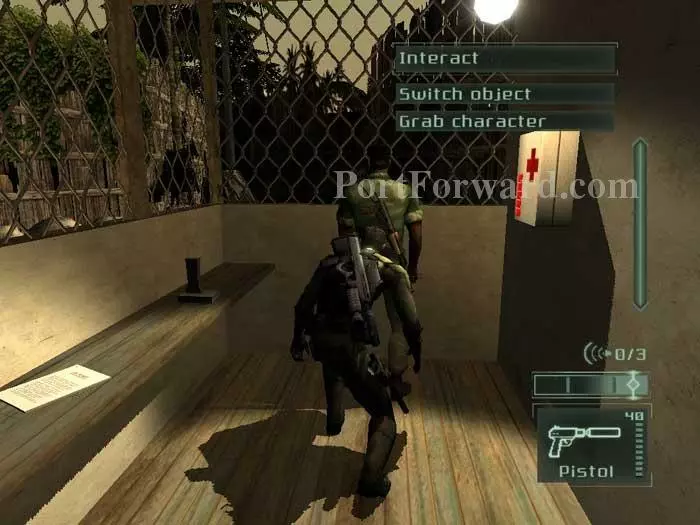
Stay right then airfoil/elbow the patrol before grabbing this guard from behind. Use the switch on the left to open the gate outside. Note the first aid kit on the right.

Splinter Cell: Pandora Tomorrow Walkthrough - Splinter Cell-Pandora-Tomorrow 210

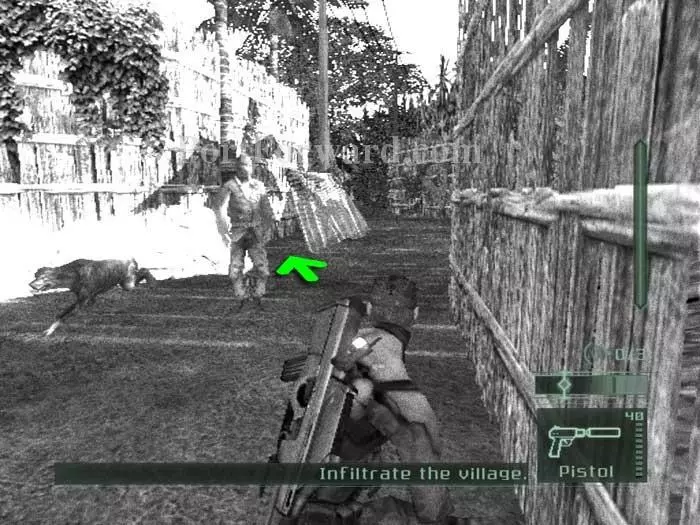
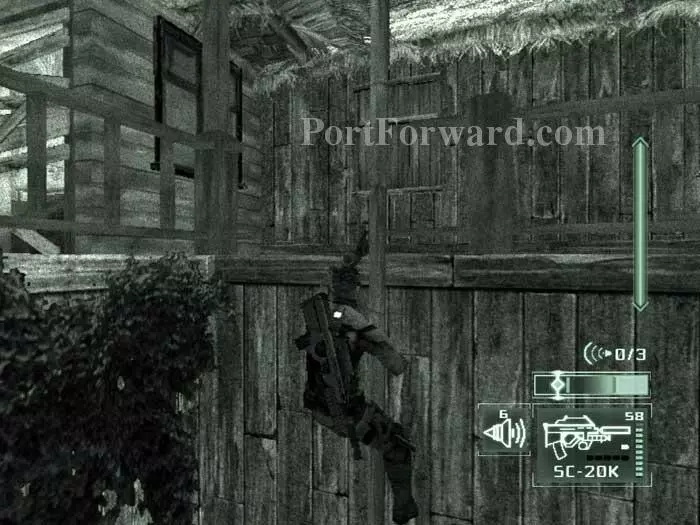
Slip through the open gate then wait here on the right until the guard and his dog turn their backs. Scurry left of the boards as indicated to get past the guard and dog undetected.

Splinter Cell: Pandora Tomorrow Walkthrough - Splinter Cell-Pandora-Tomorrow 211

Sneak into this tent and wait for the guards to finish their conversation with the guard in the tower. One guard walks off; grab the other one and place him in he right corner where you'll find some 5.56mm ammo.

Splinter Cell: Pandora Tomorrow Walkthrough - Splinter Cell-Pandora-Tomorrow 212

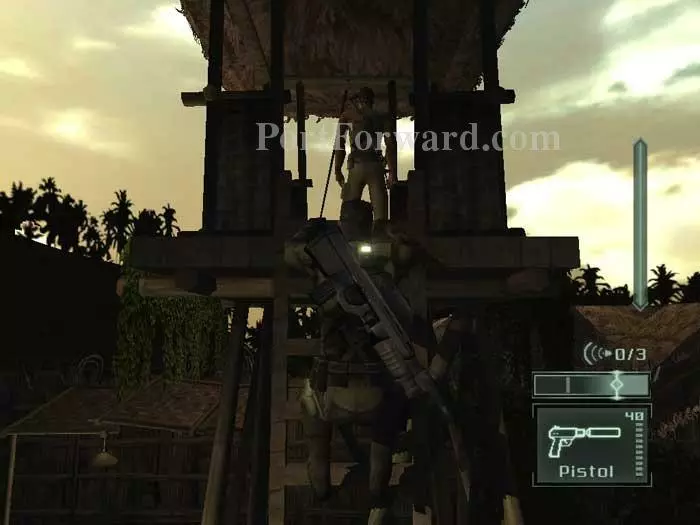
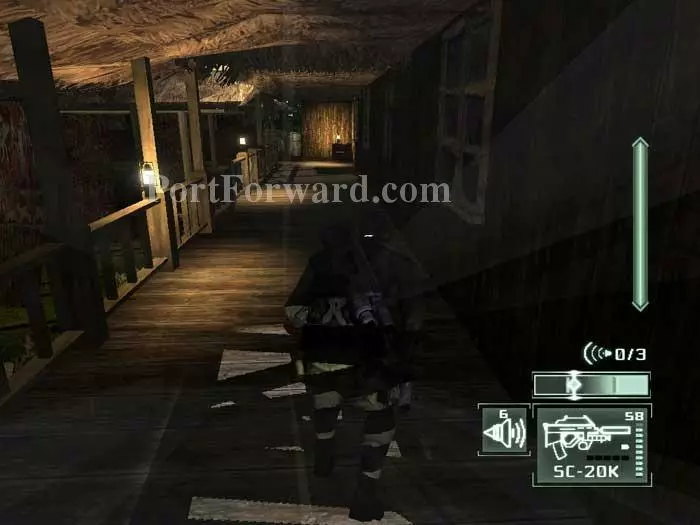
Climb the ladder to the guard tower then pause until the guard is turned away. Grab him from behind and knock him out. You do not need to hide his body. If you want to leave now, use the zip line to enter the village and load the next area.

Splinter Cell: Pandora Tomorrow Walkthrough - Splinter Cell-Pandora-Tomorrow 213

Otherwise, the previous guard is taking a nap in the tent on the right, where you'll find a smoke grenade on the table. Activate your thermal vision before entering the foliage -- more tripwire grenades are ahead. Now you can return to the tower and use the zip line with a shiny new smoke grenade in hand.

Splinter Cell: Pandora Tomorrow Walkthrough - Splinter Cell-Pandora-Tomorrow 214

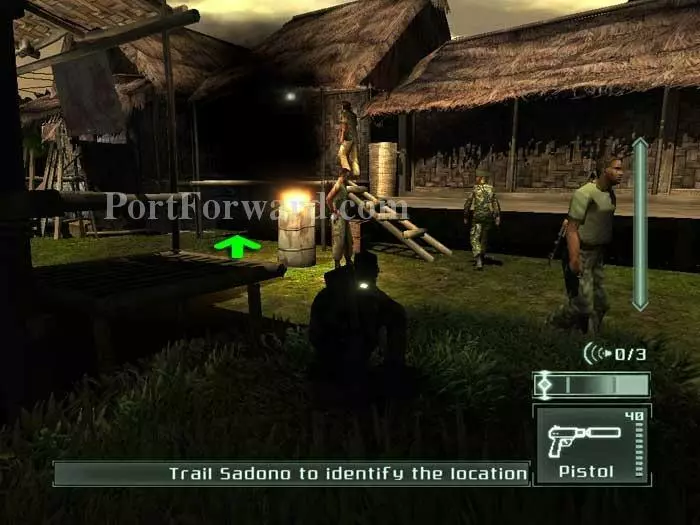
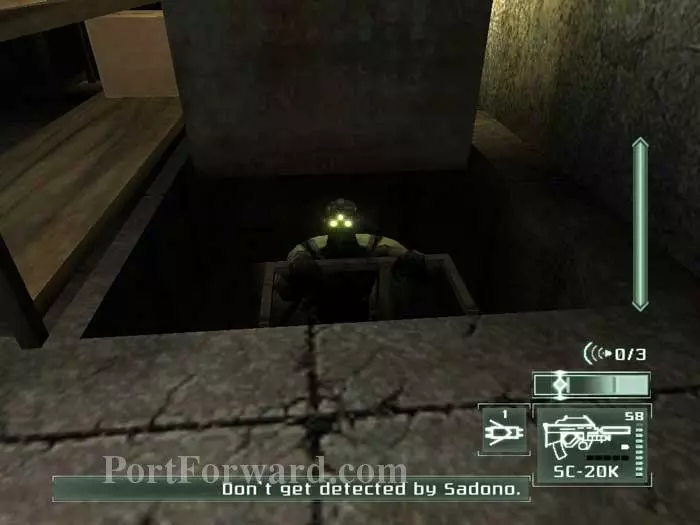
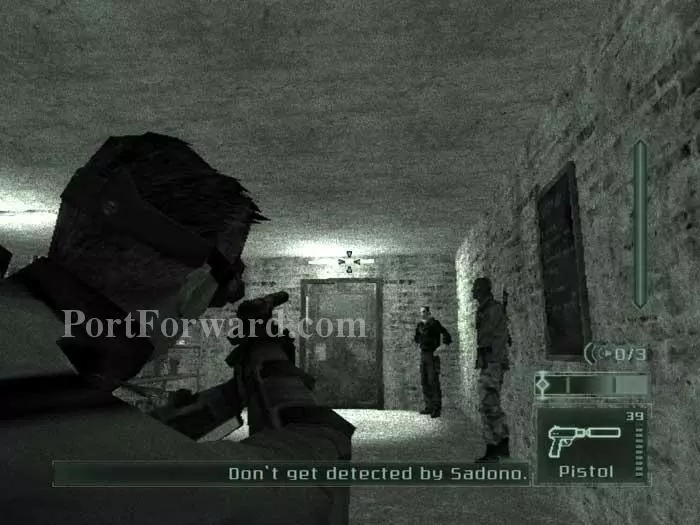
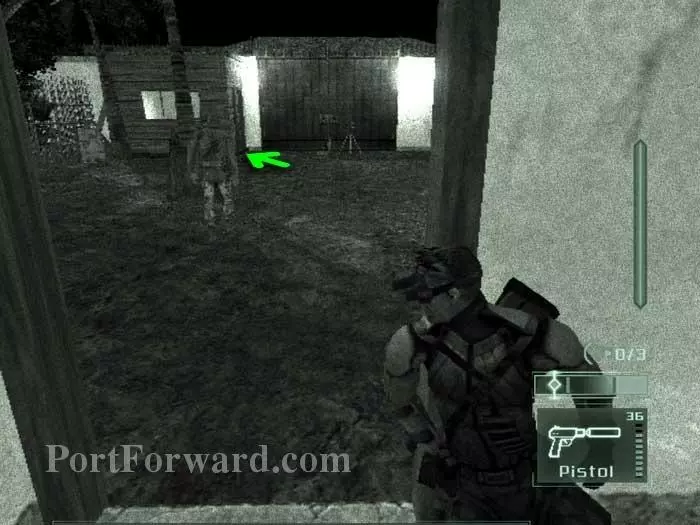
After dropping off the zip line your objectives are updated. That's Sadono at the top of the stairs. Wait for the guards to disperse then dash under the walkway where indicated.

Splinter Cell: Pandora Tomorrow Walkthrough - Splinter Cell-Pandora-Tomorrow 215

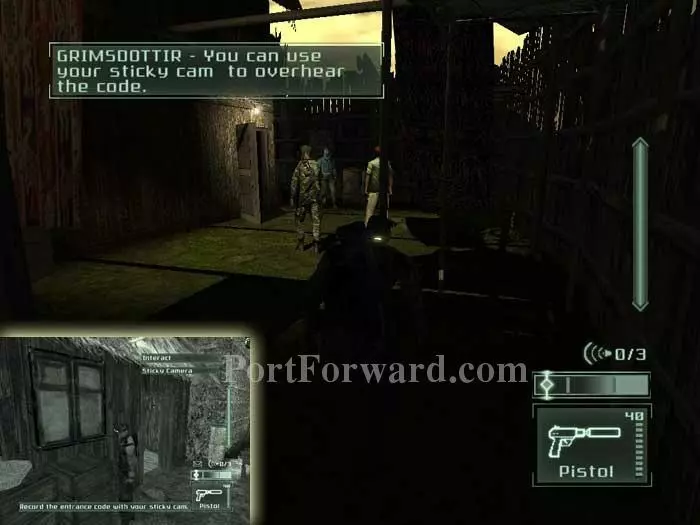
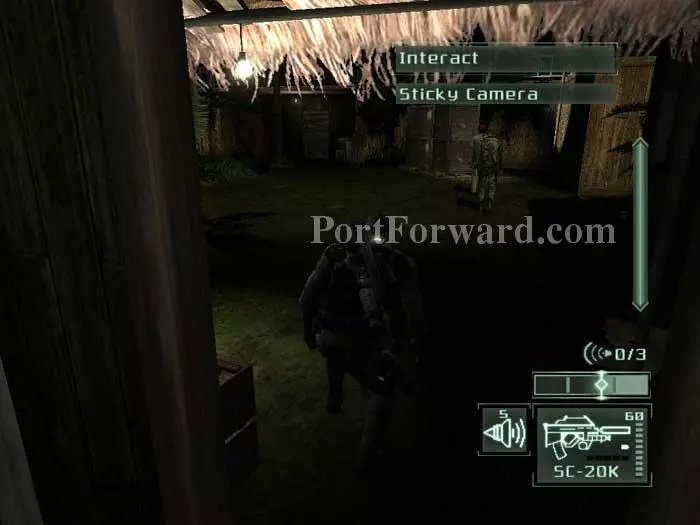
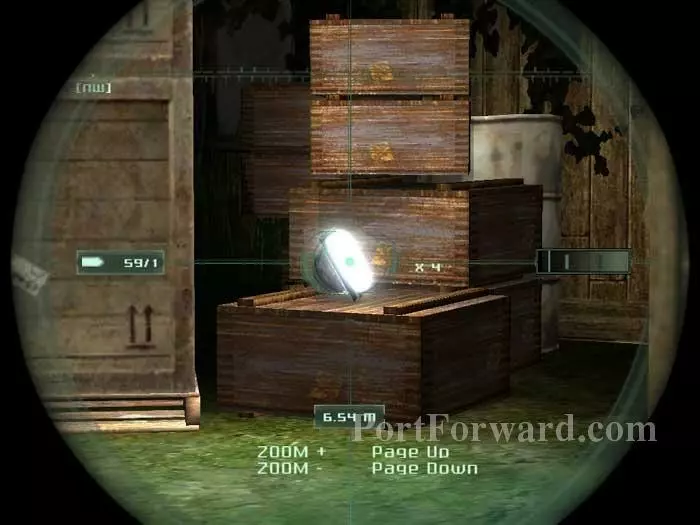
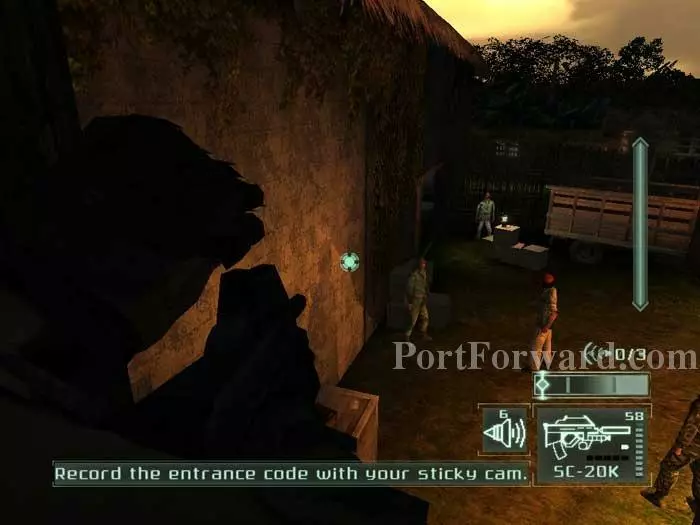
New instructions - use your sticky cam to overhear Sadono's house code. Fortunately, a sticky cam is available on a nearby crate (inset).

Splinter Cell: Pandora Tomorrow Walkthrough - Splinter Cell-Pandora-Tomorrow 216

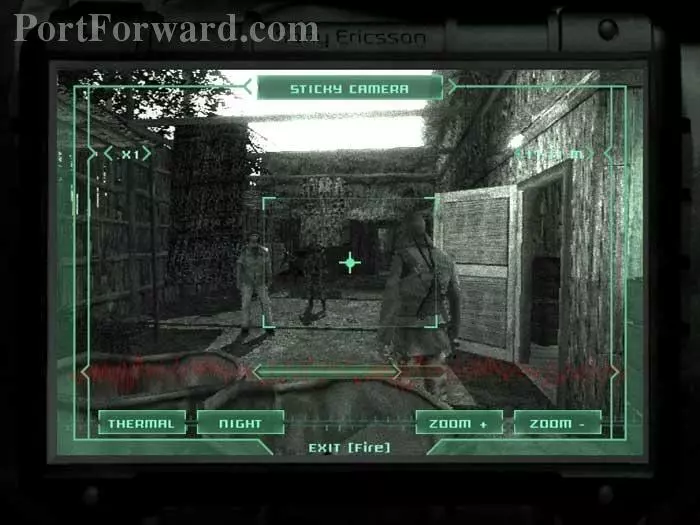
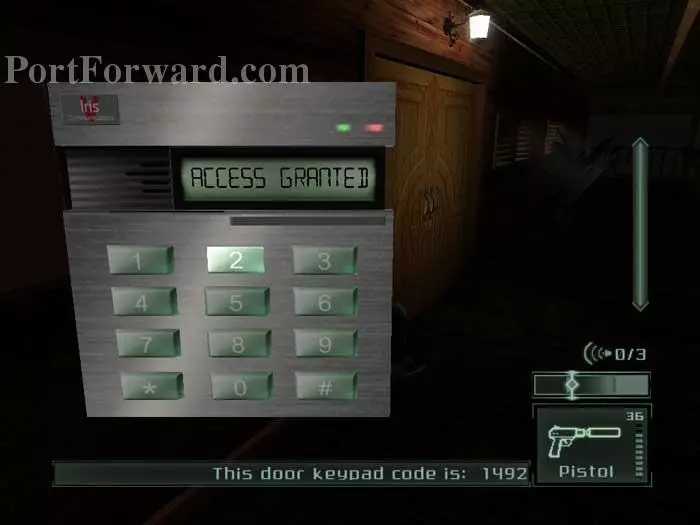
Fire a sticky cam near Sadono, but not so near that he is alerted to its presence. Recording the conversation reveals the code 1492. Wait for Sadono and his guard to continue through the door, then lure the remaining guard away from his post with a whistle. You'll have two more opportunities to get the code if you missed it this time.

Splinter Cell: Pandora Tomorrow Walkthrough - Splinter Cell-Pandora-Tomorrow 217

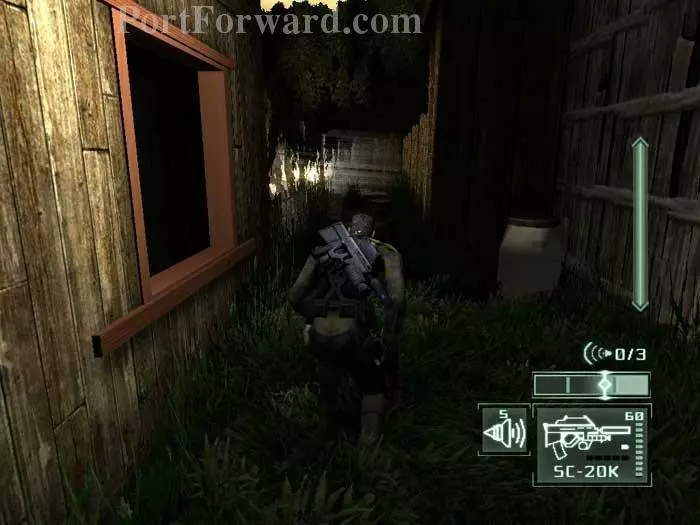
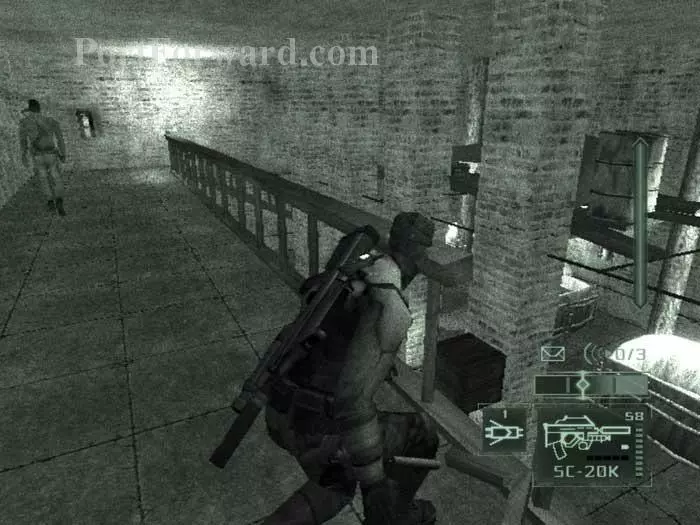
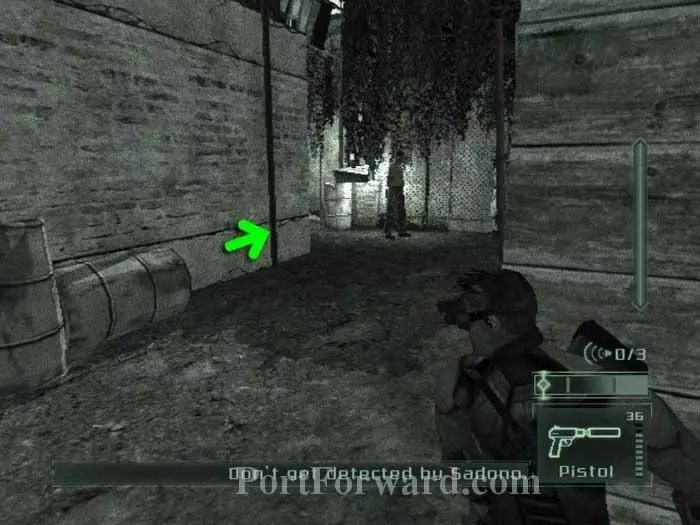
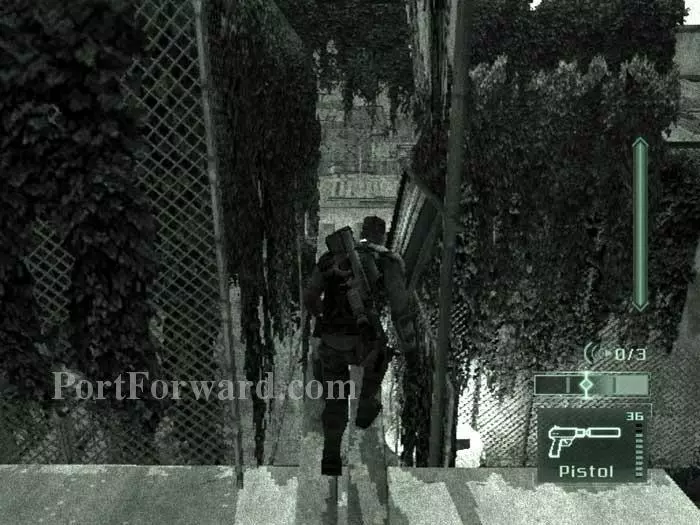
Continue through this small passage to the right of the building. My preference is to ignore the window on the left. If you enter, you'll find a guard, ammo and a first aid kit. Continue ahead, trailing Sadono and his guard to a door on the right. If you prefer to avoid the door, there is also a narrow crawlspace on the right that you can squeeze through buy pressing your back against the building.

Splinter Cell: Pandora Tomorrow Walkthrough - Splinter Cell-Pandora-Tomorrow 218

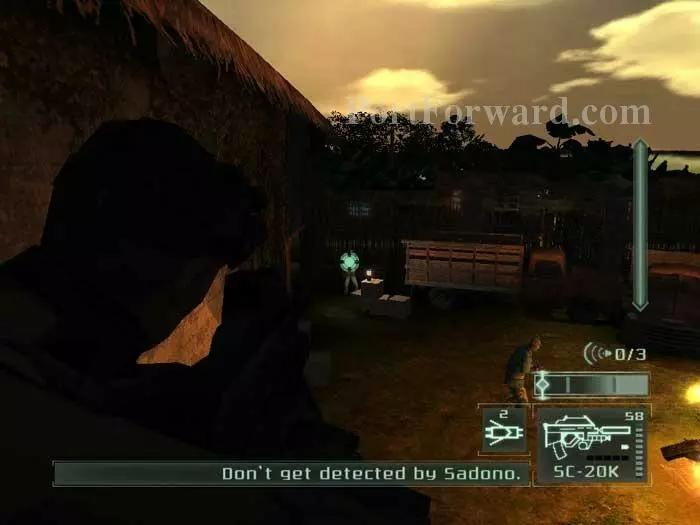
This is your second opportunity to overhear Sadono's entrance code, 1492. Shoot a sticky cam near Sadono while he speaks to his second of three lieutenants. Note the sticky cam on the crate to my left.

Splinter Cell: Pandora Tomorrow Walkthrough - Splinter Cell-Pandora-Tomorrow 219

Two guards and a dog block your path once Sadono leaves. Hide in the shadows then shoot out this spotlight.

Splinter Cell: Pandora Tomorrow Walkthrough - Splinter Cell-Pandora-Tomorrow 220

The spotlight was illuminating this pipe, now dark. Climb it to the balcony above.

Splinter Cell: Pandora Tomorrow Walkthrough - Splinter Cell-Pandora-Tomorrow 221

Stay in the shadows on the right as you make your way to the overlook ahead/left.

Splinter Cell: Pandora Tomorrow Walkthrough - Splinter Cell-Pandora-Tomorrow 222

Here's your third and final chance to overhear the entrance code. Fire a sticky cam at the wall to record Sadono telling his lieutenant the code 1492.

Splinter Cell: Pandora Tomorrow Walkthrough - Splinter Cell-Pandora-Tomorrow 223

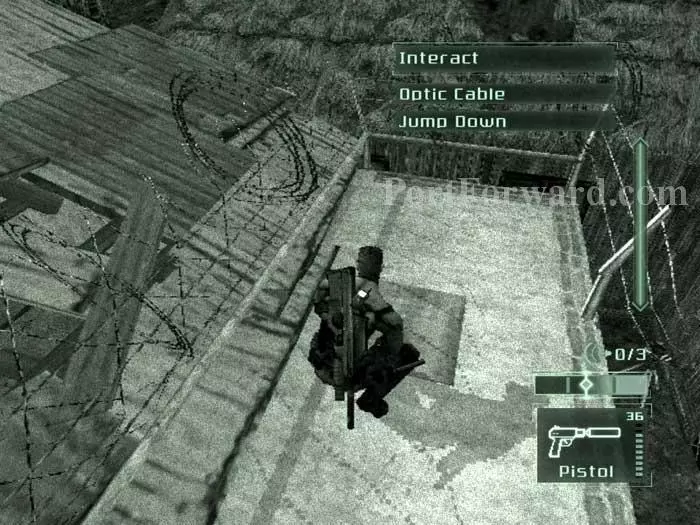
Your destination is the doorway far-left. Sticky shocker the patrol guarding the door while the other patrol is walking away. Drop silently (crouch before landing) then rush to the doorway.

Splinter Cell: Pandora Tomorrow Walkthrough - Splinter Cell-Pandora-Tomorrow 224

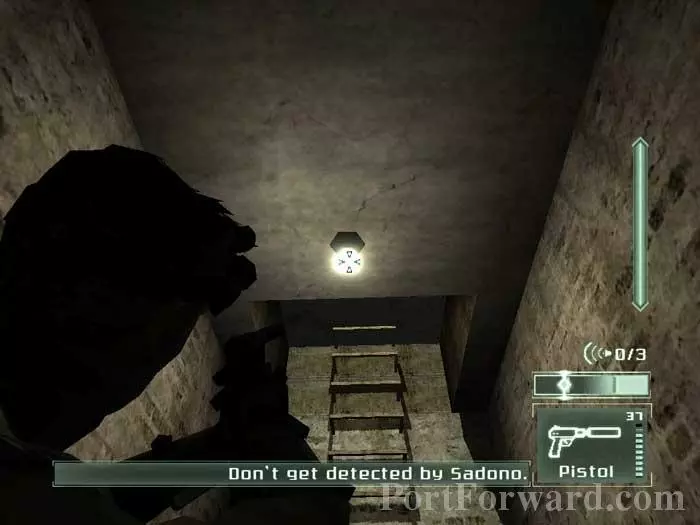
Descend the ladder to load the next zone.

Splinter Cell: Pandora Tomorrow Walkthrough - Splinter Cell-Pandora-Tomorrow 225

Pass through the broken section of railing while the guard has his back turned. Be sure to perform a crouch before your feet hit the ground to silence your landing.

Splinter Cell: Pandora Tomorrow Walkthrough - Splinter Cell-Pandora-Tomorrow 226

Stay close to the pillars, performing a SWAT turn between pillars two and three.

Splinter Cell: Pandora Tomorrow Walkthrough - Splinter Cell-Pandora-Tomorrow 227

Scurry through this door when the guard above isn't looking.

Splinter Cell: Pandora Tomorrow Walkthrough - Splinter Cell-Pandora-Tomorrow 228

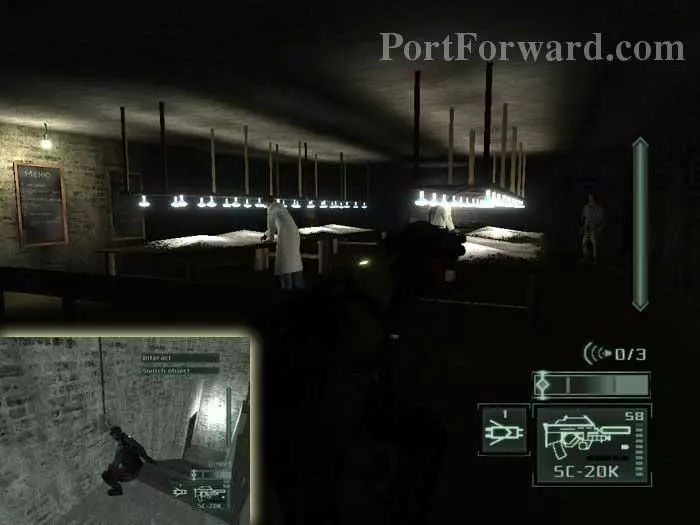
Ascend the stairs to find rows of technicians working under spotlights. Switch off the lights at the top of the stairs (inset).

Splinter Cell: Pandora Tomorrow Walkthrough - Splinter Cell-Pandora-Tomorrow 229

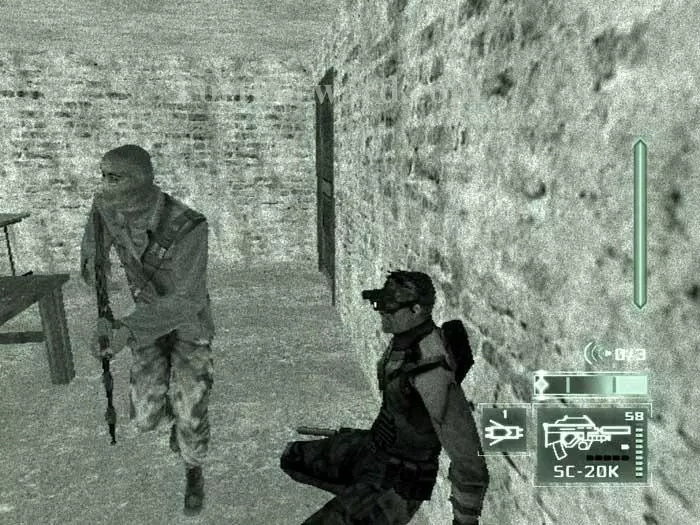
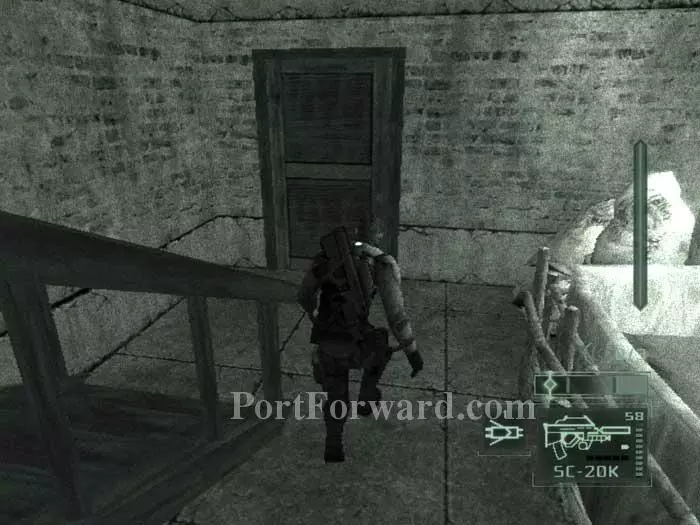
Scurry to the door in the far corner, pressing your back against the wall when the guard walks by. If the guard doesn't leave the door, whistle to get him to move.

Splinter Cell: Pandora Tomorrow Walkthrough - Splinter Cell-Pandora-Tomorrow 230

Shoot out this light before advancing through the door far-left. Be sure to use your pistol as the SC-20K is too loud.

Splinter Cell: Pandora Tomorrow Walkthrough - Splinter Cell-Pandora-Tomorrow 231

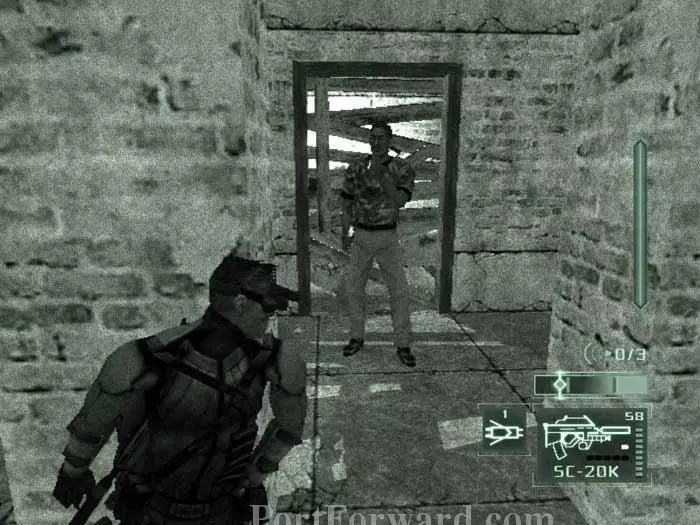
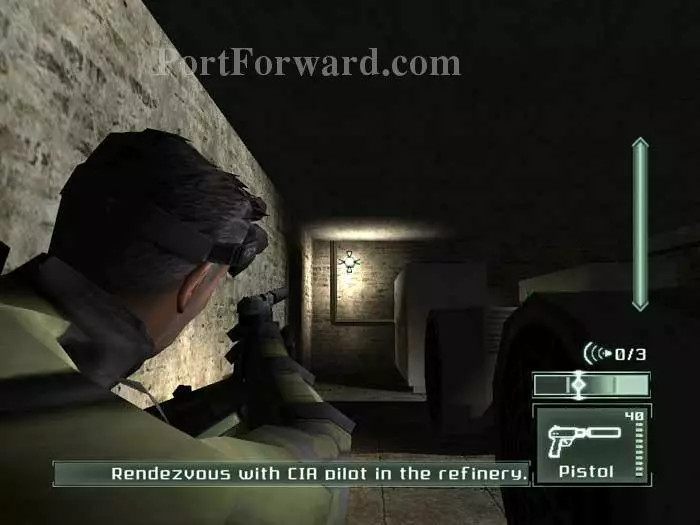
Two guards are in this room, and that's the CIA pilot in the far corner. Shoot out the light over the door, then talk to the pilot once the guard has walked out of range.

Splinter Cell: Pandora Tomorrow Walkthrough - Splinter Cell-Pandora-Tomorrow 232

The pilot gives you the code 0623 for the door.

Splinter Cell: Pandora Tomorrow Walkthrough - Splinter Cell-Pandora-Tomorrow 233

Shoot out the light then quickly climb the ladder to find 5.56mm ammo and first aid.

Splinter Cell: Pandora Tomorrow Walkthrough - Splinter Cell-Pandora-Tomorrow 234

Exit outside then wait for the guards to finish talking and move on. You'll find flares by the barrels on the left. Climb the indicated pole.

Splinter Cell: Pandora Tomorrow Walkthrough - Splinter Cell-Pandora-Tomorrow 235

Follow these planks to the adjacent roof.

Splinter Cell: Pandora Tomorrow Walkthrough - Splinter Cell-Pandora-Tomorrow 236

Drop through this trap door.

Splinter Cell: Pandora Tomorrow Walkthrough - Splinter Cell-Pandora-Tomorrow 237

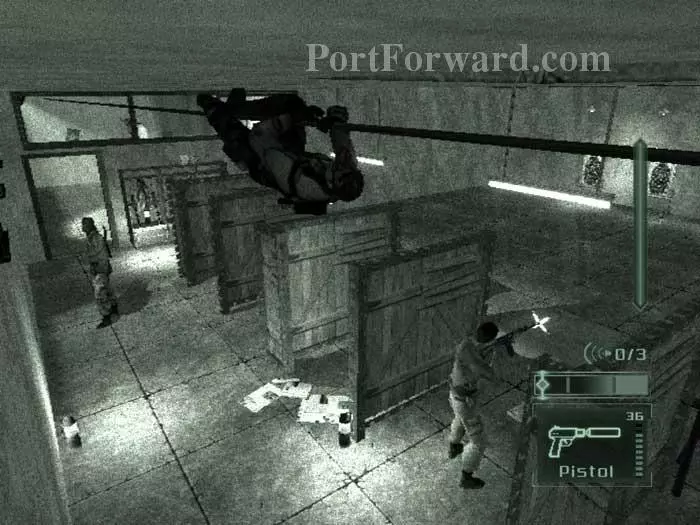
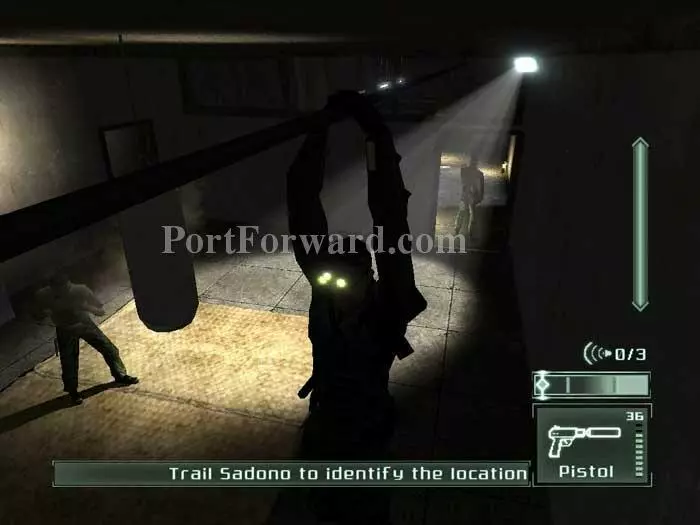
You're hanging from a pipe over a firing range. Pull up your legs and shimmy along the pipe through the transom to the next room.

Splinter Cell: Pandora Tomorrow Walkthrough - Splinter Cell-Pandora-Tomorrow 238

Drop below to the dark corner. Sneak behind the coughing boxer to the door far-left.

Splinter Cell: Pandora Tomorrow Walkthrough - Splinter Cell-Pandora-Tomorrow 239

Hold here until the guard turns around. Another guard is just outside the door, to the right. A turret is directly ahead. Fortunately, the yard is very dark and you shouldn't have any trouble sneaking your way to the indicated door. (I hugged the left side of the yard.) Once inside, you'll find first aid and ammo.

Splinter Cell: Pandora Tomorrow Walkthrough - Splinter Cell-Pandora-Tomorrow 240

Pass through another door and enter this courtyard. A guard patrols the area with the spotlight. Your objective is the indicated doorway. Another guard patrols the porch, and turrets are at each end. Patiently time your advance to keep the guards' backs to you and you should be fine.

Splinter Cell: Pandora Tomorrow Walkthrough - Splinter Cell-Pandora-Tomorrow 241

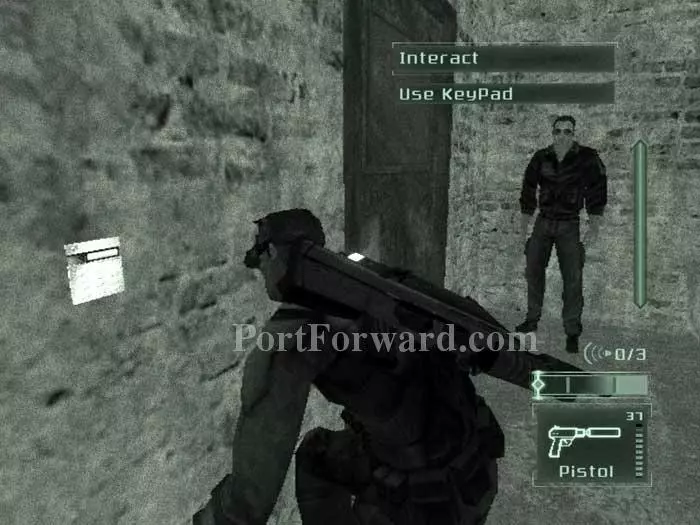
Wait for the guard to turn away, then enter the code 1492 into the keypad. Enter the villa.

Splinter Cell: Pandora Tomorrow Walkthrough - Splinter Cell-Pandora-Tomorrow 242

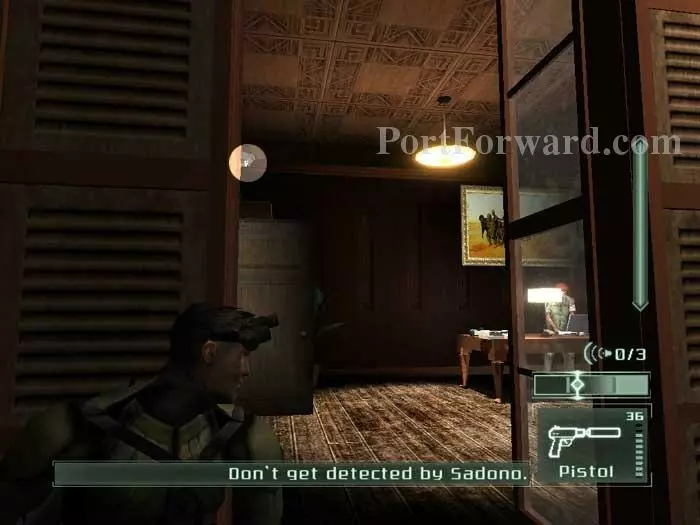
There's Sadono on his laptop -- apparently his secure phone connection uses VOIP. Wait for Sadono to leave the room, return, then leave again. Shoot out the security camera (circled) then access the laptop to tap Sadono's phone.

Splinter Cell: Pandora Tomorrow Walkthrough - Splinter Cell-Pandora-Tomorrow 243

Return to the hallway then follow it to this switch. Deactivate the switch to save yourself from a minor electrical shock.

Splinter Cell: Pandora Tomorrow Walkthrough - Splinter Cell-Pandora-Tomorrow 244

Slip out the back door then be ambushed through this next door. Remain still or you'll be shot.

Splinter Cell: Pandora Tomorrow Walkthrough - Splinter Cell-Pandora-Tomorrow 245

Once Shetland's snipers start firing, the guards turn their backs. Slip past them to the awaiting Osprey.

More Splinter Cell: Pandora Tomorrow Walkthroughs

This Splinter Cell: Pandora Tomorrow walkthrough is divided into 8 total pages.

More From Portforward